With custom widgets, your team can change specific parts of your website content dynamically based on who is visiting. Instead of displaying identical web pages to every visitor, you can adapt your site's layout and content to match a contact's saved details, location, or preferences.
This helps you deliver relevant experiences, like showing localized language options, highlighting targeted offers, or rearranging menu options for returning contacts without needing to manually rewrite your entire website code for each audience.
Custom widgets are dynamic element replacements that allow you to swap specific sections of your website's HTML code based on contact attributes or behavioral rules.
Located under "Website Experience" in Positive User, custom widgets monitor incoming contact properties (such as language, gender, or custom contact details) and serve tailored web content on the fly. Unlike static website templates, they make it easy to adapt what contacts see in real time.
Go to "Website Experience" → "Custom Widgets" and click "New custom widget".
Fill in the "Name", “Folder” (optional), "Class name", and "Description" (optional) fields, then click "Confirm".
Type your HTML code right in the editor and check the preview on the right side.
More details: “How to Configure a Custom Widget” [LINK]

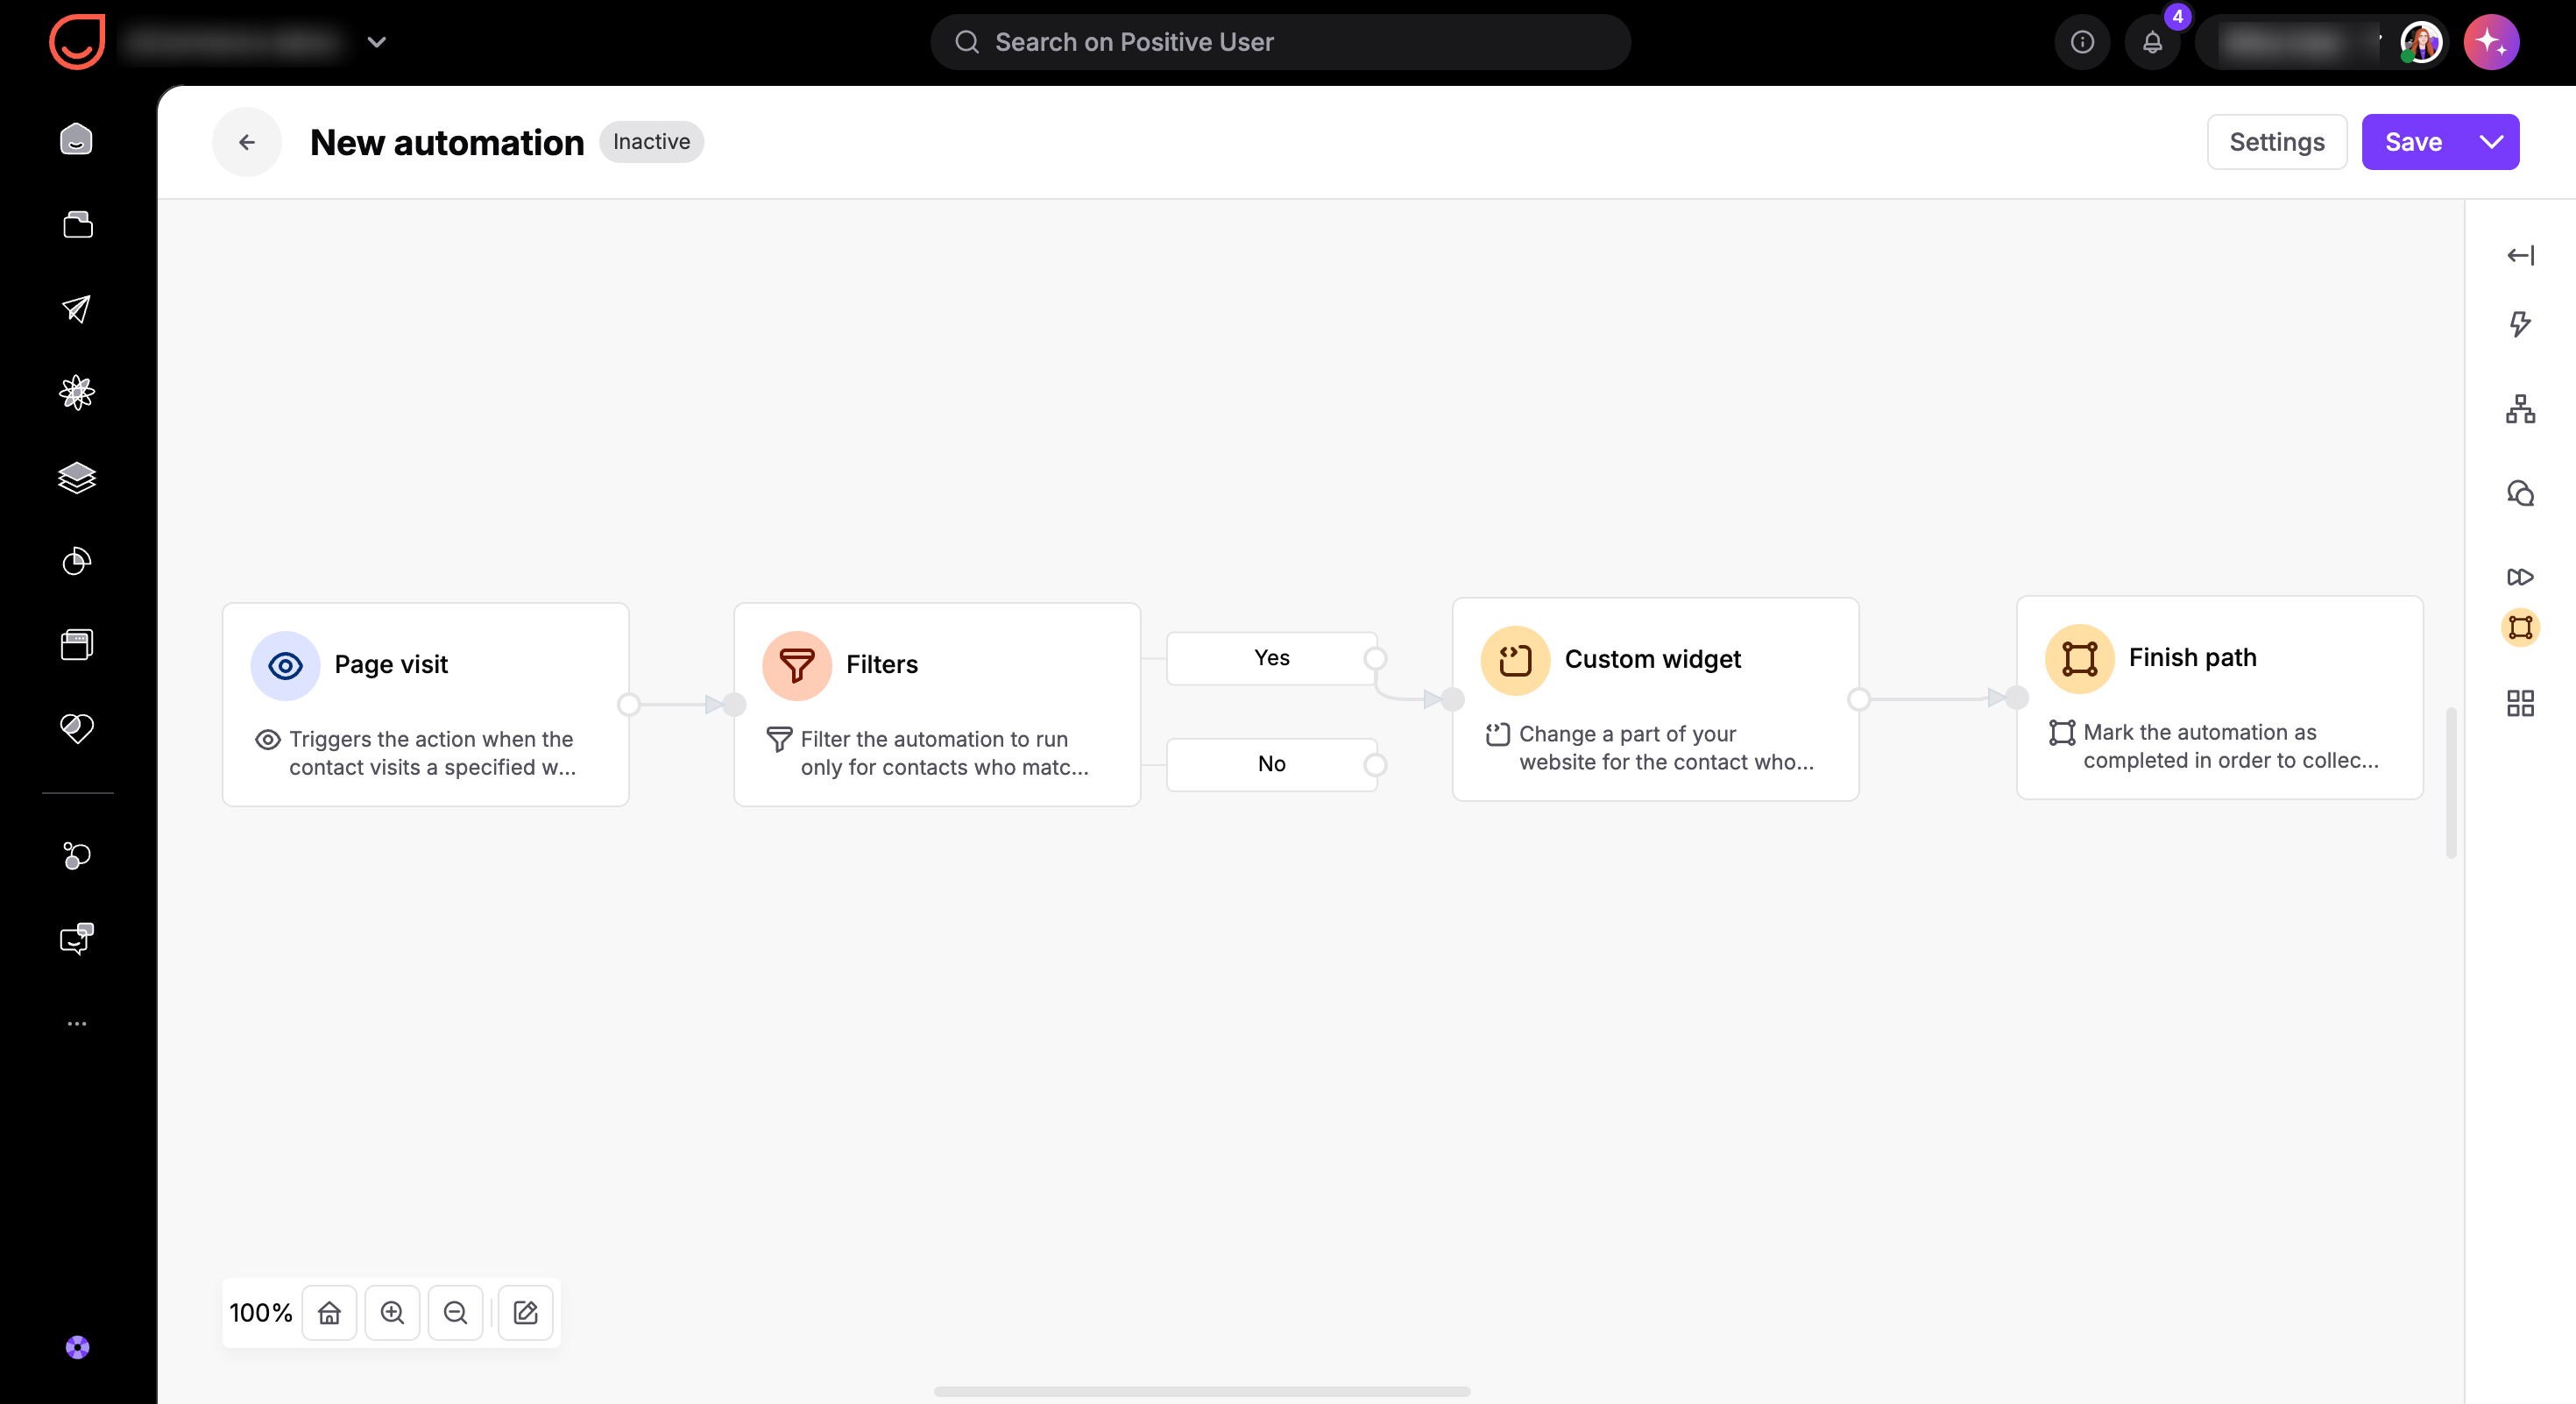
Creating a custom widget prepares the alternative content, but it does not display automatically. To activate a custom widget, you must connect it to an automation flow that triggers for each contact visiting your website. The automation checks the contact's attributes in real time and applies the code replacement whenever the specified conditions are met.
Suppose you want to offer a specialized add-on deal to contacts who have purchased a specific plan, while presenting the message in their preferred language. Add a "Page Visit" module and enter your website URL, then connect a "Filters" module to check contact properties. Select attributes like "Subscription Plan" (e.g., "Pro Plan") and "Language" (e.g., "Spanish") to target contacts who have purchased that plan and prefer Spanish. After that attach a "Custom Widget” module at the end of the flow and select your prepared widget (e.g., a localized upgrade banner showing products related to their subscription).
Once your flow is ready, click "Save", name your automation, choose how often it should run, and switch the status toggle to turn it on.
Custom widgets help you present relevant content to contacts based on what you already know about them.
Personalized Content: Display targeted product selections or tailored messages to specific contacts. For example, you can show specific clothing lines to contacts with matching attributes.
Multi-Language Support: Serve localized versions of your website content based on geographical attributes, such as showing language variants to contacts matching a specific "Country" property.
How to Create and Configure Custom Widgets [LINK]