Tags are a powerful feature in Positive User that help you categorize and segment objects such as contacts, companies, deals, products, tickets, and messages. They make it easier to organize your database, trigger automations, and target the right audience with personalized campaigns.
This article shows you all supported ways to add and remove tags in Positive User. You will learn how to manage tags automatically, manually, during live conversations, through imports, and via API, so you can choose the best approach for each operational scenario.
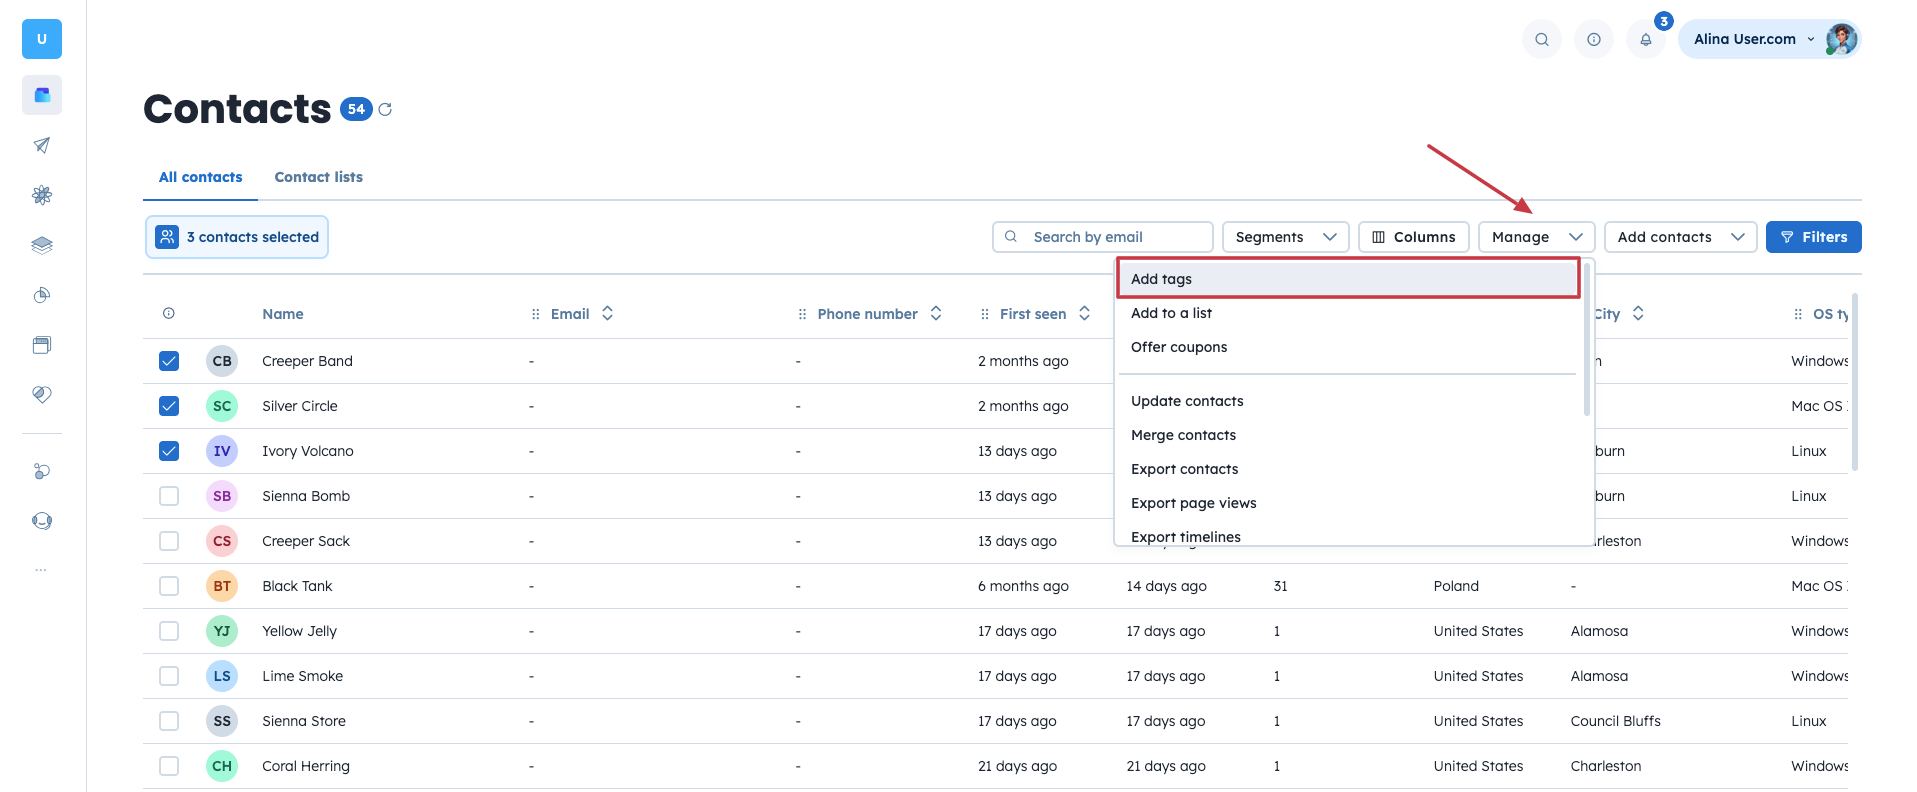
You can manually add or remove tags directly from data sections such as Contacts, Companies, or Deals. This method is useful when you need full control over selected records.
The steps are similar for all object types:
Contact tags: “Data” → “Contacts” → Apply filters or select users manually → “Manage” → “Add Tags” / “Remove Tags”
Company tags: “Data” → “Companies” → Apply filters or select companies manually → “Manage” → “Add Tags” / “Remove Tags”
Product tags: “Data” → “Products” → Apply filters or select products manually → “Manage” → “Add Tags” / “Remove Tags”
Deal tags: “Sales” → “Deals” (table view) → Apply filters or select deals manually → “Manage” → “Add Tags” / “Remove Tags”
Conversions tags: “Customer Service” → “Conversations” → Hover over a message in a conversation → Click three dots next to the message → “Add a tag” (to remove a tag, click the X icon next to it)
Example: In the Contacts section, you can manually add the tag “Prospect” to users who have not yet been contacted. This helps sales teams quickly identify and prioritize new leads.
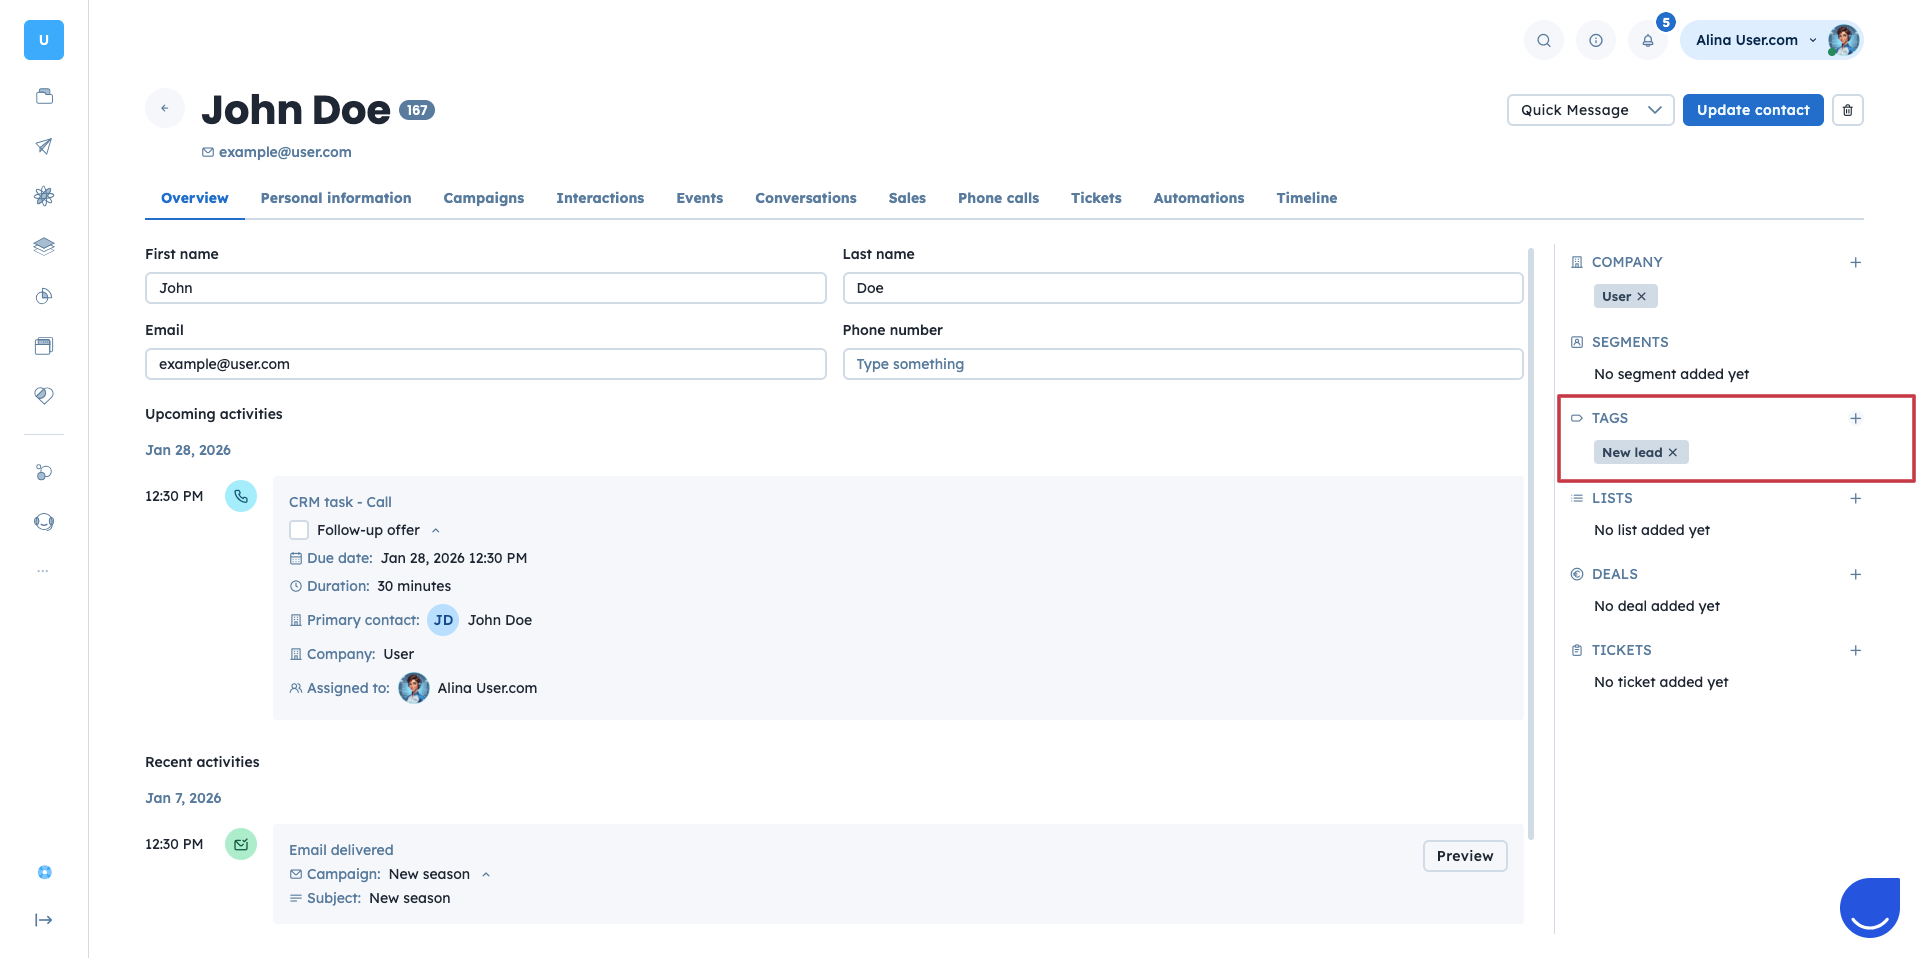
You can also manage tags directly from the profile view of a single object. This method works well when you review individual records and need to update tags based on recent interactions.
Contacts tags: “Data” → “Contacts” → Open a contact profile → “Tags” section on the right → “+” icon to add a tag (click the X icon to remove a tag)
Company tags: “Data” → “Companies” → Open a company profile → “Tags” section on the right → “+” icon to add a tag (click the X icon to remove a tag)
Product tags: “Data” → “Contacts” → Open a product profile → “Tags” section on the right → “+” icon to add a tag (click the X icon to remove a tag)
Deal tags: “Sales” → “Deals” → Open a deal profile → “Tags” section on the right → “+” icon to add a tag (click the X icon to remove a tag)
Ticket tags: “Customer service” → “Support tickets” → Open a ticket profile → “Tags” section on the right → “+” icon to add a tag (click the X icon to remove a tag)
Conversions tags: “Customer service” → “Conversions” → Hover over a message in a conversation → Click three dots next to the message → “Add a tag” (to remove a tag, click the X icon next to it)
Example: After a product demo, a sales representative reviews the lead profile and adds the tag “High Interest” to mark the opportunity for follow-up actions.
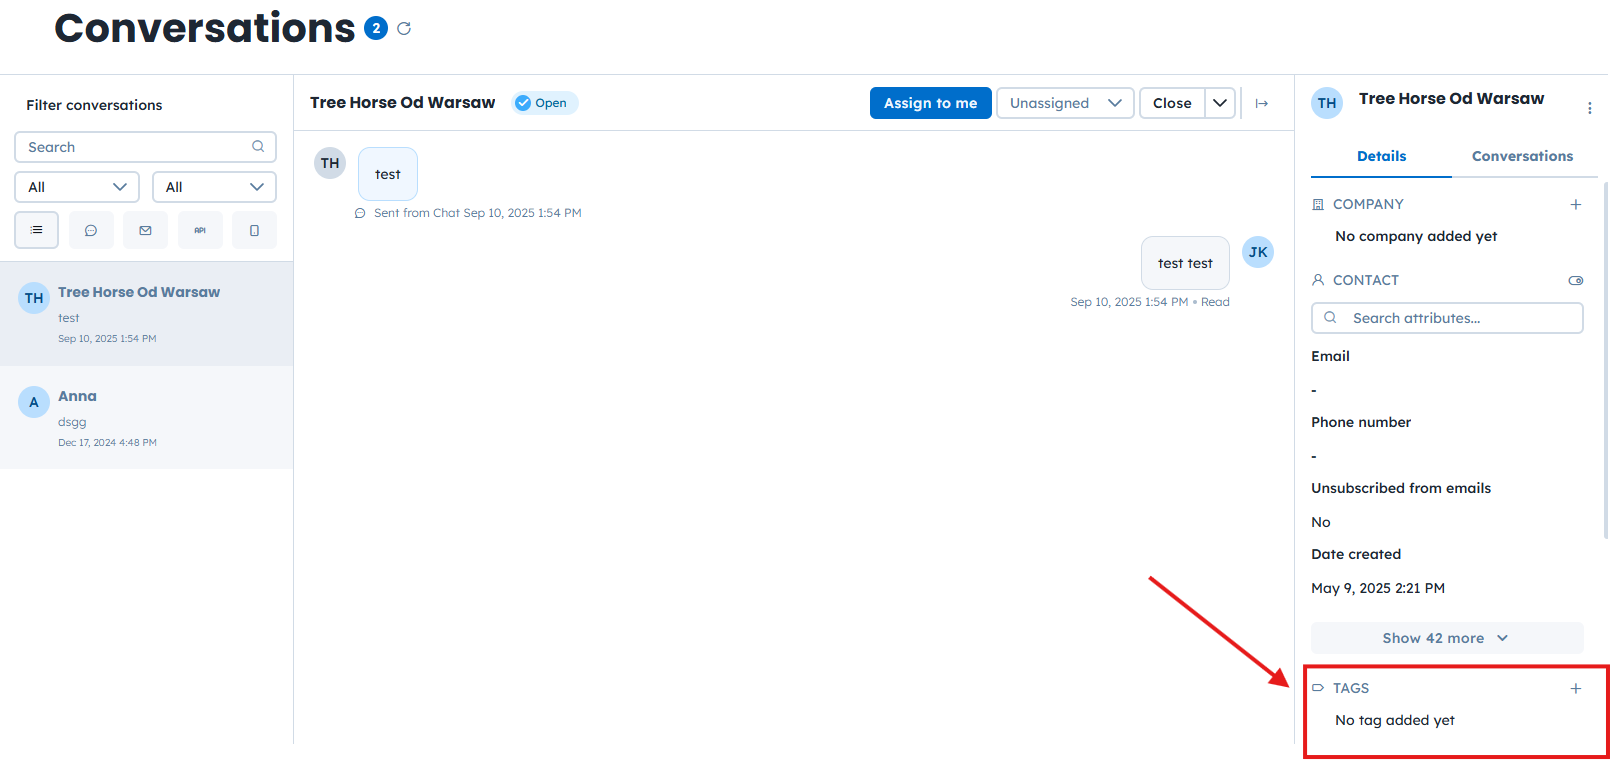
“Conversations” module allows you to manage contact tags while chatting with contacts in real time. This is especially helpful for sales and support teams working with live conversations.
To add a tag during a conversation:
Open the conversation: “Sales”/”Customer service” → “Conversations” → Enter a conversation.
Find the “Tags” section on the right side of the panel among other contact details.
Click the “+” icon and select an existing tag or create a new one.
Example: During a live chat, a user expresses satisfaction with support. The agent adds the tag “Satisfied Customer” directly from a conversation view, making it easier to include these users in testimonial or feedback campaigns later.
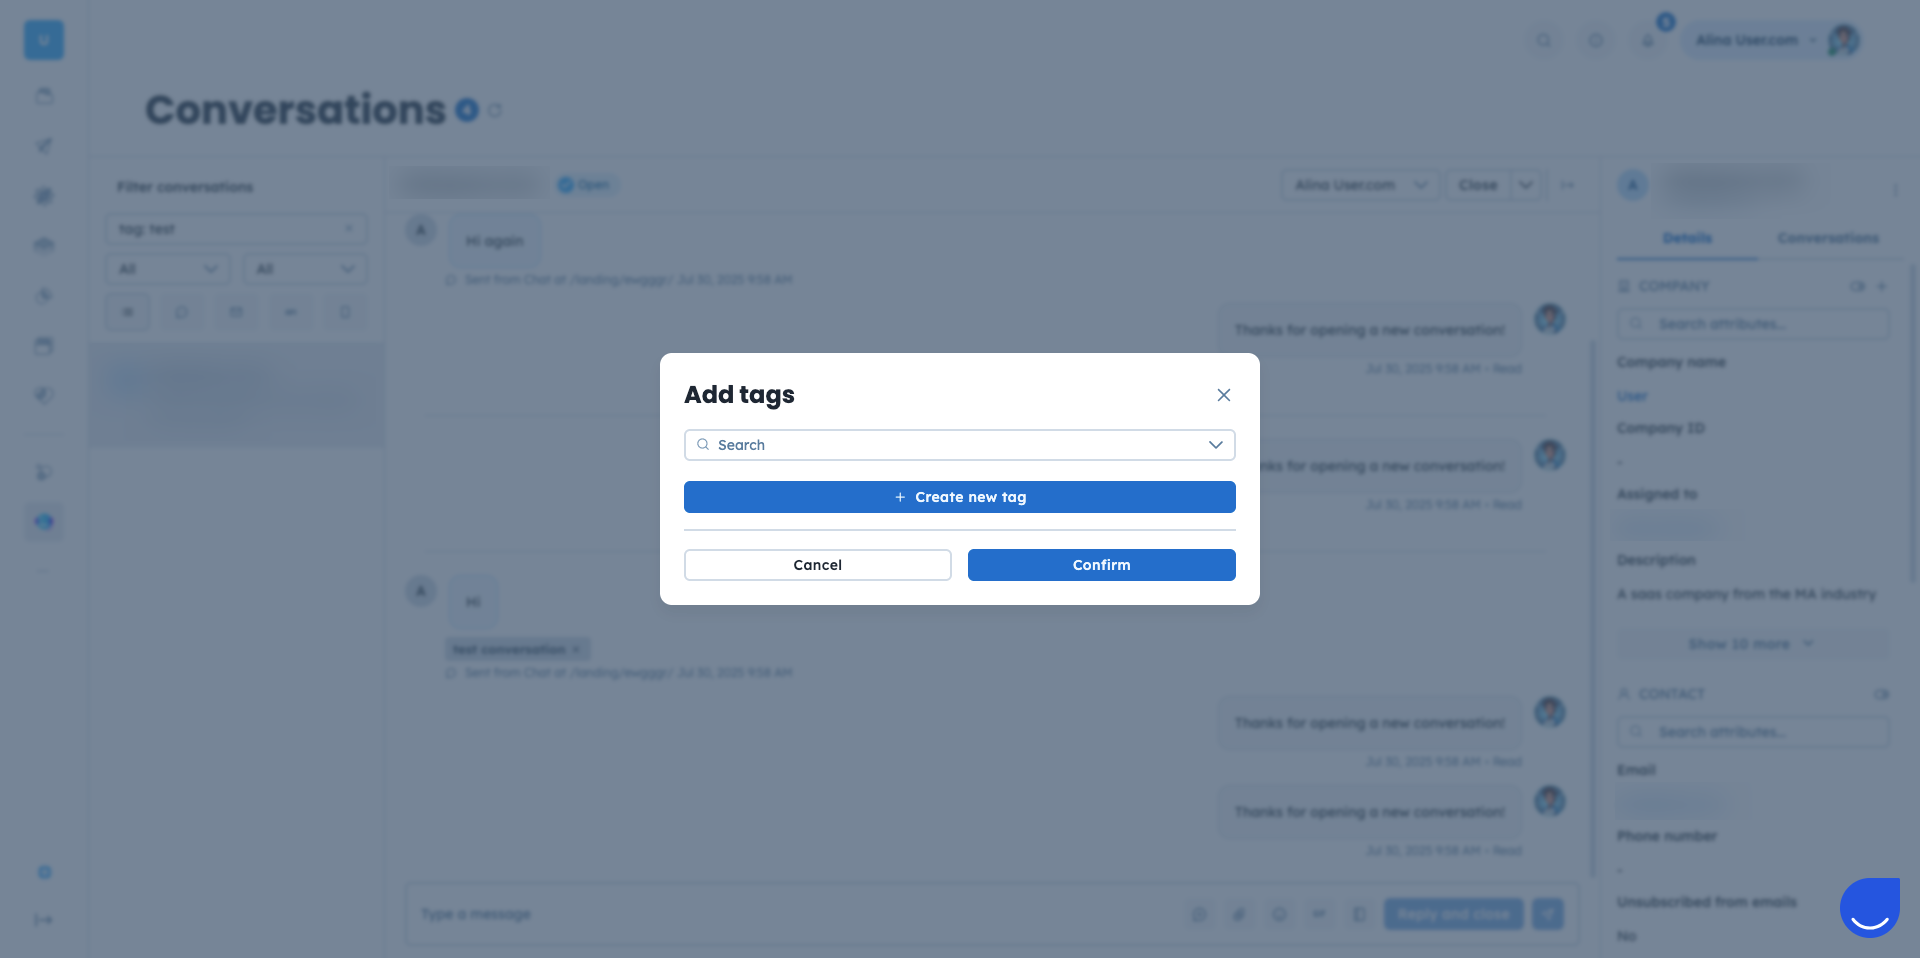
Also, here you add the tags to the messages inside the conversations. It helps customer support teams to get more stats about the types of requests from the customers and leads. Moreover, you can filter conversations by a specific tag to go through them or analyze the chosen topic.
To add a tag to the message from the conversation:
Go to “Sales”/“Customer service” → “Conversions” section.
Open the conversation you want to tag a message from. Hover over a message in a conversation → Click three dots next to the message → “Add a tag” (to remove a tag, click the X icon next to it).
Choose one of the existing tags or create a new one straight away.
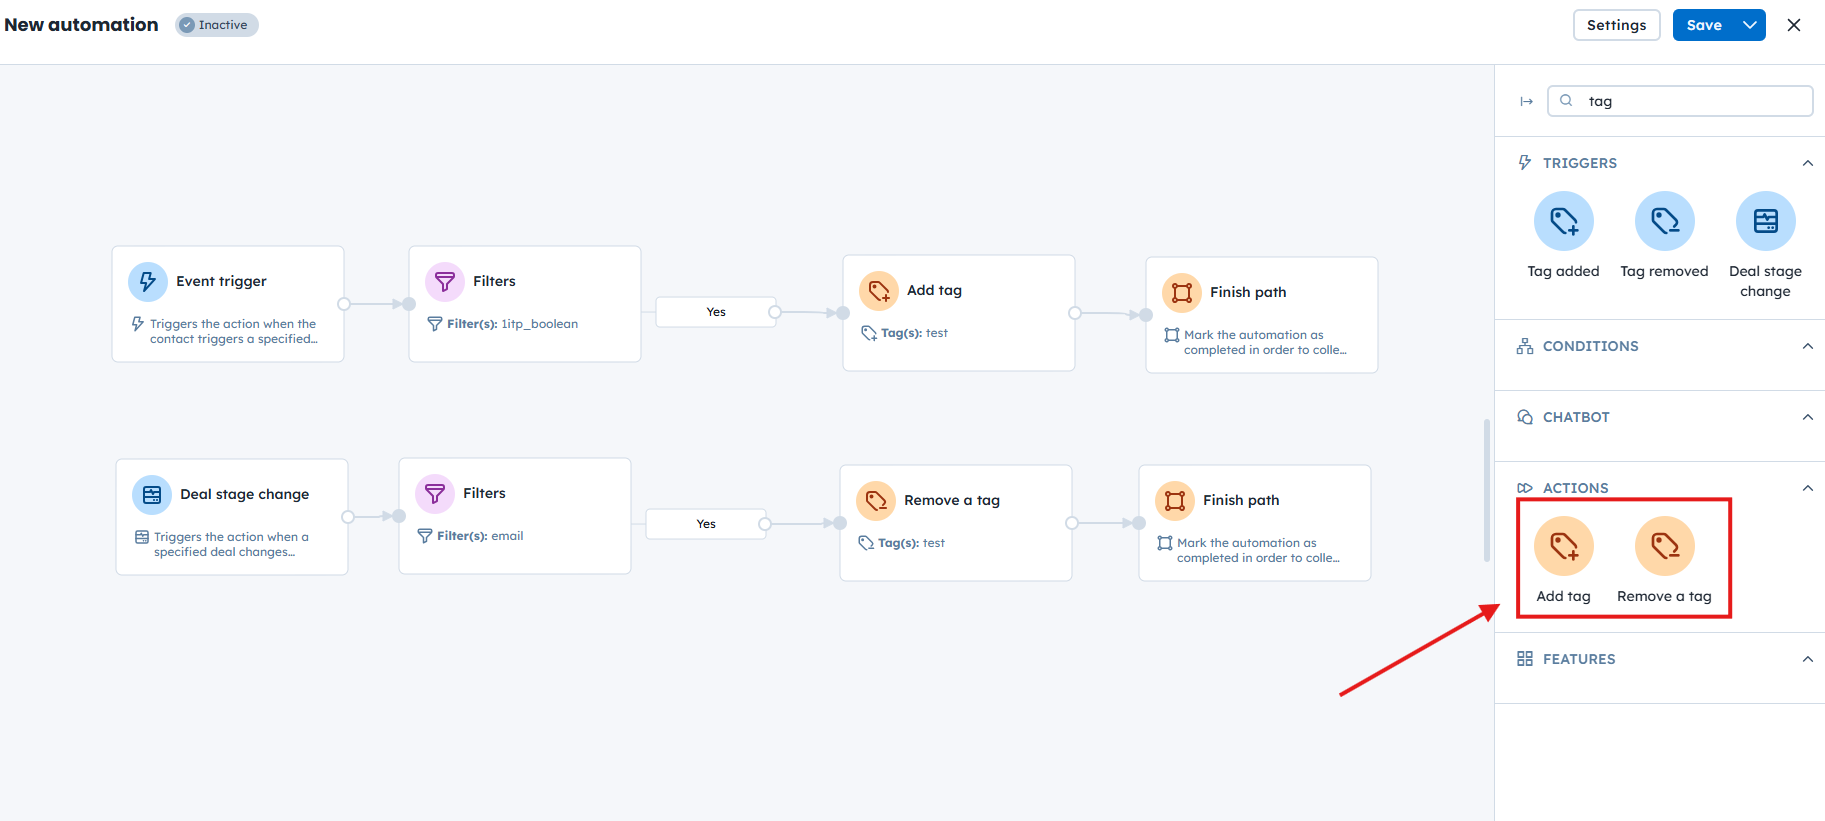
Automations are the most popular and scalable way to manage tags. They let you add or remove tags automatically based on contact behavior, attribute values, or other events in the contact journey.
There are four modules dedicated to tag management:
“Add Tag” action [LINK]
“Remove Tag” action [LINK]
“Tag added” trigger [LINK]
“Tag Removed” trigger [LINK]
Example: You can create an automation that adds the tag “Golden” to users who have made more than seven purchases. This allows you to easily identify highly engaged users and target them with dedicated campaigns.

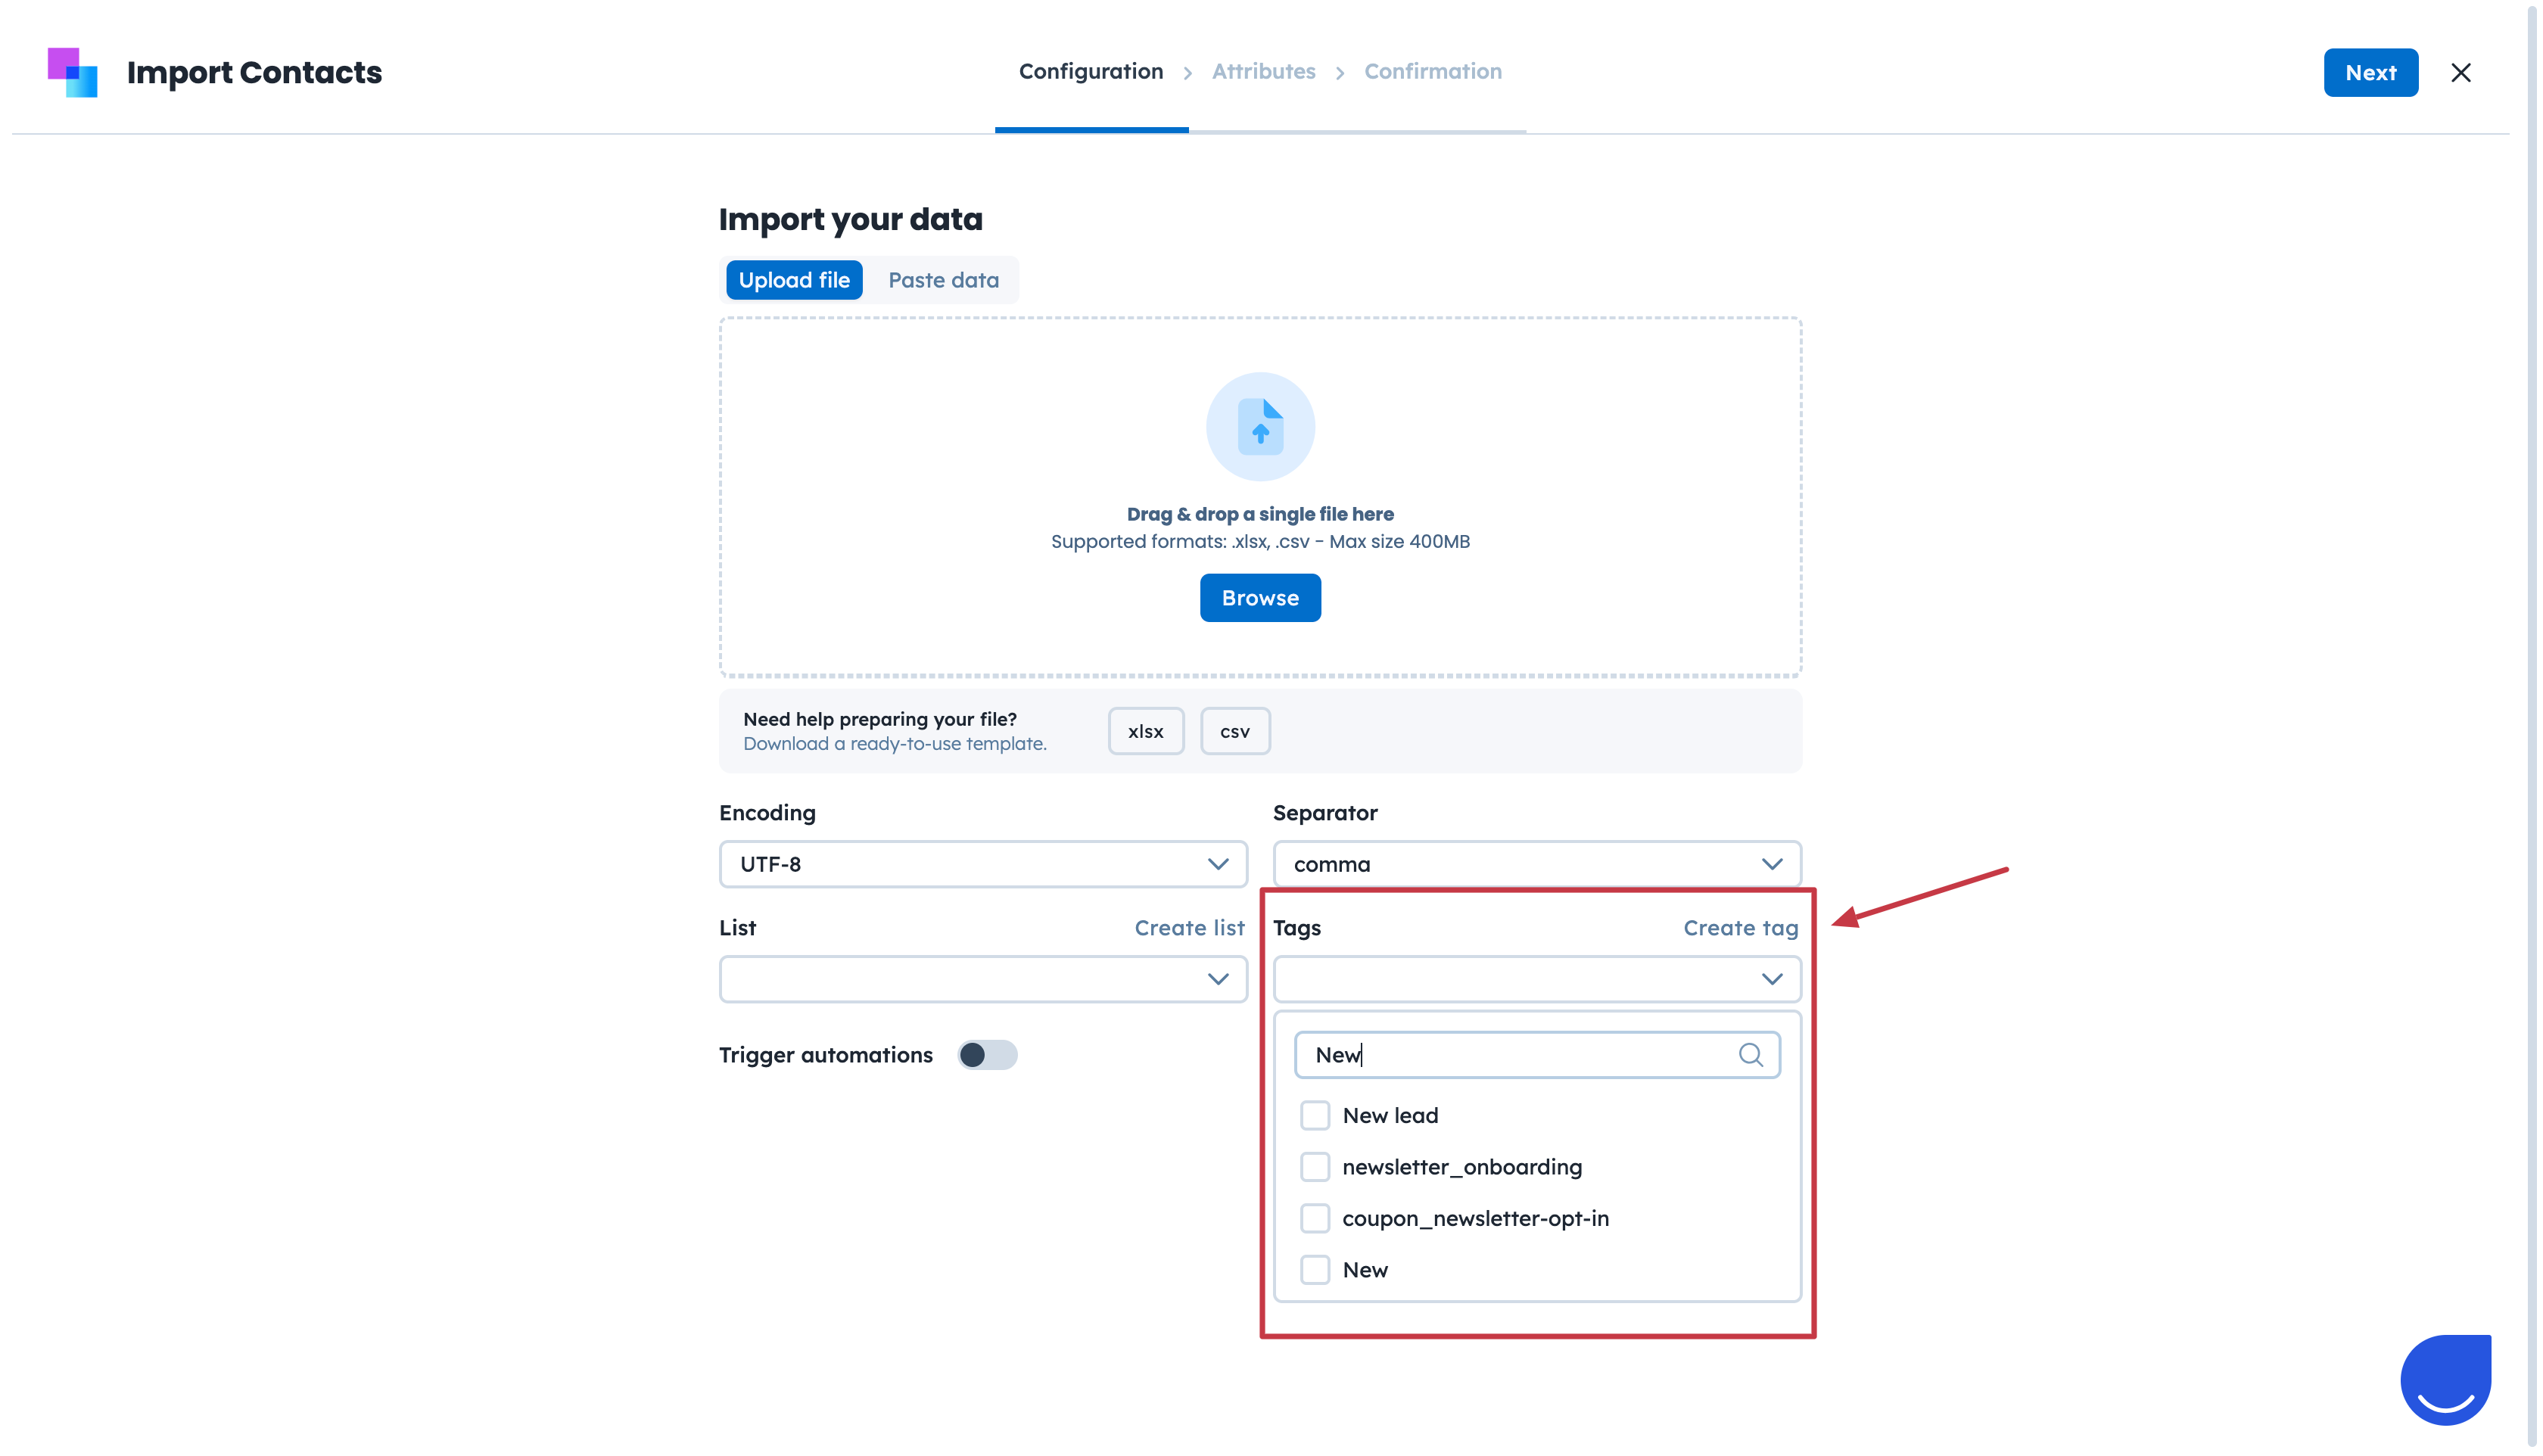
CSV import lets you add tags to multiple objects at once. This is an efficient way to label imported records and keep track of data sources. Tags added during import can also trigger automations.
To add tags during import:
Start a CSV import.
On the first step, create a new tag or select existing tags.
Example: You import leads collected during an event and tag them as “Event Lead – Summer 2025” to personalize follow-up campaigns.
The REST API allows you to add or remove tags programmatically for different objects. This method is ideal for integrations and large-scale automation managed outside the Positive User interface.
In addition to basic tag management, the API supports advanced operations related to tags.
For a full list of available options, see the Positive User REST API documentation.
Example: When a user or company status changes in your internal system, you can automatically update their tags in Positive User using the API.
Module Guide: Tag Added Trigger [LINK]
Module Guide: Tag Removed Trigger
Module Guide: Add Tag Action
Module Guide: Remove Tag Action
