Connecting your email inbox (such as Gmail or Outlook) to Positive User helps you manage all your customer interactions in one place. This connection ensures your team can view message histories directly on a contact's timeline, pull in contacts automatically, and run automated workflows based on email replies.
Before you begin, ensure that your email provider allows external IMAP connections. For example, Gmail blocks IMAP access by default. To change this, go to your Gmail settings, navigate to "Forwarding and POP/IMAP", and enable the connection before moving to the next step.
Follow these steps to connect your personal or team email address.
Go to "Workspace Settings" → “Email” → "Connected Inboxes" → Click "Connect via IMAP"
Fill out the configuration fields on the panel:
Name: Enter an internal identification name for this connection. Your contacts will not see this label.
Host name: Enter your email provider’s IMAP host address. For Gmail, use “imap.gmail.com”.
Username: Enter your full email address.
Password: Enter your email account password. If you use two-step verification, you must generate and input a unique app password here instead of your regular password. (Check the instruction)
Port: Enter your provider's secure port number. For Gmail and most secure networks, this is 993.
Team member: Select your account name from the drop-down menu to assign ownership of this connected inbox.
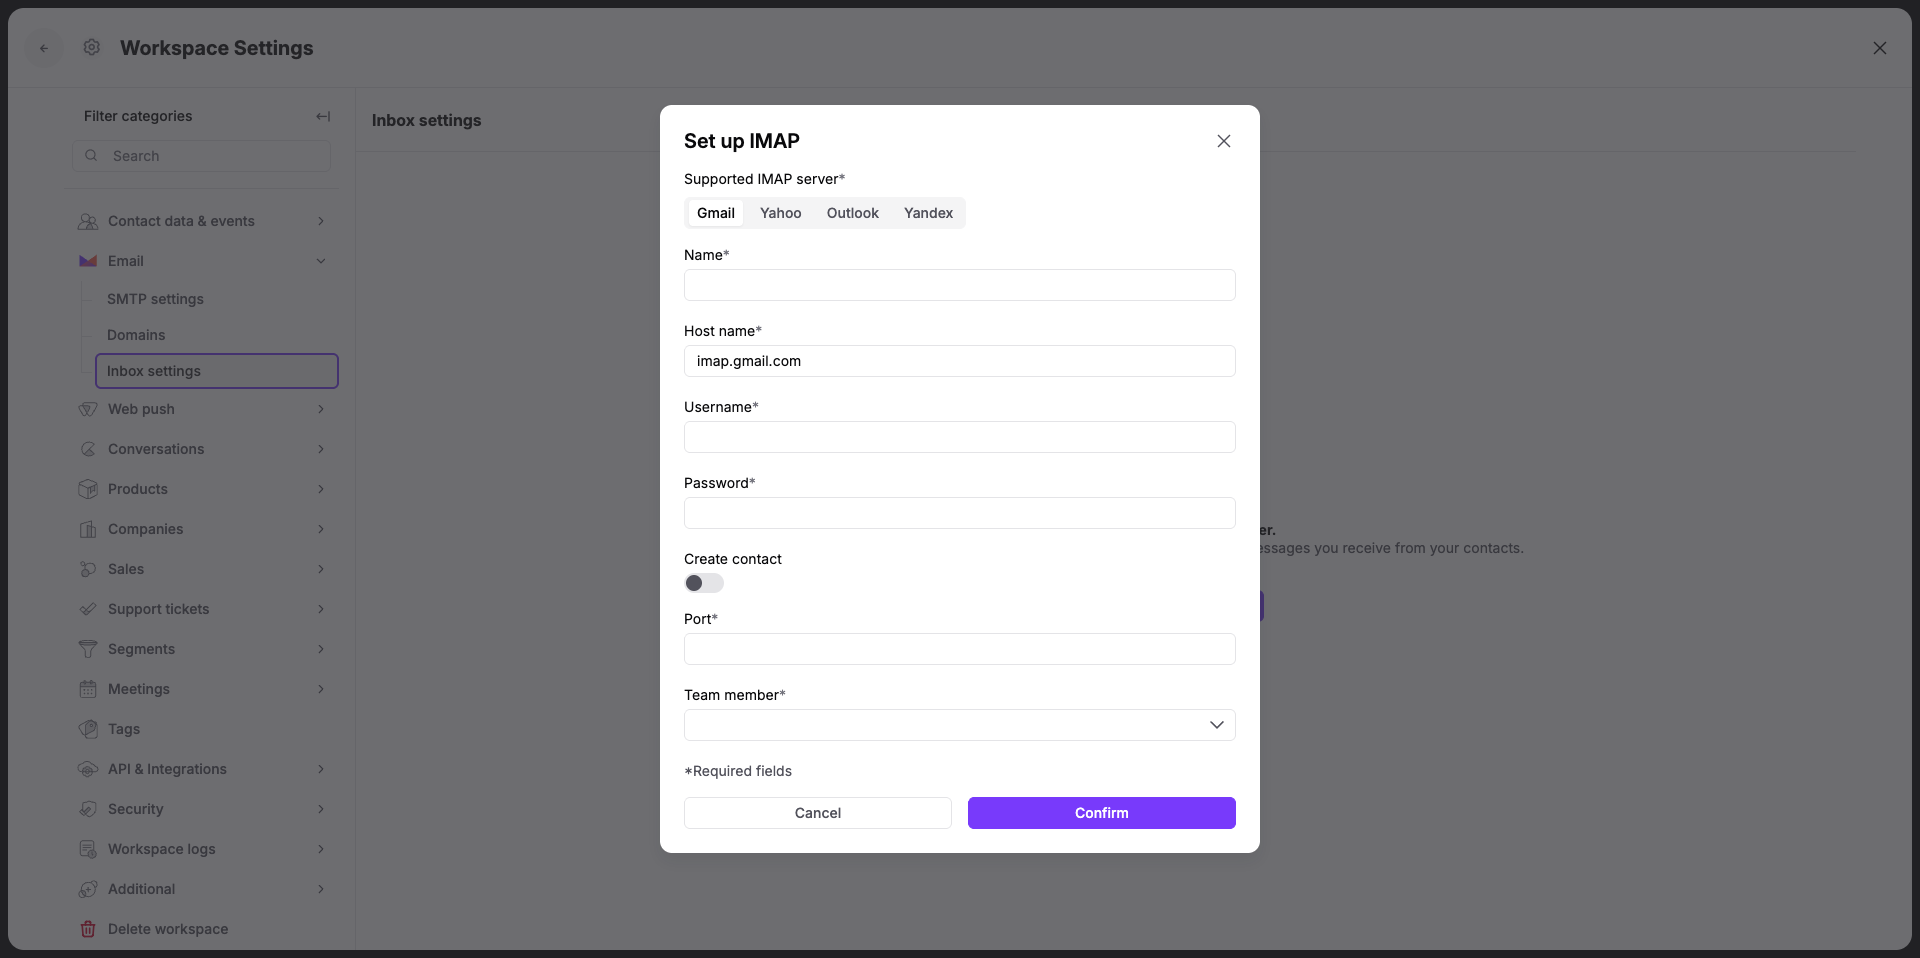
Create contact: Switch this toggle on if you want to import your existing email directory. This automatically creates new contact profiles in your workspace for those email addresses.

Click the purple "Confirm" button to complete the setup.
Tracking conversation history on a contact timeline: Your team can view every historical email exchanged with a contact directly within their profile so everyone retains full context. For example, when a contact sends a reply to your personal inbox, the entire message thread automatically logs on their timeline for your sales team to review.
Building your contact directory automatically: You can skip manual file uploads or API configurations by pulling your network straight into your workspace. For example, turning on the automatic contact creation switch instantly builds active contact profiles for everyone you have emailed in the past.
Triggering automated follow-up workflows: You can design automation sequences that react instantly depending on how a contact interacts with your emails. For example, you can build a workflow in "Automations" that uses the "IMAP email" condition module to instantly send a targeted follow-up message the moment a contact replies to your onboarding note.
How to Configure IMAP/SMTP for an Email Account with 2-Step Verification
“IMAP email” Action Module Guide [LINK]
