Embed forms help your team gather valuable details from website visitors and seamlessly turn anonymous contacts into known contacts. By using the drag-and-drop editor in Positive User, you can design, configure, and publish these forms without any technical coding skills. To explore the fundamental concepts behind forms, take a look at our "Introduction to Forms" article.
Follow these steps to build and publish your form.
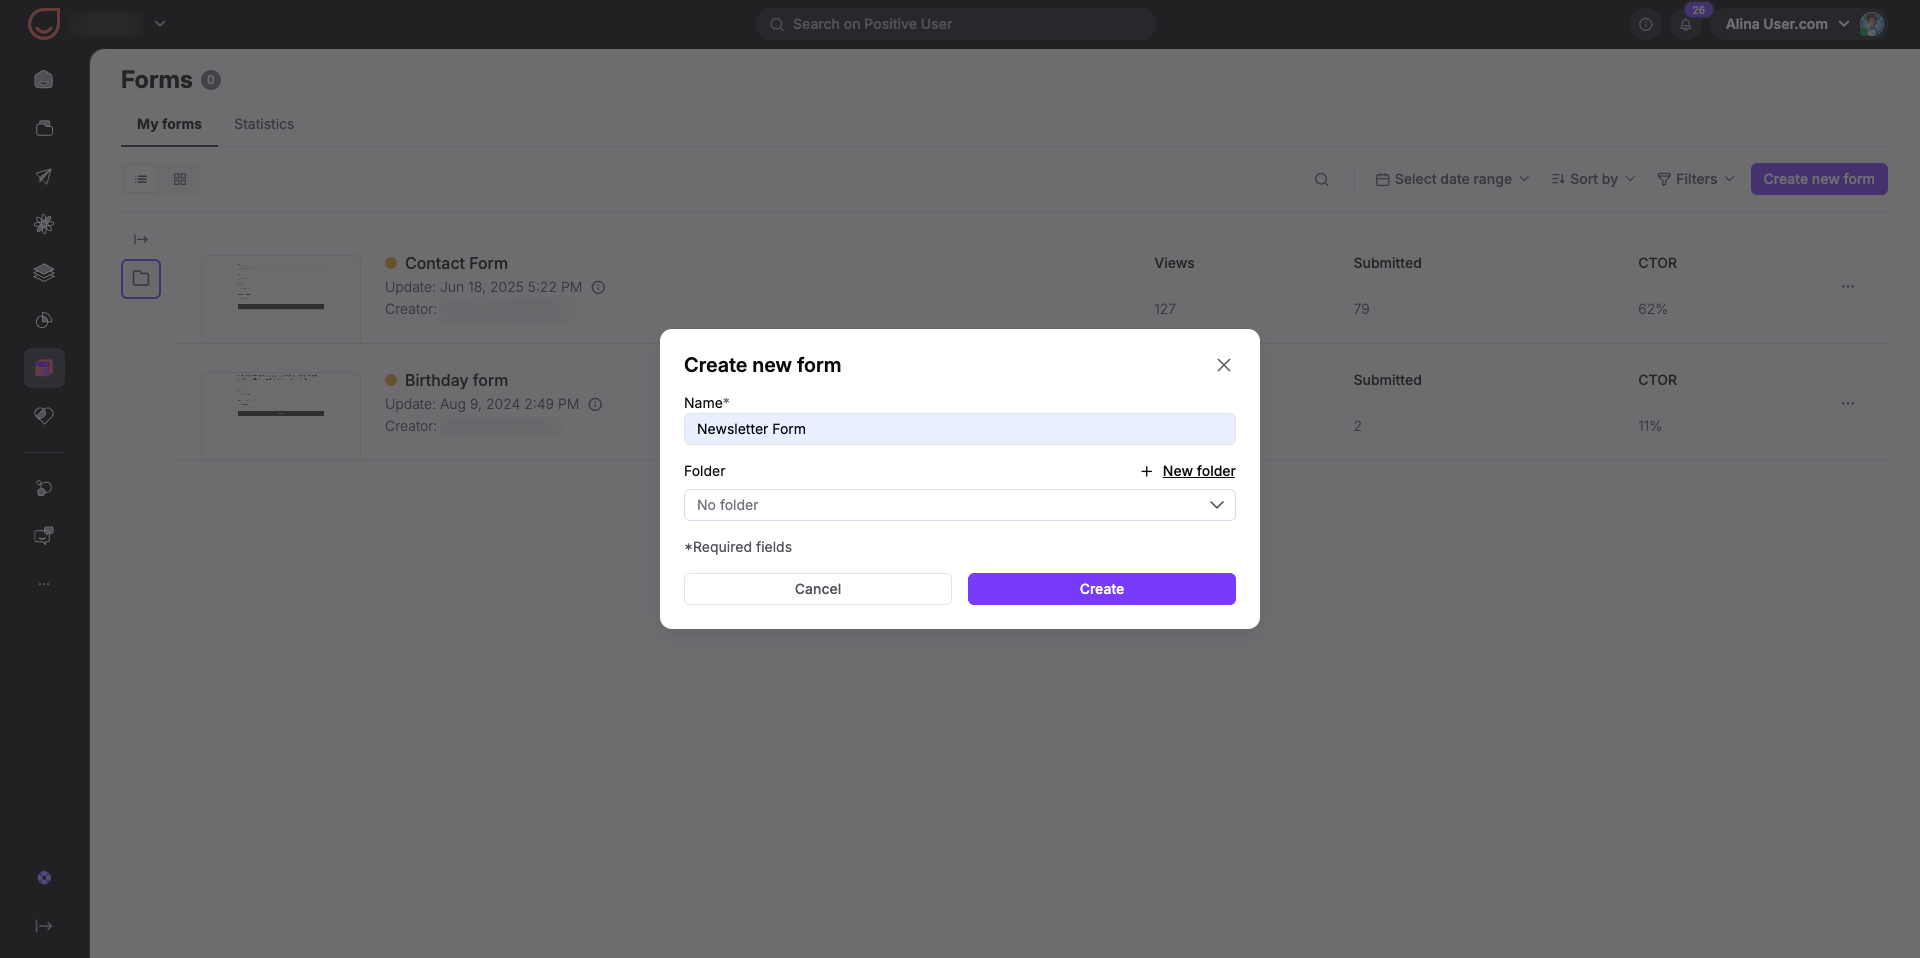
Go to "Website Experience" → "Forms" and click the "Create new form" button.
Give your form a clear name and choose a folder to keep your workspace organized, then click "Create".
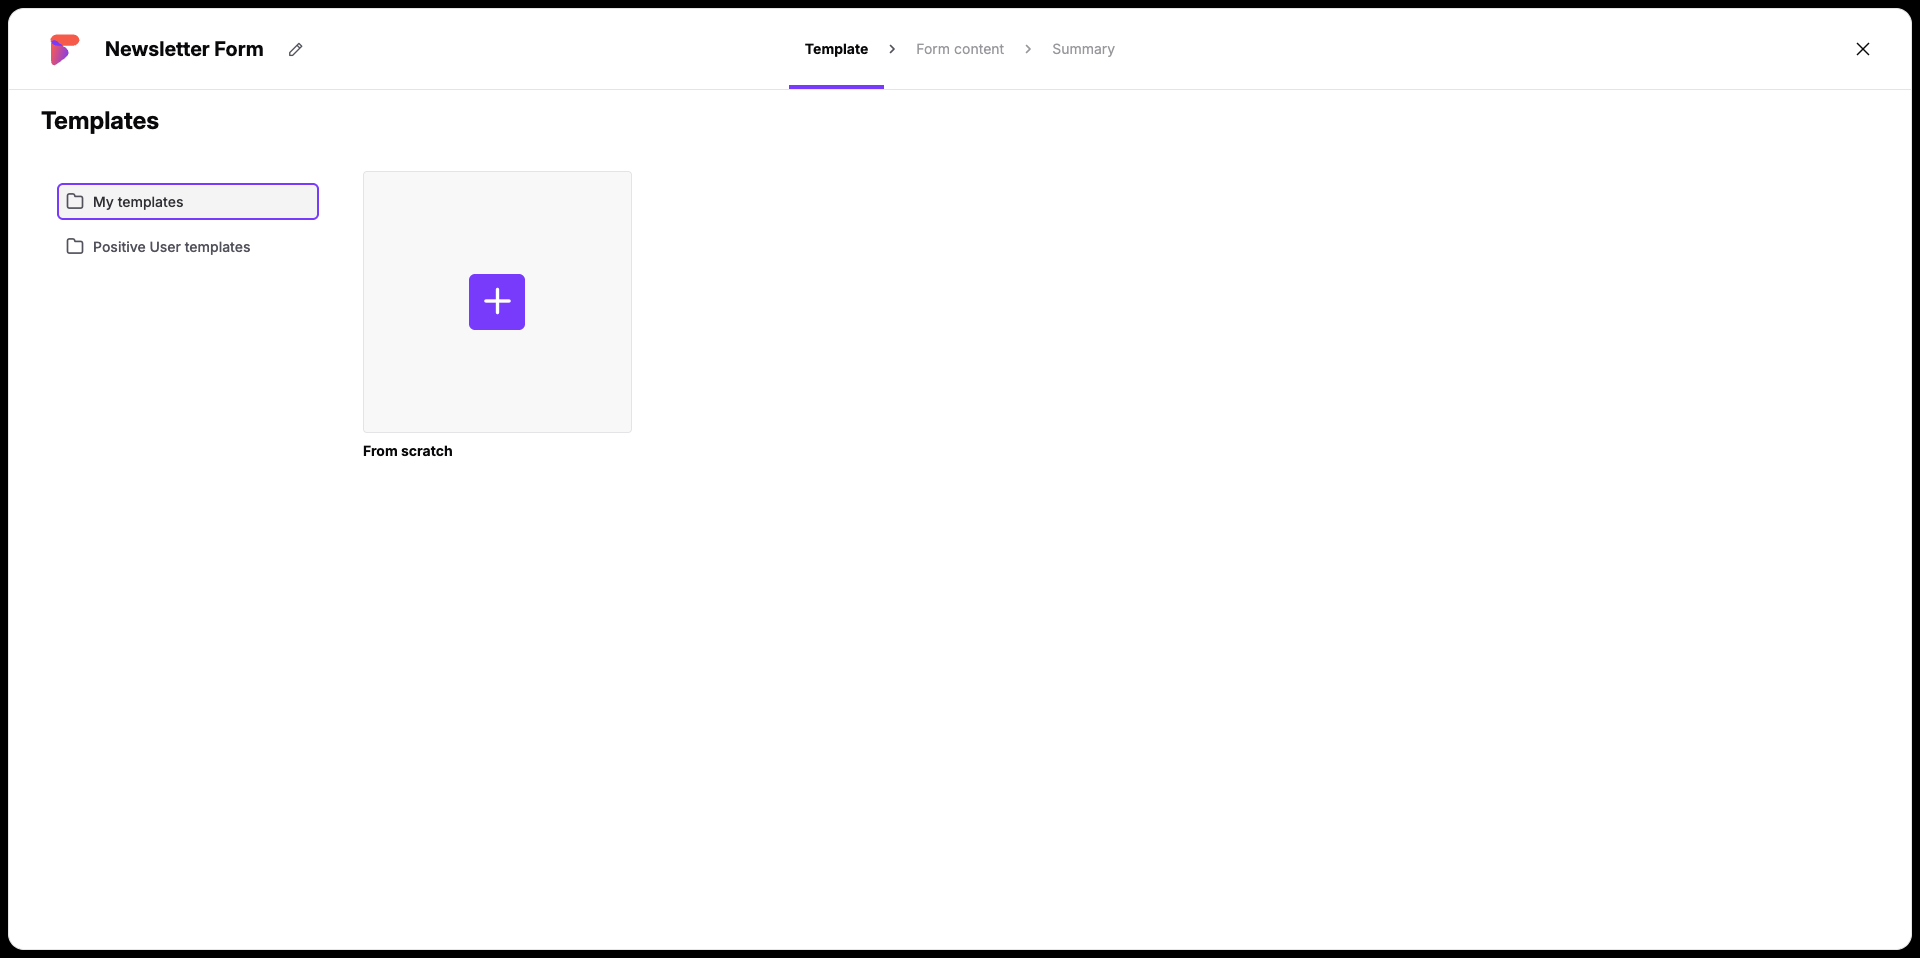
Then choose a template from one of the existing ones or select "From scratch" to start with a blank layout.
The editor is split into two main sections: your live preview on the left and the customization tools panel on the right.
First, build the structure of your form by dragging layout elements from the "Blocks" tab on the right side of the screen.
Next, fill those layout blocks by dragging items from the "Content" tab. You can customize your form elements to match your brand by uploading images your "Media Library", writing clear text, and styling your call-to-action buttons.

To gather specific customer information, drag a "User" or "Company" module directly onto your editing space. Click on the module to select which profile attribute you want to save, such as an email address or first name. This mapping ensures that the gathered data syncs straight into the correct contact or company profile.
The field will automatically change its layout on the basis of the type of attribute (e.g., text field for strings, checkboxes for booleans, dropdown for fixed choices or calendar view for date/datetime attributes).
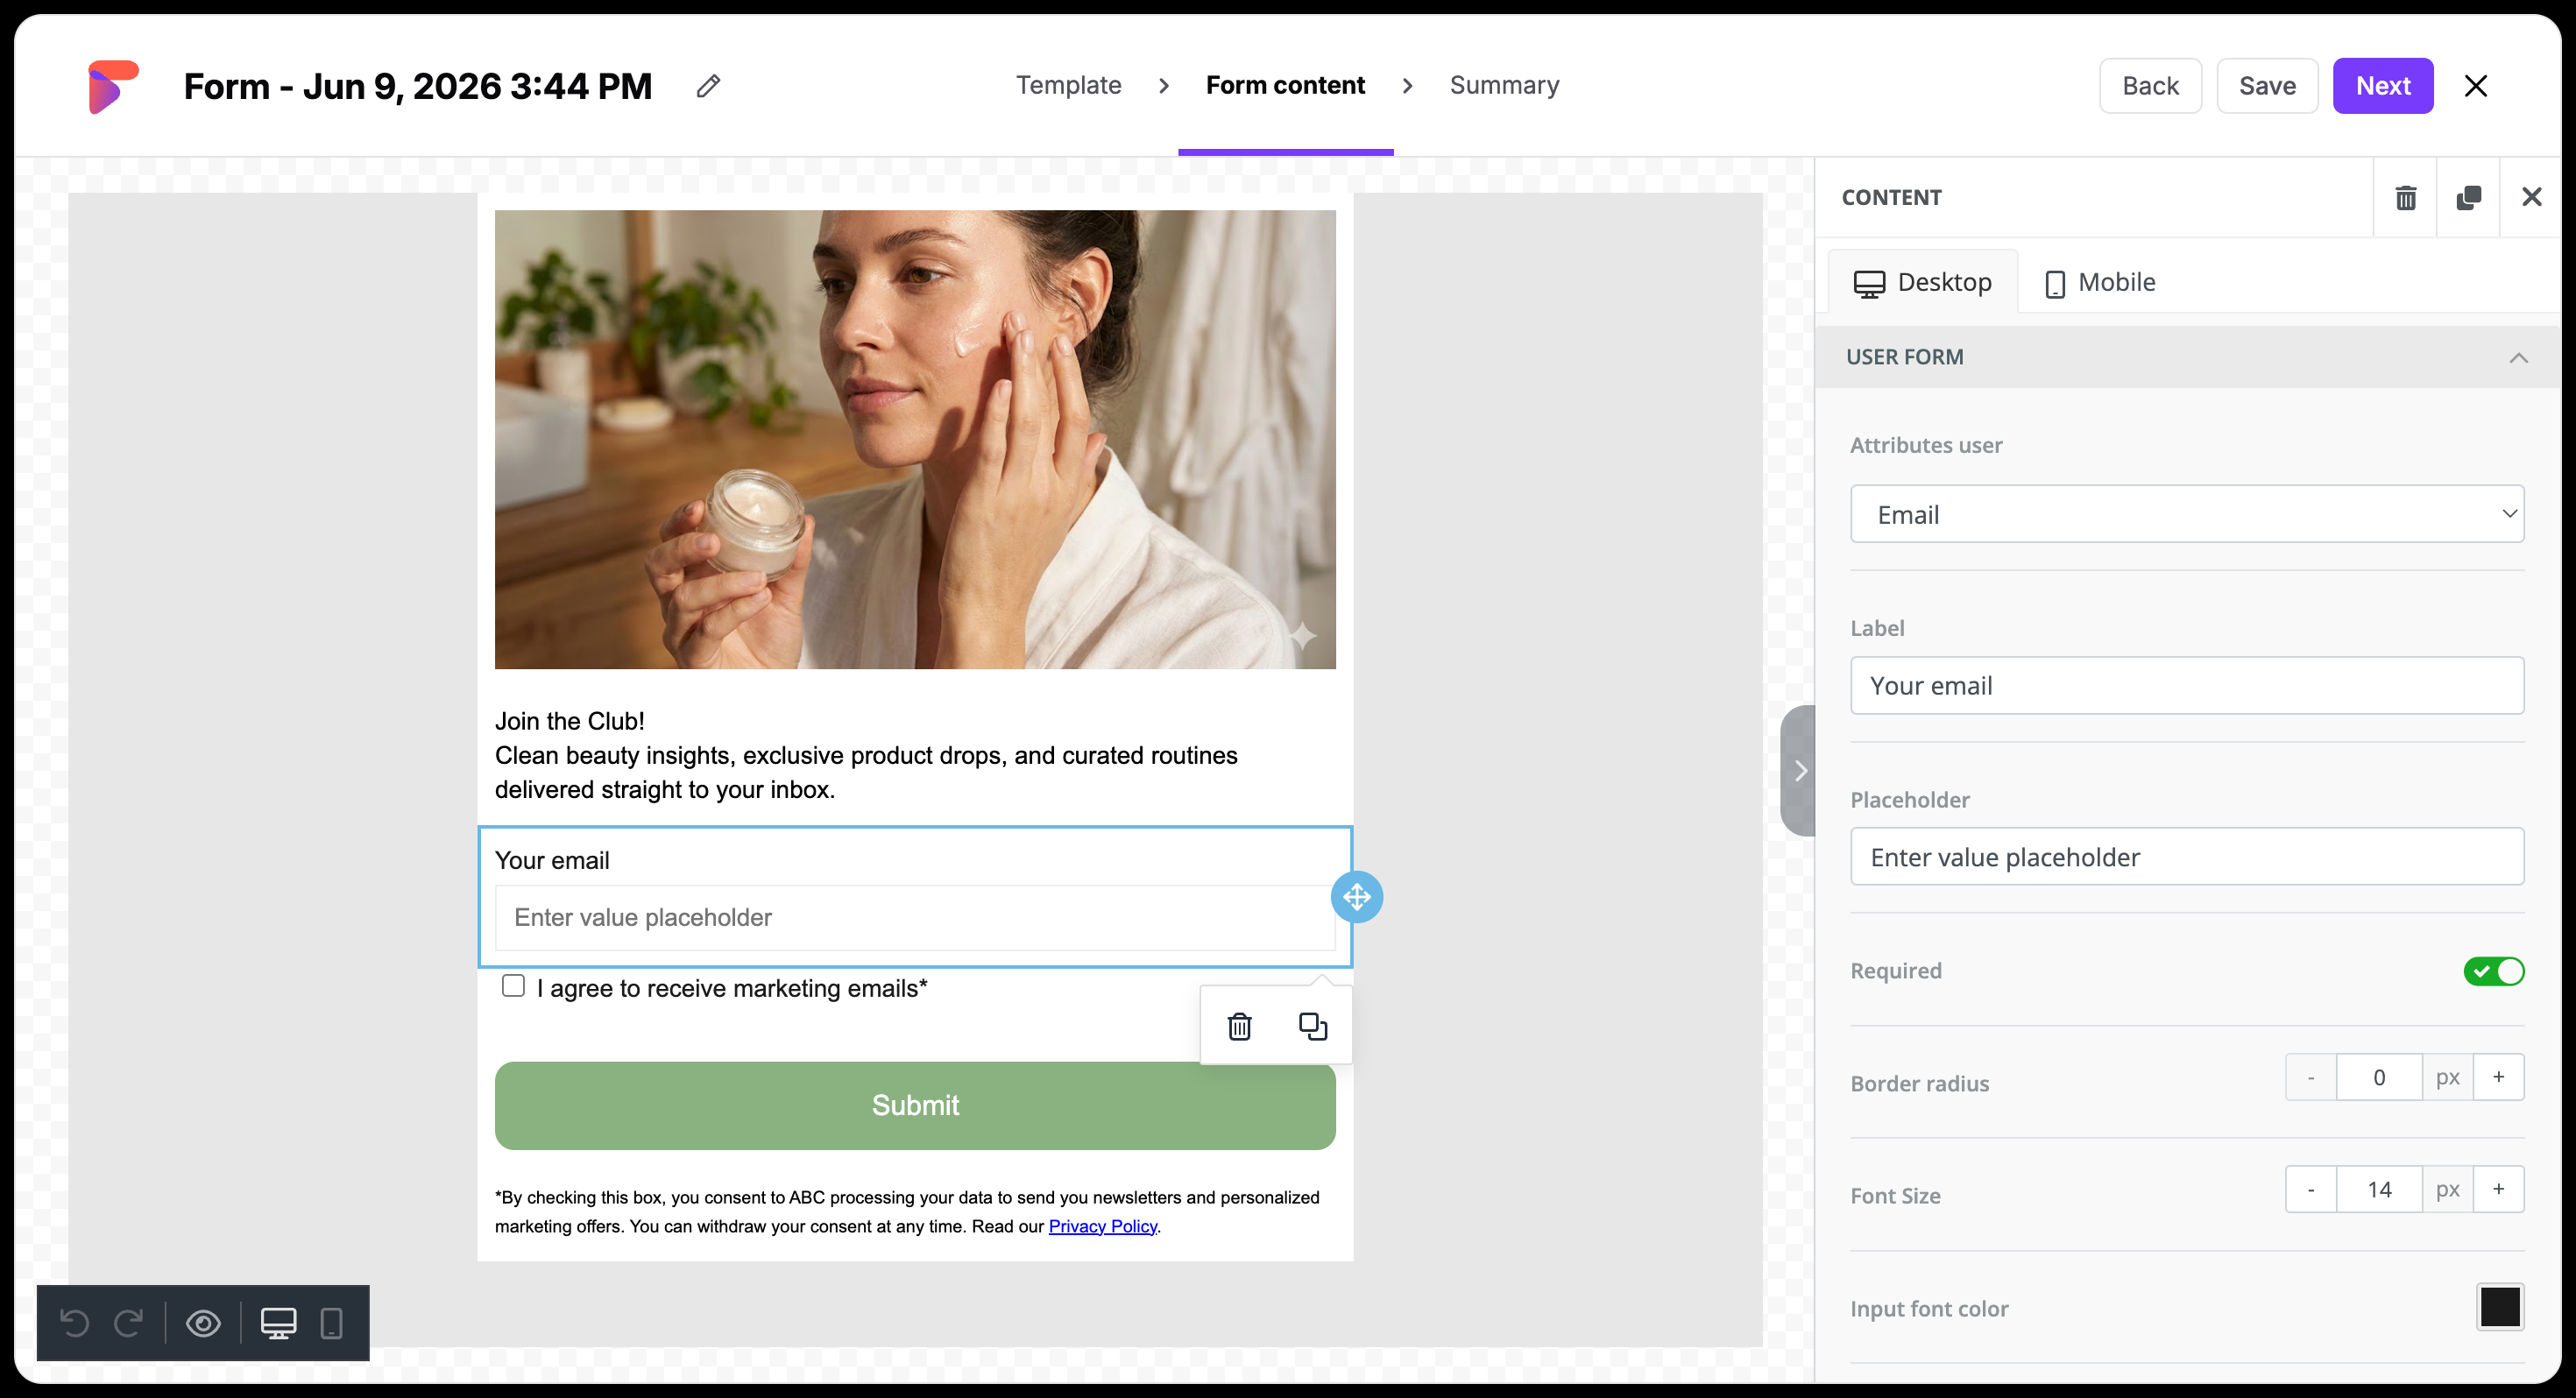
If there is information you absolutely need, switch on the "Required" toggle for that field. When an anonymous contact tries to send the form without filling it out, the interface automatically highlights the missing fields to guide them.
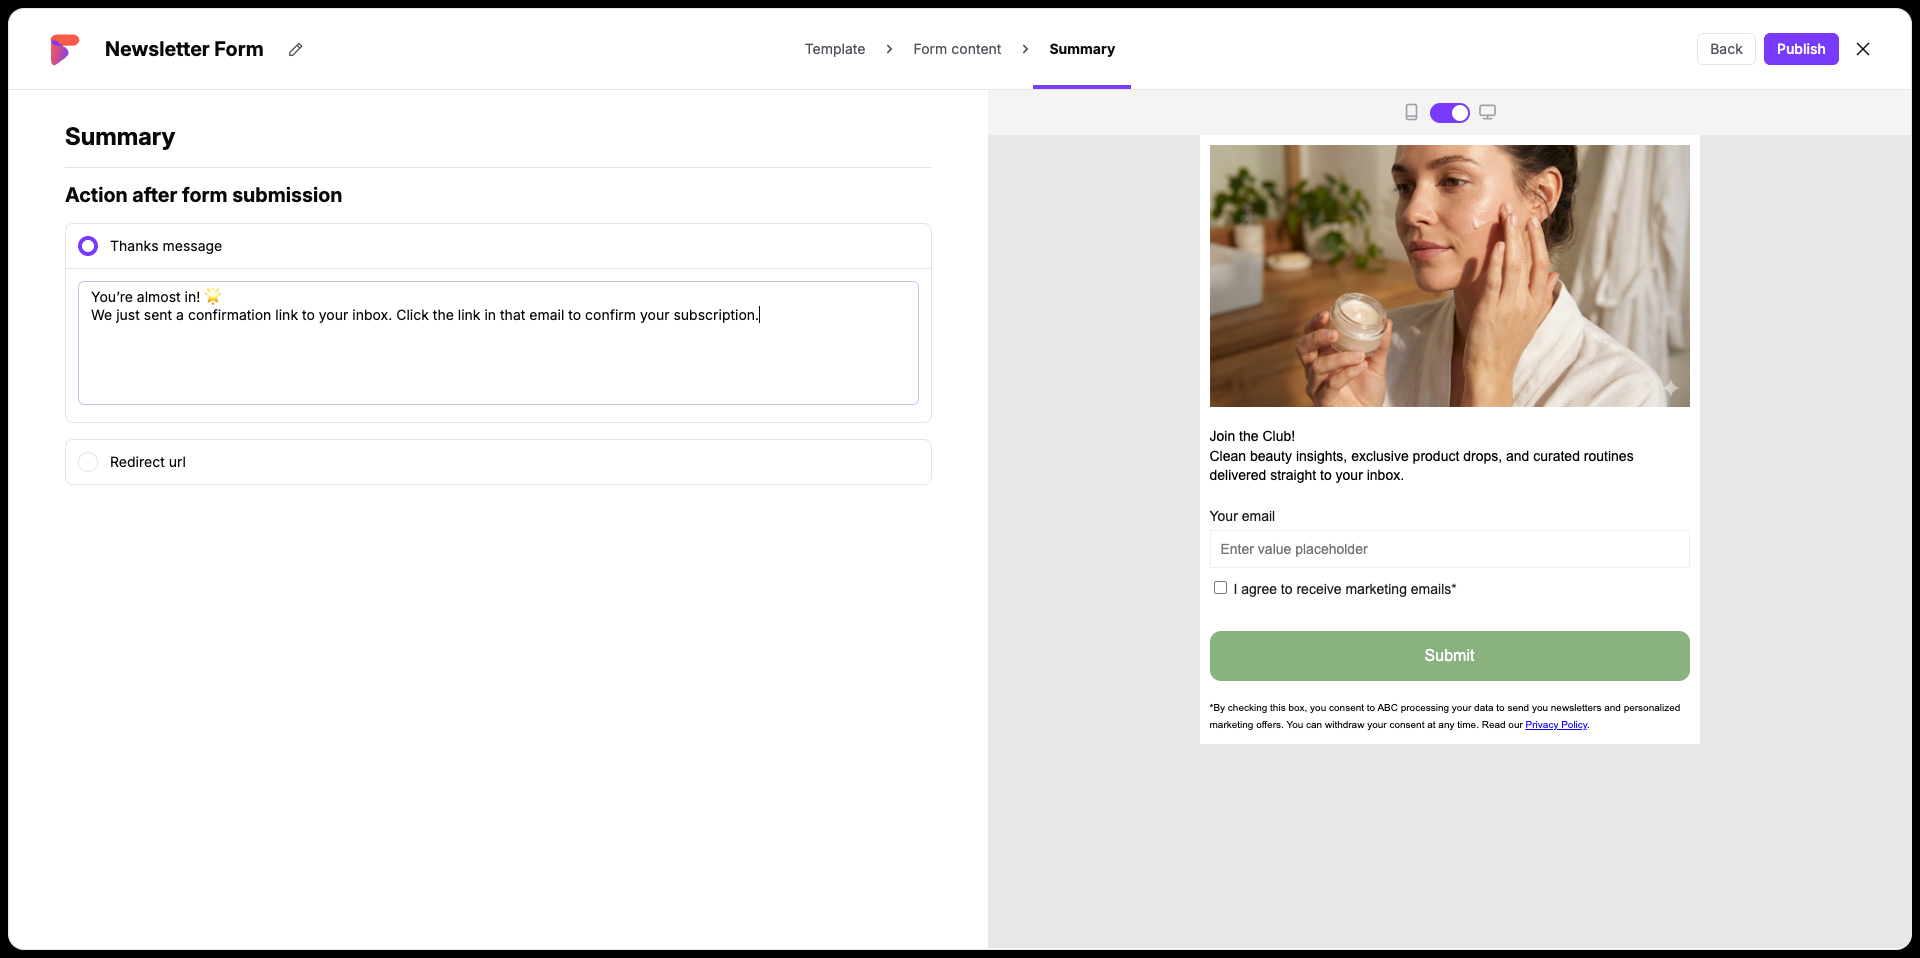
When you are happy with the layout and fields of your form, click the "Next" button in the top right corner to advance to the "Summary" step.
Under the "Action after form submission" section, choose exactly what happens after a contact hits your submission button:
"Thanks message": Type a custom note that displays on the screen immediately after they submit.
"Redirect url": Provide a specific web link where contacts are sent automatically after filling out the form.
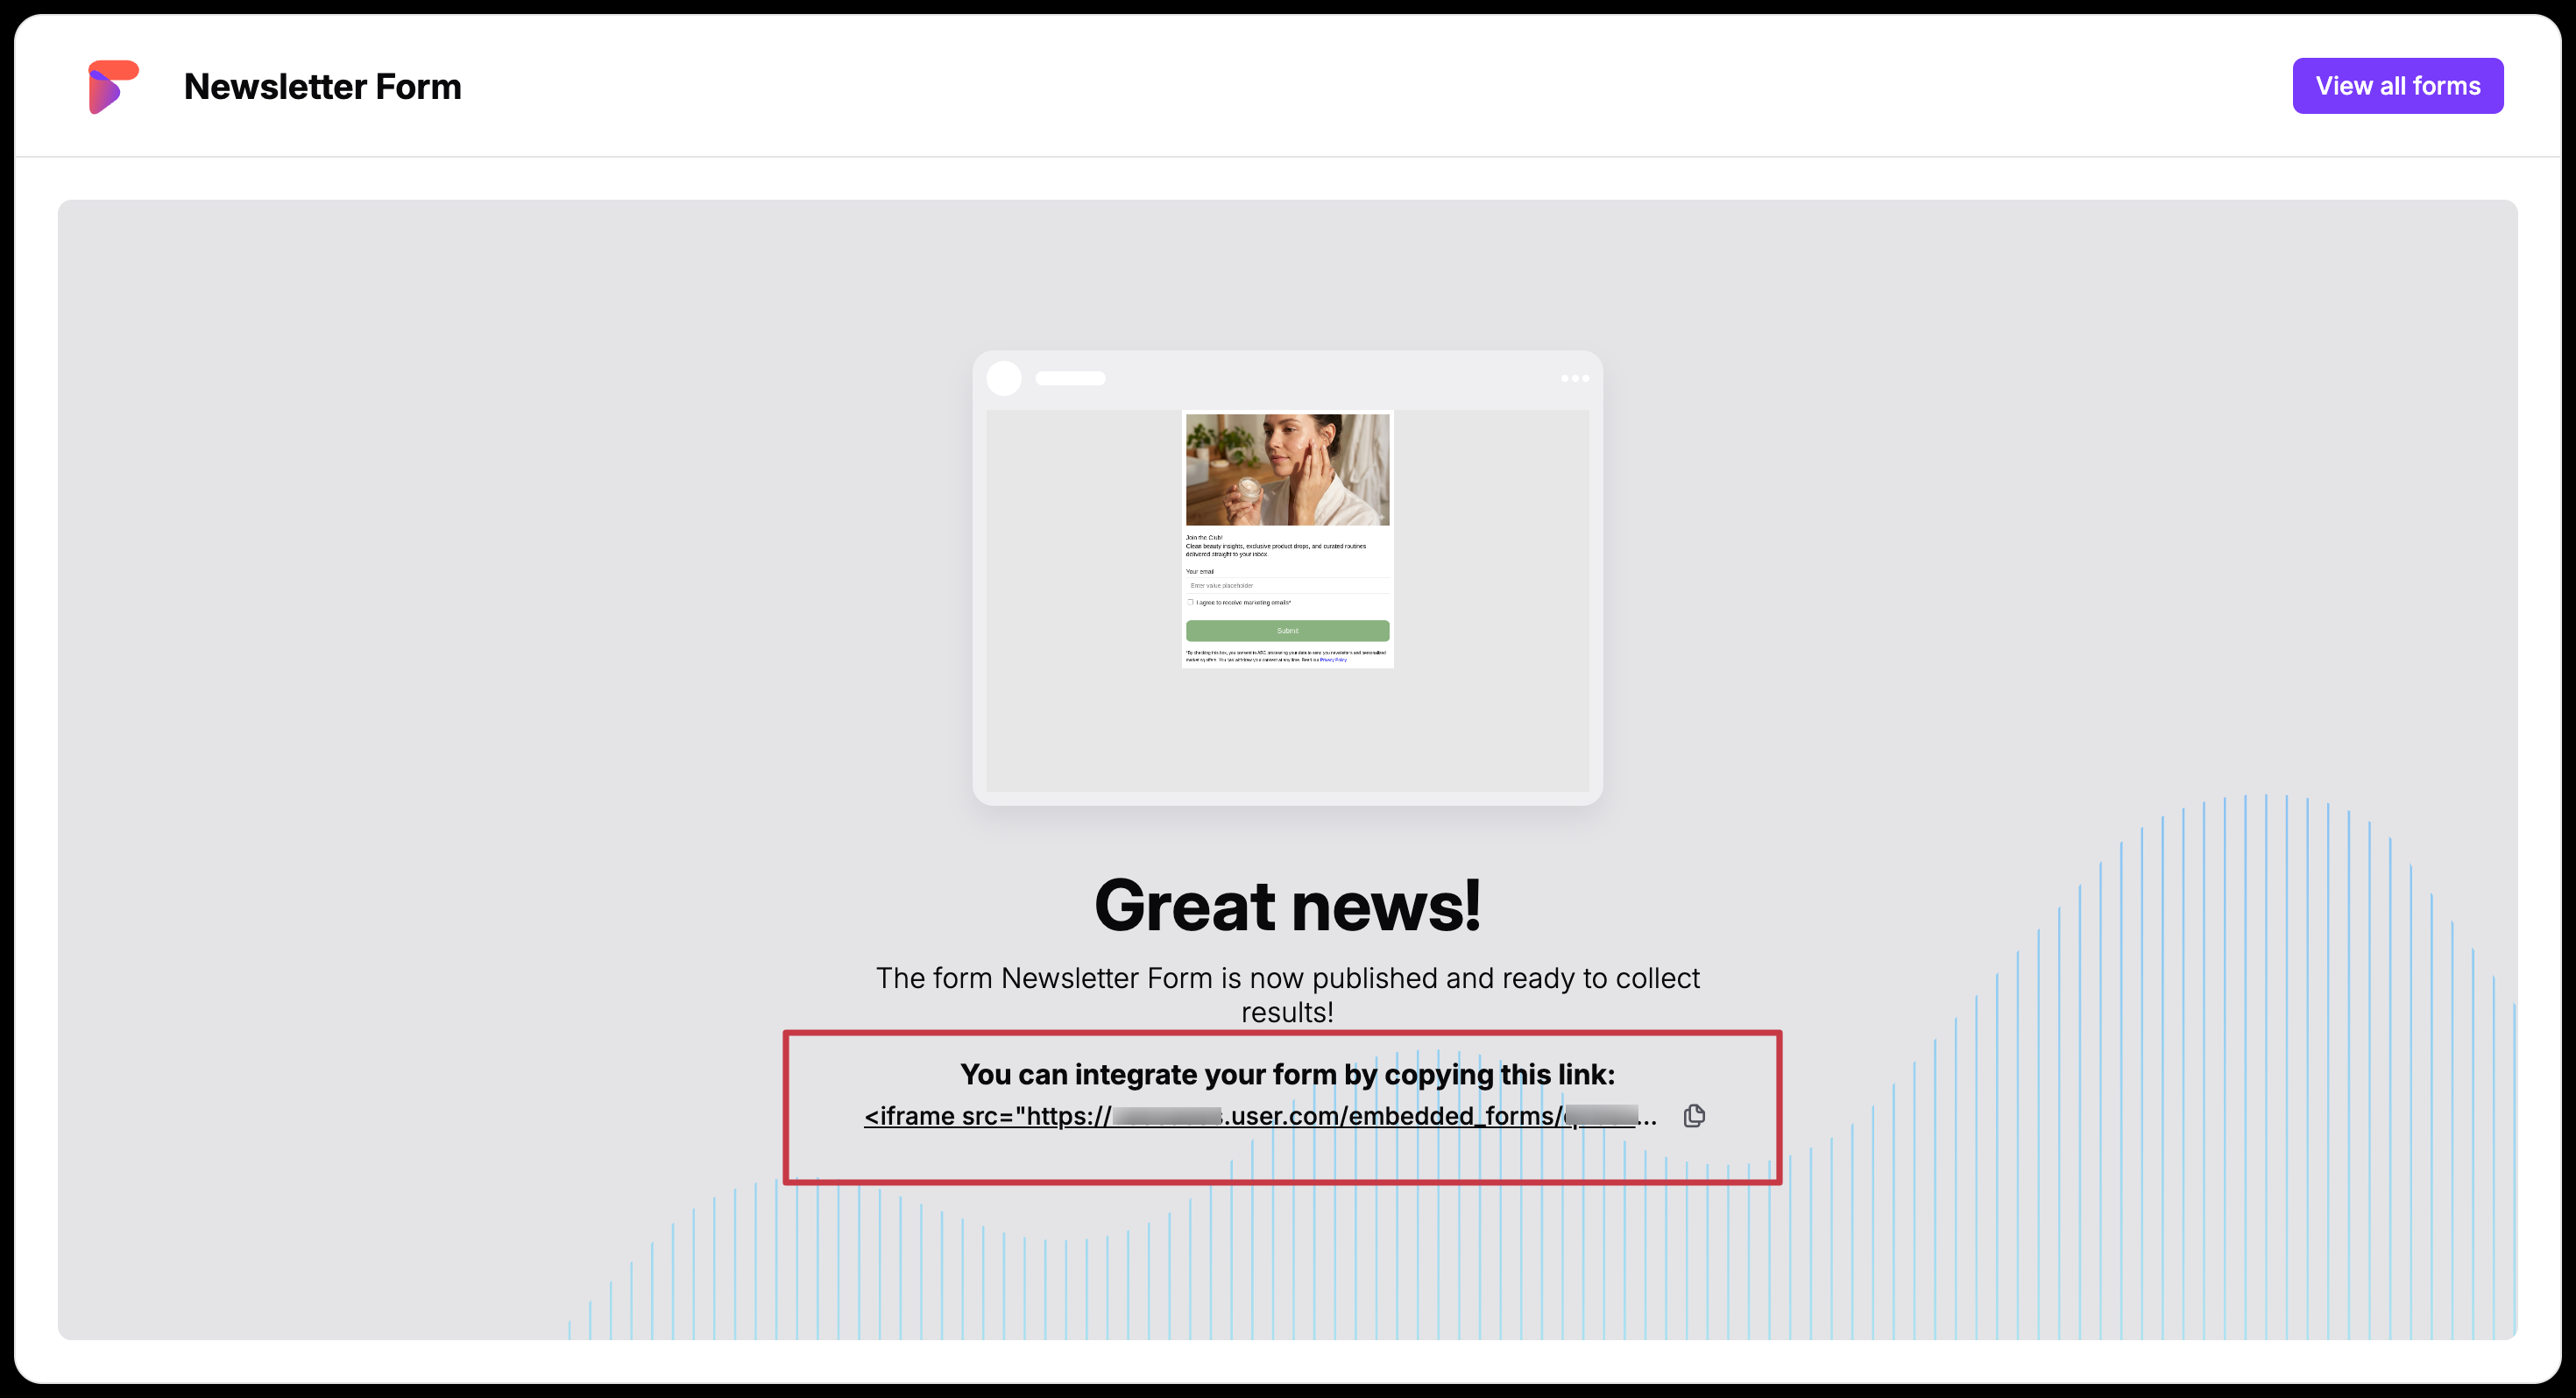
Once everything looks right, click the "Publish" button in the top right corner to make the form ready for implementation on your site.
After hitting "Publish", a success screen will appear providing a unique integration code snippet for your website.
To activate the form live on your site:
Copy the provided HTML iframe embed snippet directly from the confirmation box.
Paste the snippet code directly into your website content management system (CMS) or raw source code at the exact location where you want the form to render.
Now, every time a visitor fills out the embedded form fields, Positive User instantly updates their profile attributes based on the submitted values.
Every time a visitor fills out an embed form on your website, the activity logs directly onto their contact profile timeline as an event named “form_conversion”. This tracking event automatically captures:
The unique identification details of the form (e.g., name of the form and its ID)
All relevant data points and answers collected from the input modules.
This automated event tracking lets you see precisely when, how, and with which form contacts submitted their data.

To trigger an automated workflow sequence for a specific form submission, use the "Event" trigger module within your automation builder and select the “form_conversion” event. Since your account workspace might use multiple active forms, apply a filter using the specific form ID attribute to target only this layout.
For complete instructions, review the “How to Trigger an Automation on Form Submission” guide.
Lead Generation: You can embed a simple form with an email field at the bottom of your blog posts, which helps turn anonymous contacts into known contacts in your "Contacts” section.
Support Follow-up Requests: You can build a form that gathers a contact's name and phone number on your contact page, which helps trigger an automation that automatically assigns a follow-up task to a team member.
