Adding a new team member to the Positive User workspace is a straightforward process that enables you to expand your team within the platform. It allows new team members to manage communications, interact with contacts, and contribute to your workflows.
Positive User is an application that lets different teams collaborate in one shared workspace, using the same database. Usually, these departments are:
marketing
sales
support
Once you create a workspace in the Positive User environment, you need to give access to it to other team members. To do so, you must send a team member invitation to every email address that should have access.
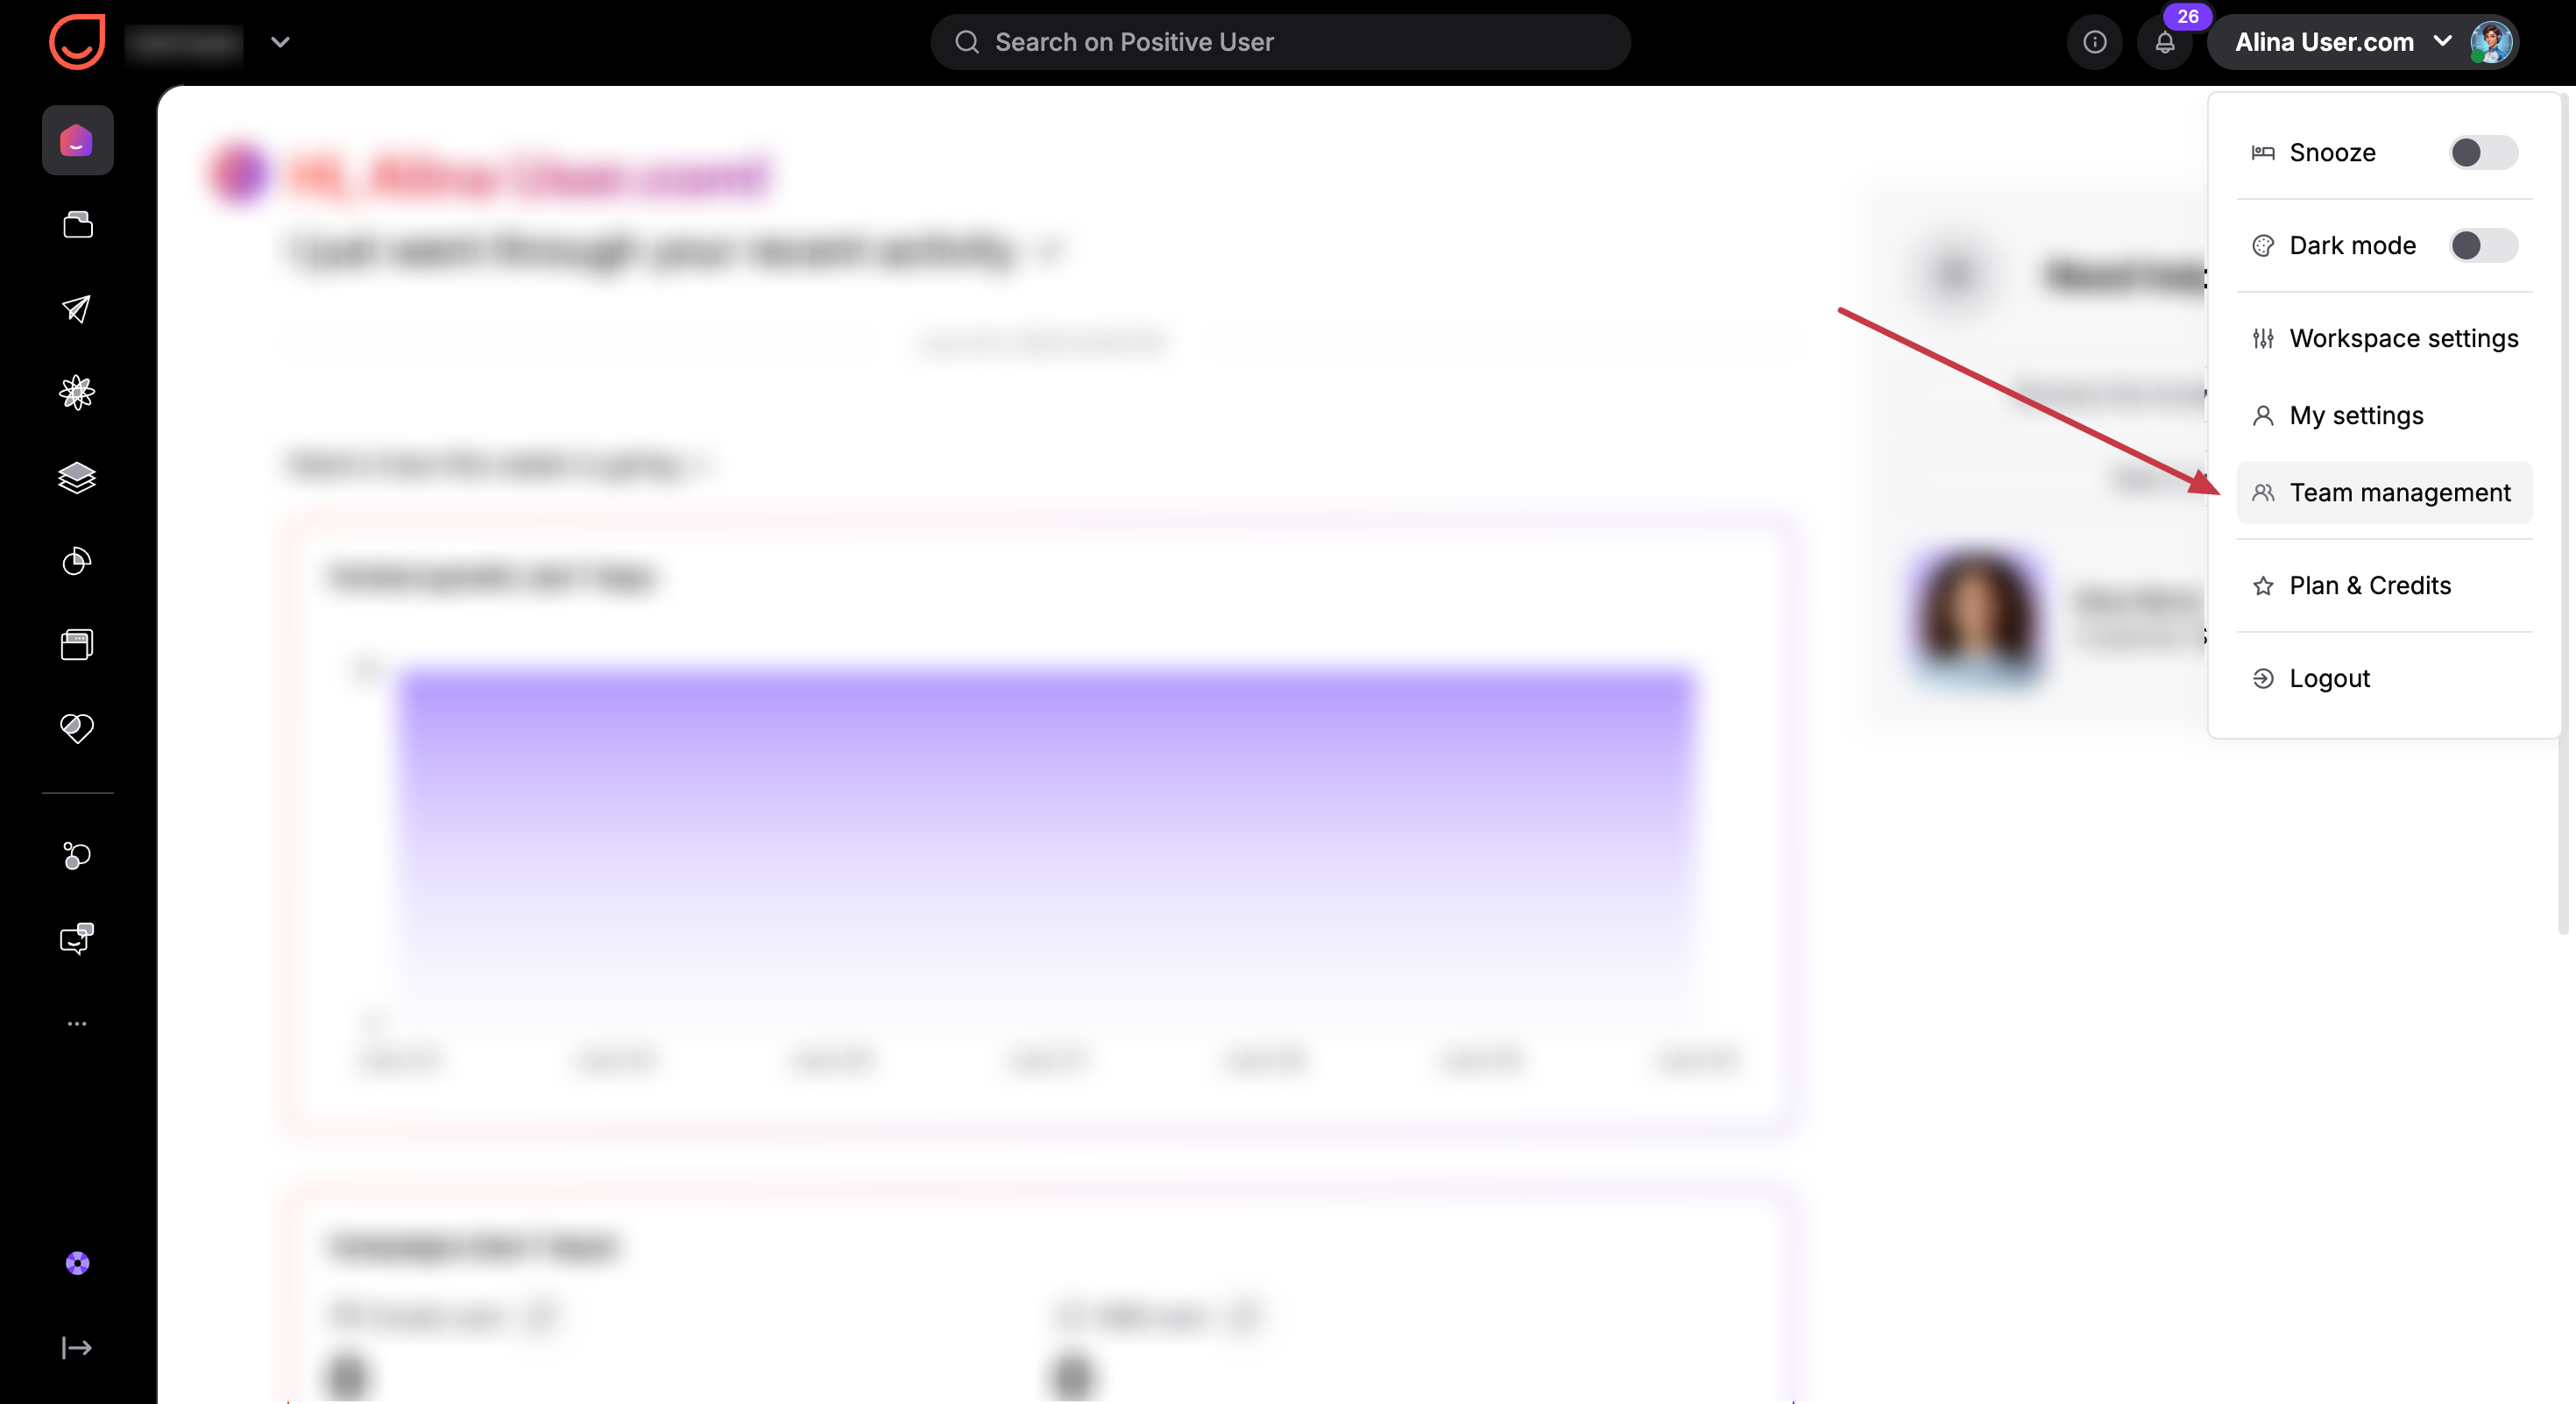
To invite a new team member to the workspace, you need to have access to the “Team Management” section of the account. If you don’t have enough access level, please contact your admin.
Go to “Team Management”.
Click the "Invite team member" button in the top-right corner of the page.
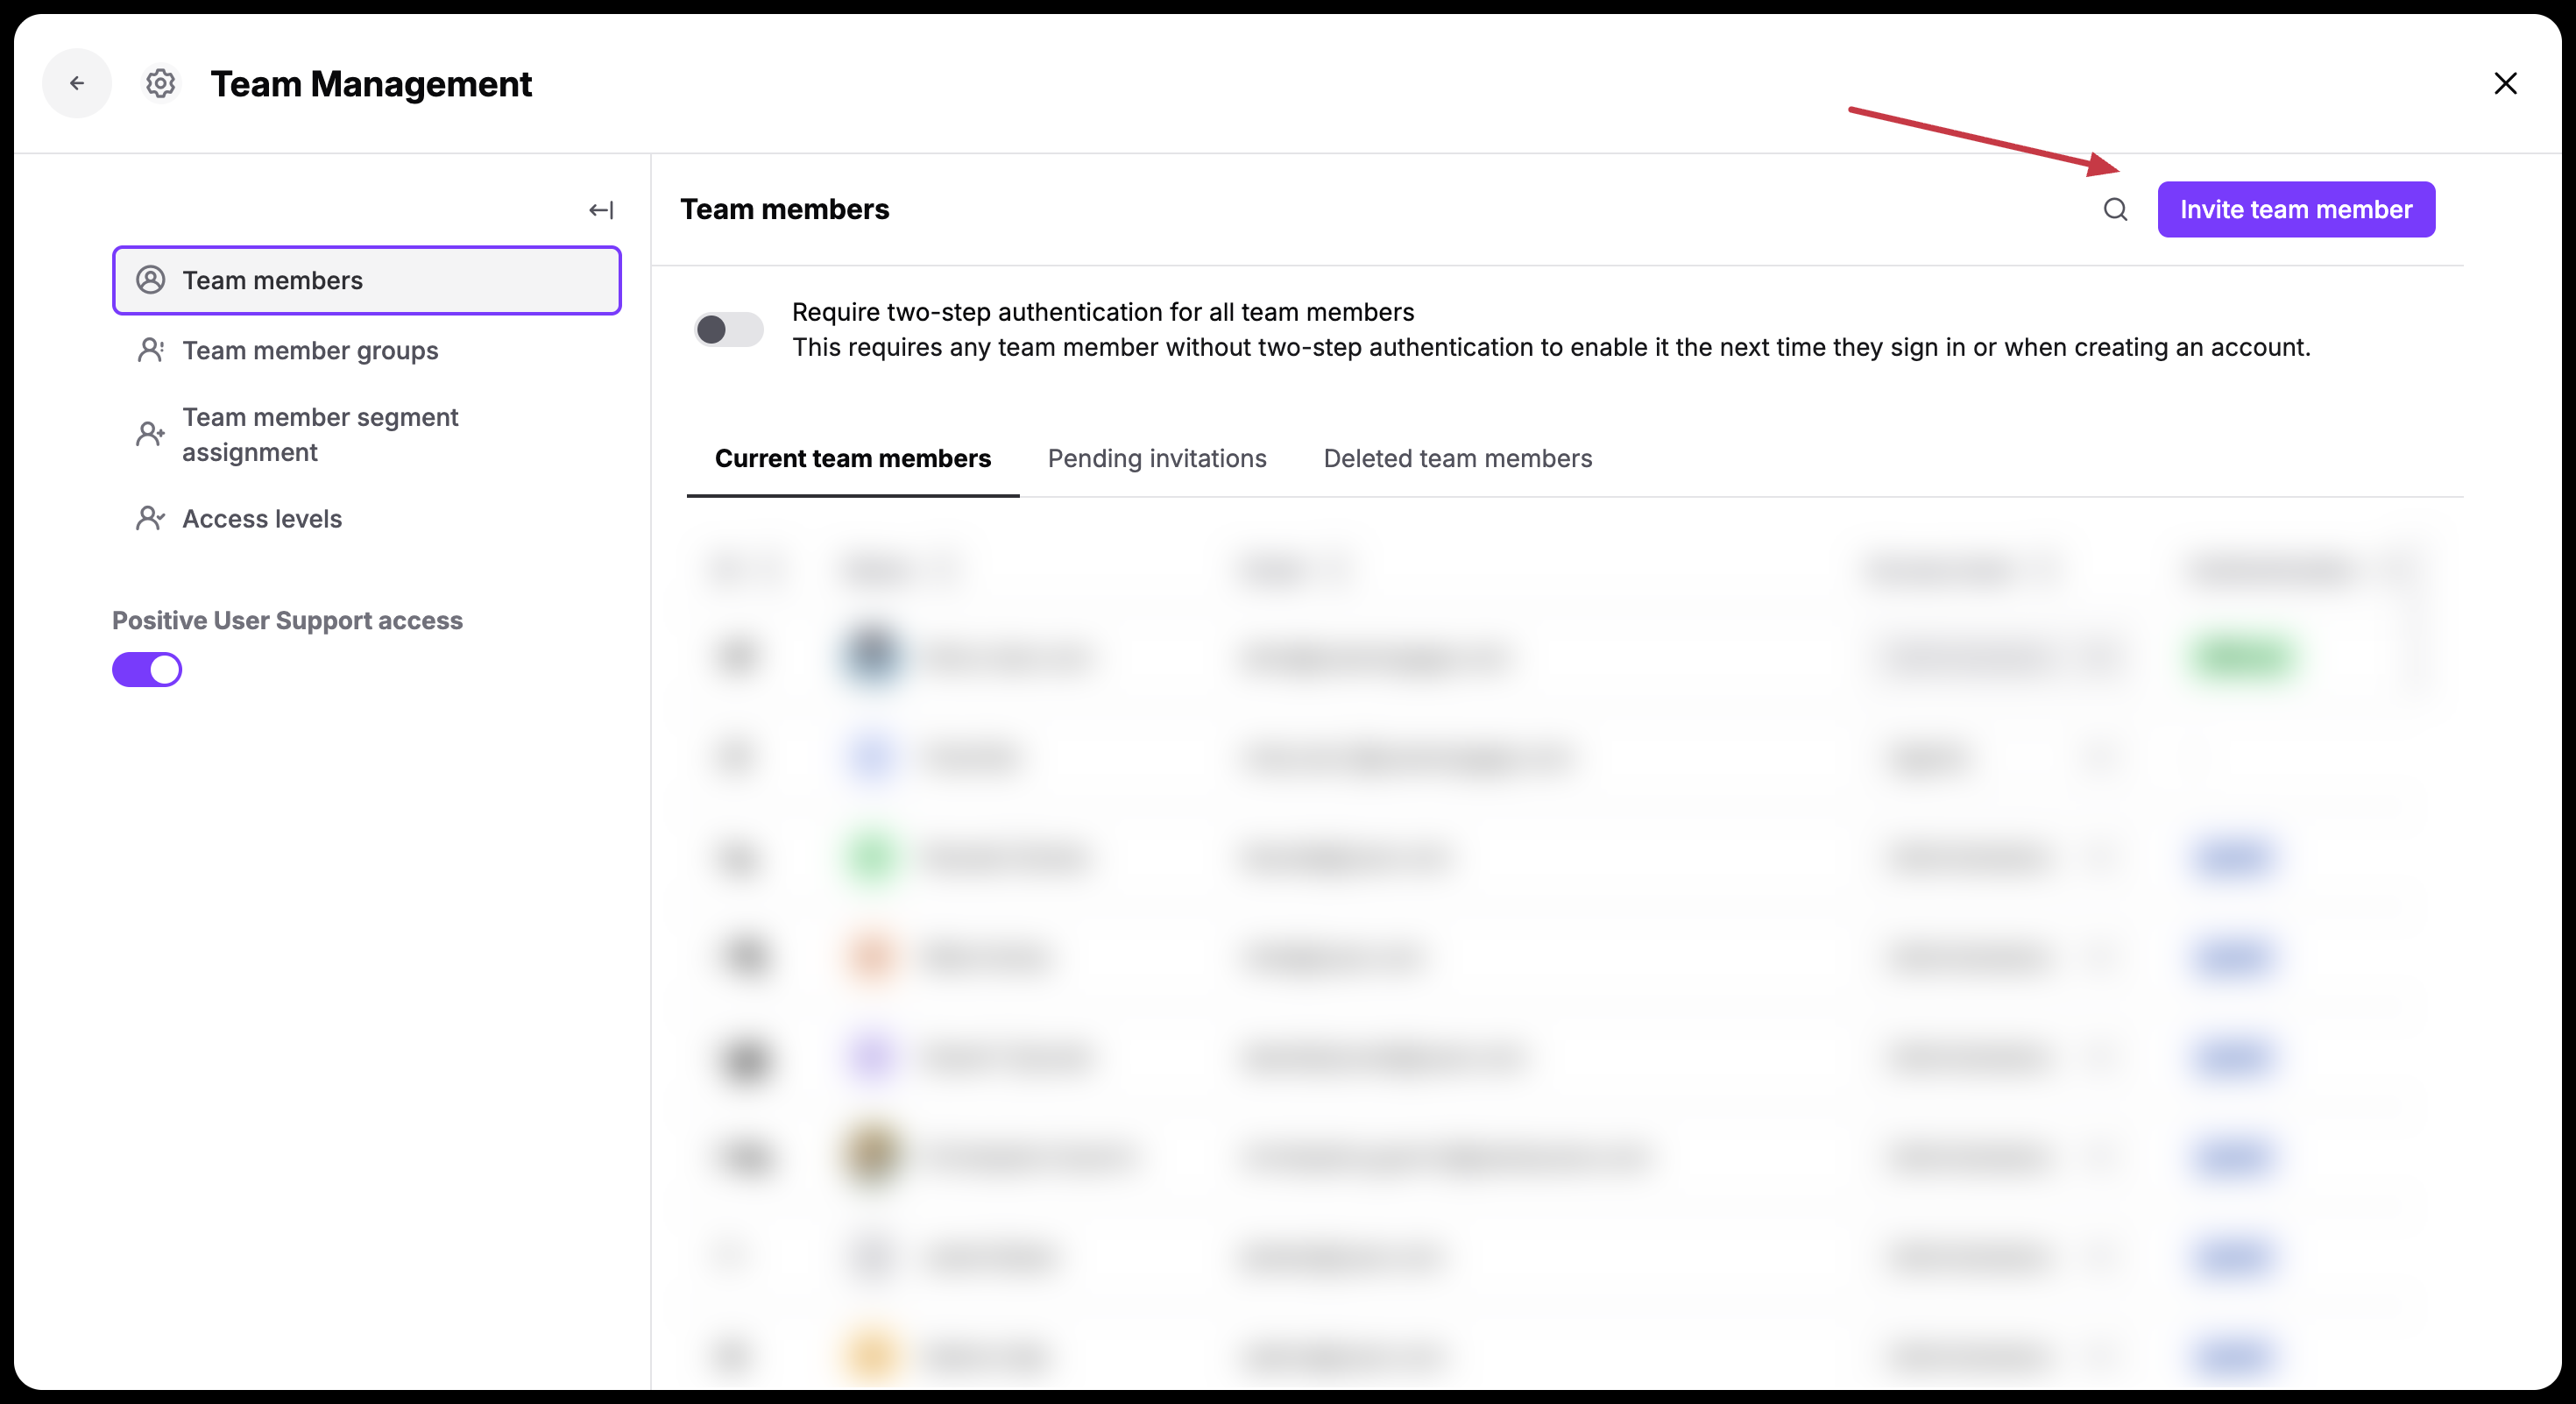
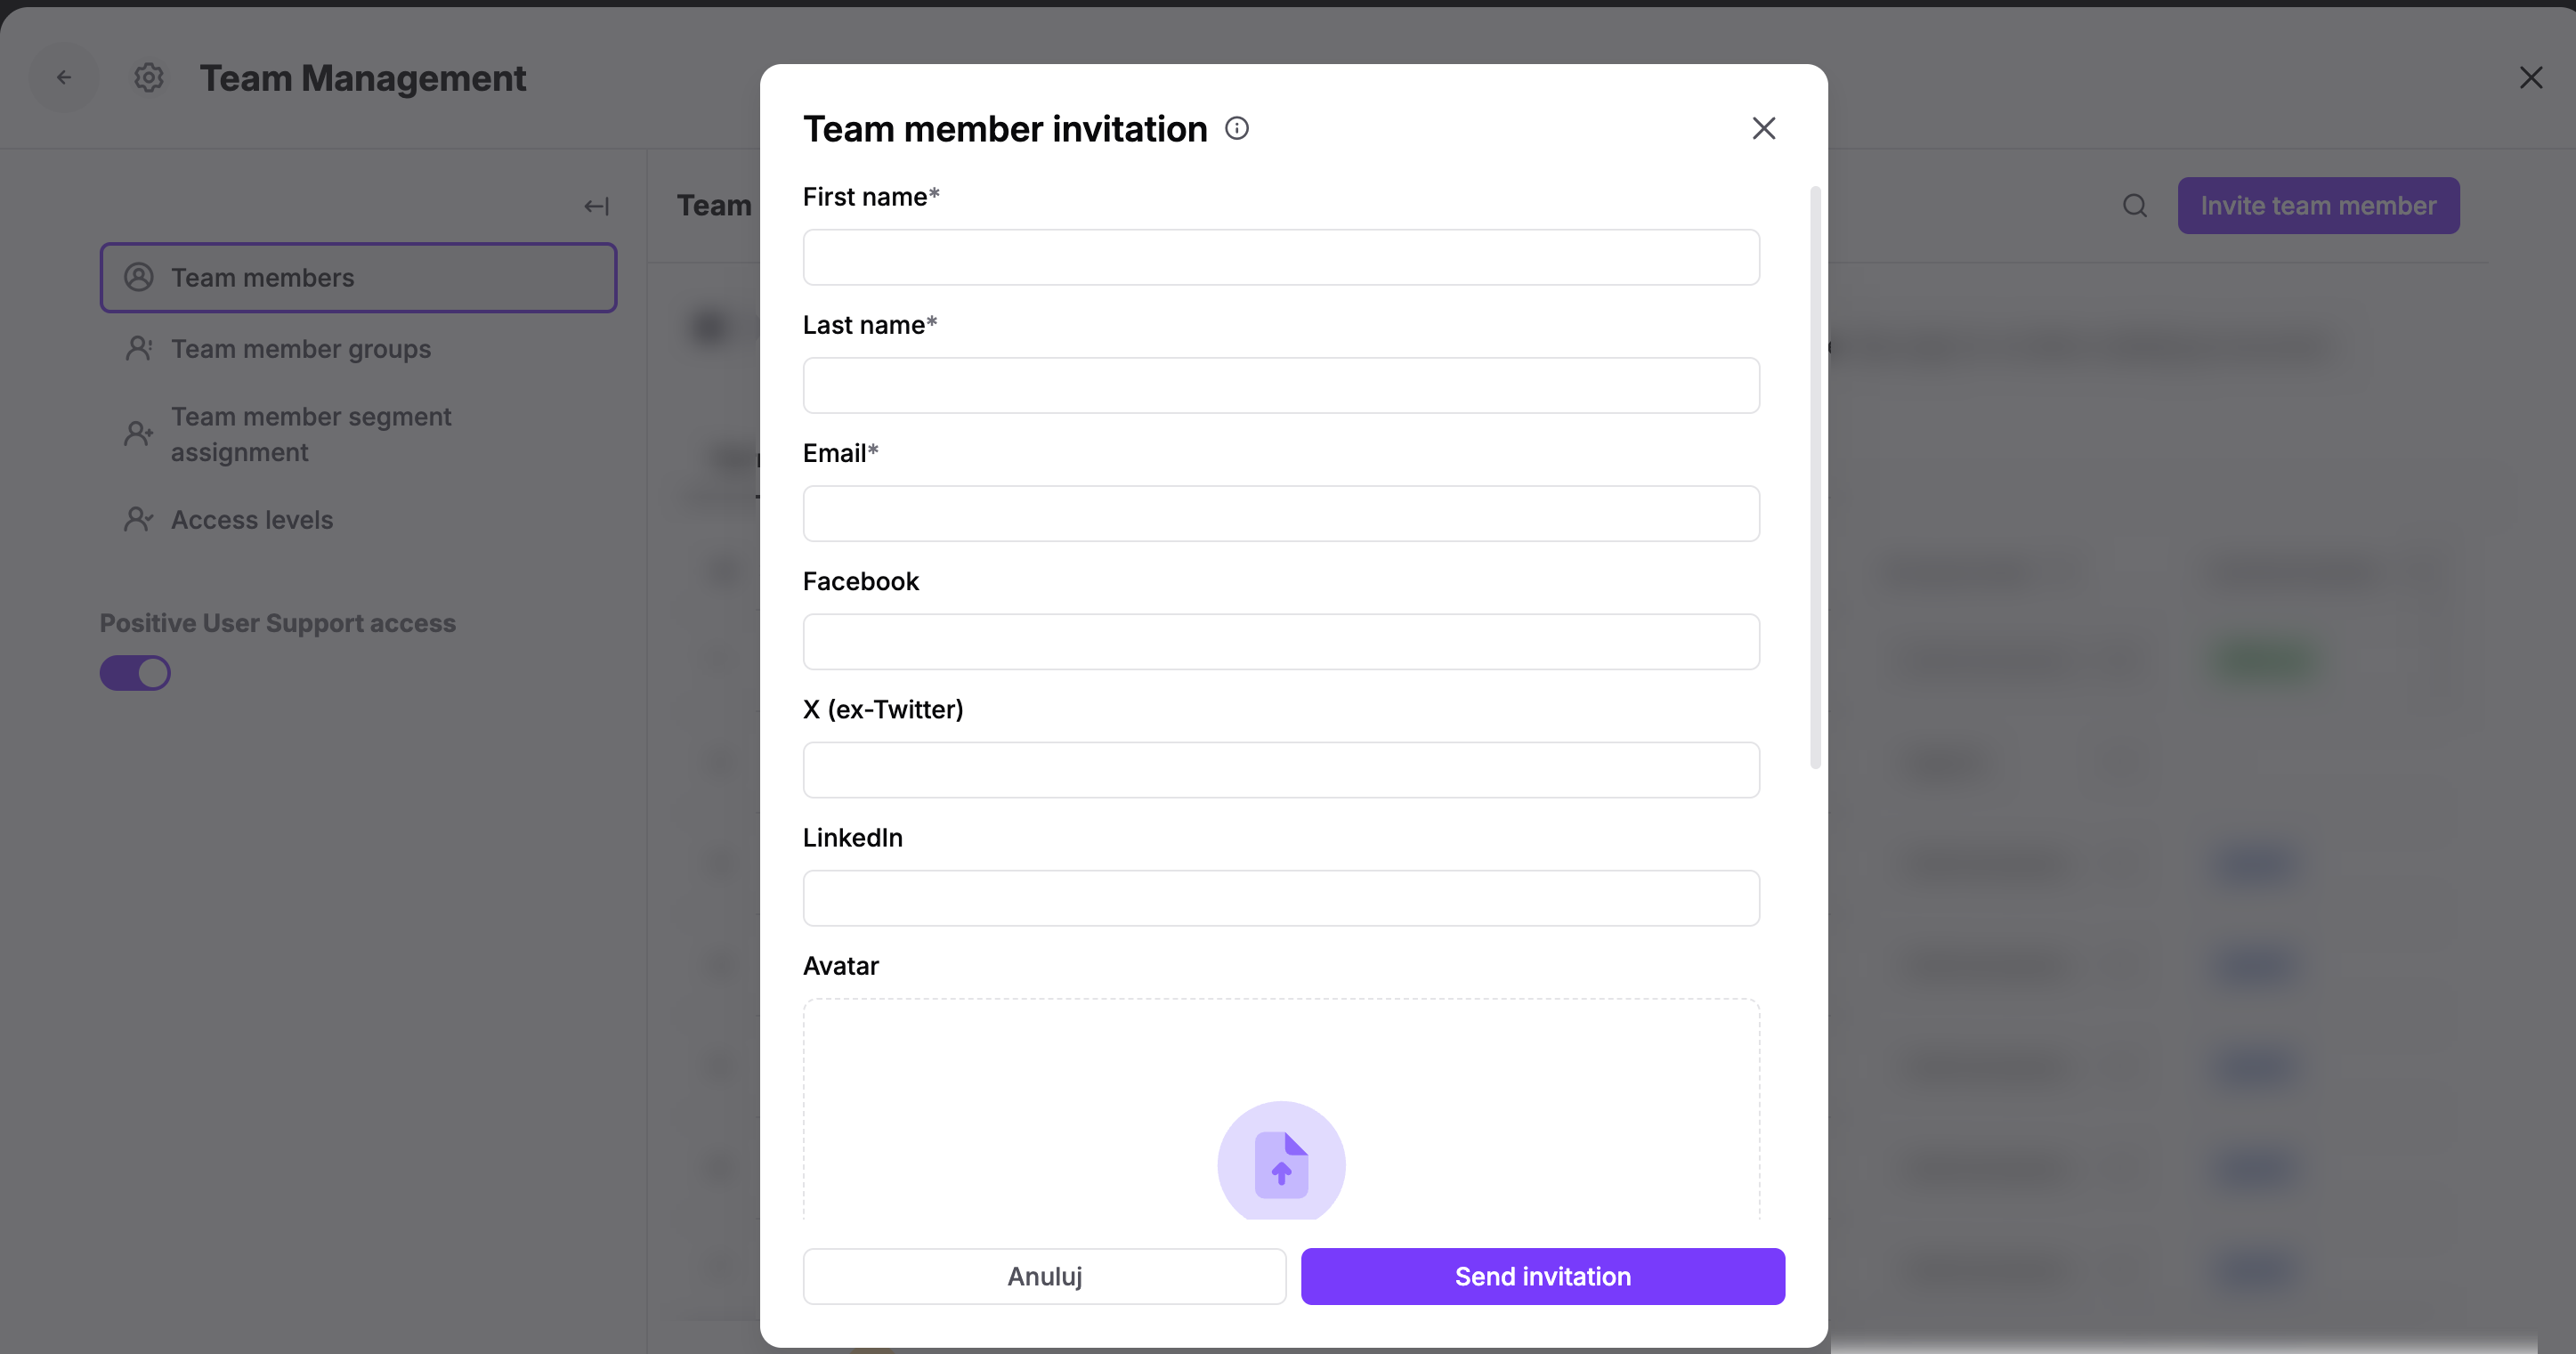
Once you click the button, you’ll see a form with invitation details.
The obligatory fields are:
First name
Last name
Access level (more about permissions here)
Depending on your organizational needs, you can assign specific permissions to the new team member. Positive User allows you to customize access levels, ensuring team members can only reach the parts of the system necessary for their work.
Within a few seconds, your team member will receive an email with the invitation. Once the invitation is sent, it’s time for your team member to act.
This is how the invitation email looks like:
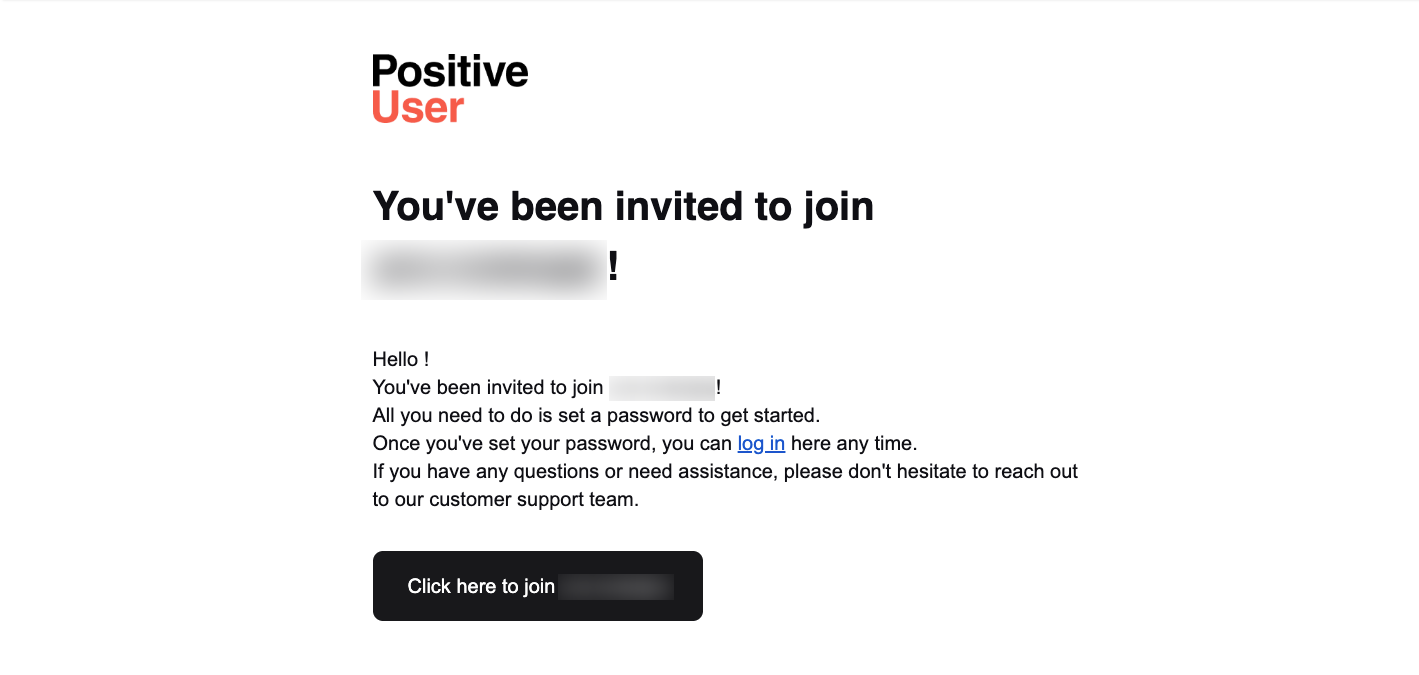
The new team member should click this black button and set the password for the Positive User account or choose the "Sign up with Google" option.

Once the team member logs in to the workspace, it’s highly recommended to configure their Team member Profile. More information about that part of the app is here.
