Email campaigns are the most commonly used channel in communication with contacts. You might want to send a "one-time" email or send emails automatically based on the contact’s behavior. In this tutorial, we will go through the entire process of creating “one-time” campaign.
One-time email campaigns are perfect for sending timely, targeted messages such as newsletters, product announcements, or special promotions. They work well when you want to reach your audience with information that doesn’t require ongoing automation, like event invitations, company updates, or seasonal offers. These campaigns are also ideal for engaging subscribers around important moments, delivering curated content, or sharing one-off alerts that keep your audience informed without setting up a full workflow.
Before creating your first campaign, make sure steps below are done.
Connected email delivery domain (check the instruction).
Sender you want to choose for the campaign.
An opted-in audience segment (imported or collected from the website).
In User.com email campaigns are understood as a combination of content and settings which allow you to send email.
Due to that, the process of the campaign creation is divided into several steps. Let’s through all of them.
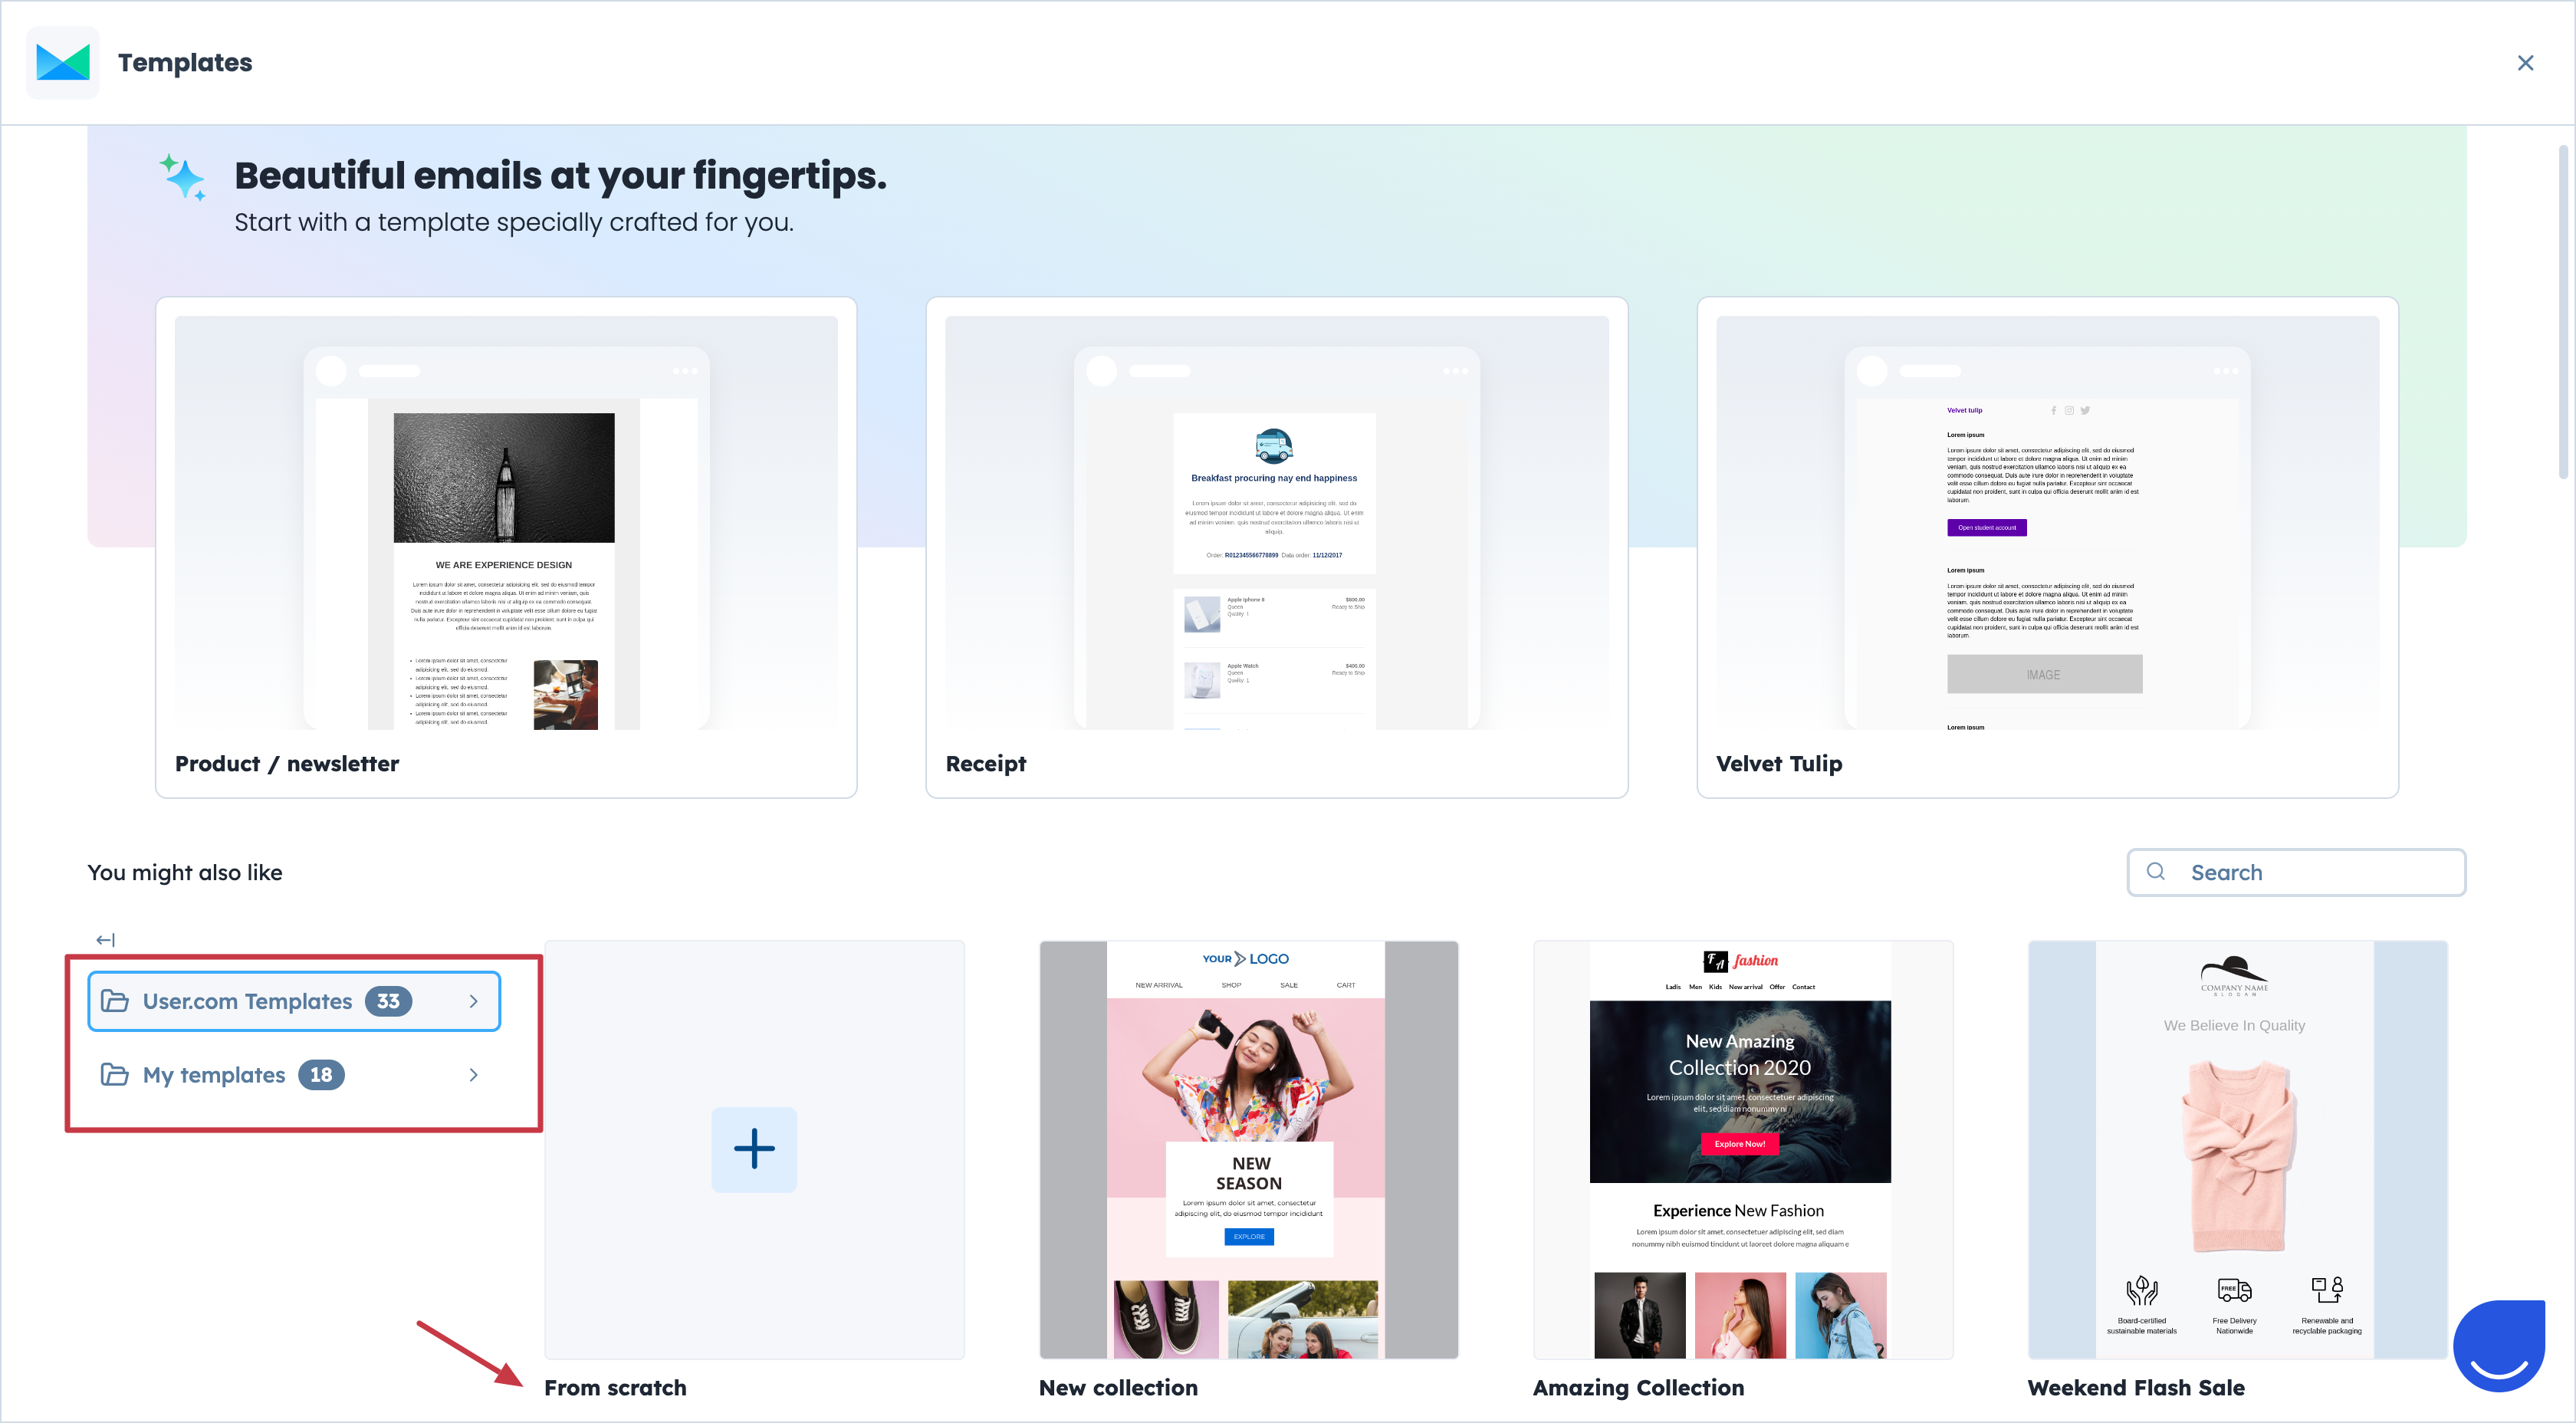
Go to “Campaigns" → "Email" → "New campaign".
Choose one of the existing templates or create your own from scratch.
“User.com Templates”: predefined templates that can be modified & adjusted to your needs.
“My templates”: library of the templates created by your team previously.
“From scratch”: you can create a new template for this specific campaign.
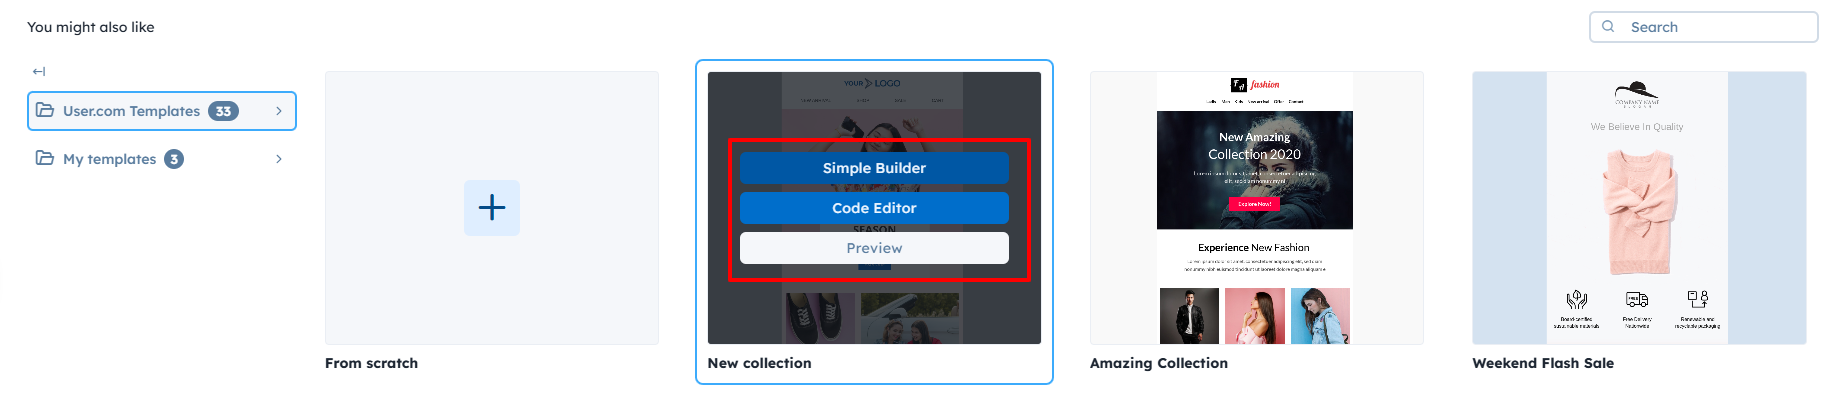
Hover over the chosen template to see 3 options:
Simple Builder: selected template opens in Drag&Drop Editor.
Code Editor: selected template opens in Code Editor.
Preview: you can preview chosen template to check the details before working with it.
This choice confirms which tool you are going to use for the work with the content.
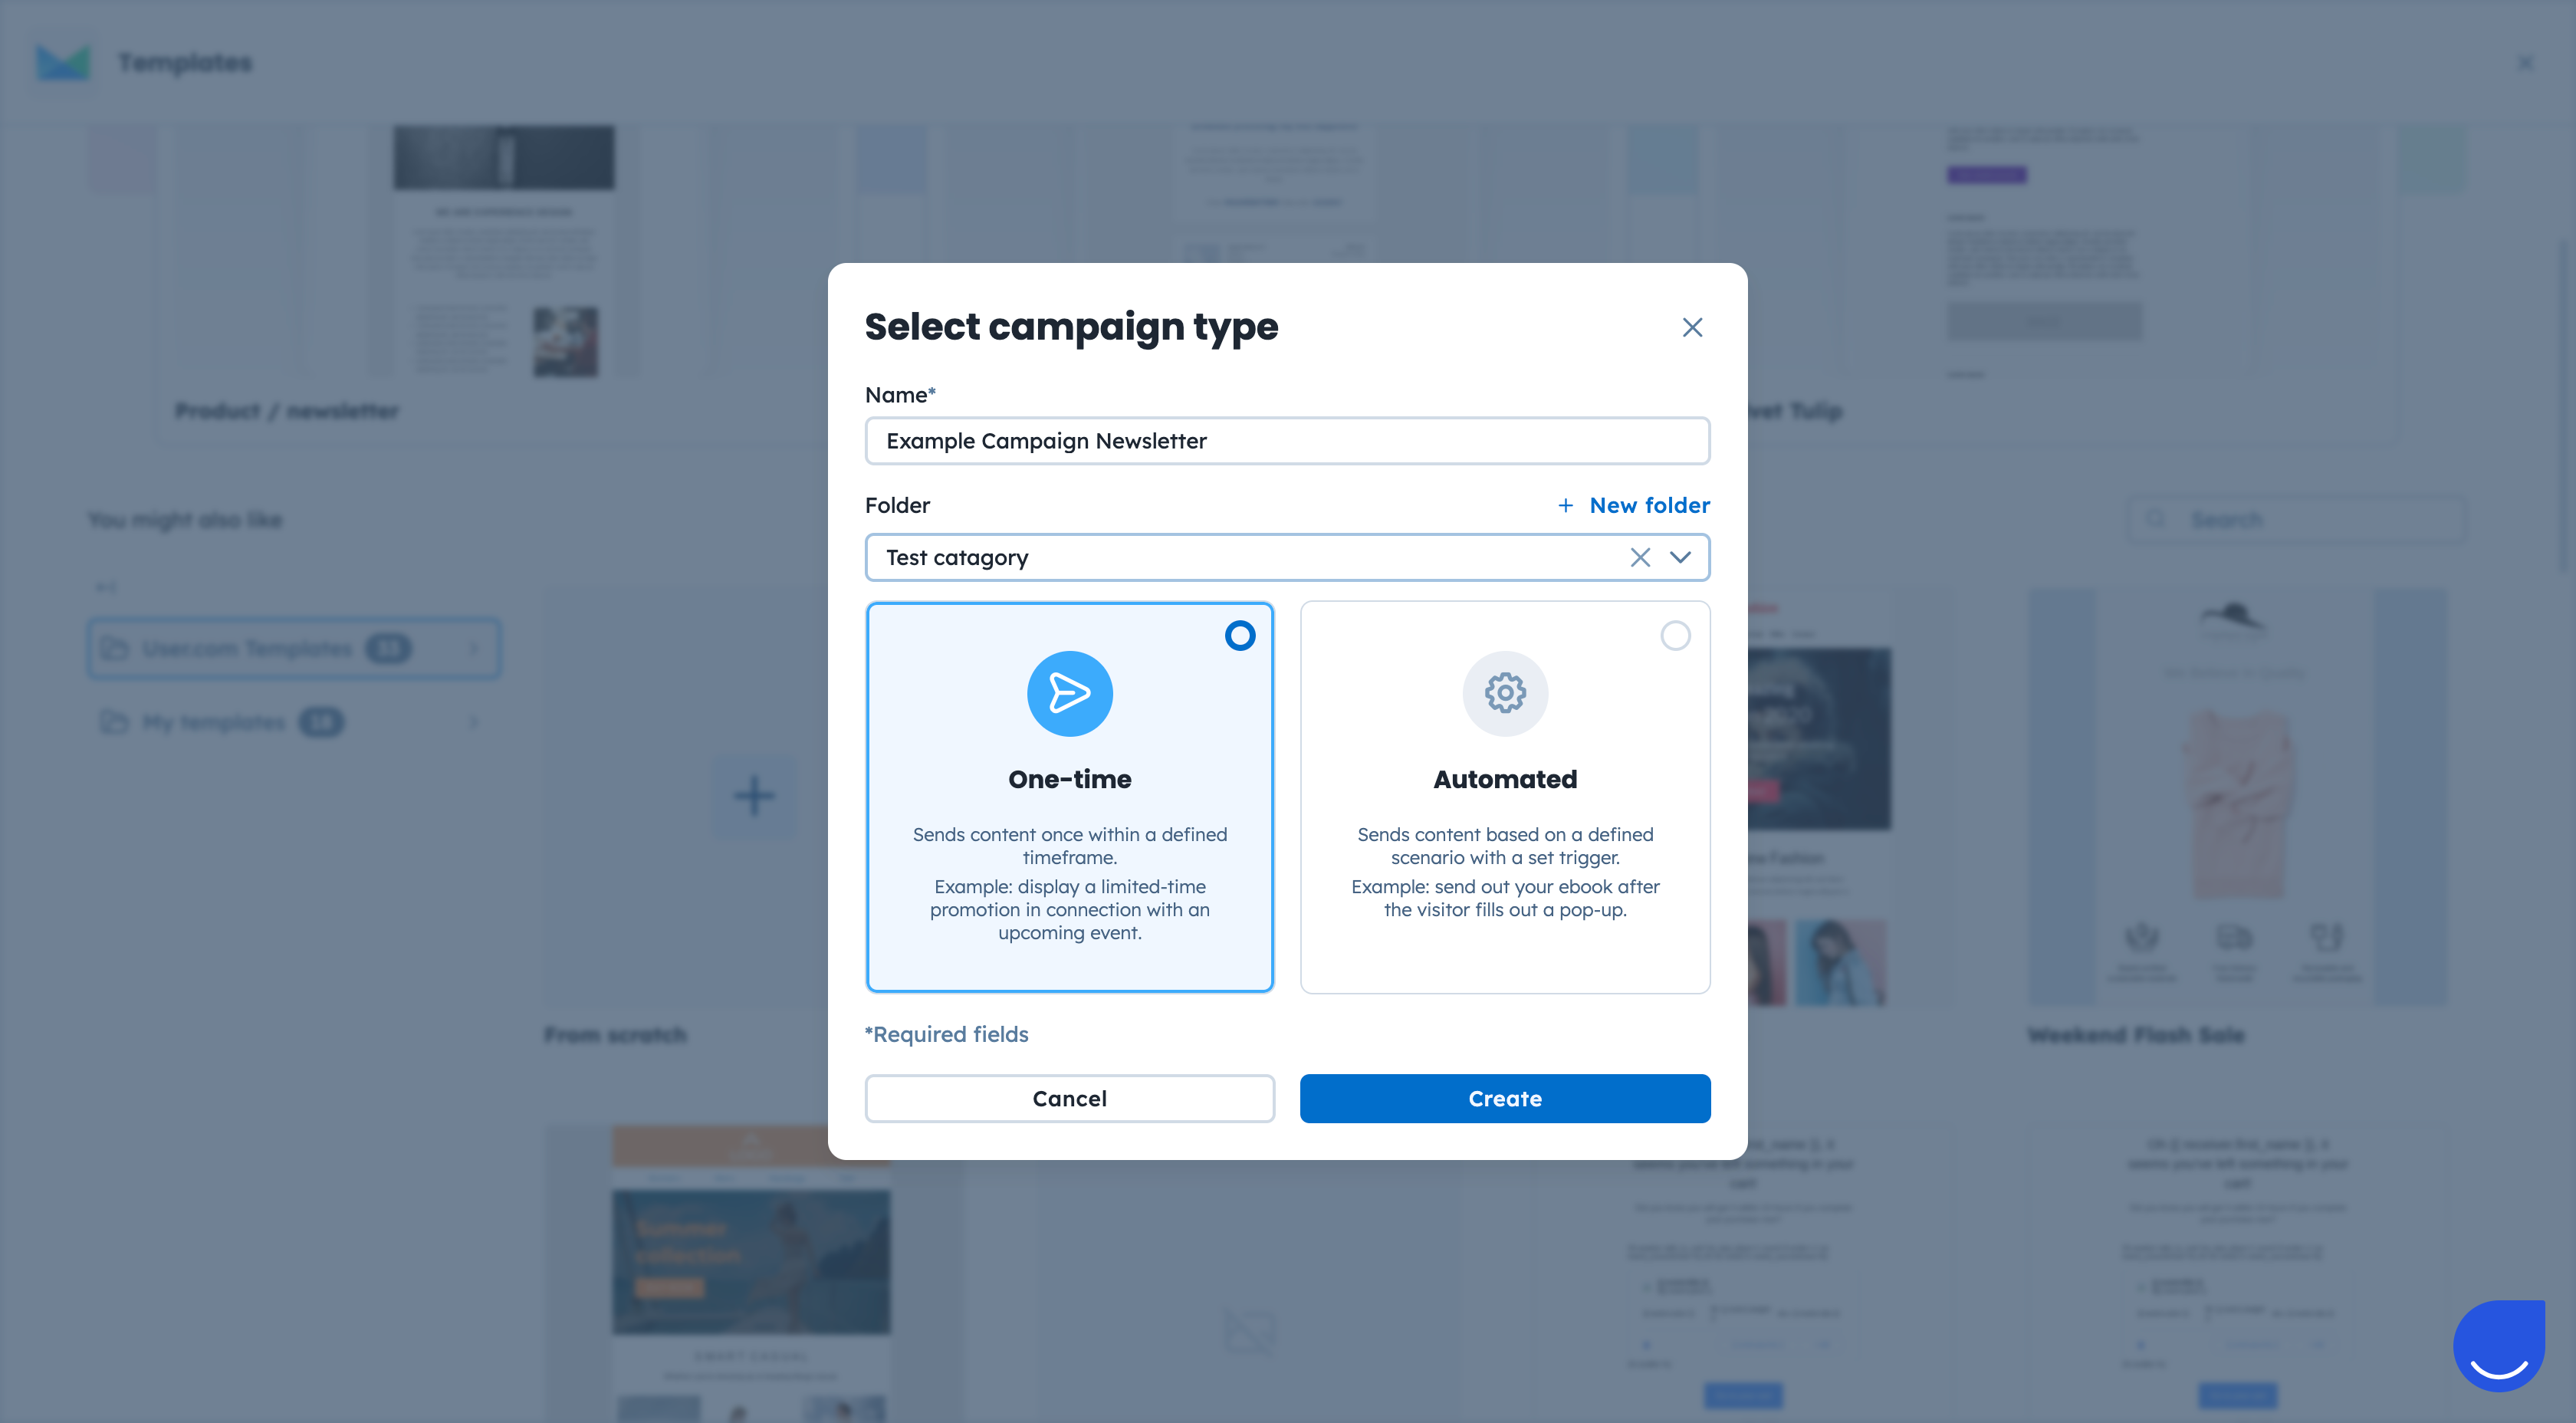
Once you define the content type, decide on the name of the campaign and assign it to the folder, if needed.
Choose the “One-time” type, and click “Create”.
Now you need to select the recipients for this specific email campaign. There are 3 available options to define them:
Select a contact list.
Select a segment.
Select contacts (using filters).
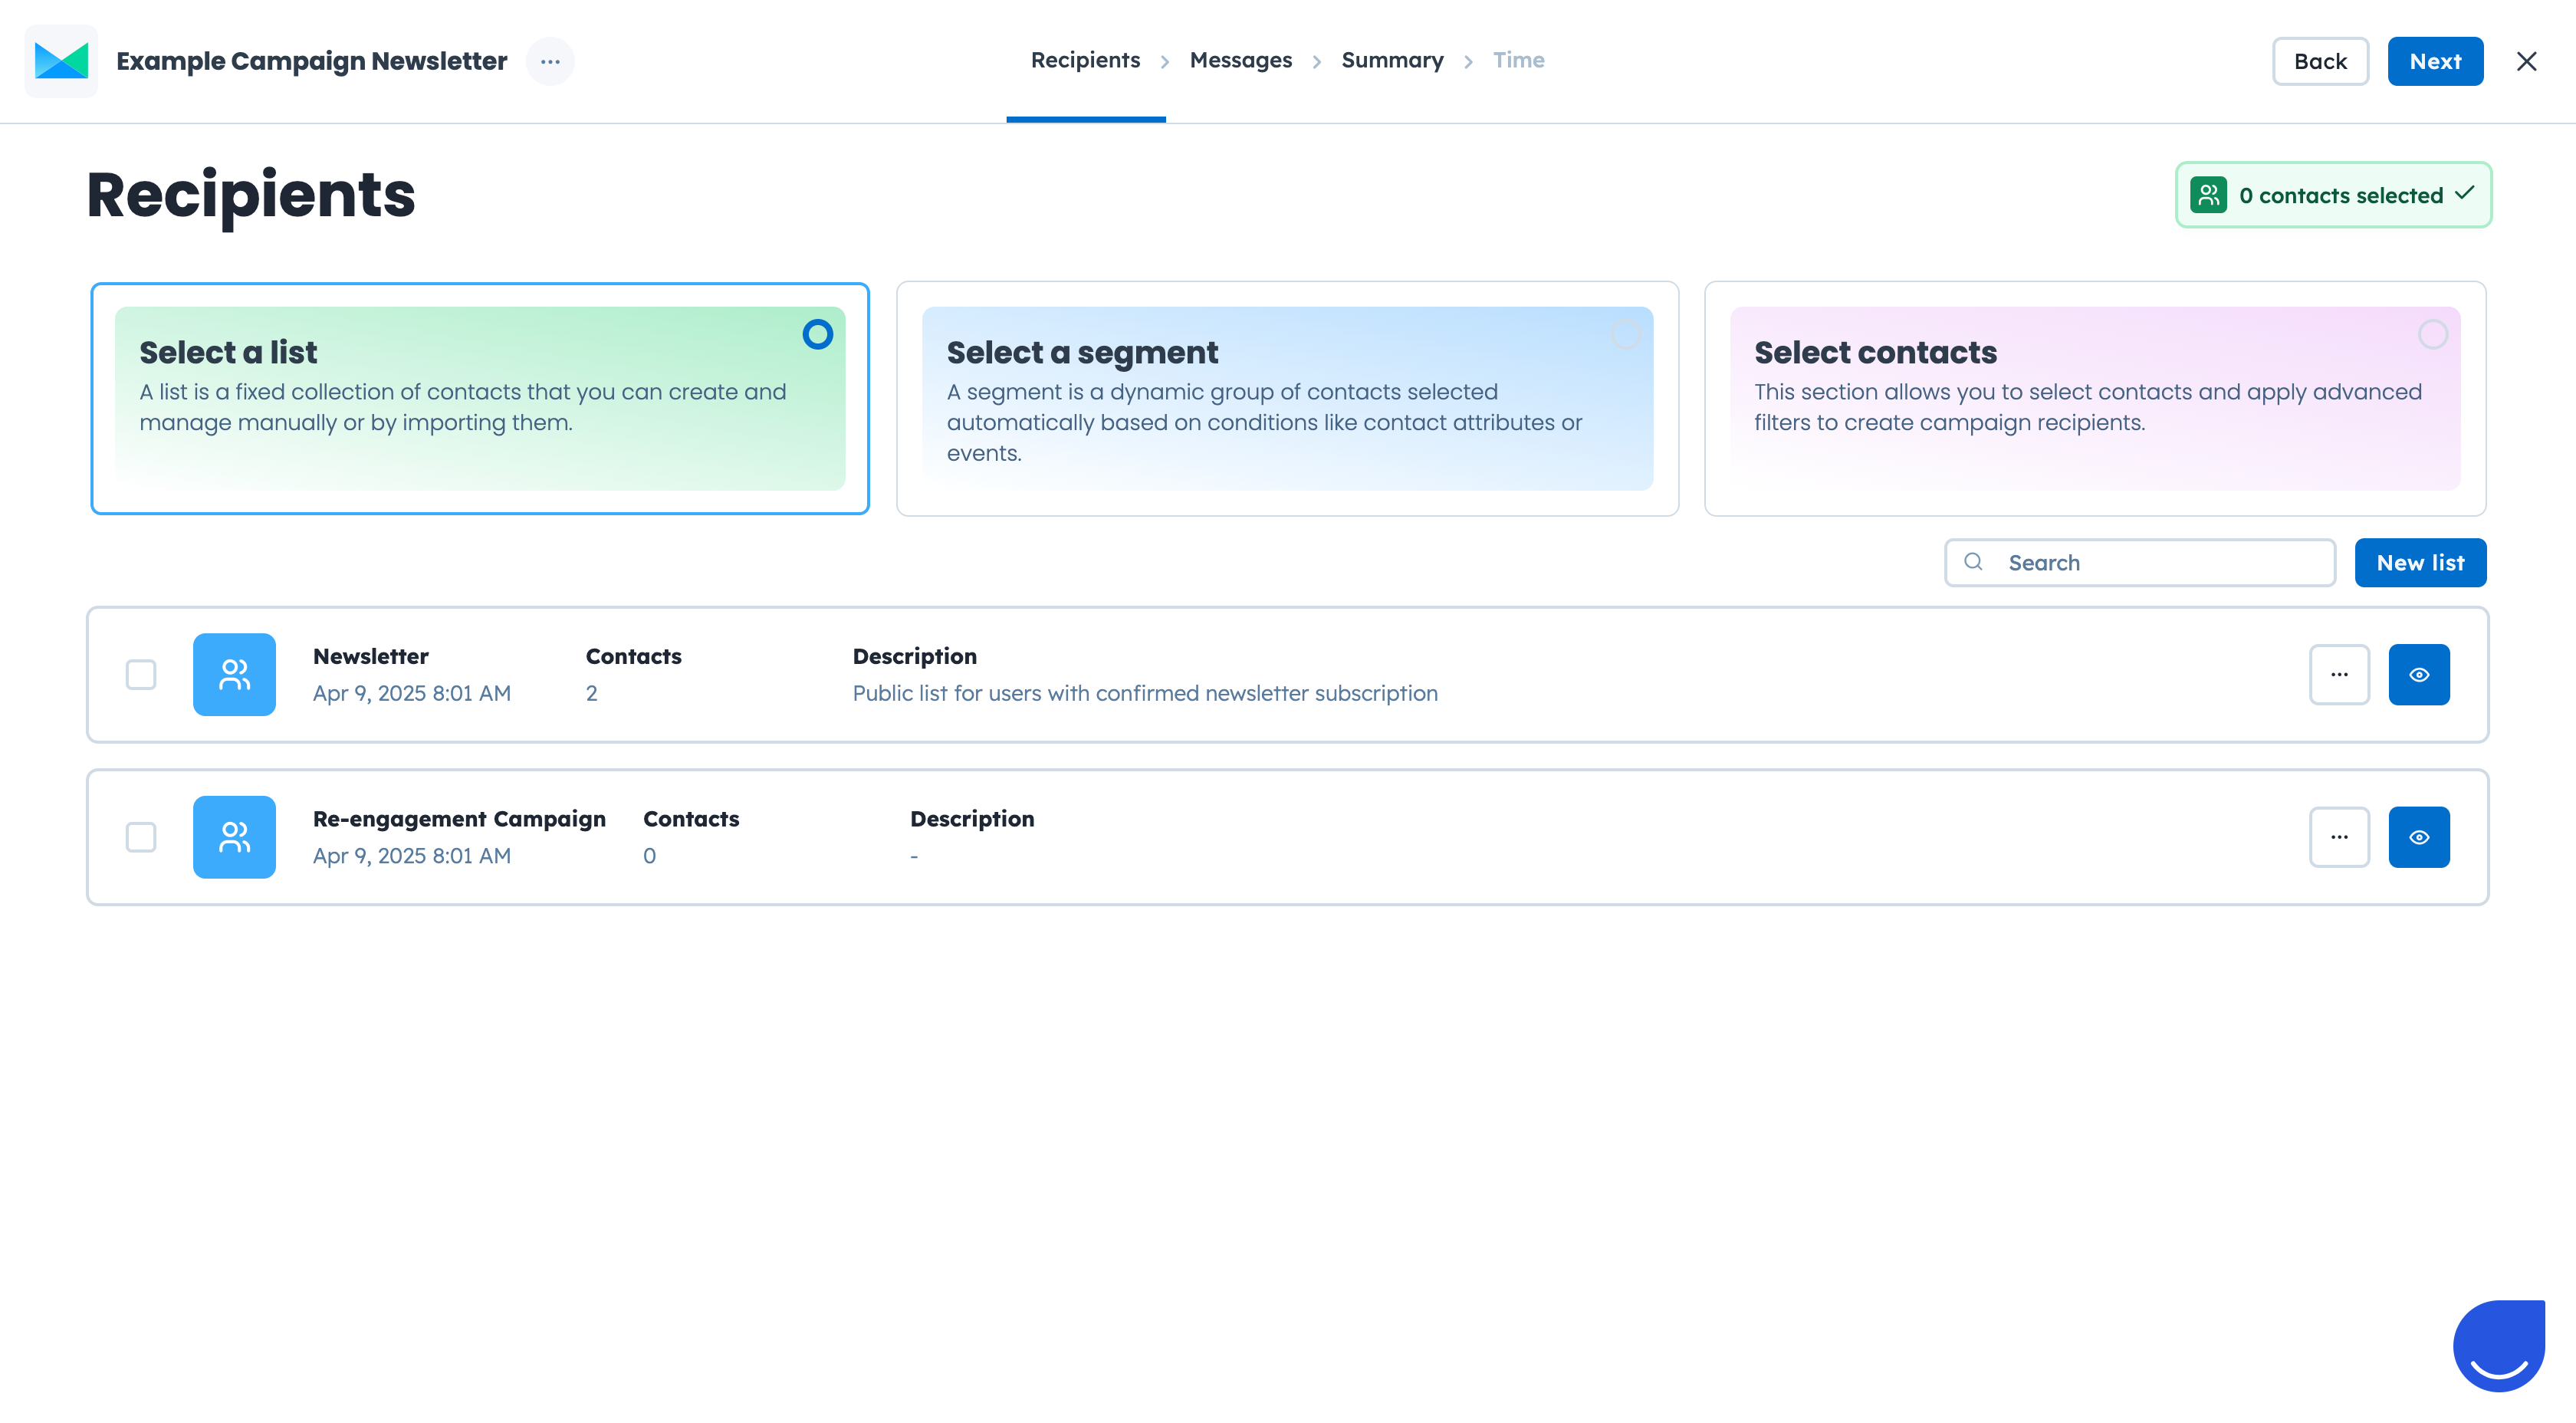
Once you are ready, click the “Next” button.
At this step you need to cover several important elements of the email campaign:
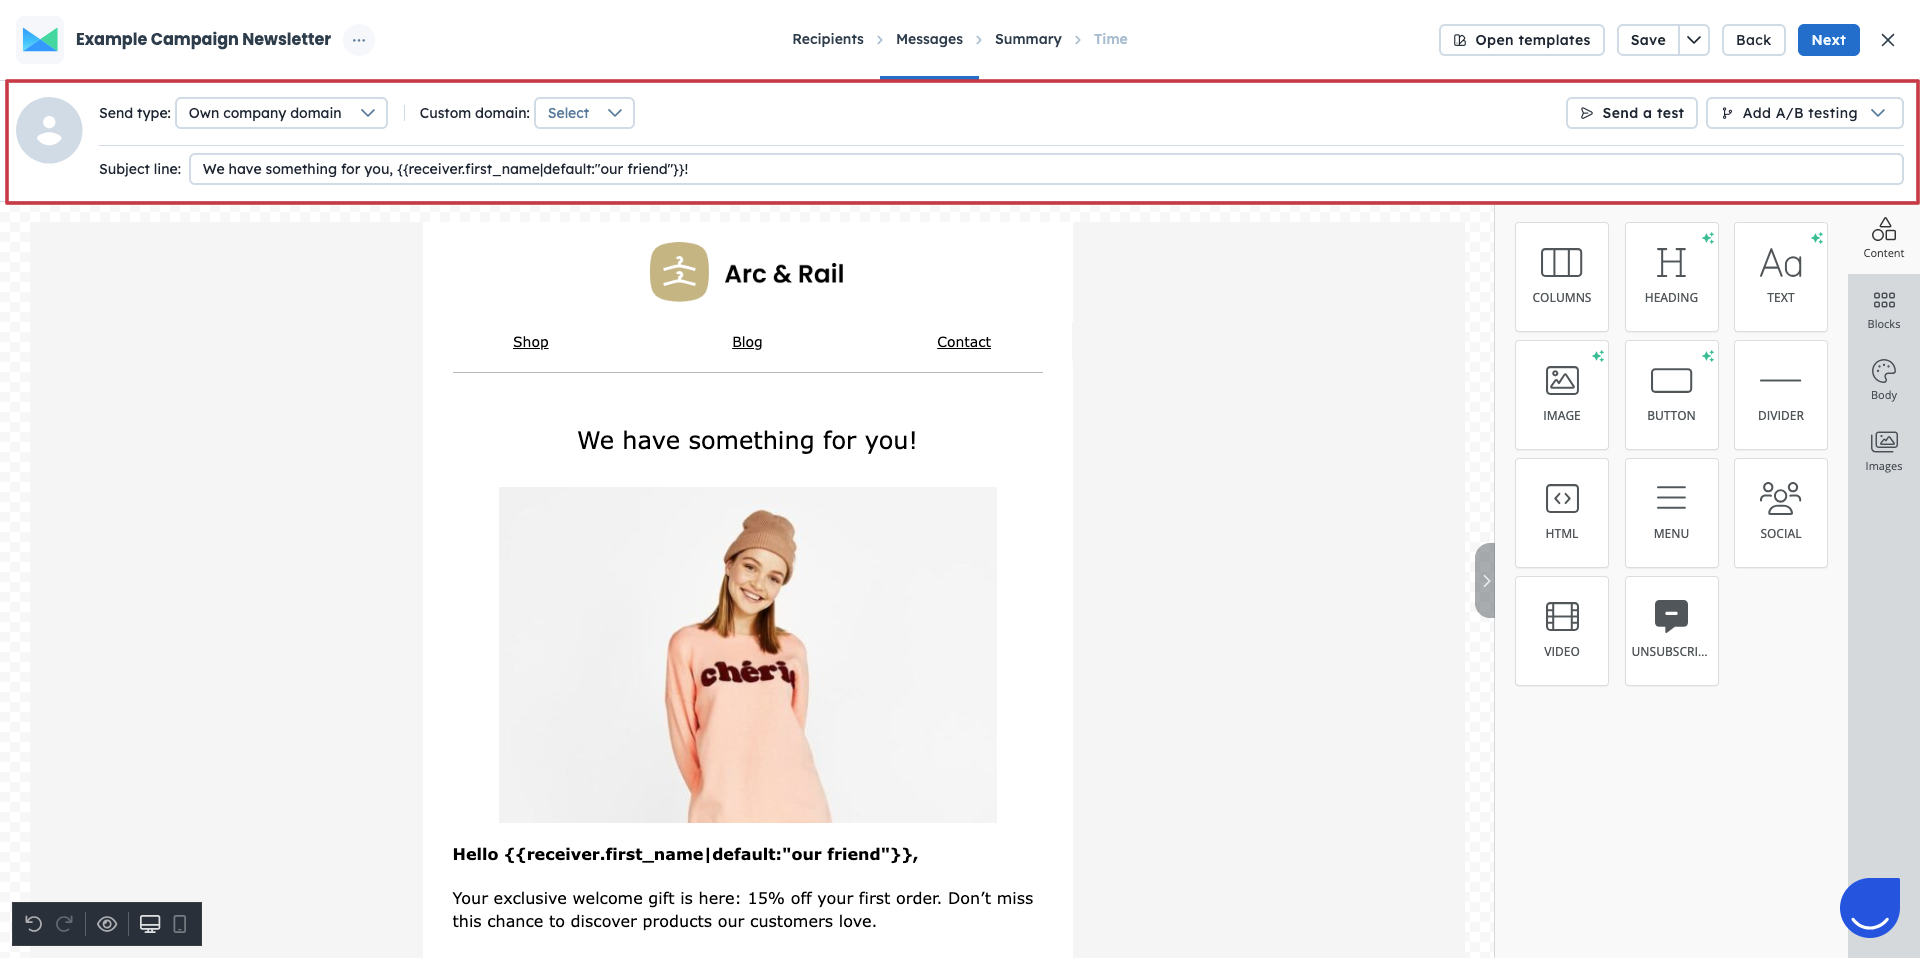
Edit or create the content of the email campaign.
Write the subject line. (Remember, you can use dynamic content in this field)
Select the domain and sender of the campaign.
Send a test message before setting the final version of the email content.
Decide whether you want to proceed with the A/B testing or not.
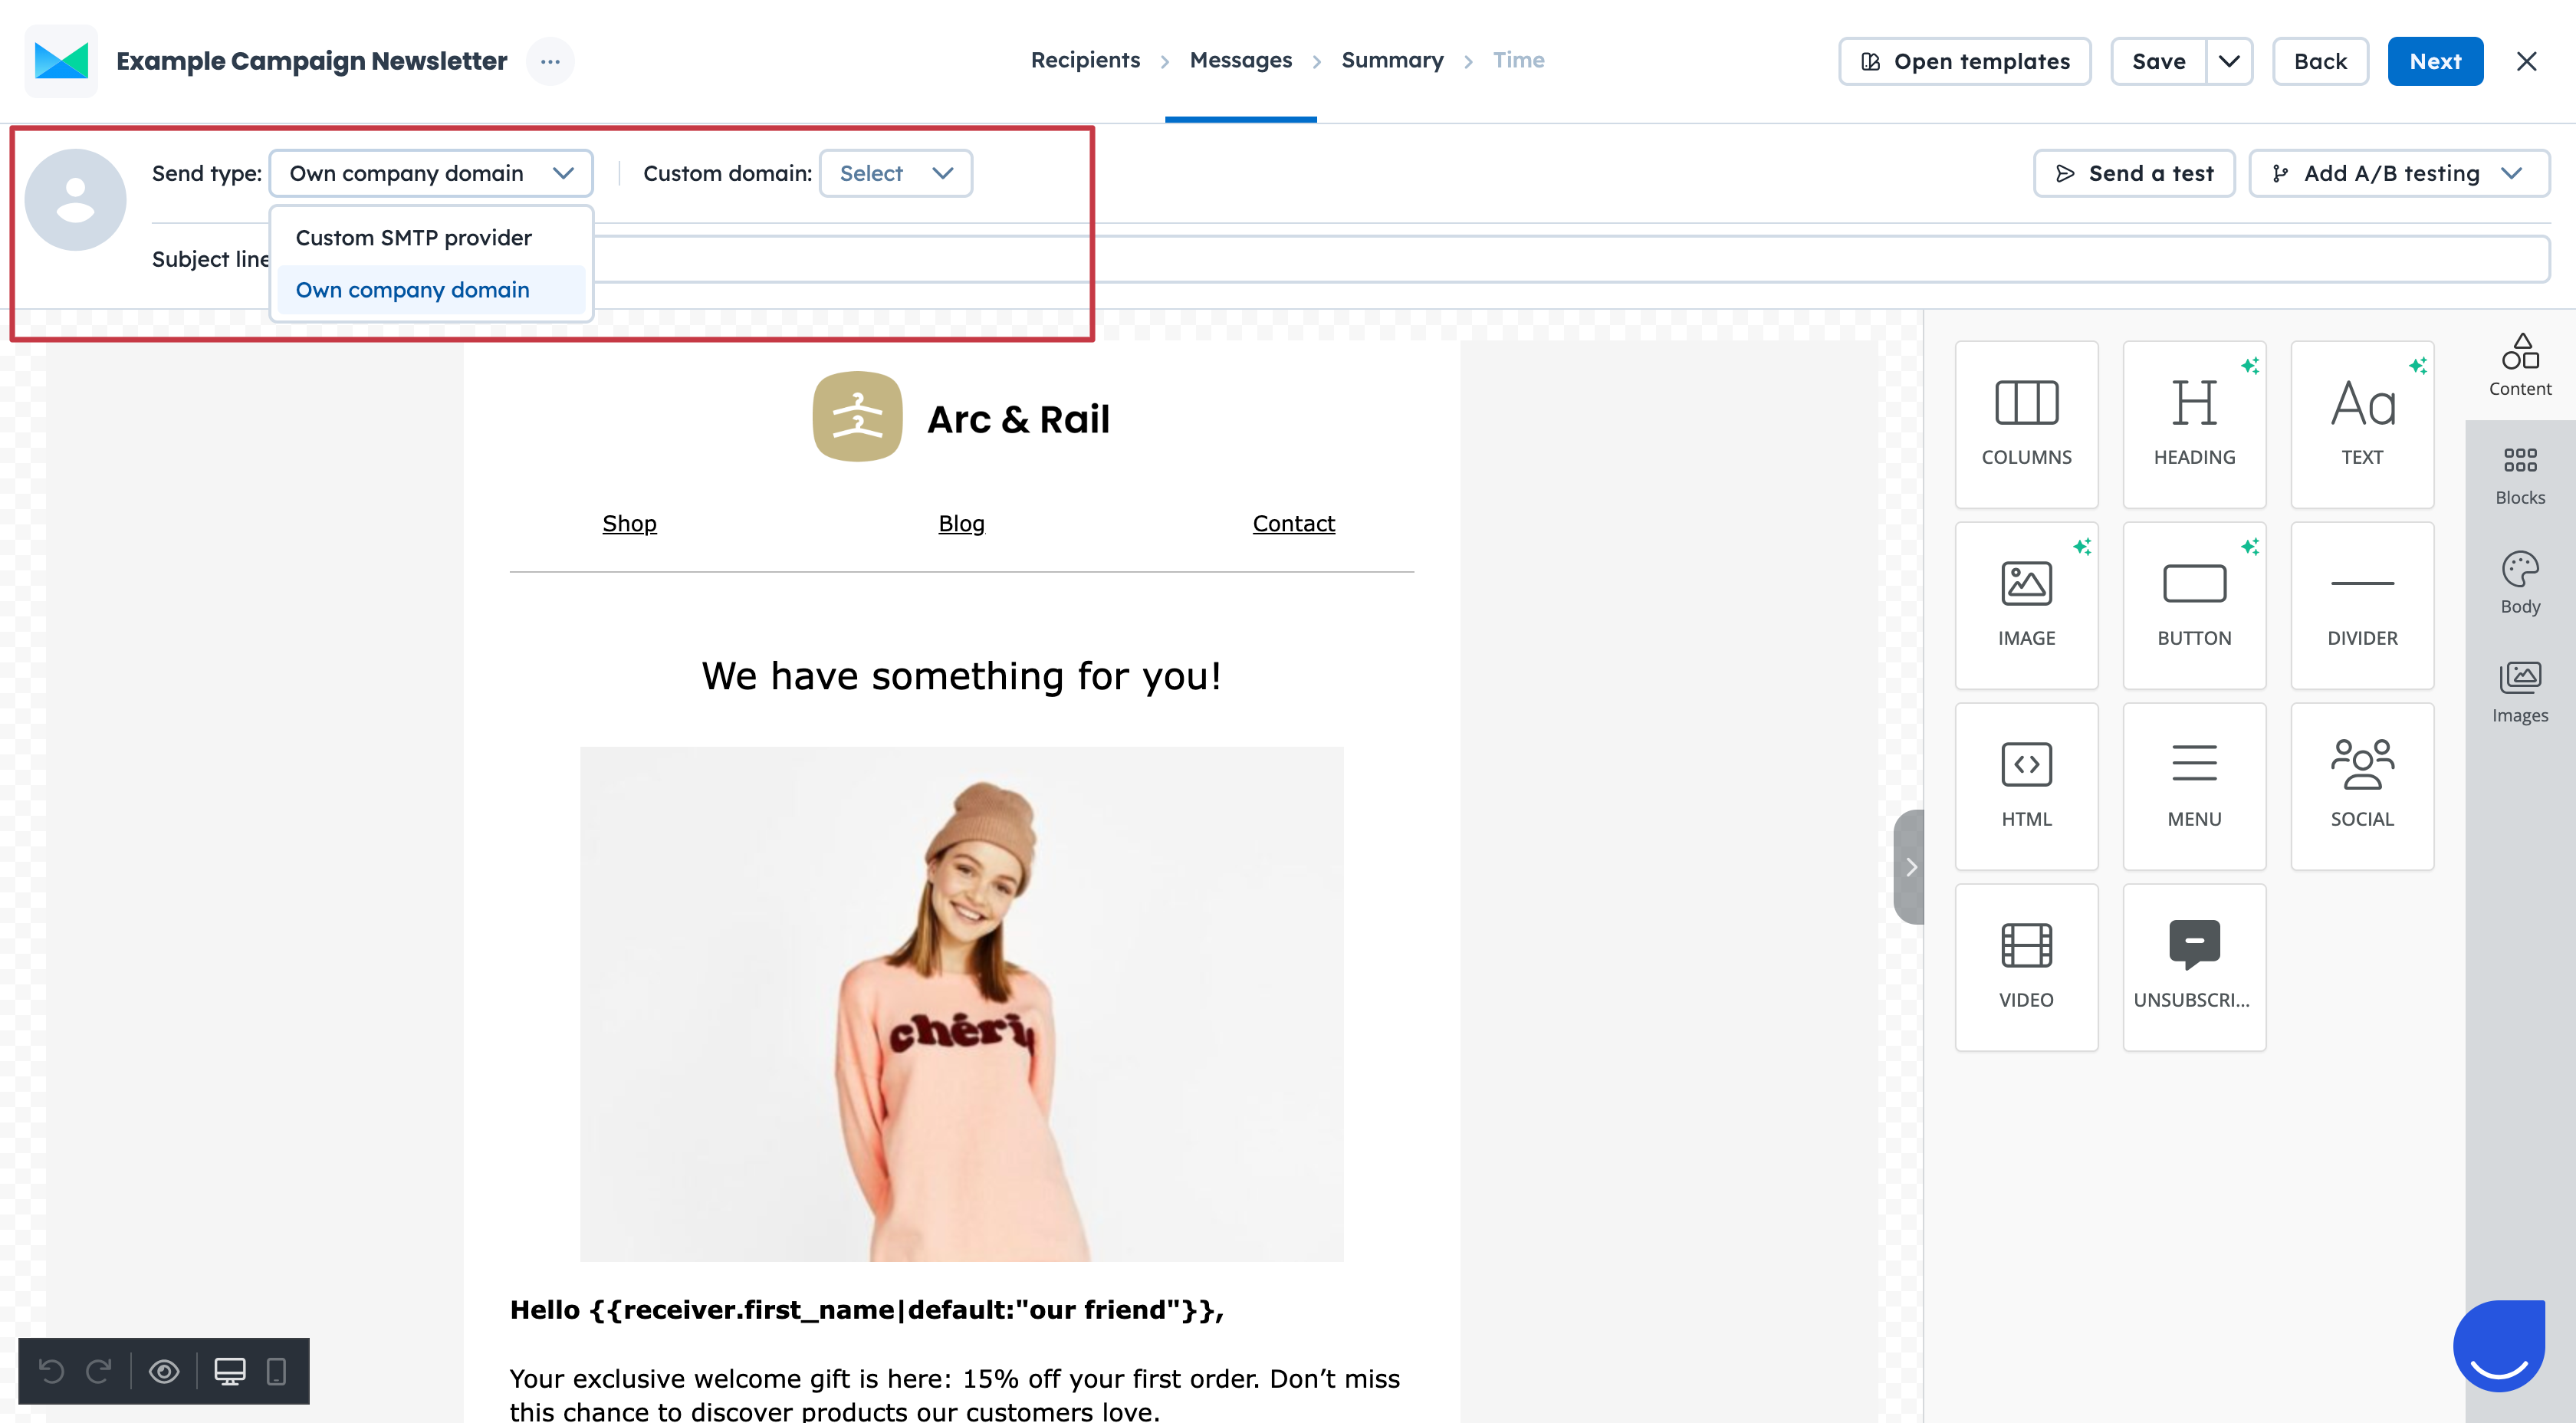
Sender Settings:
Choose the “Send Type” for the email campaign. It can be either your custom SMTP provider or User.com one.
Then decide on the domain and a particular sender, that will be shown in the email inboxes of your recipients.
To find more info on how to choose a correct sender, please check the following article.
Content:
You can adjust the content of the email message with different visual elements and dynamic content. Also, you can always change the template by clicking on “Open Templates” button.
There is a possibility to preview your email content and apply changes before saving the final version by sending a test.
Remember, to define the subject line, which will be visible in the recipients’ inboxes.

Moreover, on this step, you can can decide if you want to apply A/B testing into the email campaign. Just click the “Add A/B testing” button to add the next email version. More info about the A/B tests you can find in the following article.
This step includes all main elements of the campaign:
Number of email credits used.
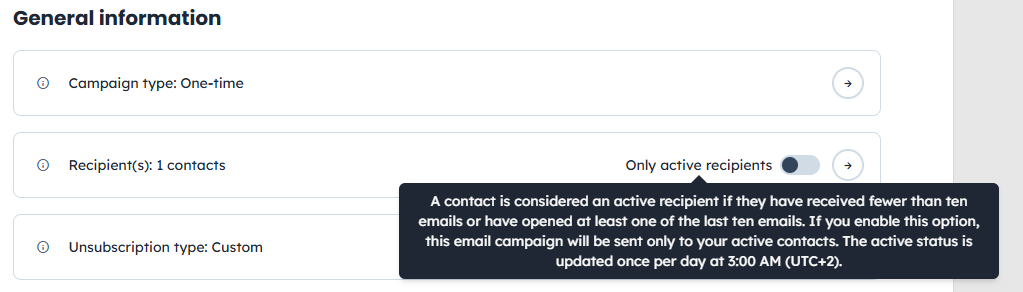
General information (campaign type, recipient number, unsubscribe type).
Technical information (sending domain, message size, behavioural tracking).
Preview of the content along with the subject line.
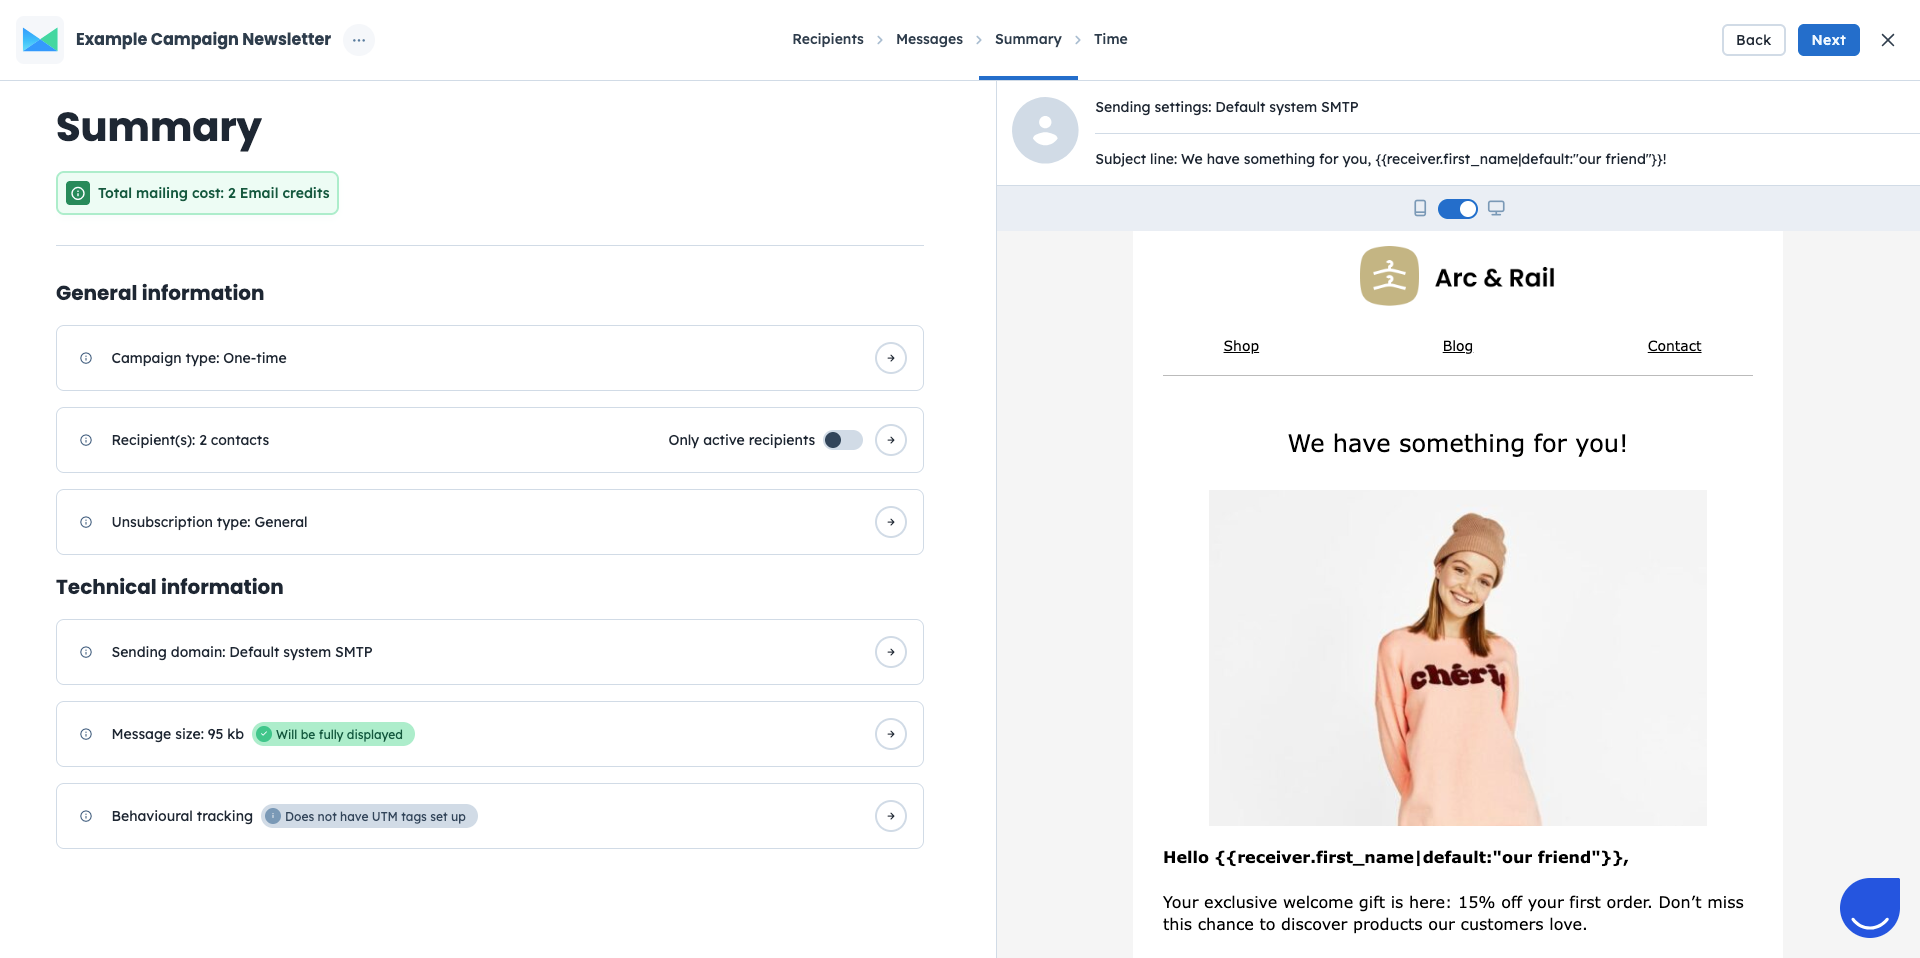
You can also specify the email recipients. You can choose “only active recipients” - the ones, who have opened at least 1 out of the last 10 sent emails.
In summary you can set a “Behavioural tracking” - to track how contacts engage after the click - set custom UTM parameters per campaign to get clearer insights into performance.
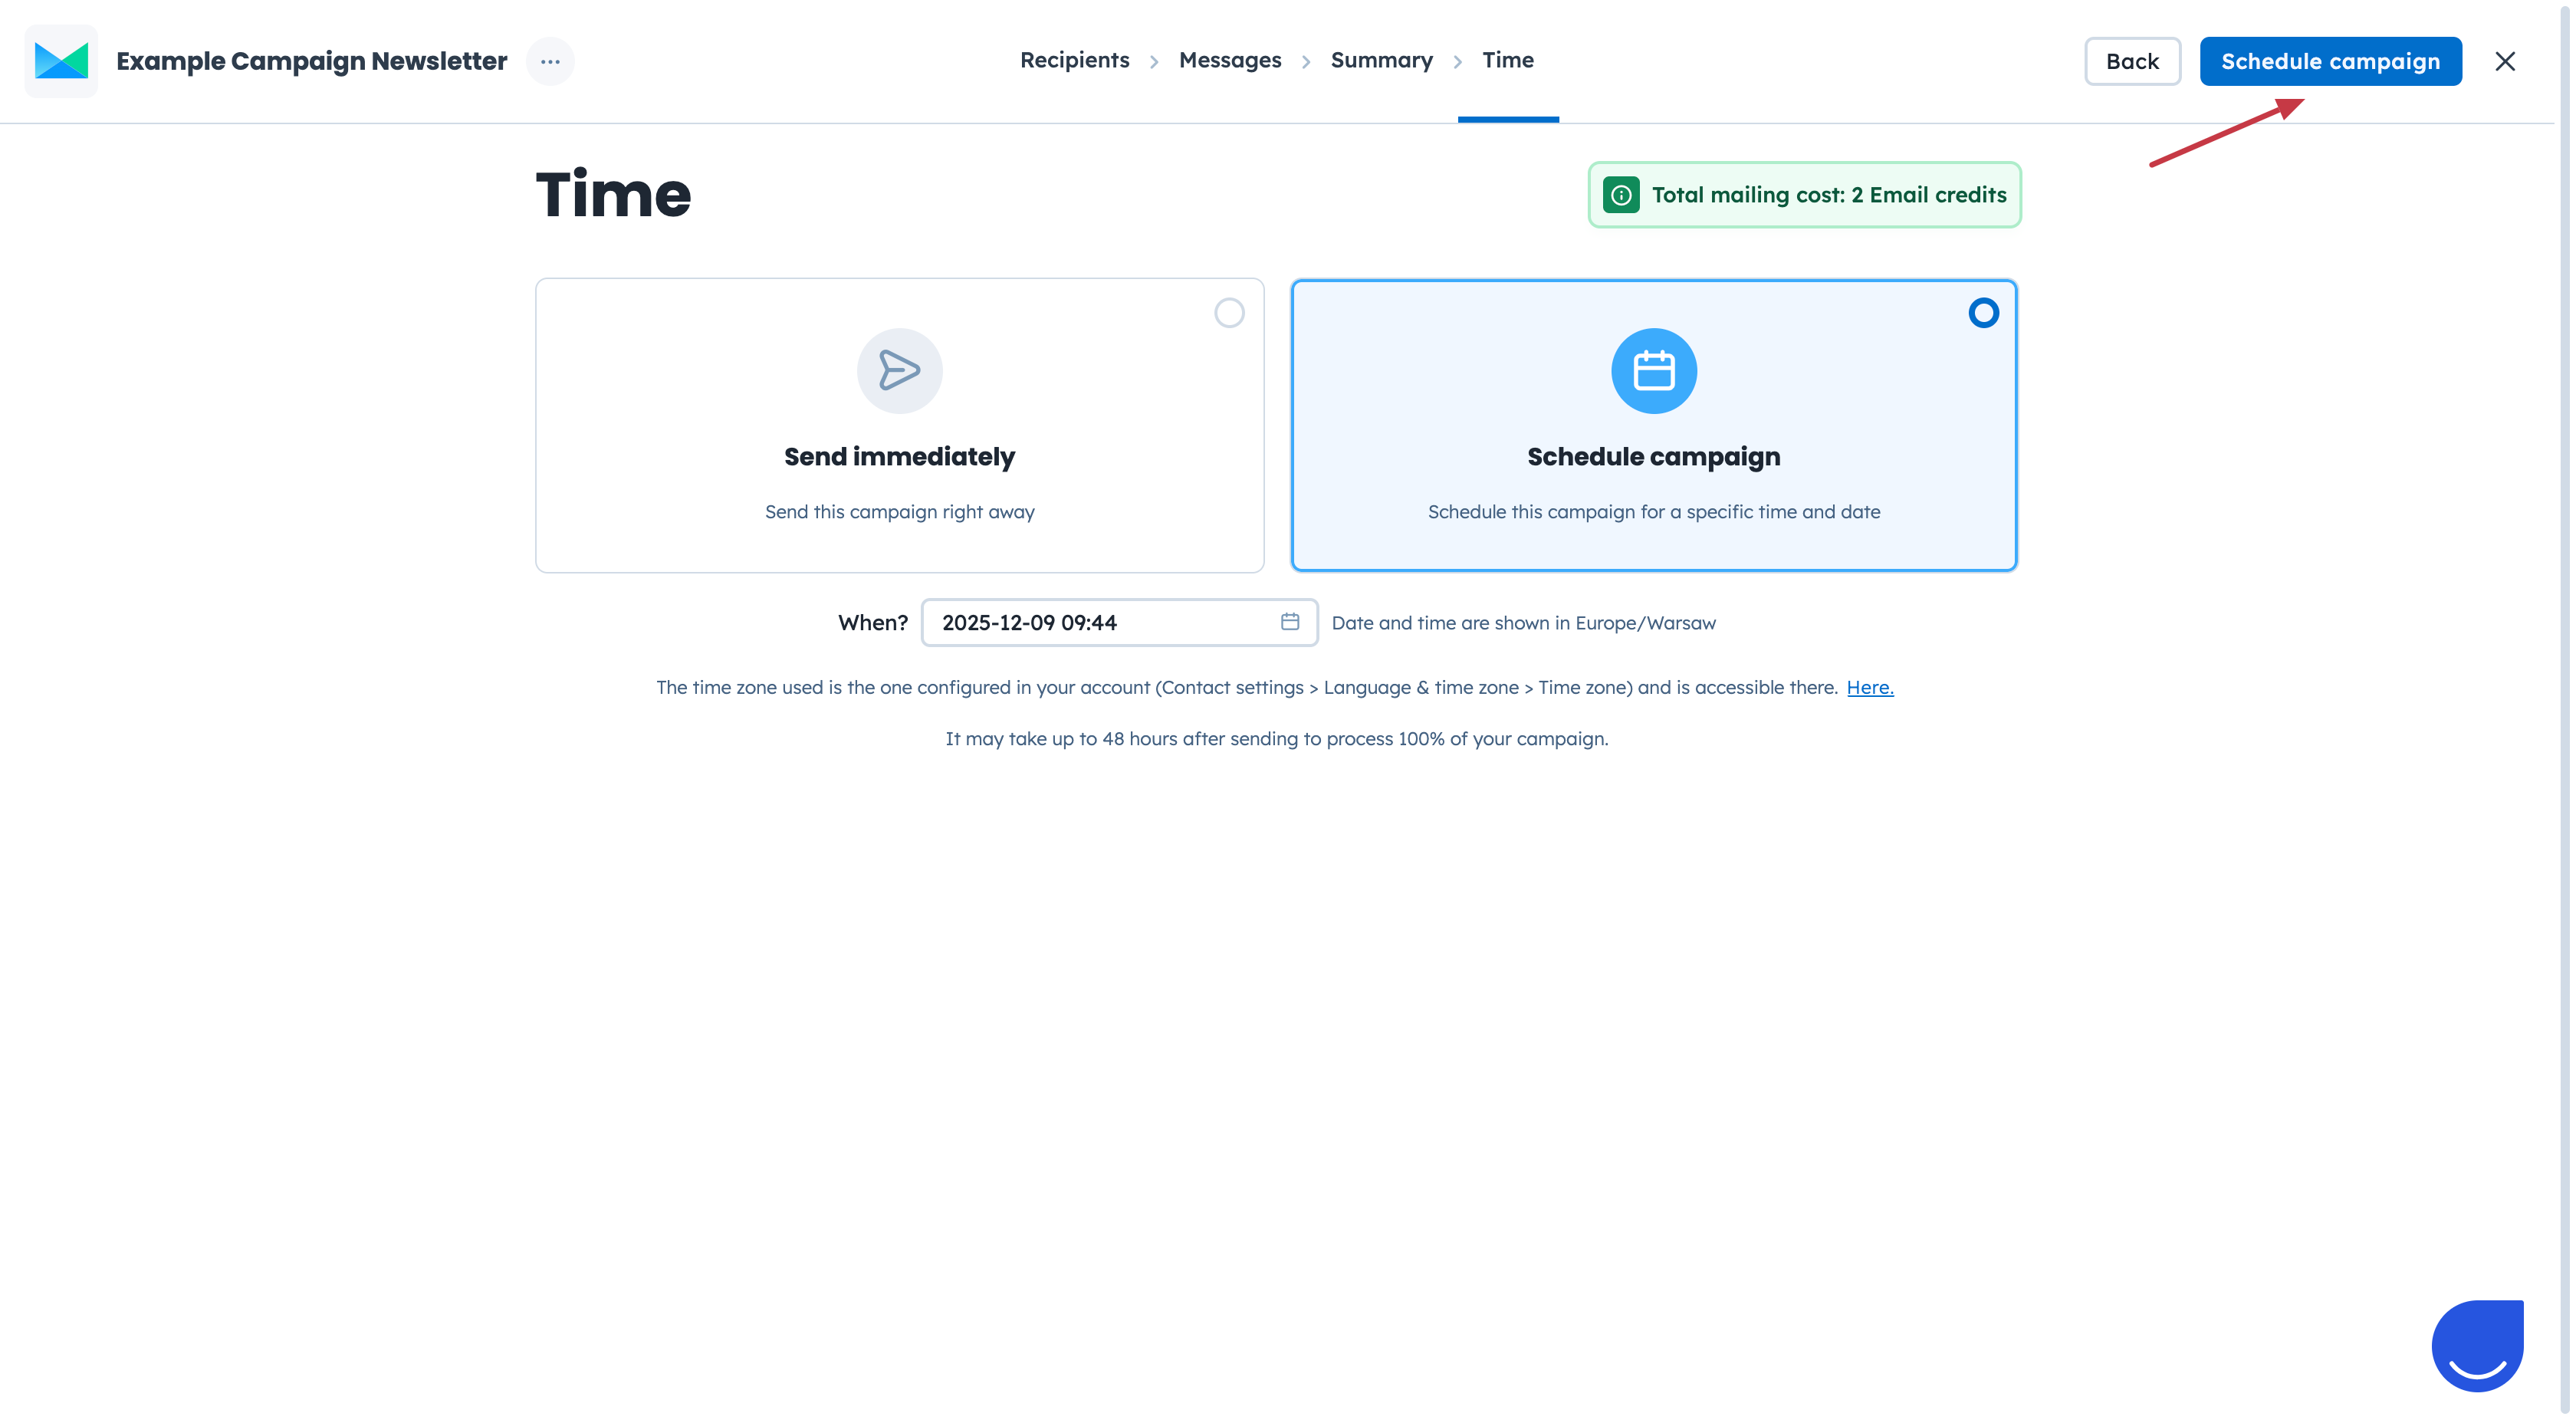
The last, but not least, step is setting the time of the email campaign delivery.
Immediately
Schedule it for the future (choose date and time in the nearest future)
Confirm your choice and activate the campaign.
If you feel you need more time or additional details to finish the campaign - just click on the “X” icon and confirm saving the changes. It will save the campaign as a draft. Check the difference between active and draft campaigns in a dedicated article.
