Contact lists are a core building block for segmentation and targeted communication in User.com. They help you group users based on consent, behavior, lifecycle stage, or business logic, and then use those groups in campaigns, automations, and analytics.
To know more about the nature of the contact lists, please check the “What Is a Contact List” article.
In this article, you’ll learn all the supported methods for adding contacts to lists and removing them when needed. You can manage lists automatically, manually, in bulk, or via API, depending on your operational needs.

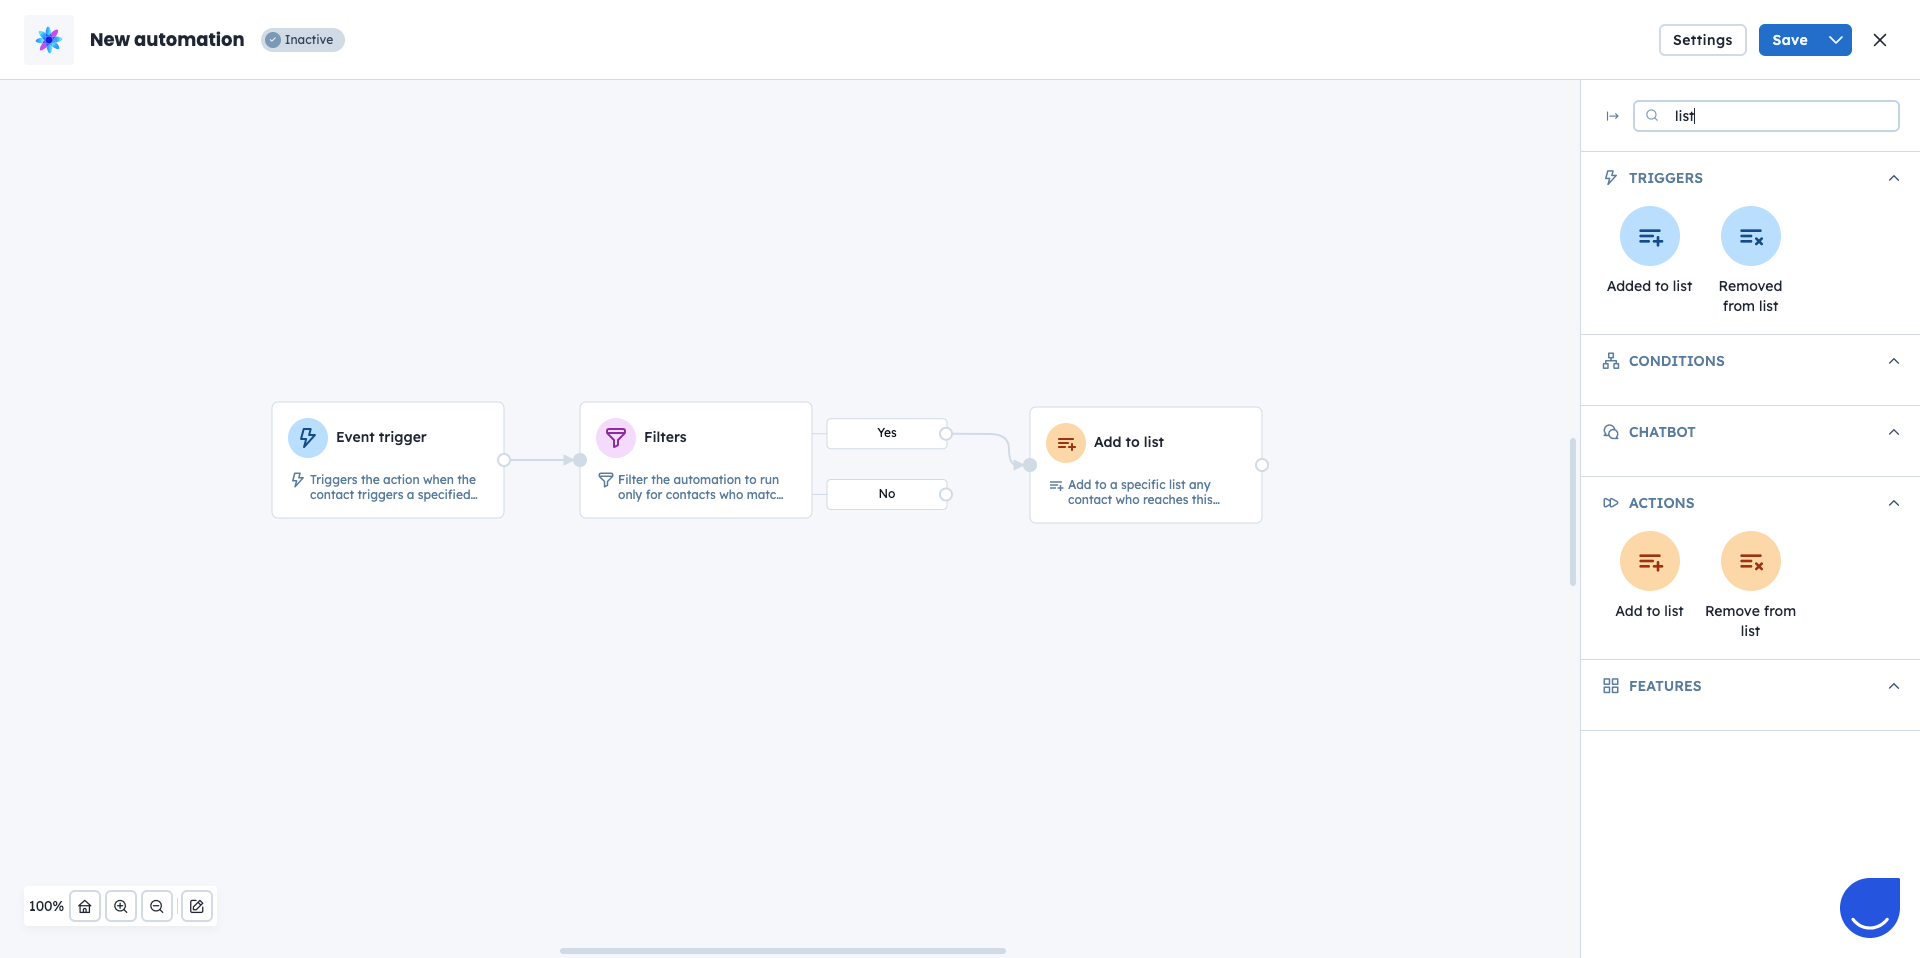
Automations allow you to manage list membership automatically based on defined triggers and conditions. This is the most scalable way to keep lists up to date.
There are two dedicated automation modules for working with contact lists:
“Add to a List” action [LINK]
“Remove from a List” action [LINK]
Example: You can automatically add contacts who submit a “Newsletter subscription” form to a “Newsletter” list. If a contact later changes their consent status, another automation can remove them from the same list.
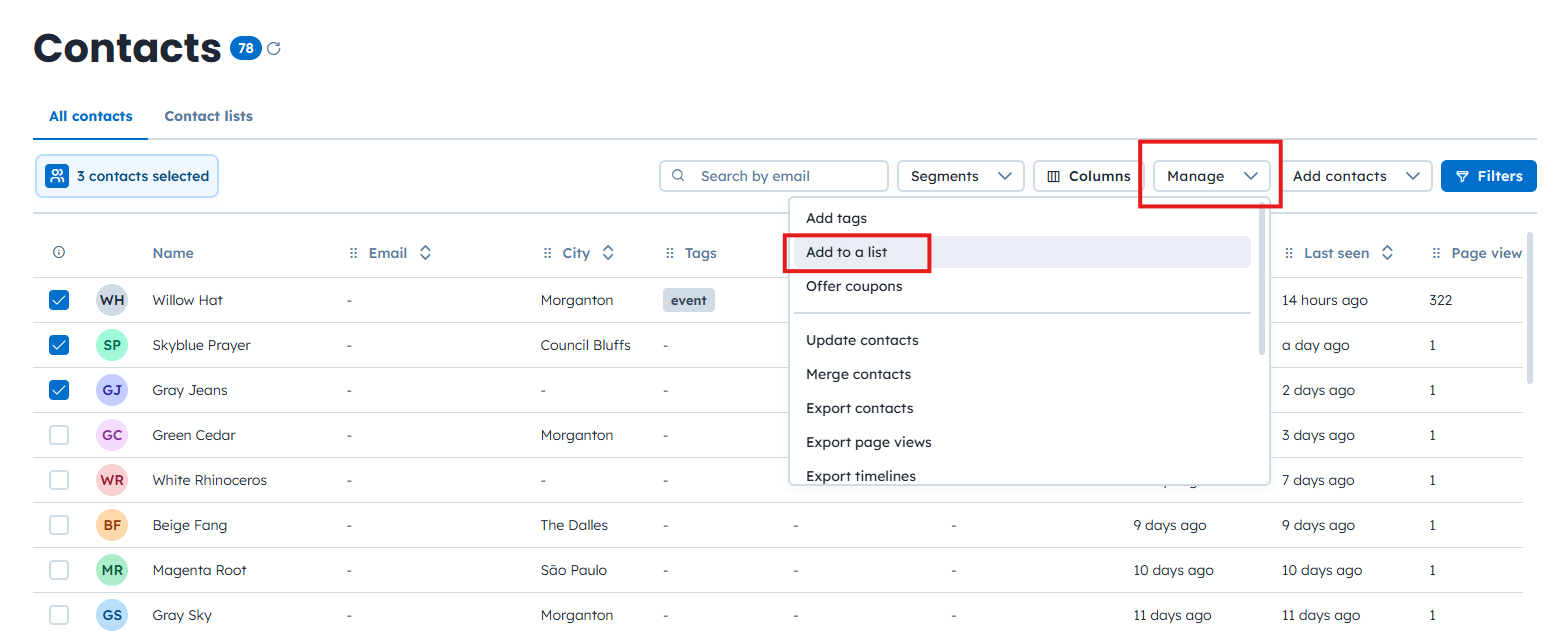
You can also manage list membership manually from the “Contacts” section. This method is useful when you want to work with filtered groups of contacts or make one-time adjustments.
To add or remove contacts from lists:
Go to “Data” → “Contacts”.
Apply filters or select contacts manually using checkboxes.
Click “Manage” → “Add to List” or “Remove from List”.
Example: You identify contacts who haven’t logged in for over a year but previously generated high revenue. After filtering by last login date and purchase value, you add them to a “Re-engagement Campaign” list used for a dedicated email campaign with special offers.
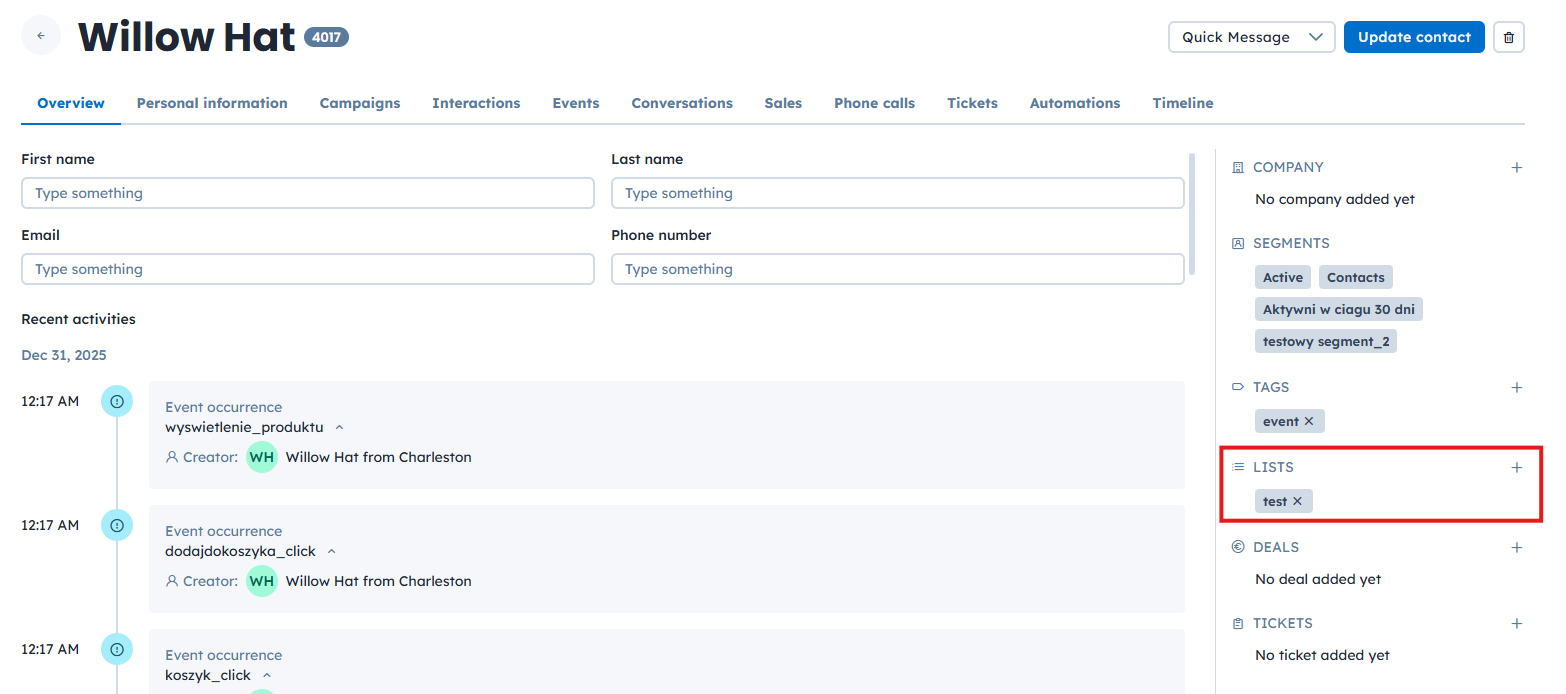
You can also manage list membership directly from an individual contact profile. This is helpful when updating lists based on direct interactions or support conversations.
To manage lists from a contact profile:
Open the contact profile.
Find the Lists section on the right side.
Click the + icon to add the contact to a list.
Click the X icon next to a list name to remove the contact from it.
Example: A support agent talks to a user who shows interest in upgrading their plan. The agent adds the user to an “Interested in Upgrades” list directly from the profile so the sales team can follow up.
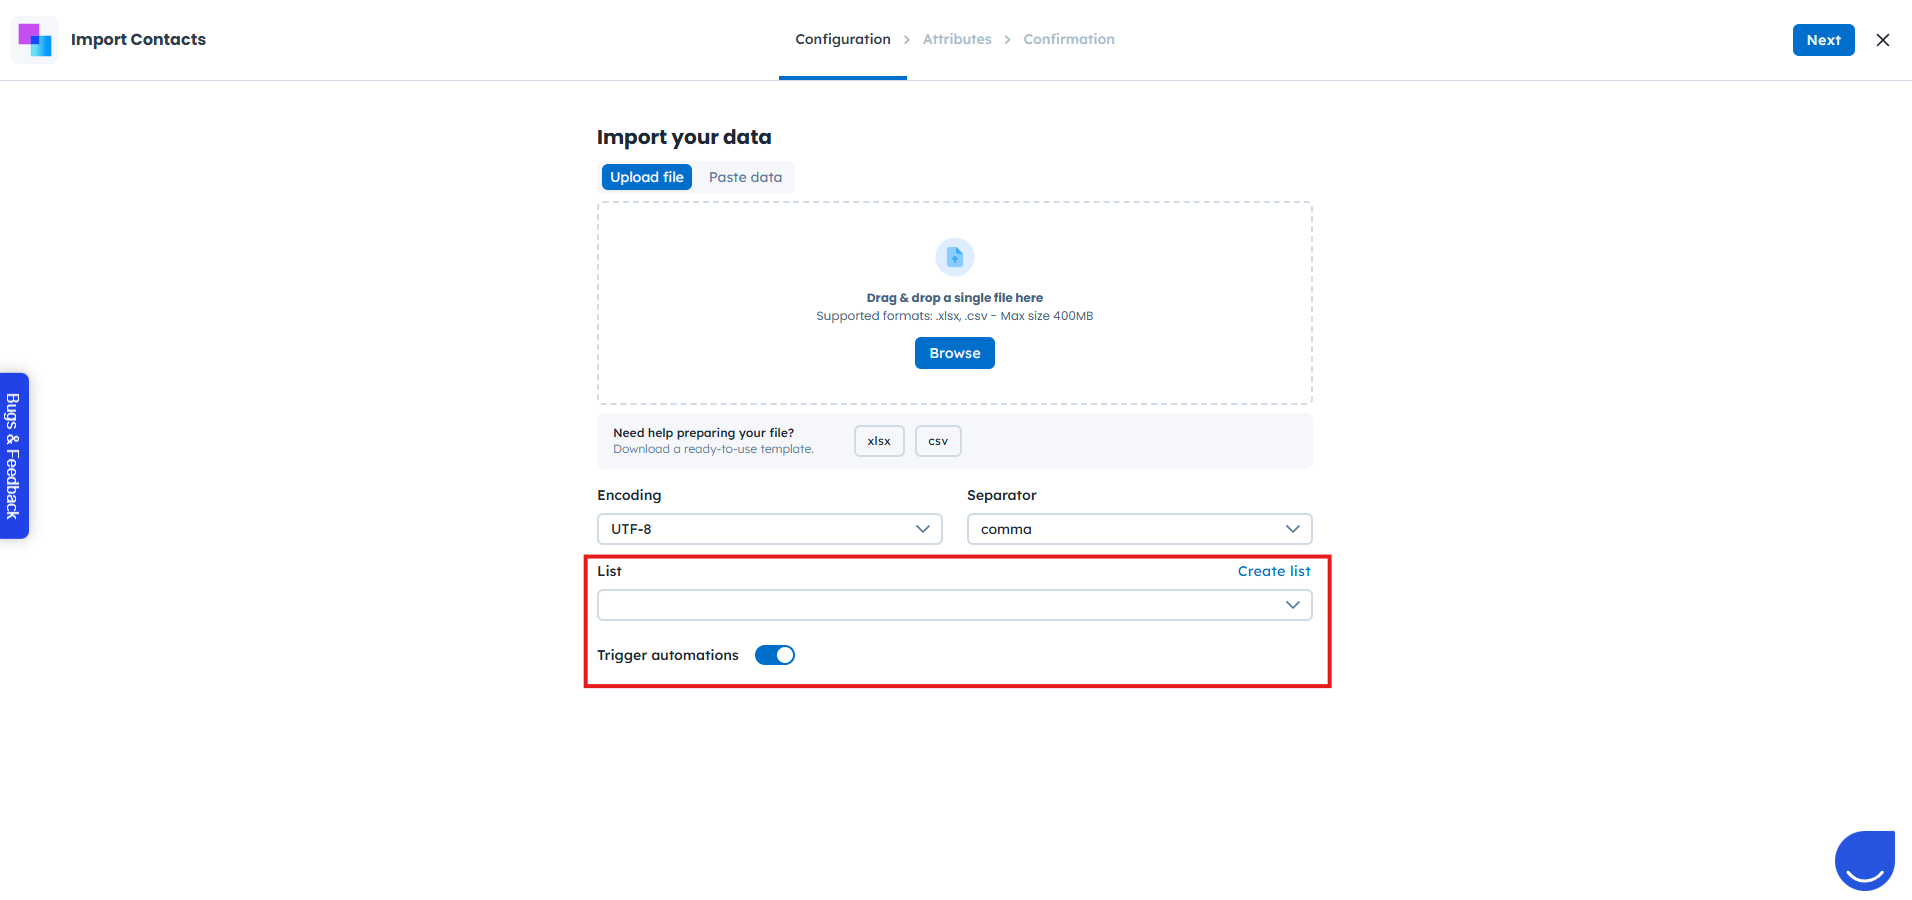
When importing contacts via CSV, you can add them to one or more lists at the same time. This is an efficient way to manage large volumes of users.
You can also trigger automations for imported contacts, as long as the automation is active and starts with the Added to List trigger [LINK].
To add contacts to lists during import:
Go to Data → Importers → Import Contacts.
Choose whether to upload a CSV file or paste data directly.
On the first step, create a new list or select an existing list.
Continue the import process.
Example: After a trade show, you import collected leads and immediately add them to a “Trade Show Leads” list. This allows the sales team to start follow-up activities without additional manual steps.
The User.com REST API allows you to manage contact list membership programmatically. This method is ideal for integrations and advanced automation scenarios.
Using the API, you can:
Add contacts to lists
Remove contacts from lists
Perform additional list-related operations
For a full overview of available endpoints and options, see the User.com REST API documentation.
Example: An integration with your e-commerce platform automatically adds contacts to a “VIP Customers” list when they exceed a defined spending threshold.
Comparing tags, segments, and user lists [LINK]
Module guide: Added to List trigger [LINK]
Module guide: Removed from List trigger [LINK]
Module guide: Add to a List action [LINK]
Module guide: Remove from List action [LINK]