A workspace in User.com is a dedicated environment where you manage your data, automations, and communication. You can create a workspace when starting your journey with User.com or add a new one if you already have an active account.
This article explains both options.
This method is recommended if you are new to User.com and do not have an application yet.
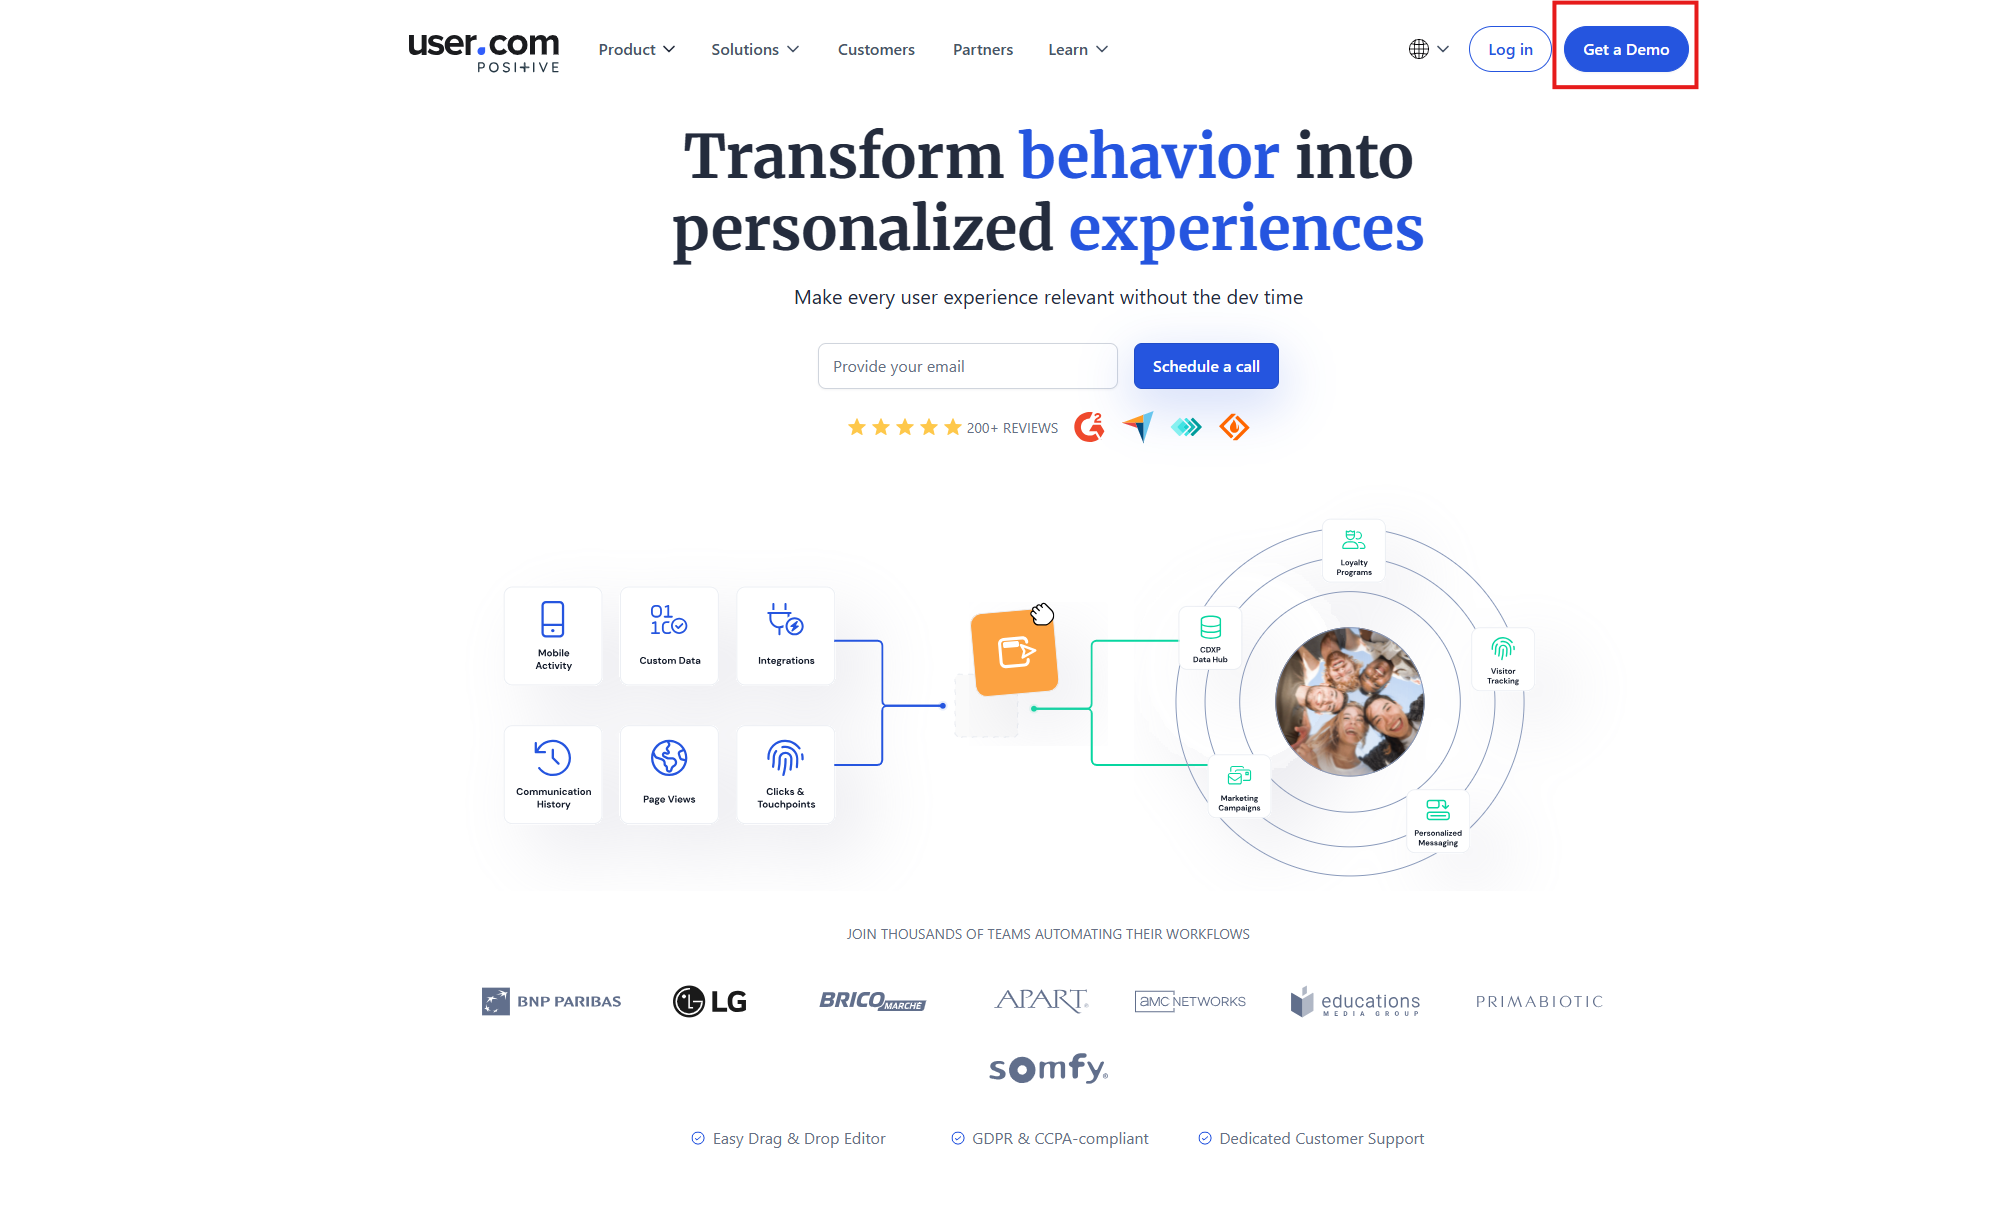
Step 1: Open the Demo Request Page
Go to the User.com website.
Click Get a demo button in the top-right corner of the page.
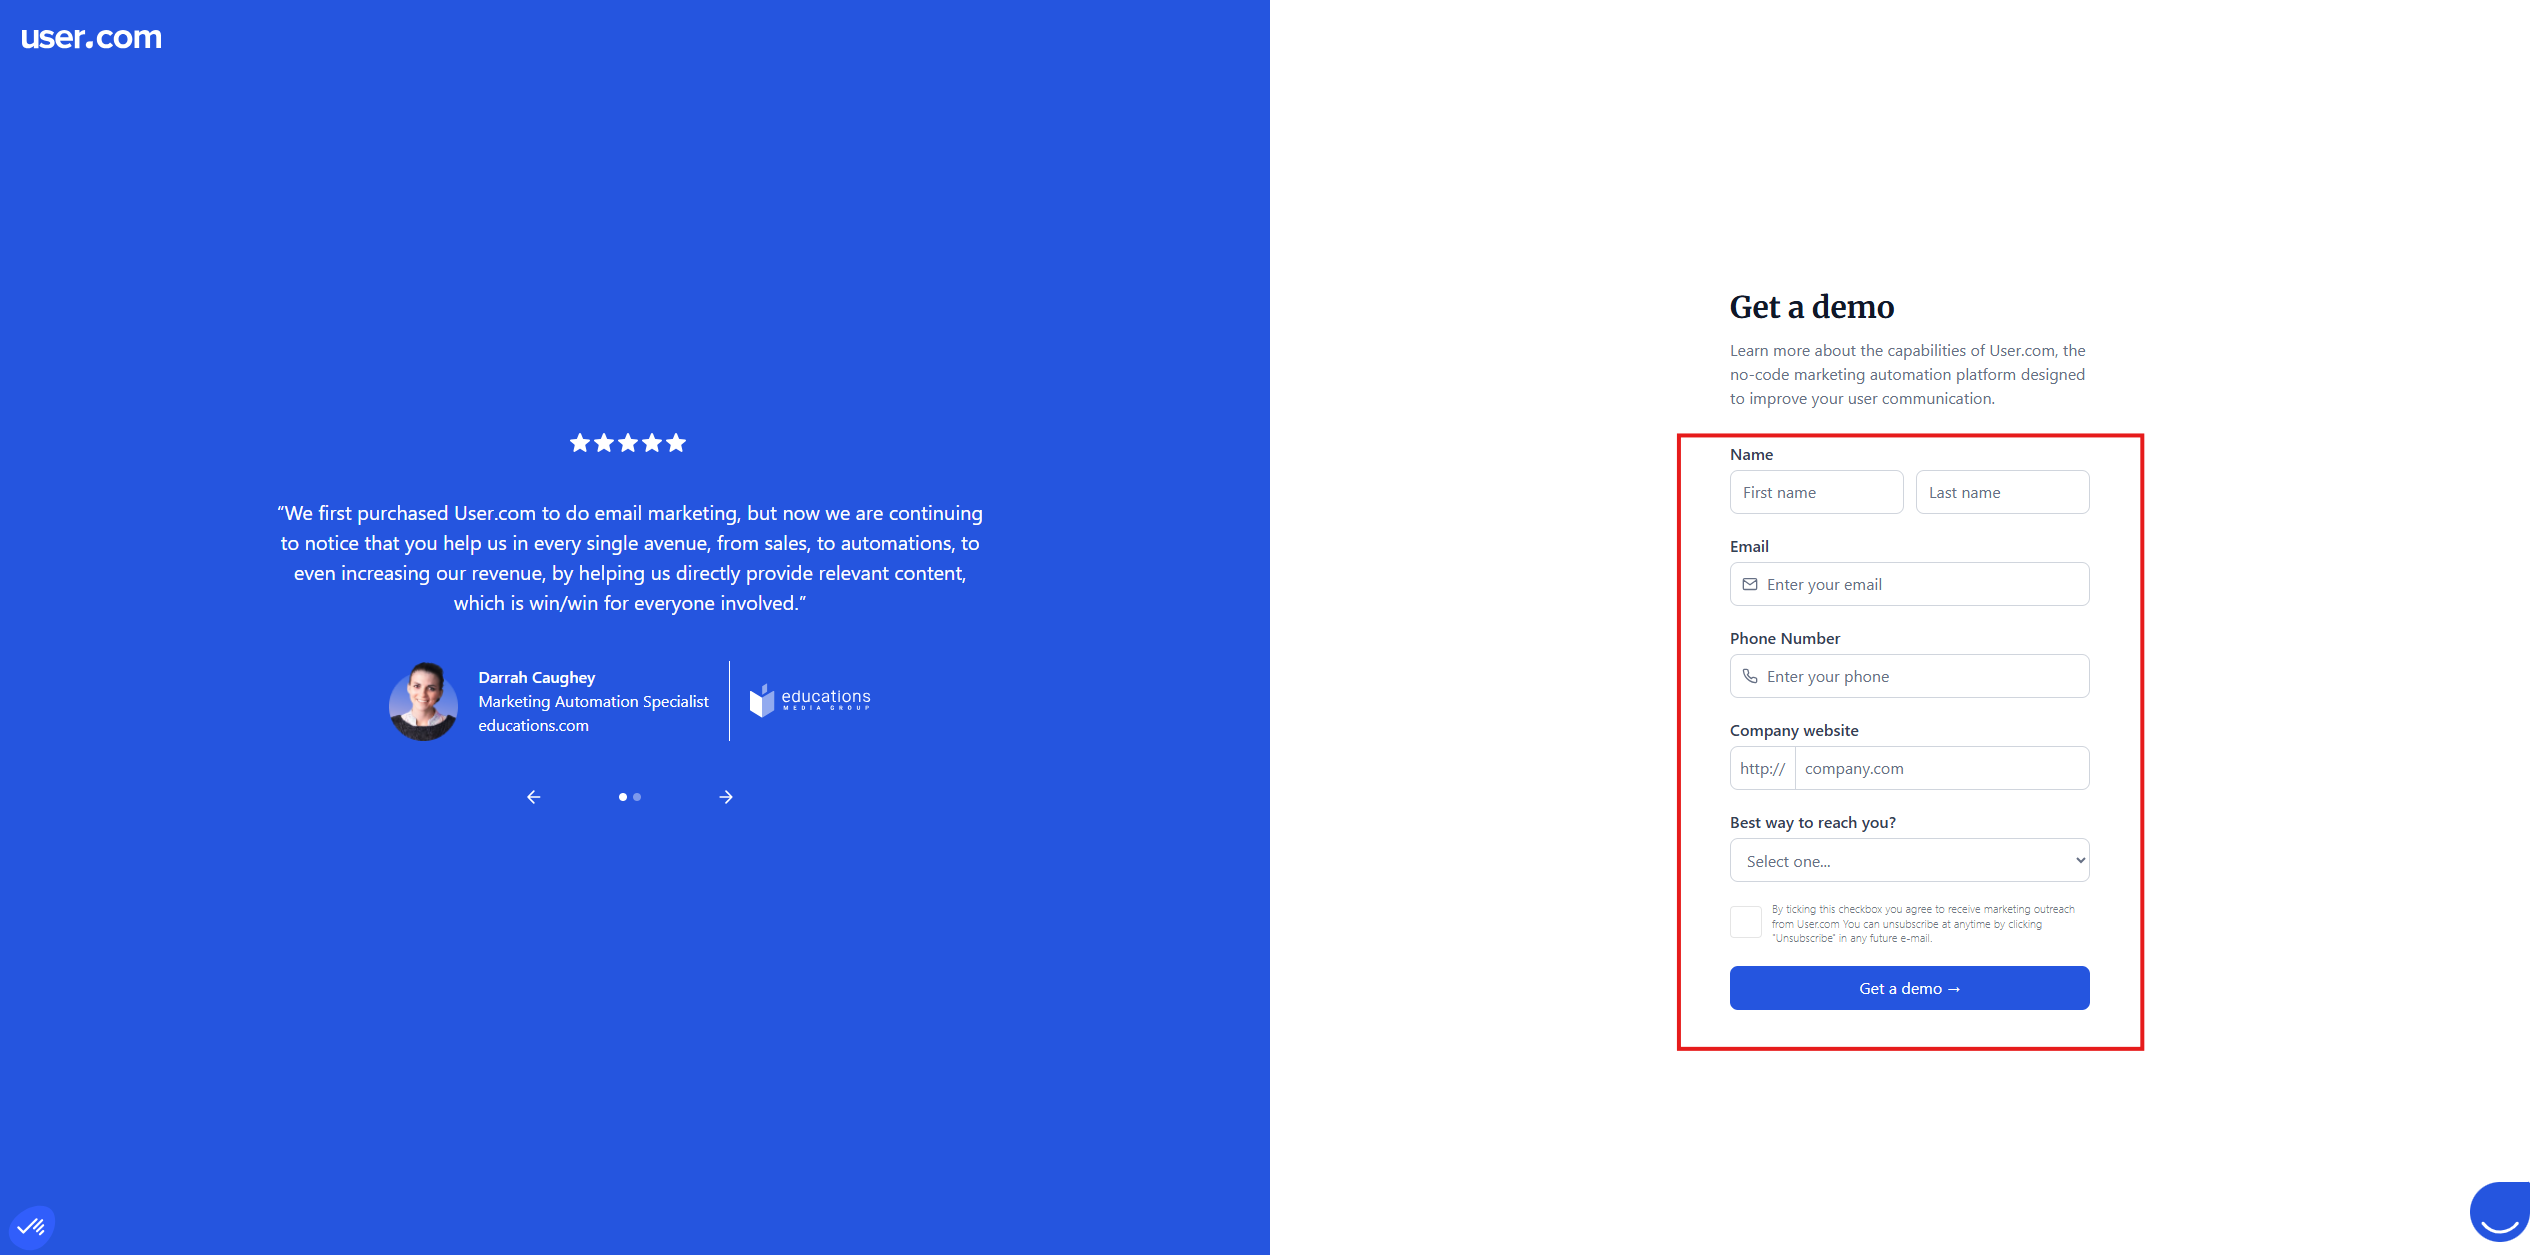
Step 2: Submit Your Contact Details
Fill in the demo request form with your contact details.
Submit the form.
After submitting the form, a member of the User.com Sales team will contact you as soon as possible. They will help you create a new workspace and guide you through the next steps.
Use this method if you already have a User.com account and want to create an additional workspace.
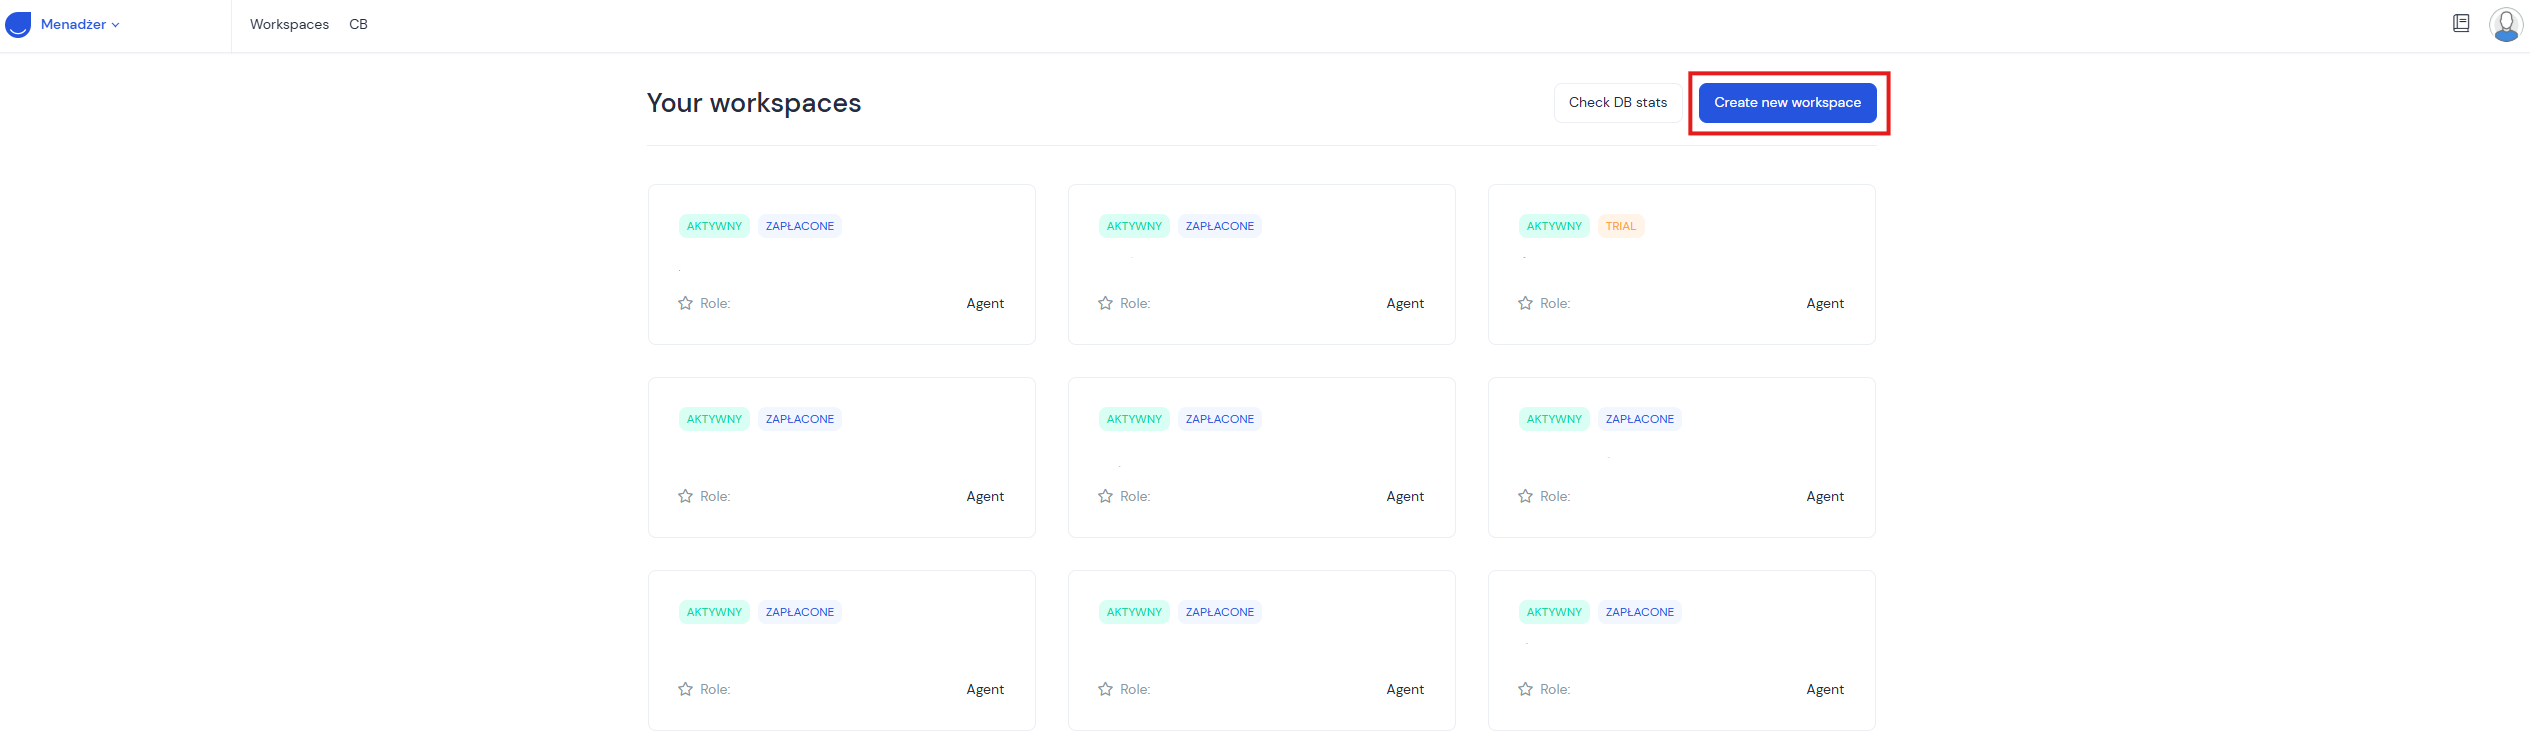
Step 1: Go to the Workspace Dashboard
Log in to your User.com account.
In the top-right corner, click Create new workspace button.
You will be redirected to the workspace registration page.
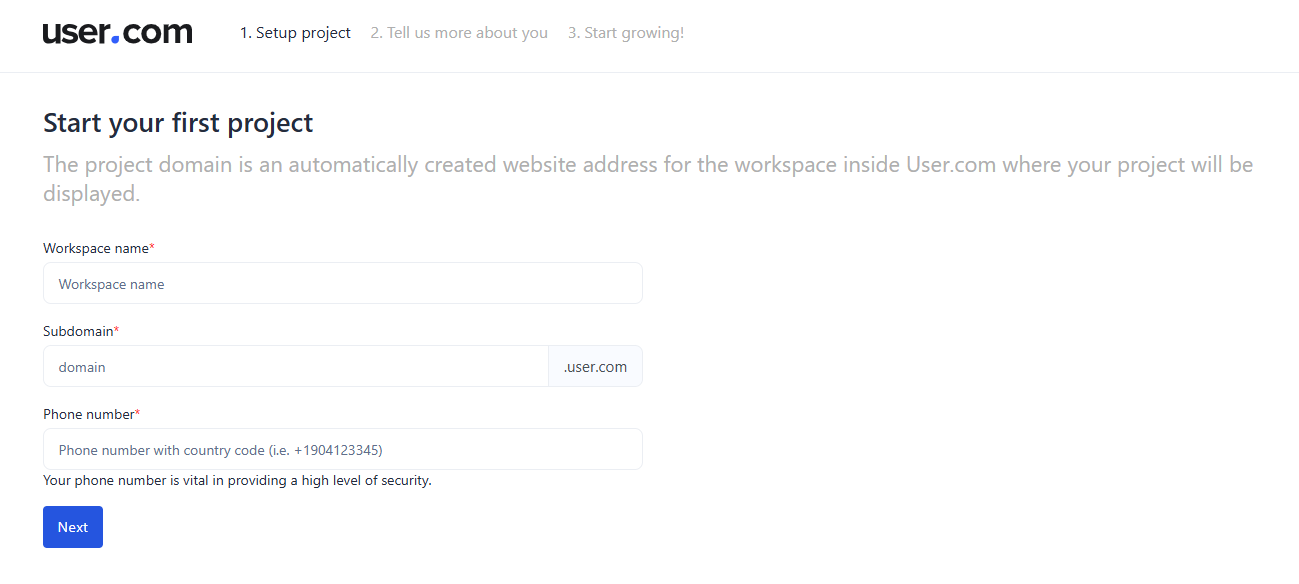
Step 2: Enter Basic Workspace Details
Fill in the following fields:
• Workspace name
• Subdomain – this is the direct link to your application. It is generated automatically from the workspace name, but you can edit it if you want.
• Phone number
Click the Next button to continue.
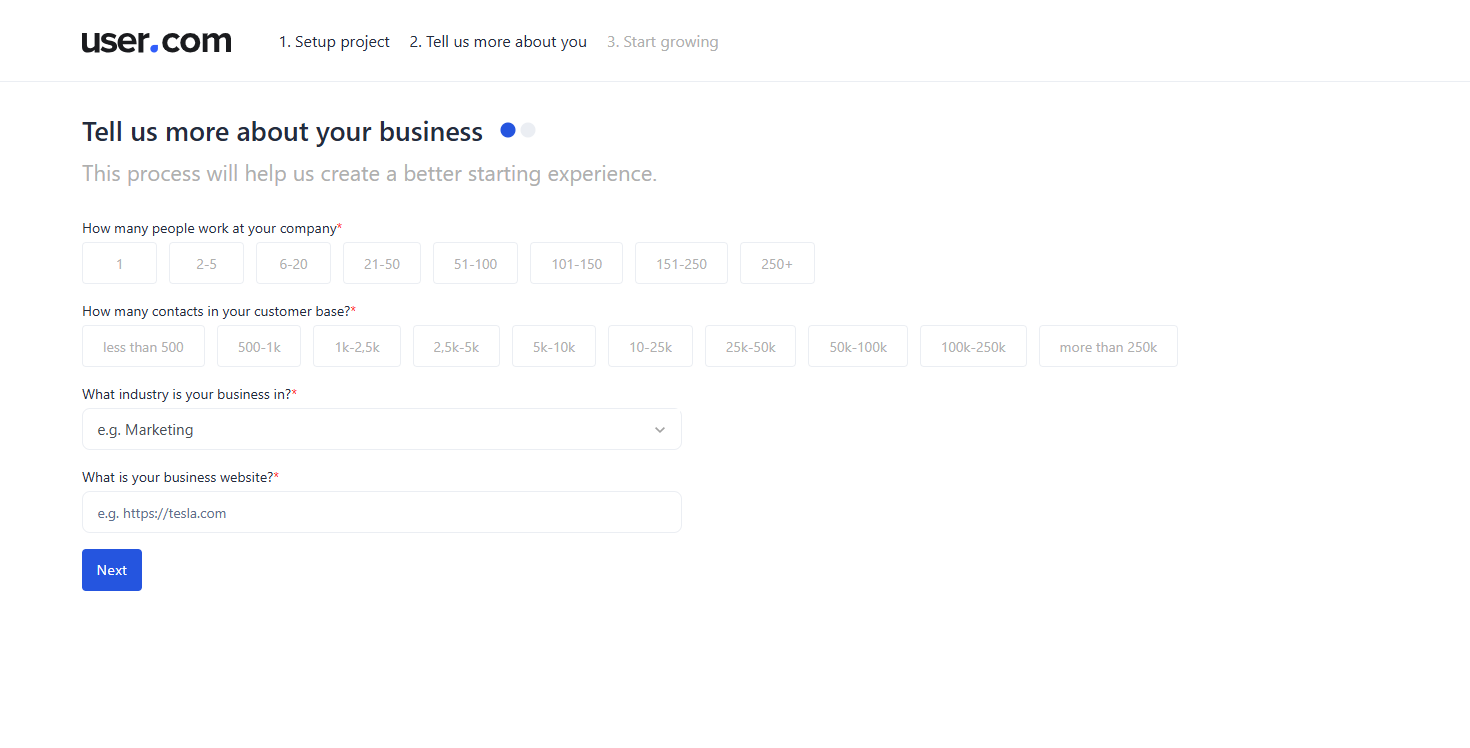
Step 3: Provide Company Information
Complete the required company details:
• How many people work at your company?
• How many contacts are in your customer base?
• What industry is your business in?
• What is your business website?
Click the Next button to continue.
Step 4: Describe Your Business Needs
In the section, select at least one option from the available six to continue.
Click the Next button to finish the setup.

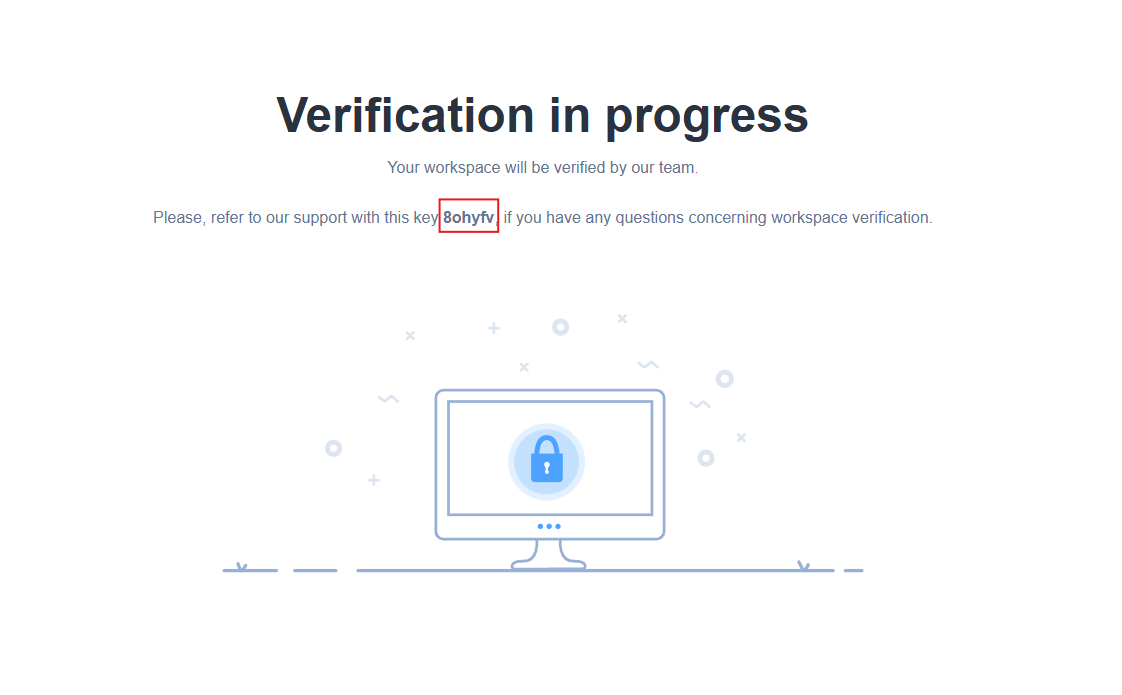
Step 5: Verify and Activate the Workspace
After the workspace is created, you will see a screen with the message “Verification in progress” and an activation key.
Copy the activation key.
Share the key with the agent via chat available on the User.com website or with the Account Manager assigned to your company.
Once the workspace is created, it will start with a 14-day trial period.

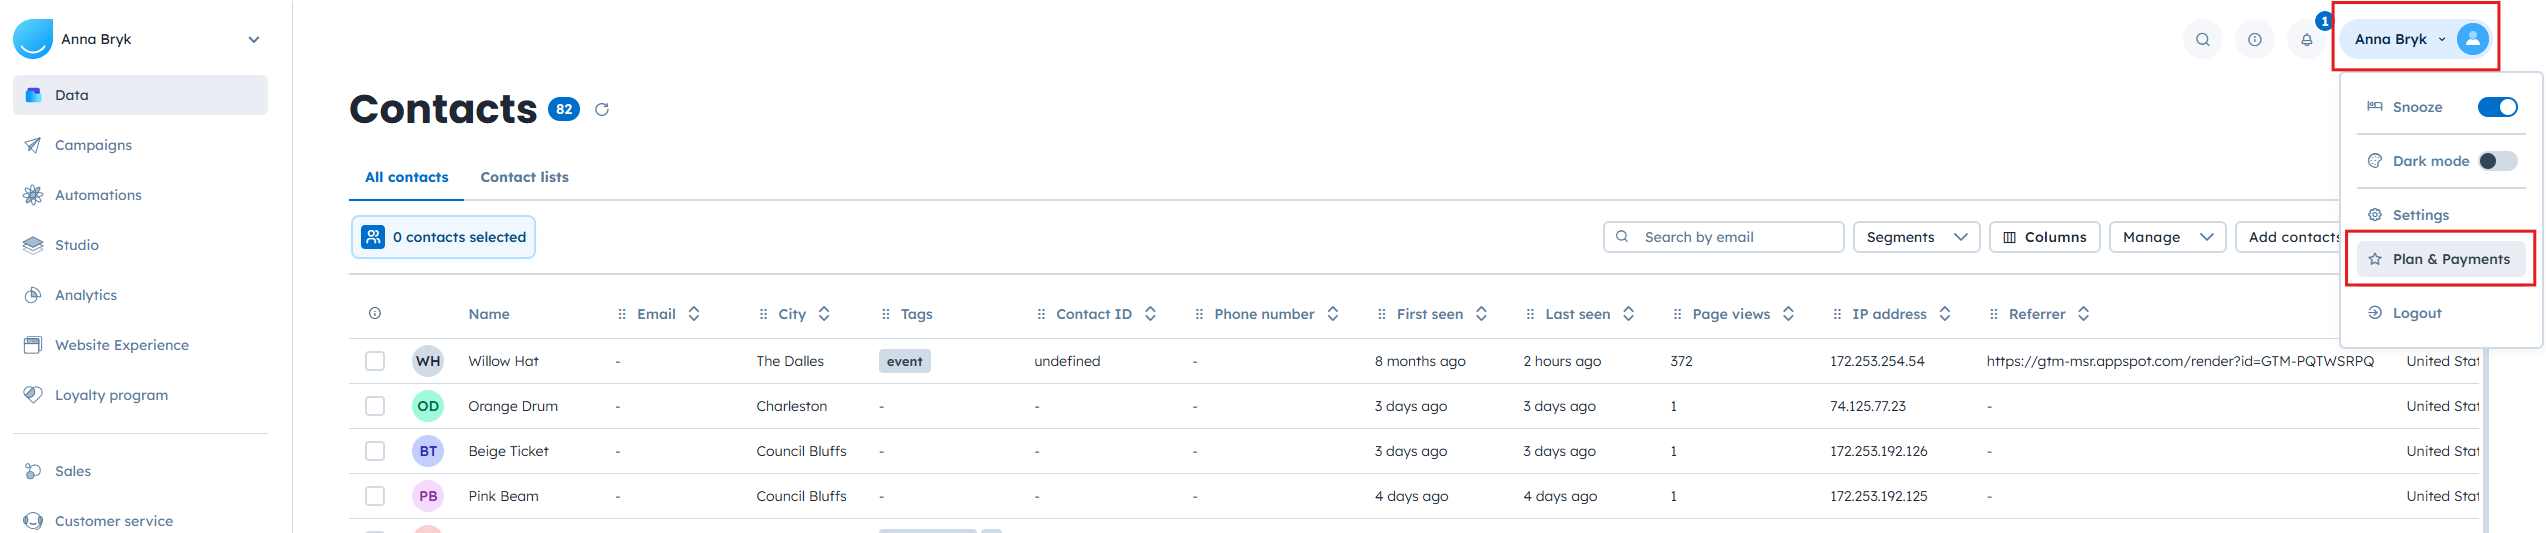
Step 6: Add a Subscription Plan
After activation, you can add a subscription plan to your workspace.
Go to Plan & payments.
In the top-right corner, click Add subscription.
Select the plan that fits your needs.

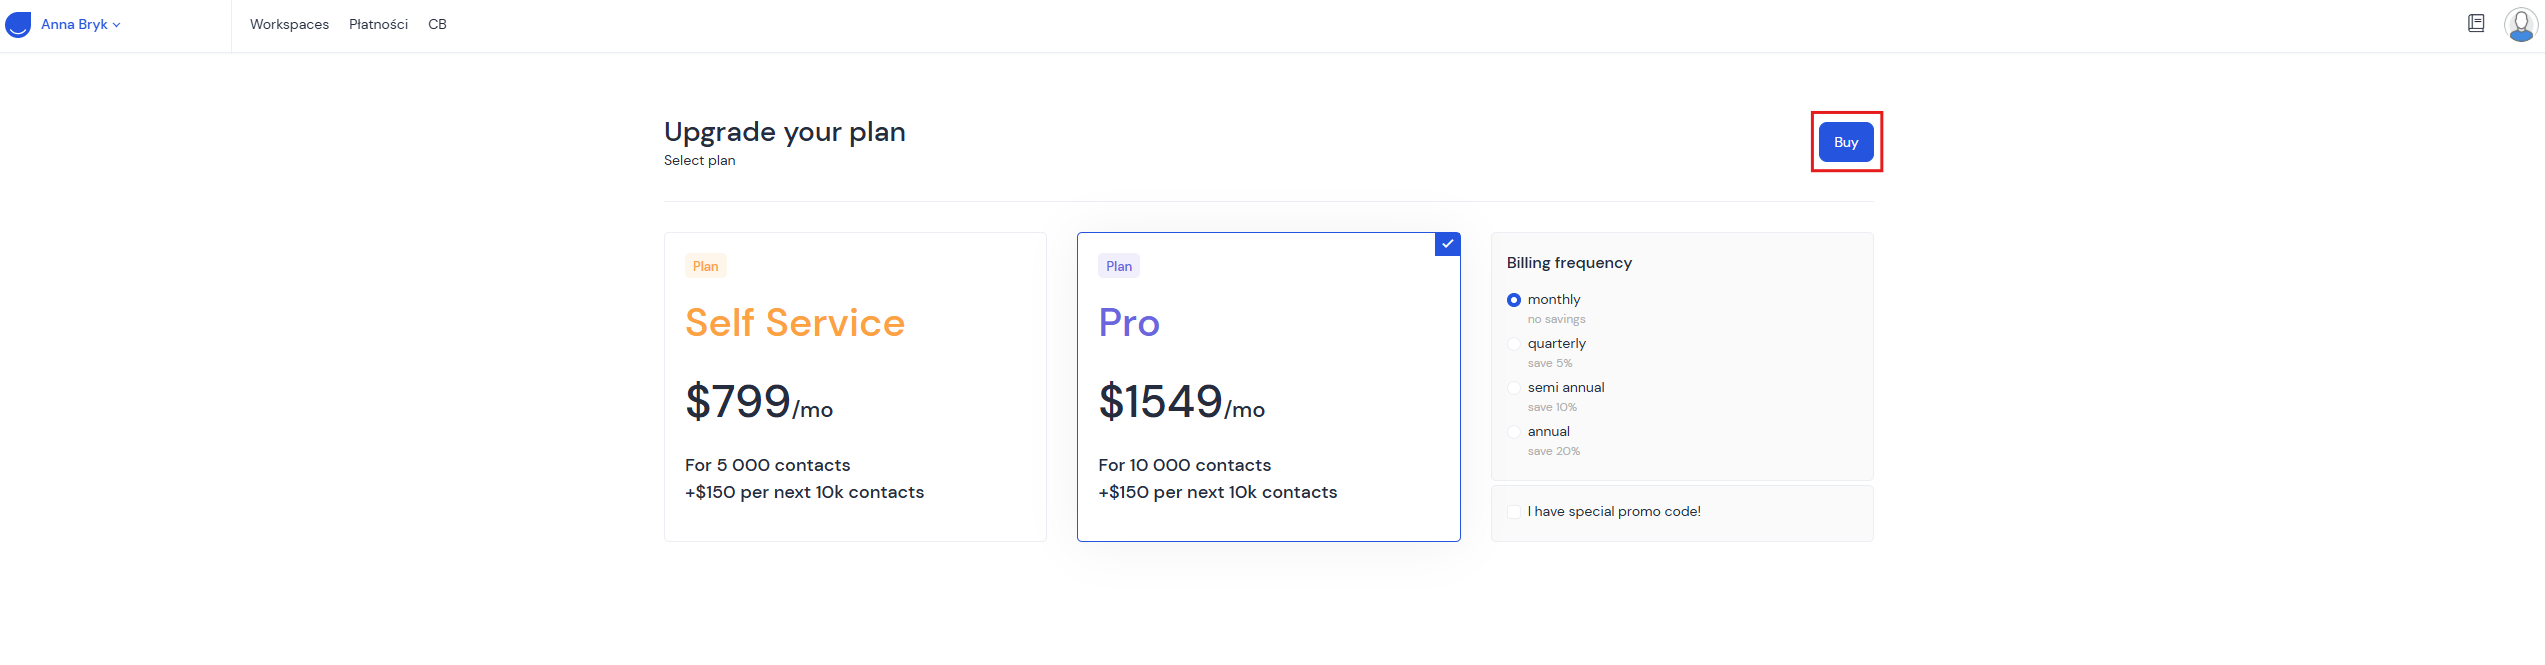
Alternatively, contact User Agnet to request a custom offer prepared by the Sales team.
