Connecting your Google Calendar to Positive User allows contacts to schedule calls directly with your team members in just a few clicks. Once connected, available time slots sync automatically with your calendar, removing back-and-forth emails. You can also automatically create tasks whenever a new meeting is booked to keep your pipeline organized.
Follow these steps to connect your account, configure your availability, and set up meeting types.
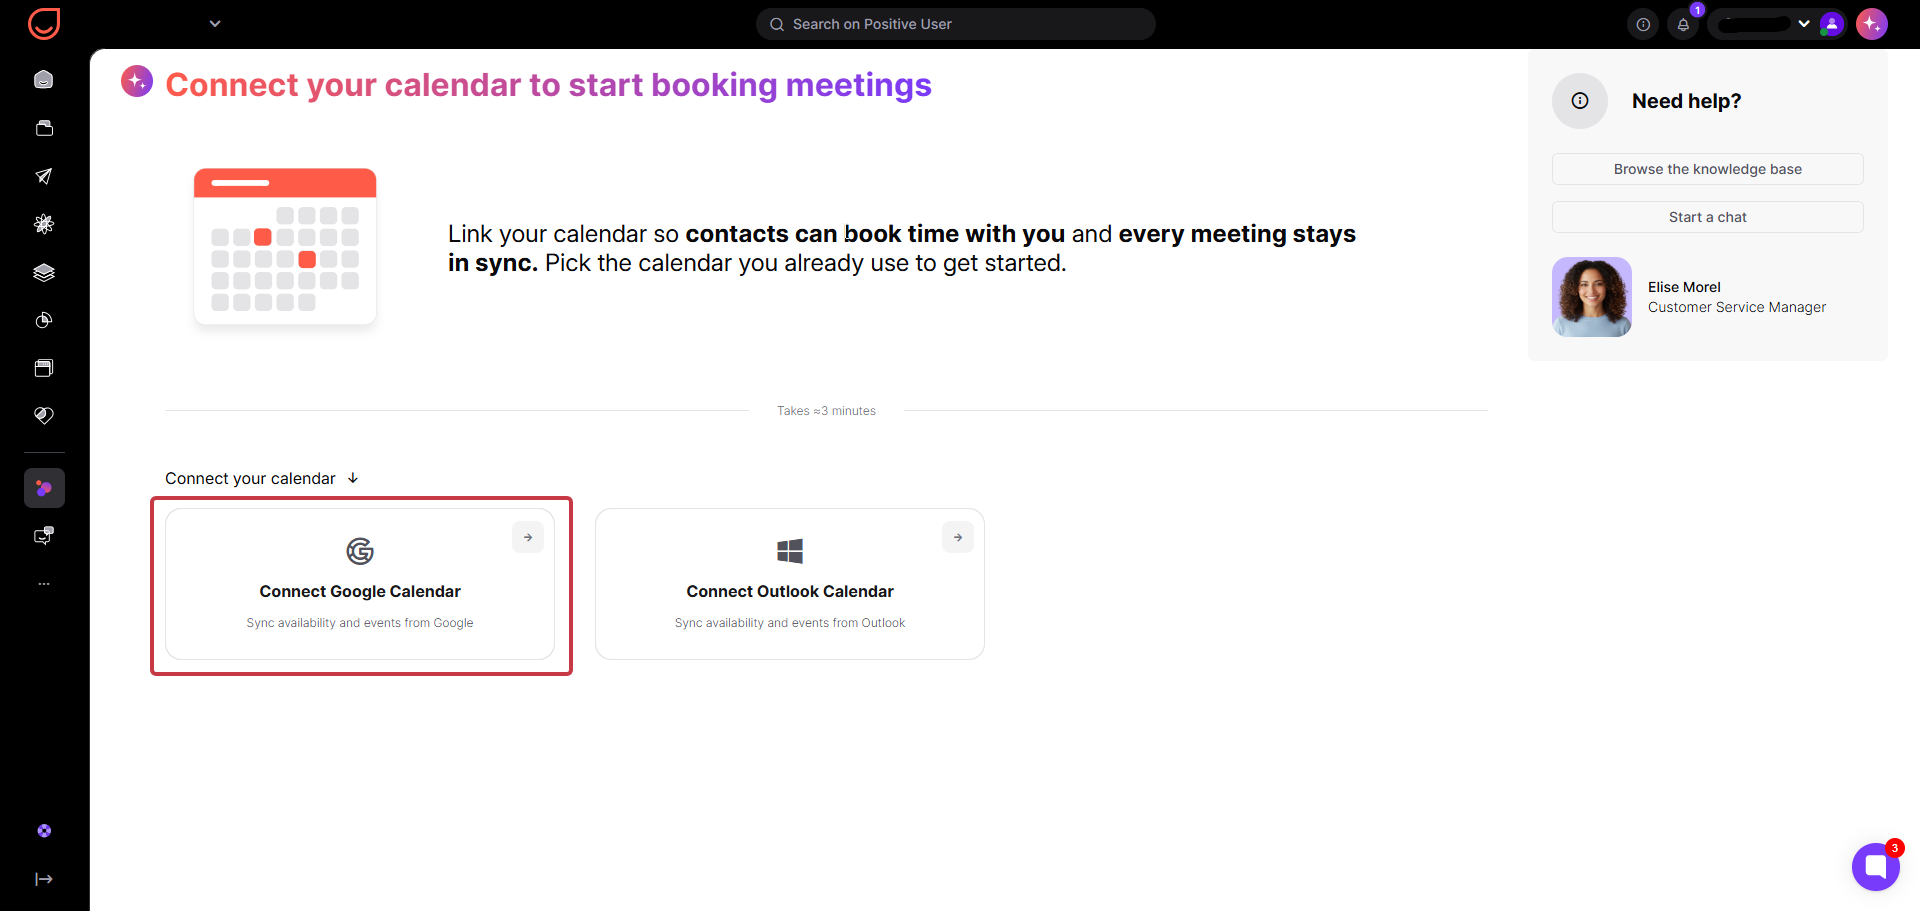
Go to "Workspace Settings" → "Meetings" → "General settings" or “Sales” → “Meetings”. Click the "Connect Google calendar" button in the center of the screen. You will be redirected to the Google sign-in page, where you select your Google account and click "Allow" to grant permission.
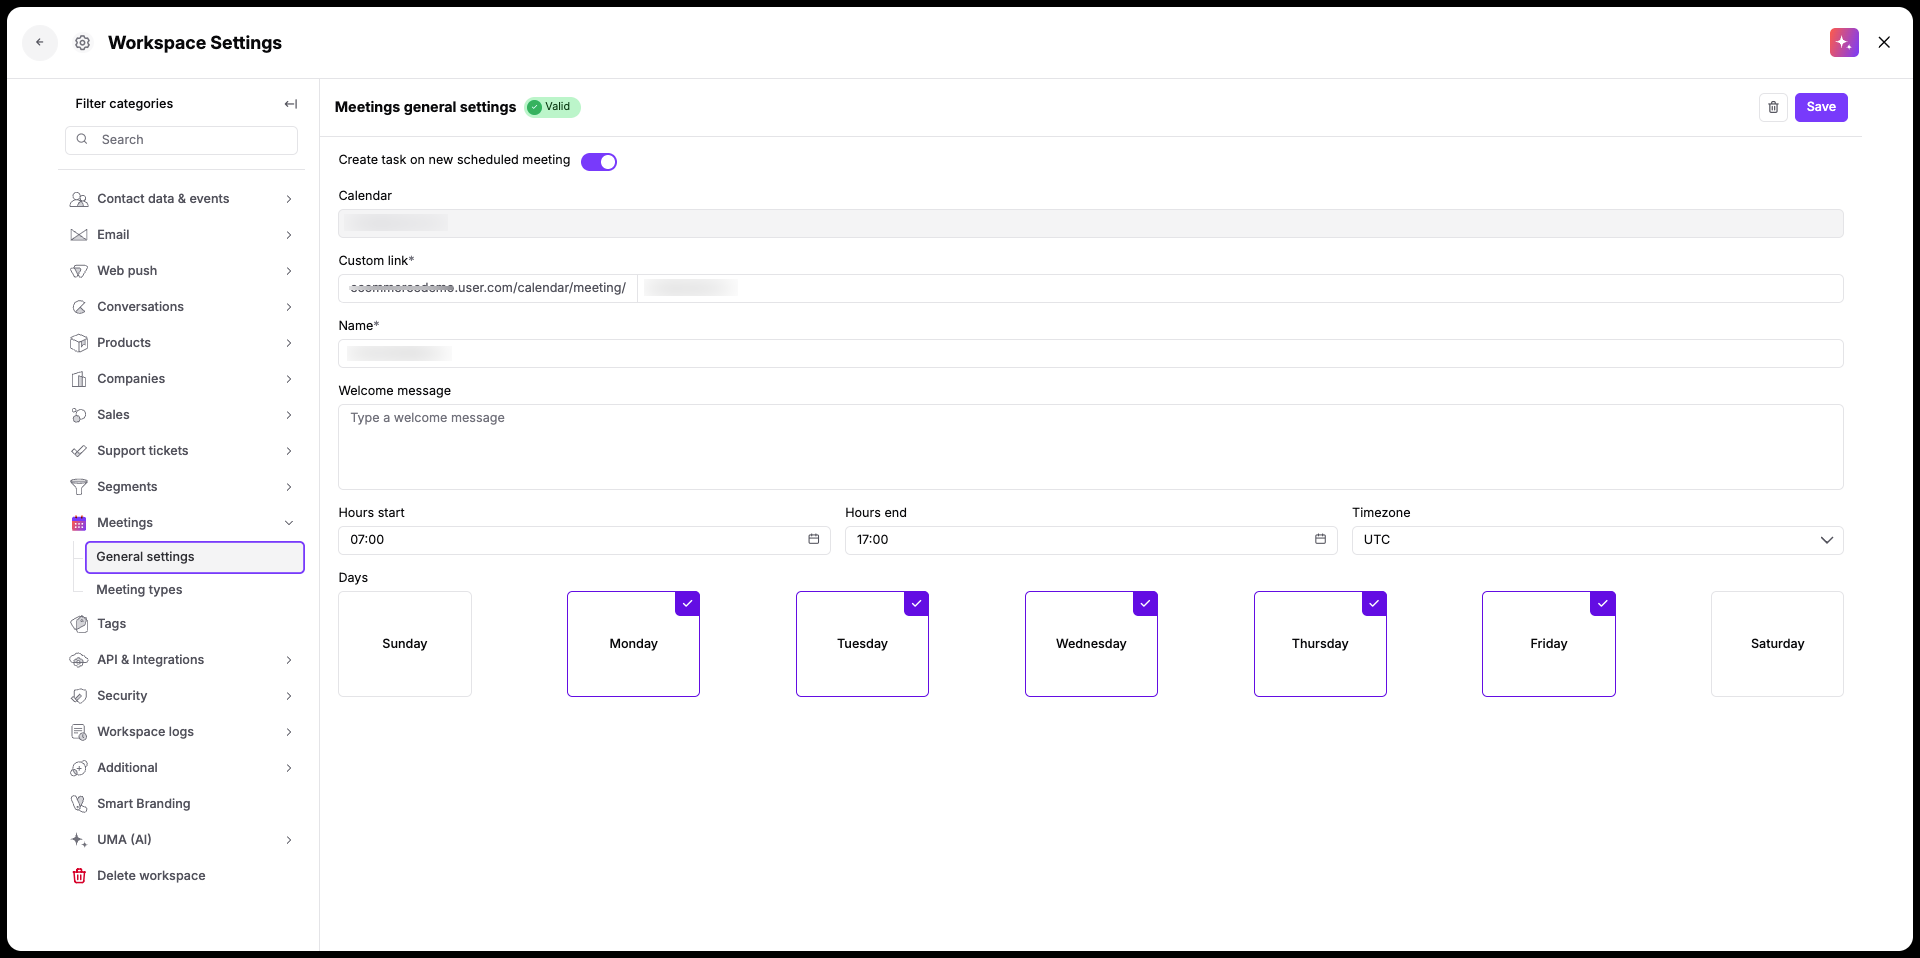
You will be automatically redirected back to the app. In "General settings", you can customize how contacts view and book time on your calendar.
Configure the following fields:
Create task on new scheduled meeting: Turn on this toggle if you want Positive User to automatically create a meeting task in "Sales" → "Tasks" whenever a contact books a call.
Custom link: Customize the URL endpoint for your public calendar page where contacts go to book meetings.
Name: Enter the display name contacts see at the top of your booking page.
Welcome message: Add a custom greeting or brief instructions visible to contacts visiting your calendar page.
Hours start and Hours end: Define the daily timeframe during which contacts can schedule meetings. This does not need to match your full working day; it strictly sets the window open for meeting bookings.
Timezone: Select your local time zone so your availability accurately maps to your calendar slots.
Days: Toggle specific days of the week on or off to make them available or unavailable for bookings.
Click the "Save" button in the top right corner to apply your changes.
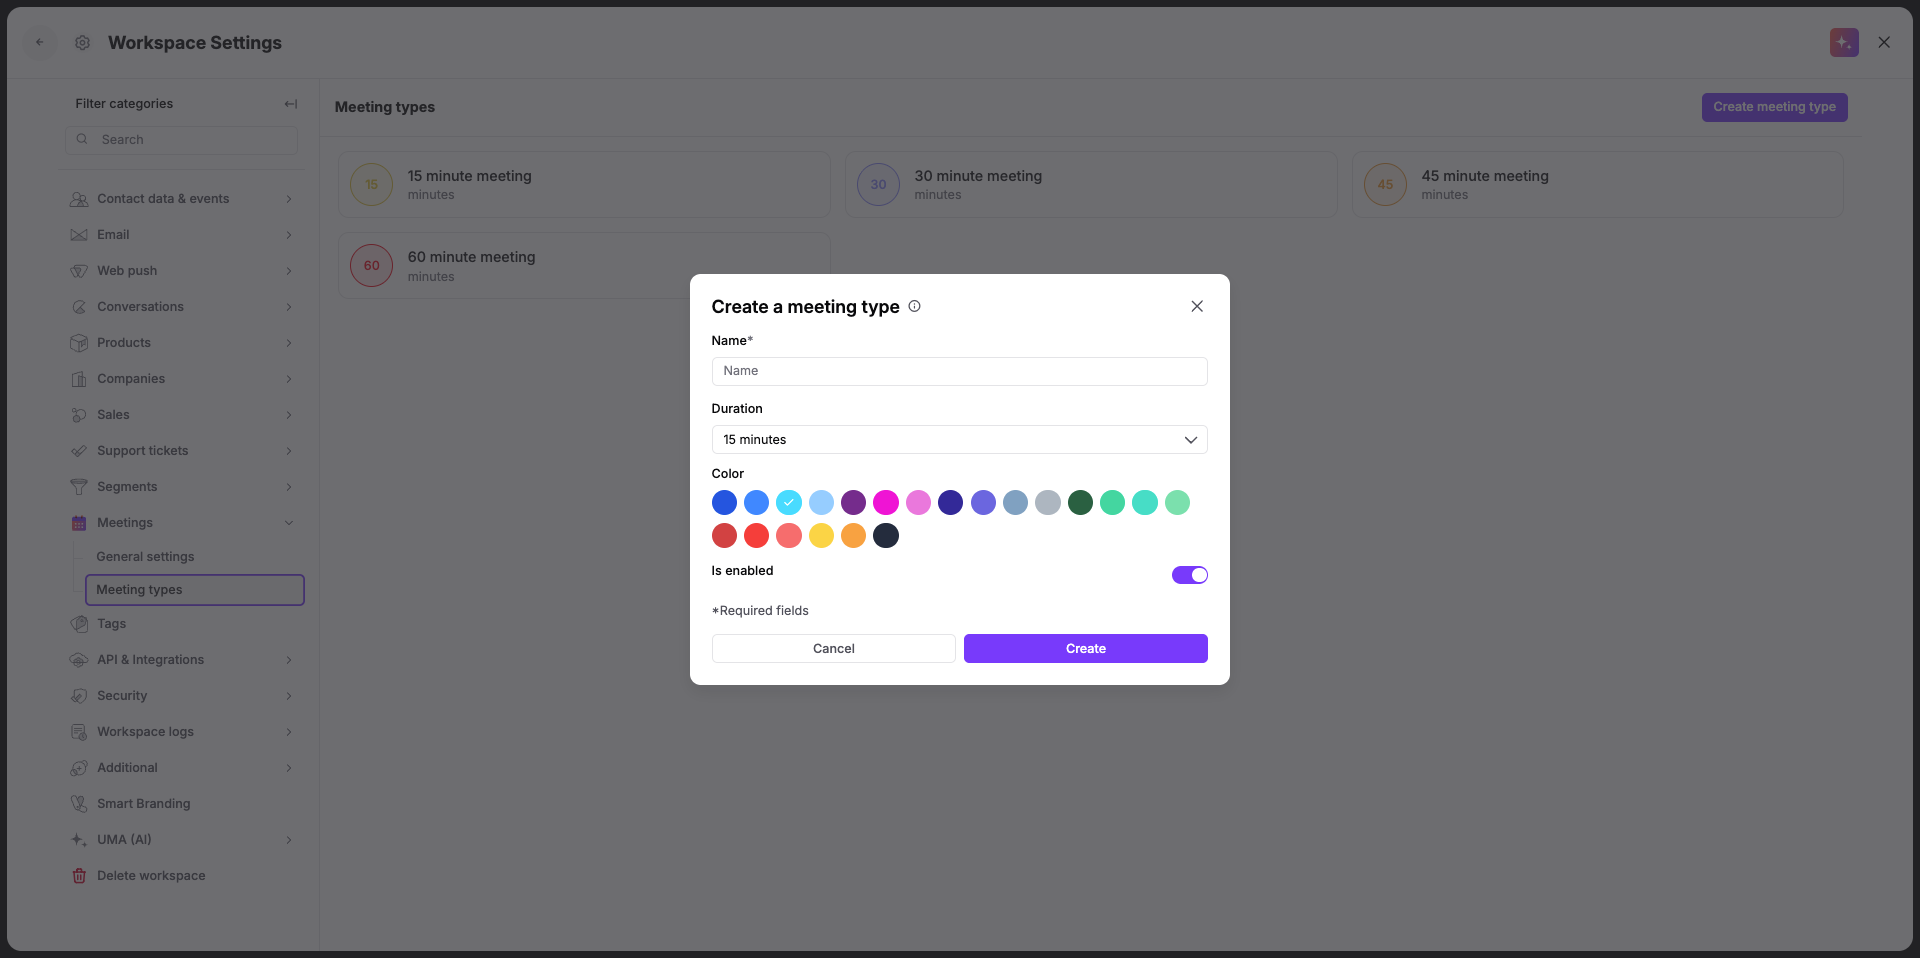
Go to "Workspace Settings" → "Meetings" → "Meeting Types" and click the "Create Meeting Type" button in the top right corner.
In the pop-up window, configure your meeting details:
Name: Enter a title for the meeting (for example, "15 Minute Demo").
Duration: Choose how long the meeting slot should last from the dropdown menu.
Color: Pick a color tag from the palette to categorize this meeting type visually.
Is enabled: Keep this toggle on to display this meeting option on your public booking page, or turn it off to temporarily hide special or temporary meeting types.
Click "Create" to save your new meeting type.
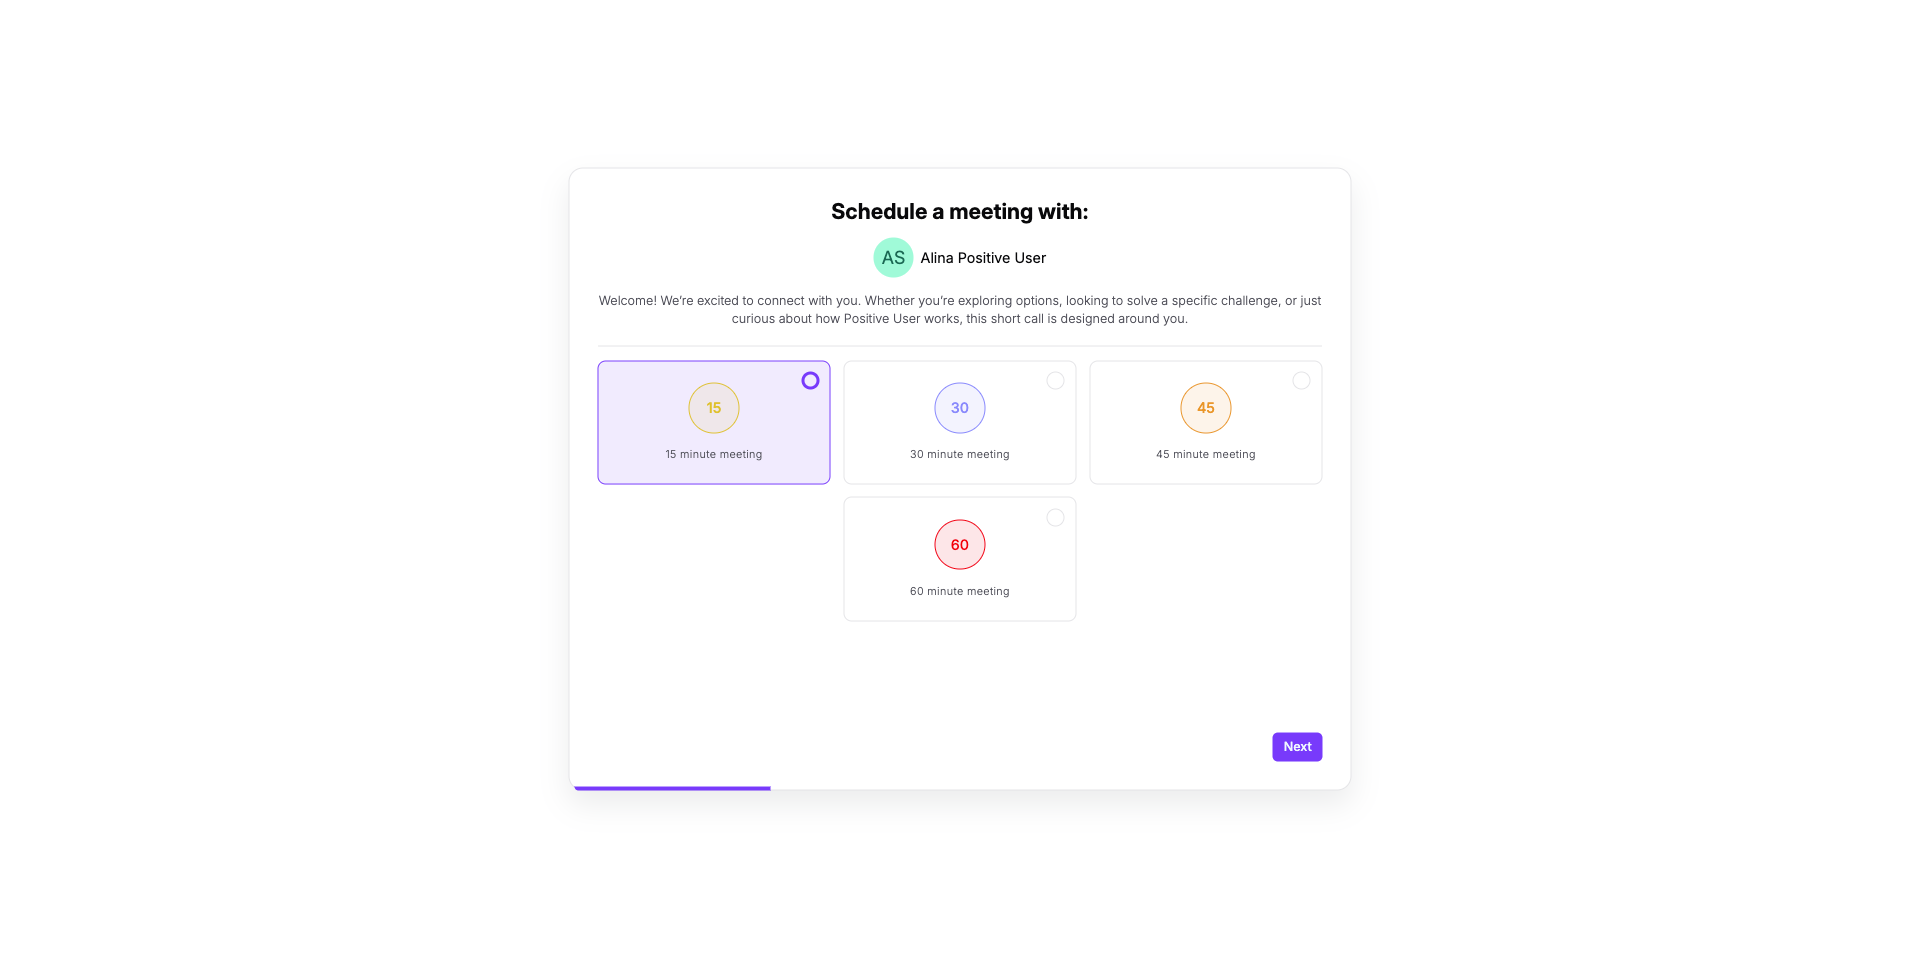
Copy your custom booking link from the “Sales” → "Meetings" section and share it with your contacts or embed it in your communications.
When a contact visits your booking page, they select a meeting type, pick an available date and time slot from your Google Calendar, and complete the form with their contact details.
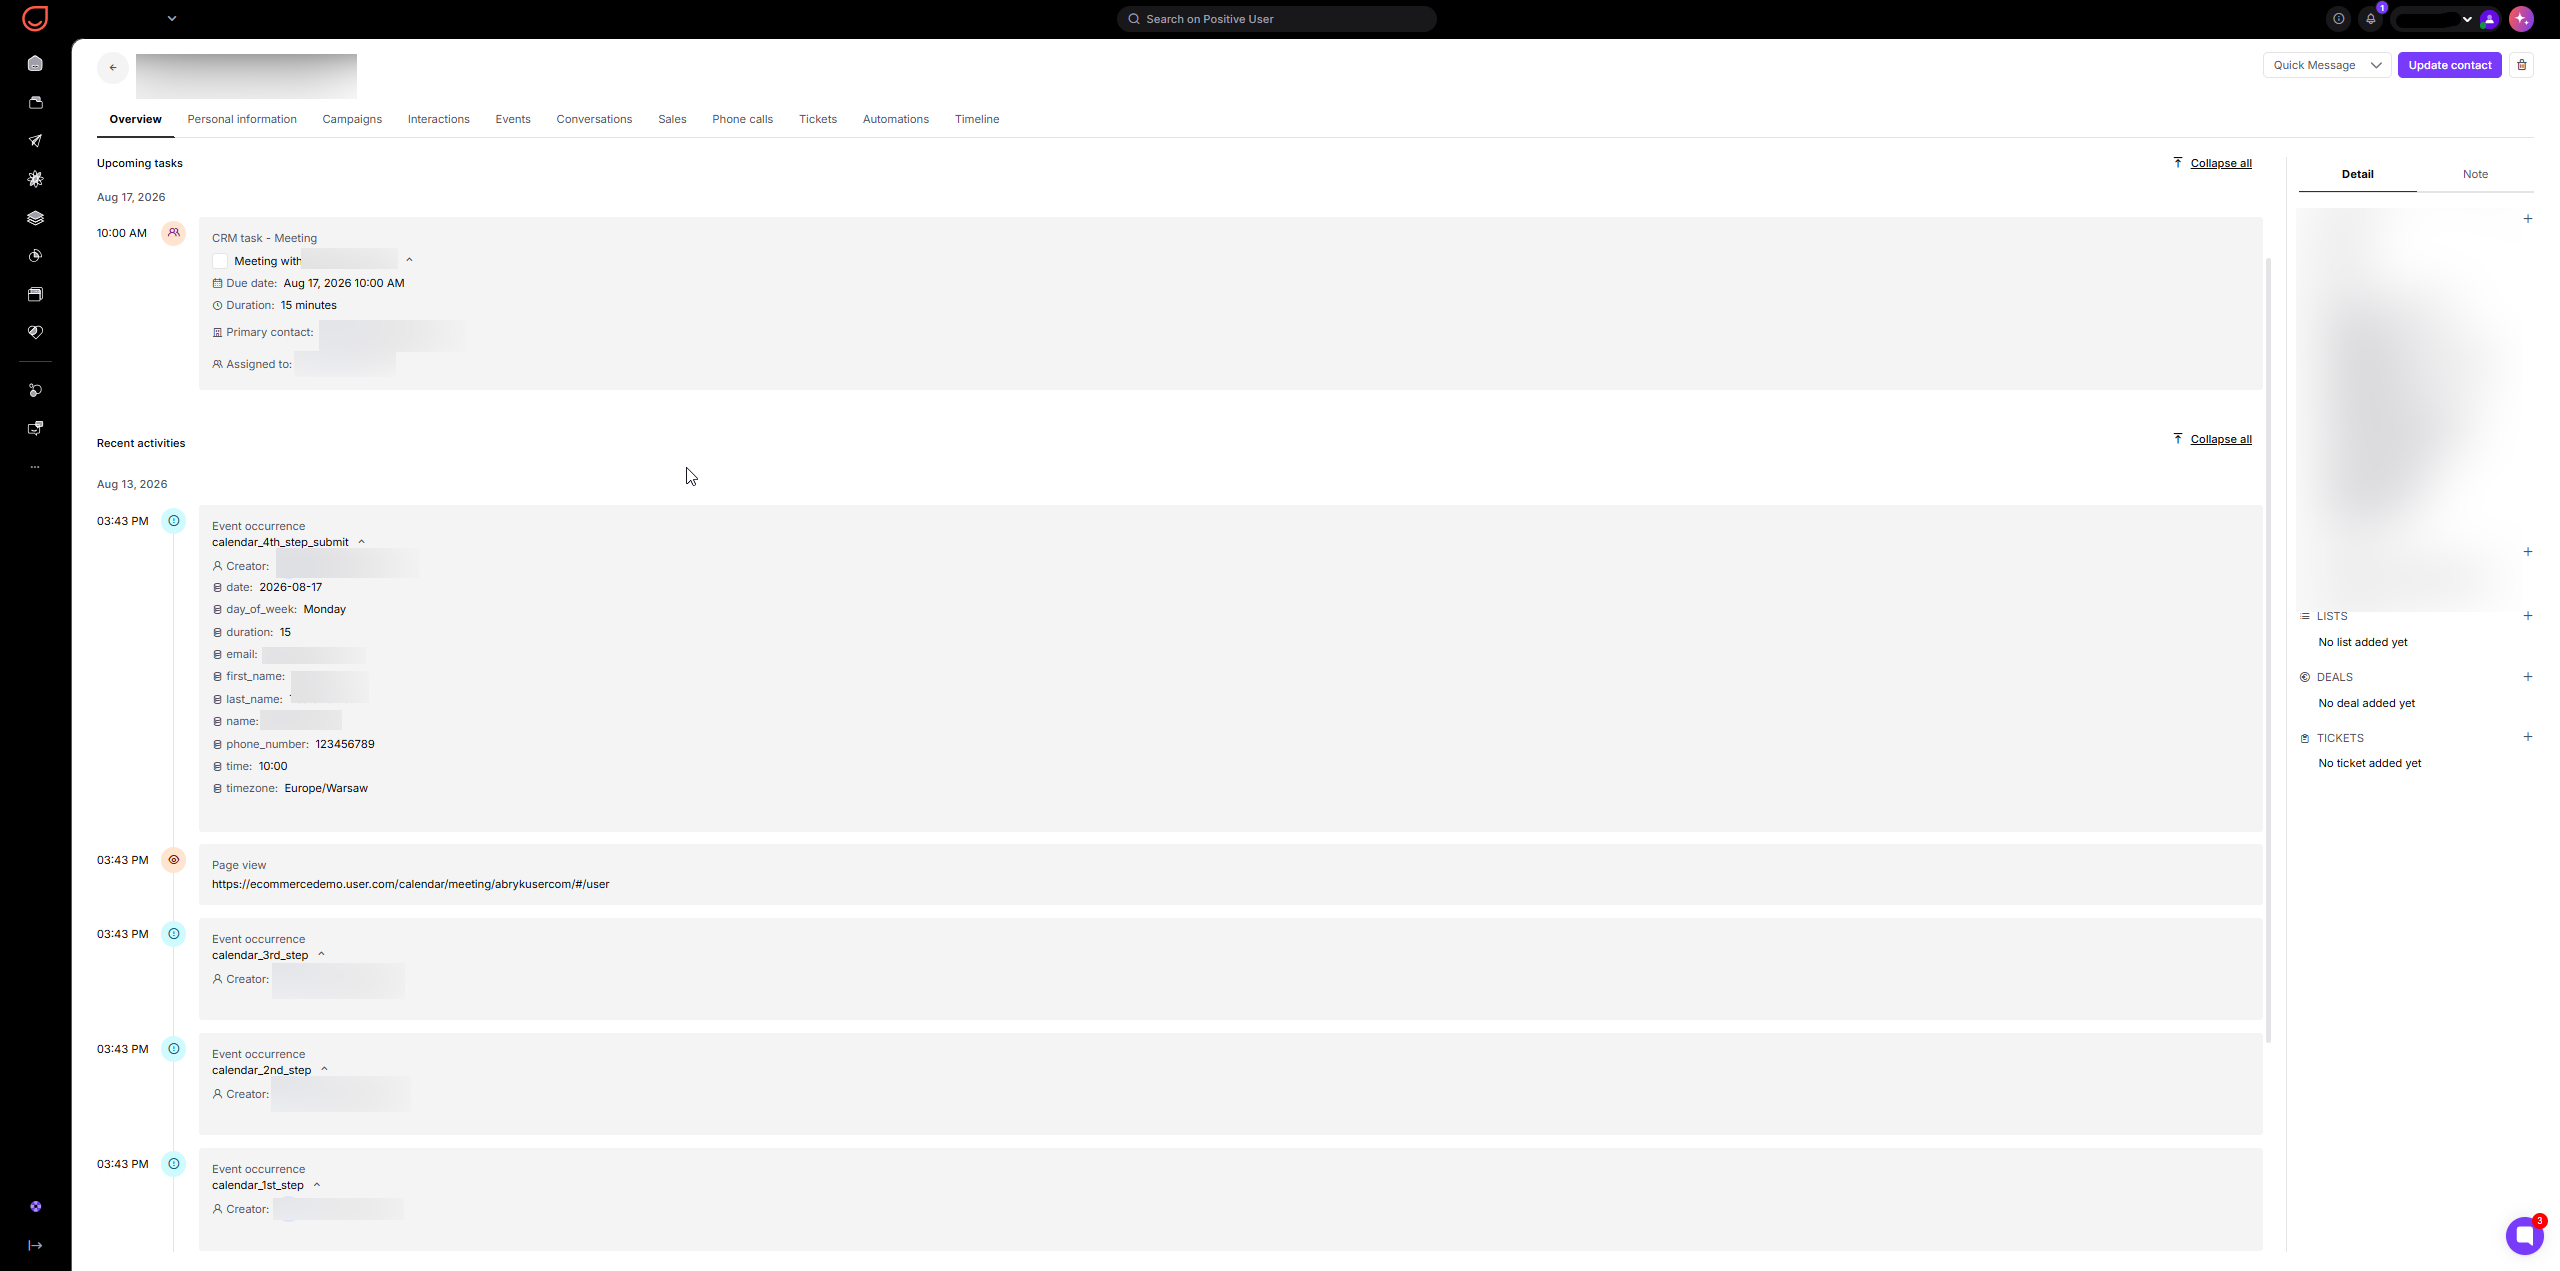
When a contact schedules a call on your calendar page, Positive User automatically tracks their progress directly on their contact profile timeline.
The system logs three event occurrences as the contact moves through the booking flow:
calendar_1st_step: Triggered when a contact visits your calendar booking page.
calendar_2nd_step: Triggered when a contact chooses a meeting type and selects a time slot.
calendar_3rd_step: Triggered when a contact fills out their details and submits the form.
calendar_4rd_step_subbmit: Triggered when a contact navigates to the appointment confirmation page.
You can use these step-by-step events in automations to re-engage contacts who started booking a call but abandoned the process before completing it.
Once the call is scheduled, a "Meeting" entry task is automatically added to the contact profile timeline and logged in "Sales" → "Meetings".
Automated Demo Scheduling: Share your calendar link in marketing campaigns or live chats so prospective contacts can instantly book a meeting without back-and-forth emails.
Streamlined Sales Management: Automatically log every booked meeting as a task in "Sales" → "Meetings" so team members get instant notifications and clear CRM task tracking.
Re-engage Incomplete Bookings: Use “calendar_1st_step” or “calendar_2nd_step” in automations to send an automated email or message if a contact leaves the booking page without confirming a slot.