Connecting your Outlook calendar allows your team to sync meeting availability directly with Positive User. This ensures your contacts can book time on your schedule without back-and-forth emails or double-booking risks.
Go to "Workspace Settings" → "Meetings" → "General settings" or “Sales” → “Meetings”. Select Outlook from the available calendar options and click "Connect".
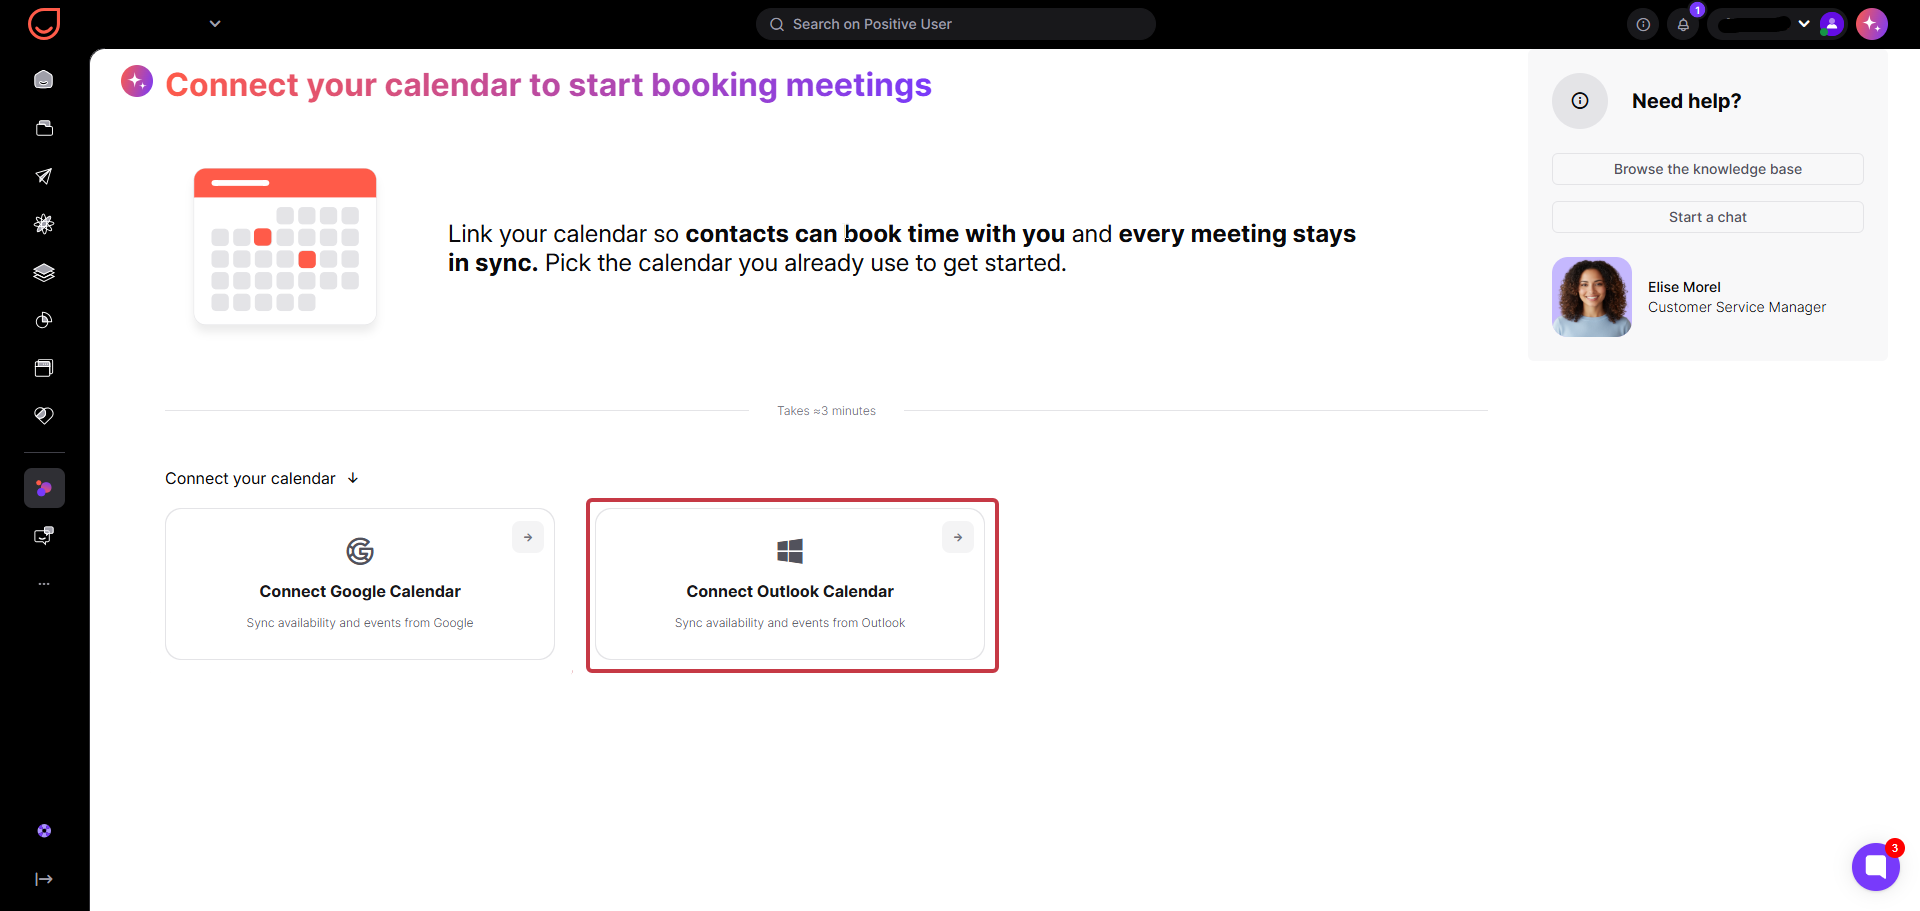
Log in and grant access to your Microsoft account. In the pop-up window, click "Sign in with Microsoft", enter your login credentials, and click "Accept" to allow Positive User to read your availability.
You will also receive an email confirmation in case of successful connection from Outlook.
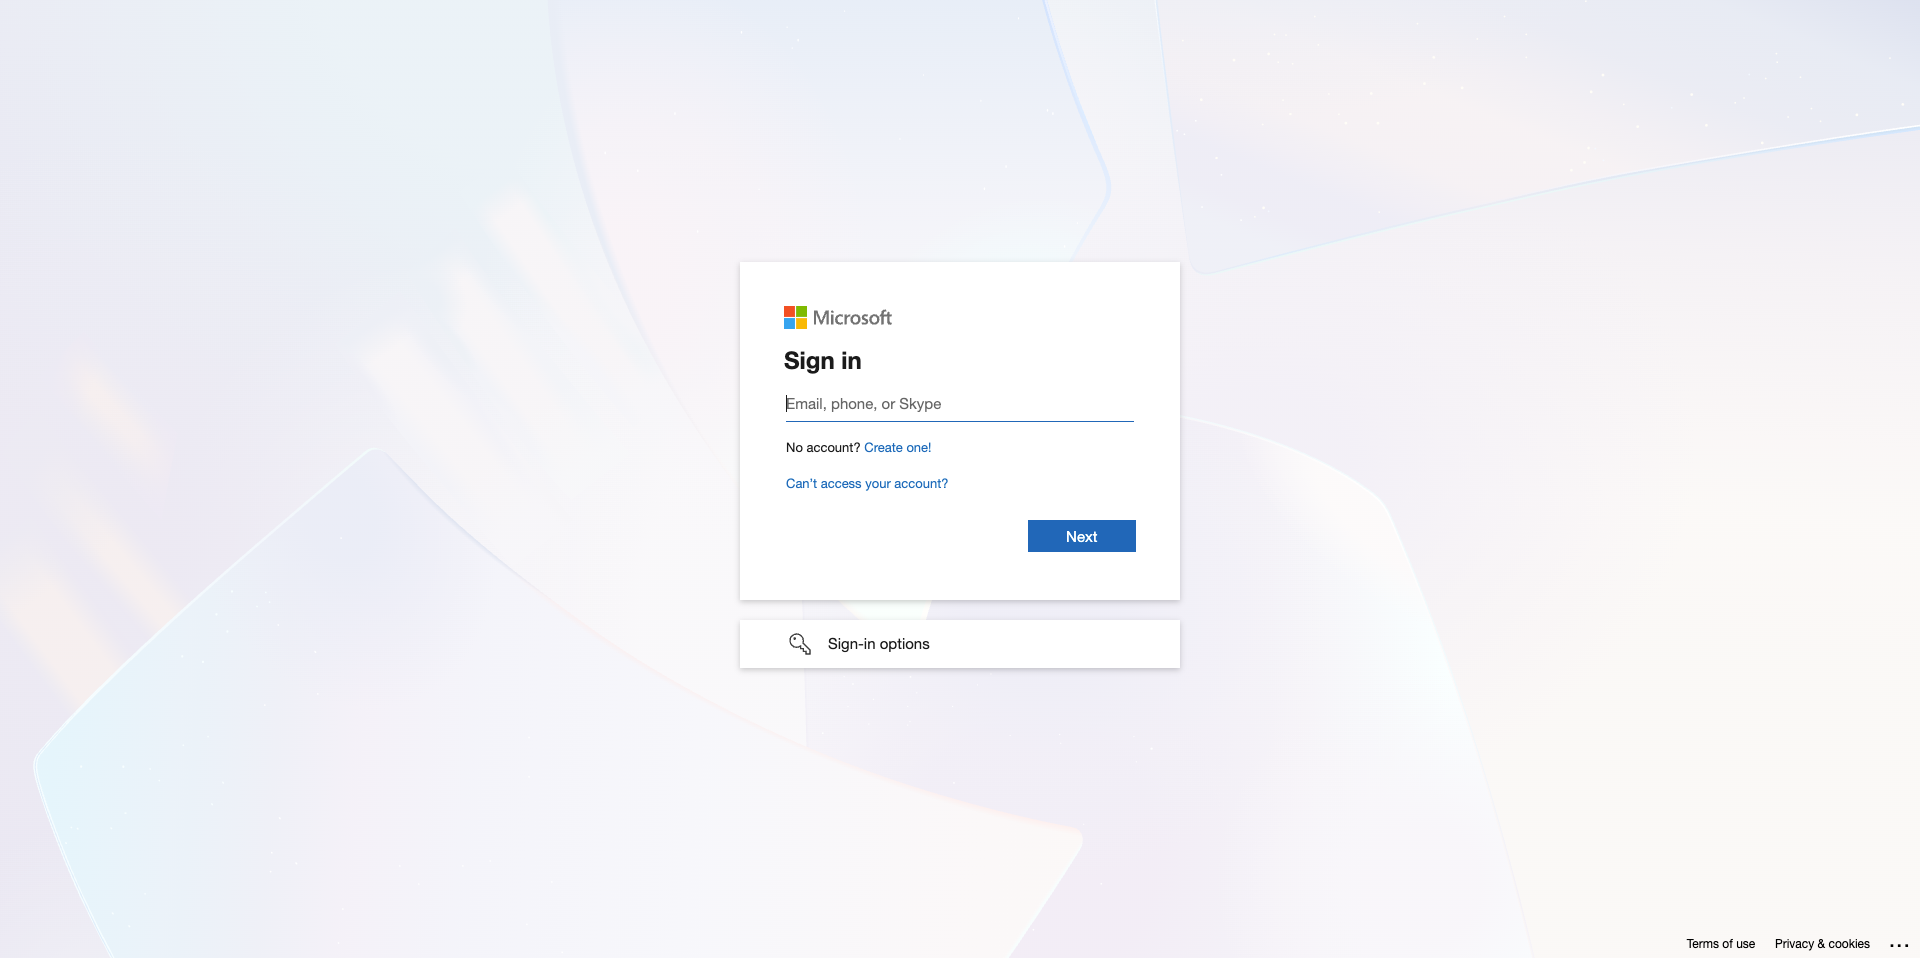
Once authorized, Positive User brings you back to "General settings". Here, you can customize how your scheduling page functions and when contacts can book time with you.
Configure the following fields:
Create task on new scheduled meeting: Turn on this toggle if you want Positive User to automatically create a meeting task in "Sales" → "Tasks"/”Meetings” whenever a contact books a call.
Custom link: Customize the URL endpoint for your public calendar page where contacts go to book meetings.
Name: Enter the display name contacts see at the top of your booking page.
Welcome message: Add a custom greeting or brief instructions visible to contacts visiting your calendar page.
Hours start and Hours end: Define the daily timeframe during which contacts can schedule meetings. This does not need to match your full working day; it strictly sets the window open for meeting bookings.
Timezone: Select your local time zone so your availability accurately maps to your calendar slots.
Days: Toggle specific days of the week on or off to make them available or unavailable for bookings.
Click the "Save" button in the top right corner to apply your changes.
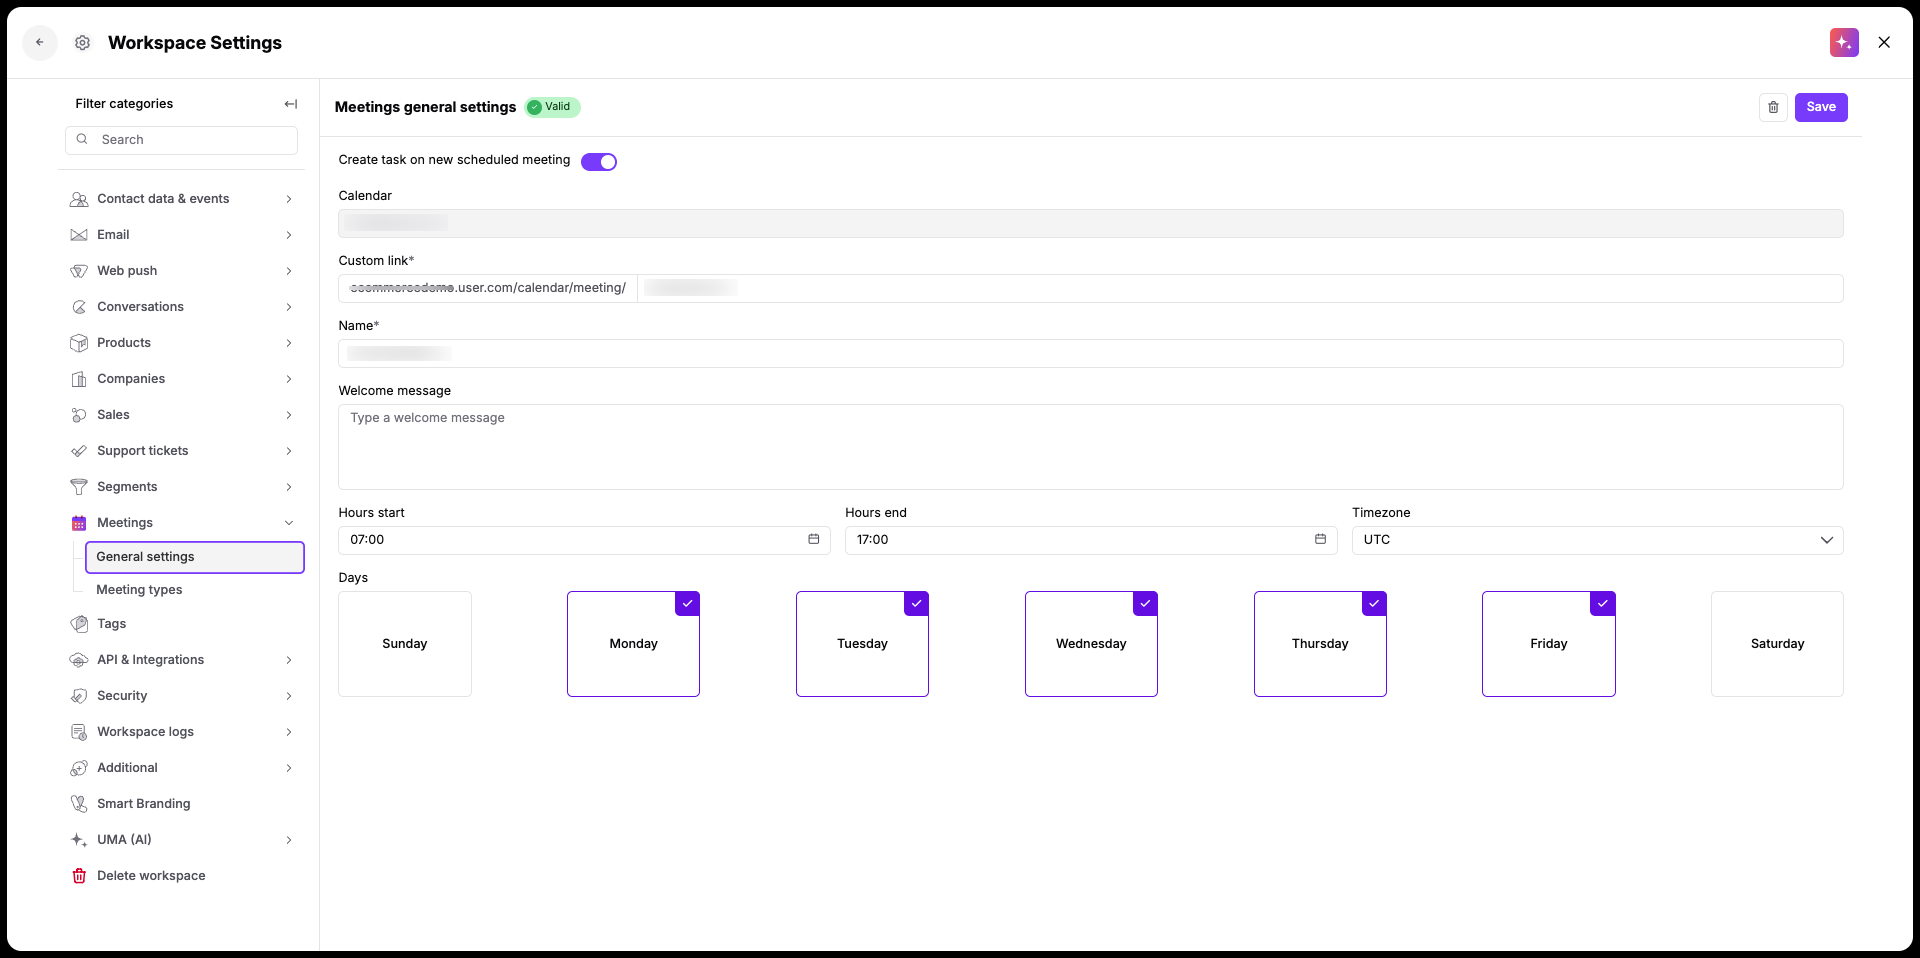
Go to "Workspace Settings" → "Meetings" → "Meeting Types" and click the "Create Meeting Type" button in the top right corner.
In the pop-up window, fill in your meeting options:
Name: Enter a title for the meeting (for example, "15 Minute Demo").
Duration: Choose how long the meeting slot should last from the dropdown menu.
Color: Pick a color tag from the palette to categorize this meeting type visually.
Is enabled: Keep this toggle on to display this meeting option on your public booking page, or turn it off to temporarily hide special or temporary meeting types.
Click "Create" to save your meeting type.
Copy your custom booking link from the "Sales" → "Meetings" page and share it with your contacts or include it in your communication channels.
When a contact visits your page, they choose a meeting type, select an open date and time slot synced from your Outlook Calendar, and enter their information to complete the booking.
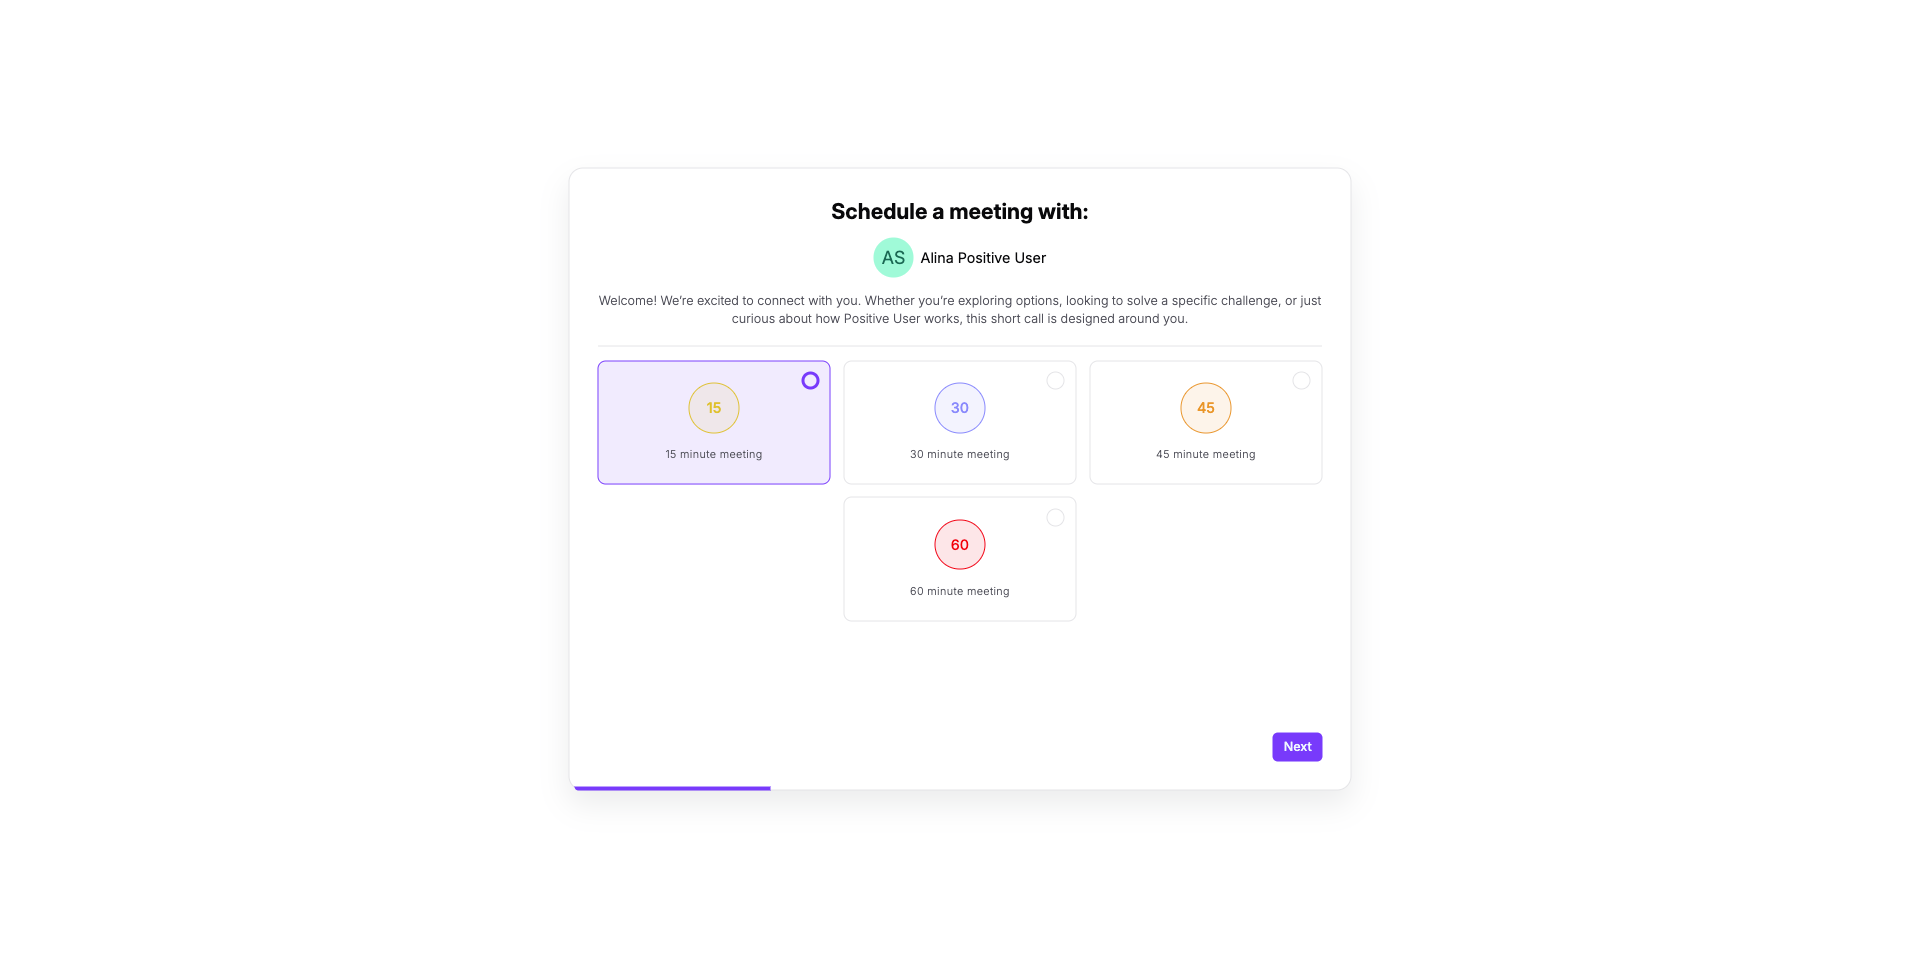
Whenever a contact schedules a call, Positive User logs their actions directly onto their contact profile timeline.
The system logs three event occurrences as the contact moves through the booking flow:
calendar_1st_step: Triggered when a contact visits your calendar booking page.
calendar_2nd_step: Triggered when a contact chooses a meeting type and selects a time slot.
calendar_3rd_step: Triggered when a contact fills out their details and submits the form.
calendar_4rd_step_subbmit: Triggered when a contact navigates to the appointment confirmation page.
You can use these event logs inside automations to follow up with contacts who started booking a call but abandoned the form before completing it.
After a booking is completed, Positive User automatically logs a "Meeting" task onto the contact profile timeline and adds it to "Sales" → “Meetings” / "Tasks".
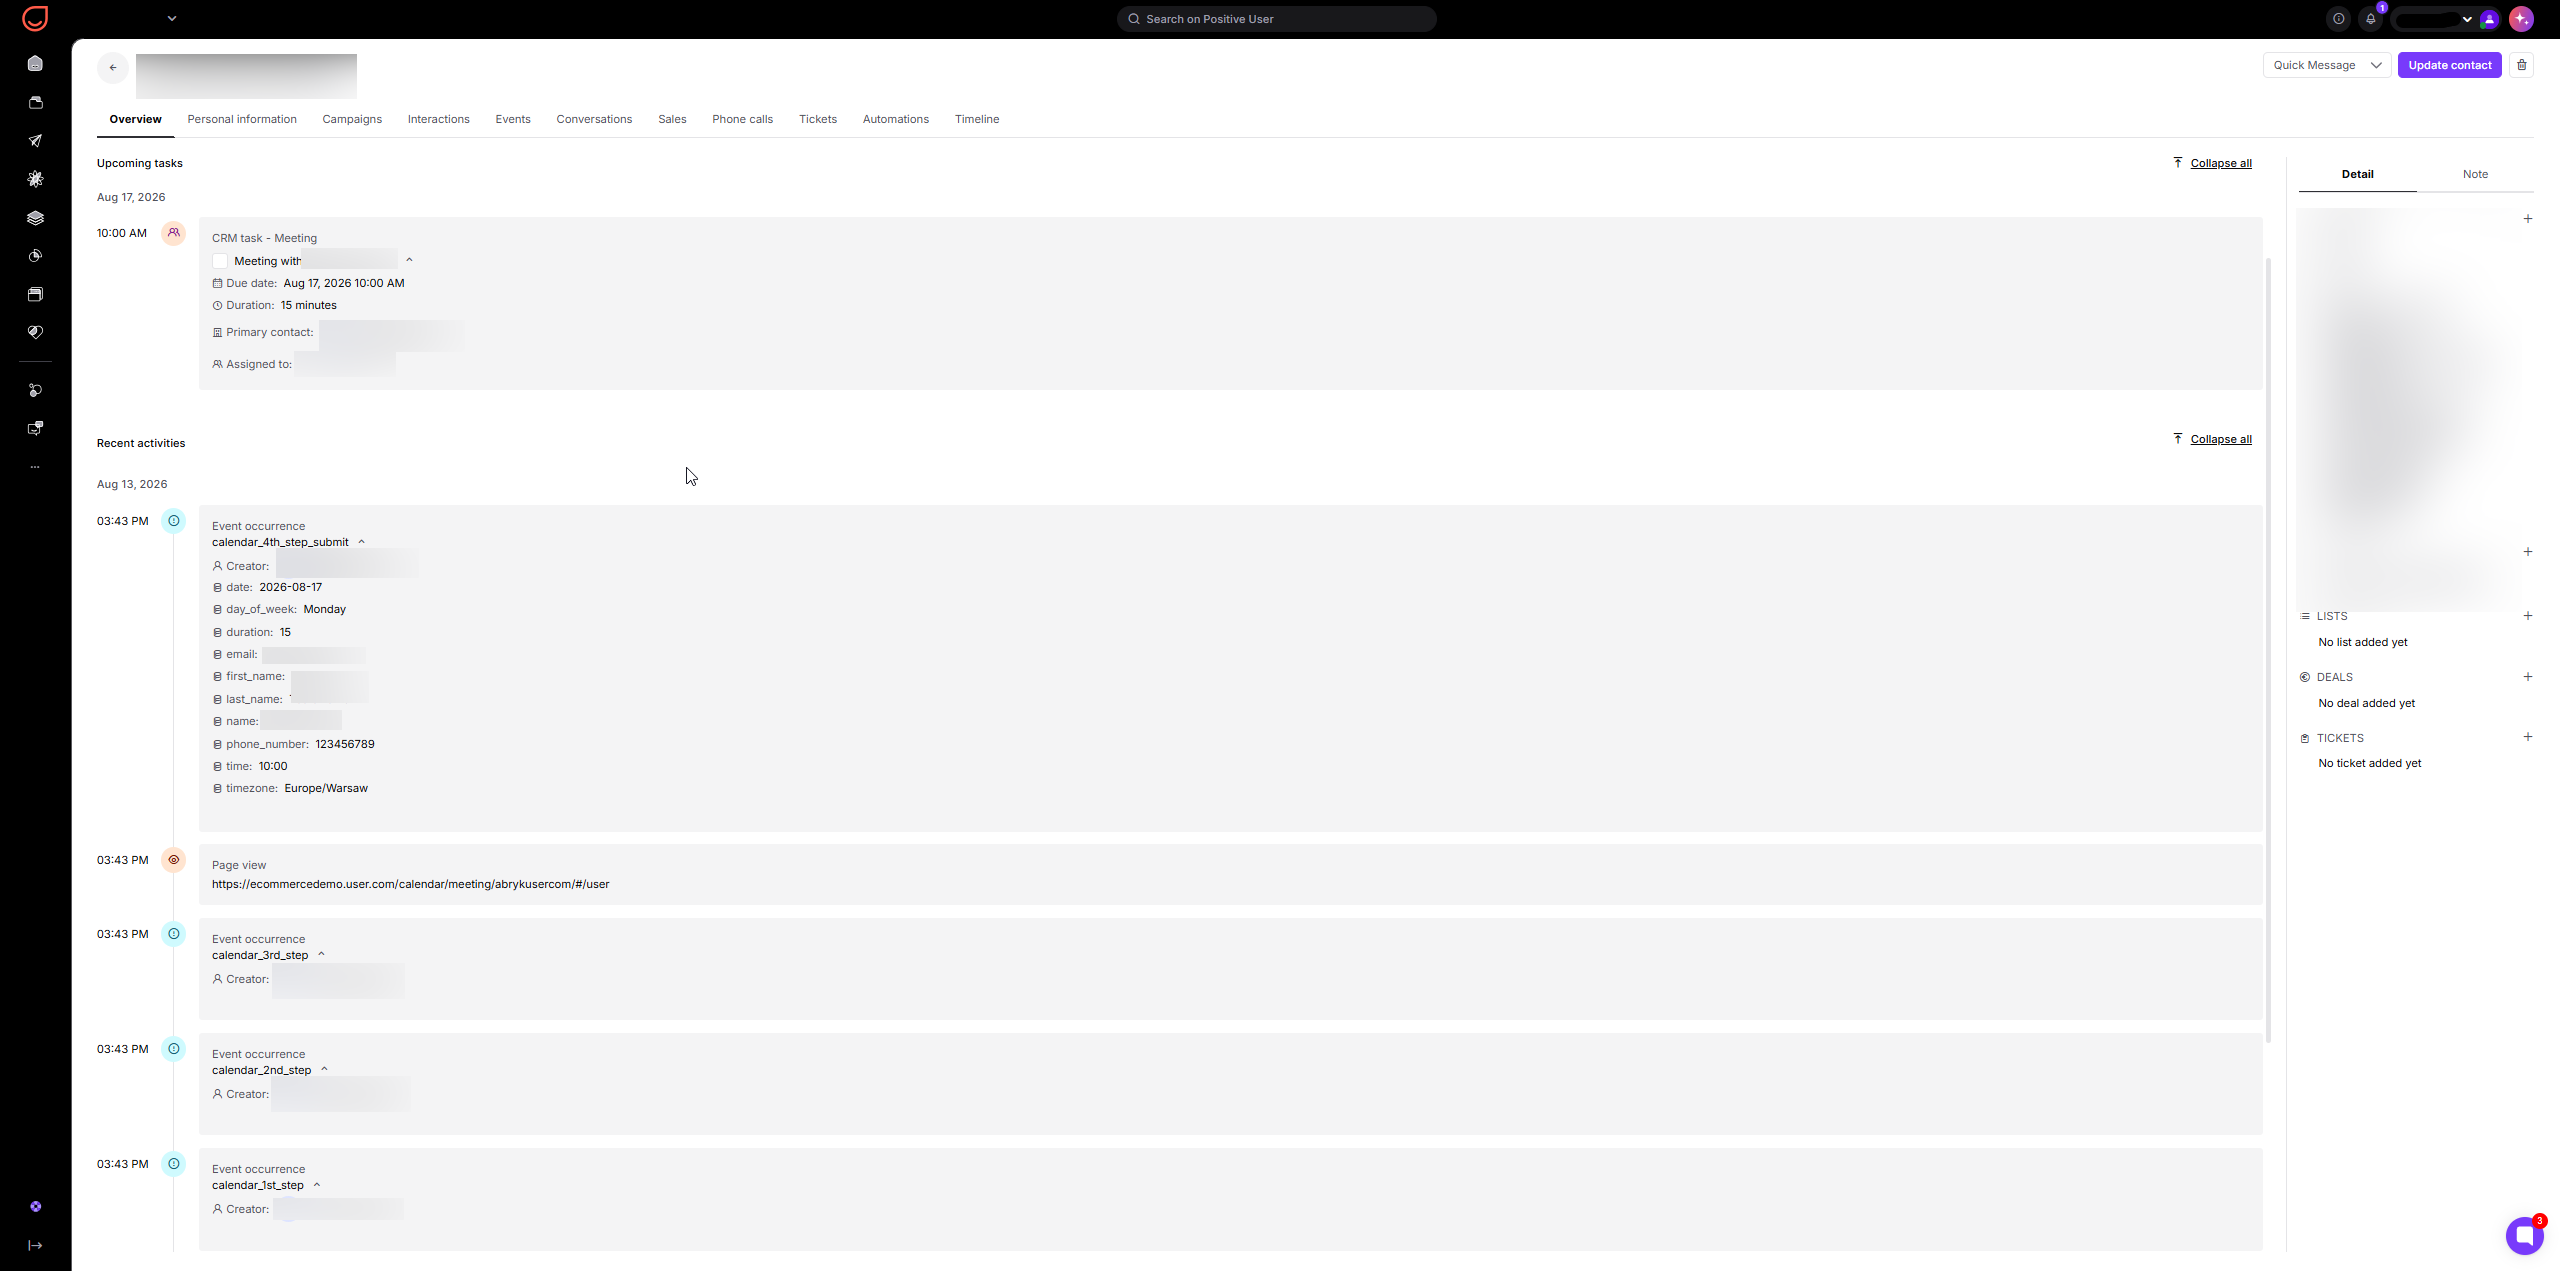
Automated Demo Scheduling: Share your booking link in marketing campaigns, automated emails, or live chat conversations so prospective contacts can instantly schedule a call without delay.
Client Onboarding Calls: Include dedicated booking links in post-purchase welcome messages so new customers can schedule setup consultations with their assigned team members.
Support & Consultation Routing: Allow contacts to schedule technical reviews directly from support ticket replies, eliminating back-and-forth communication for support specialists.