An automated mobile push notification delivers timely messages directly to your contacts' mobile device screens, even when your mobile app is closed. This campaign format helps your team engage contacts at the exact moment they take an action - such as completing registration, leaving items in a cart, or becoming inactive - without sending manual broadcasts. In Positive User, you set up the message content once, while your automation flows handle recipient targeting and delivery timing automatically based on predefined rules and customer behaviors.
An automated mobile push campaign delivers dynamic messages triggered by individual contact behaviors, specific app events, or custom rules.
Use an automated campaign when you want to:
Welcome and onboard new contacts immediately after they install your mobile app or create an account.
Recover lost sales by reminding shoppers of items left behind in their carts.
Re-engage inactive contacts who have not opened your mobile app for a set period.
Send real-time updates, such as order status changes or delivery notifications.
In contrast, one-time push campaigns send a single broadcast to a chosen audience all at once at a specific date and time. For ongoing, behavior-driven customer journeys where recipients and delivery moments are determined automatically by automation conditions, choose an automated campaign.
Before building an automated push notification campaign, ensure you have the following elements ready:
Integrated mobile application: Your mobile application must be integrated with your Positive User Workspace.
Contacts with stored FCM keys: You must already have contacts with an FCM key stored on their profile. Push notifications cannot be delivered to contacts without an active FCM key.
Created automation flow: You need an existing automation flow (or a planned automation scenario) where your campaign will be assigned after creation to trigger the push notification.
Follow these steps to configure, compose, and prepare your automated mobile push notification campaign.
Go to "Campaigns" → "Mobile App Marketing" → "Push Notifications". This opens your workspace list of existing push notification campaigns.
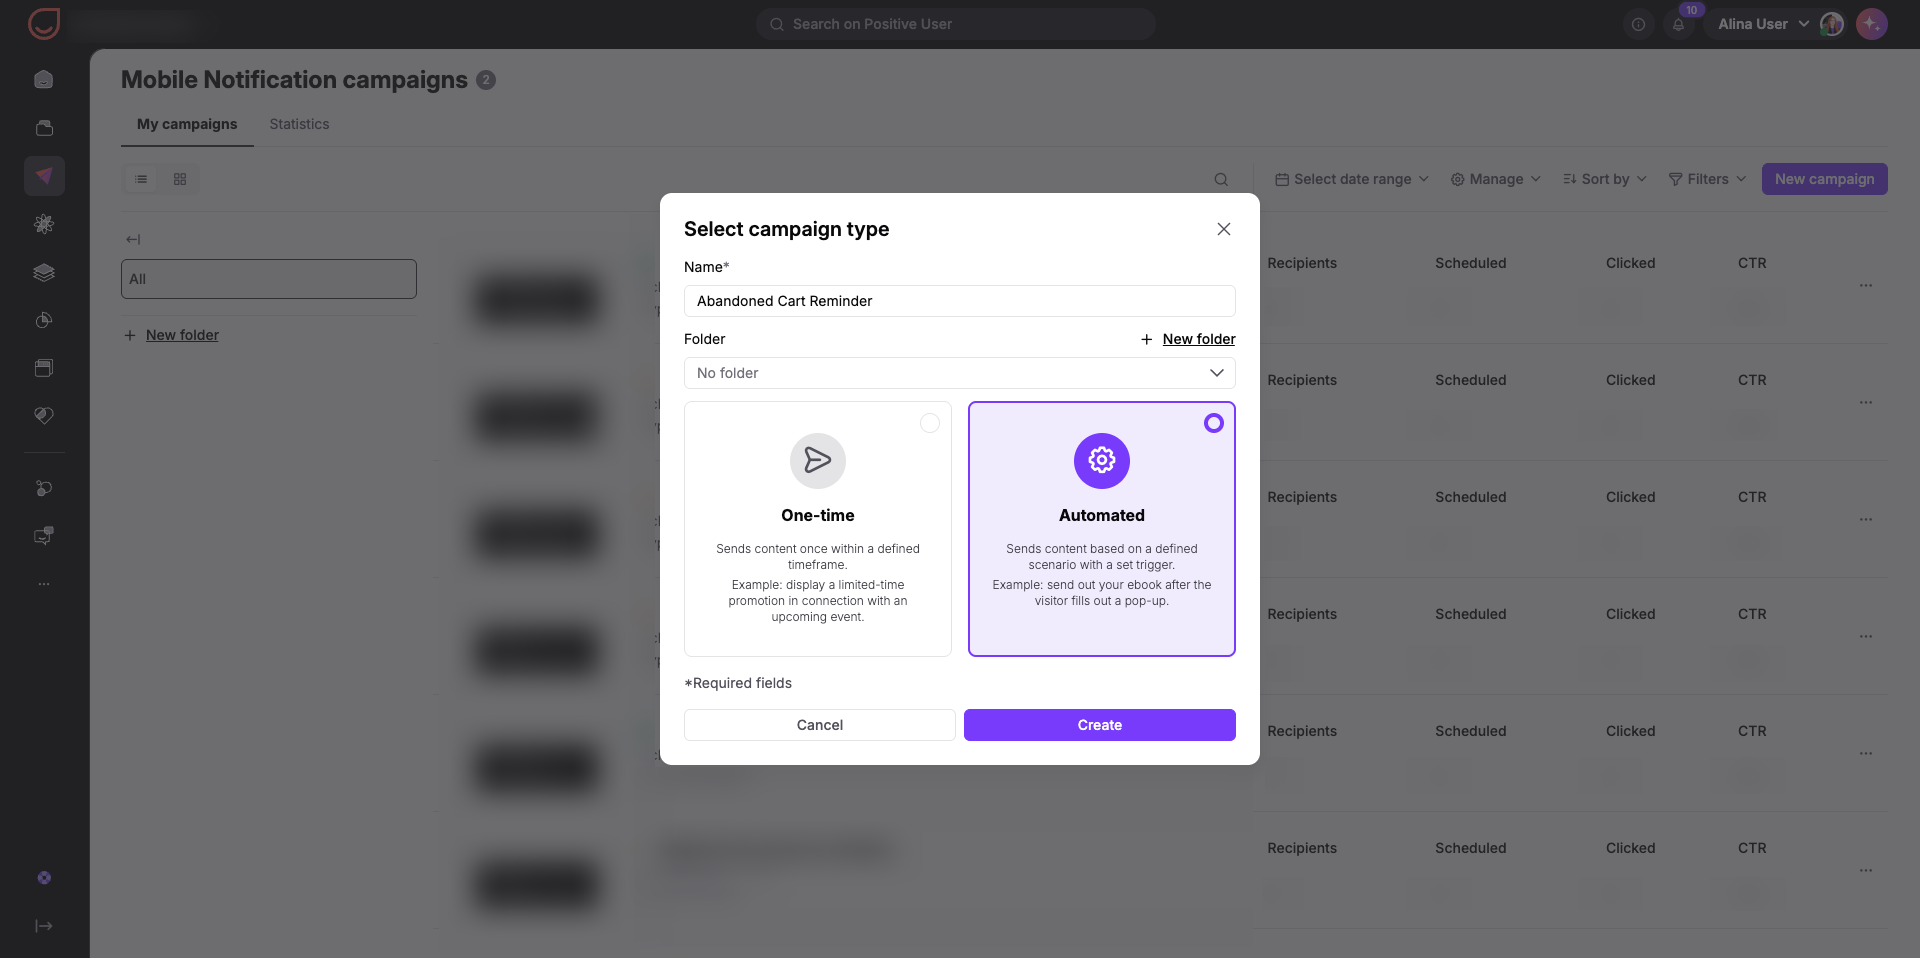
In the top right corner, click the purple "New Campaign" button. A modal window titled "Select Campaign Type" will open.
Configure the basic campaign parameters:
In the "Name" field, enter an internal campaign title, such as "Abandoned Cart Reminder". Contacts will not see this name.
In the "Folder" dropdown, choose an optional folder to keep your campaigns organized.
Select "Automated" to configure this message to trigger from contact events within an automation flow.
Click "Create".
Your campaign is now saved as a draft, and the campaign editor opens with two progress steps across the top: "Messages" and "Summary".
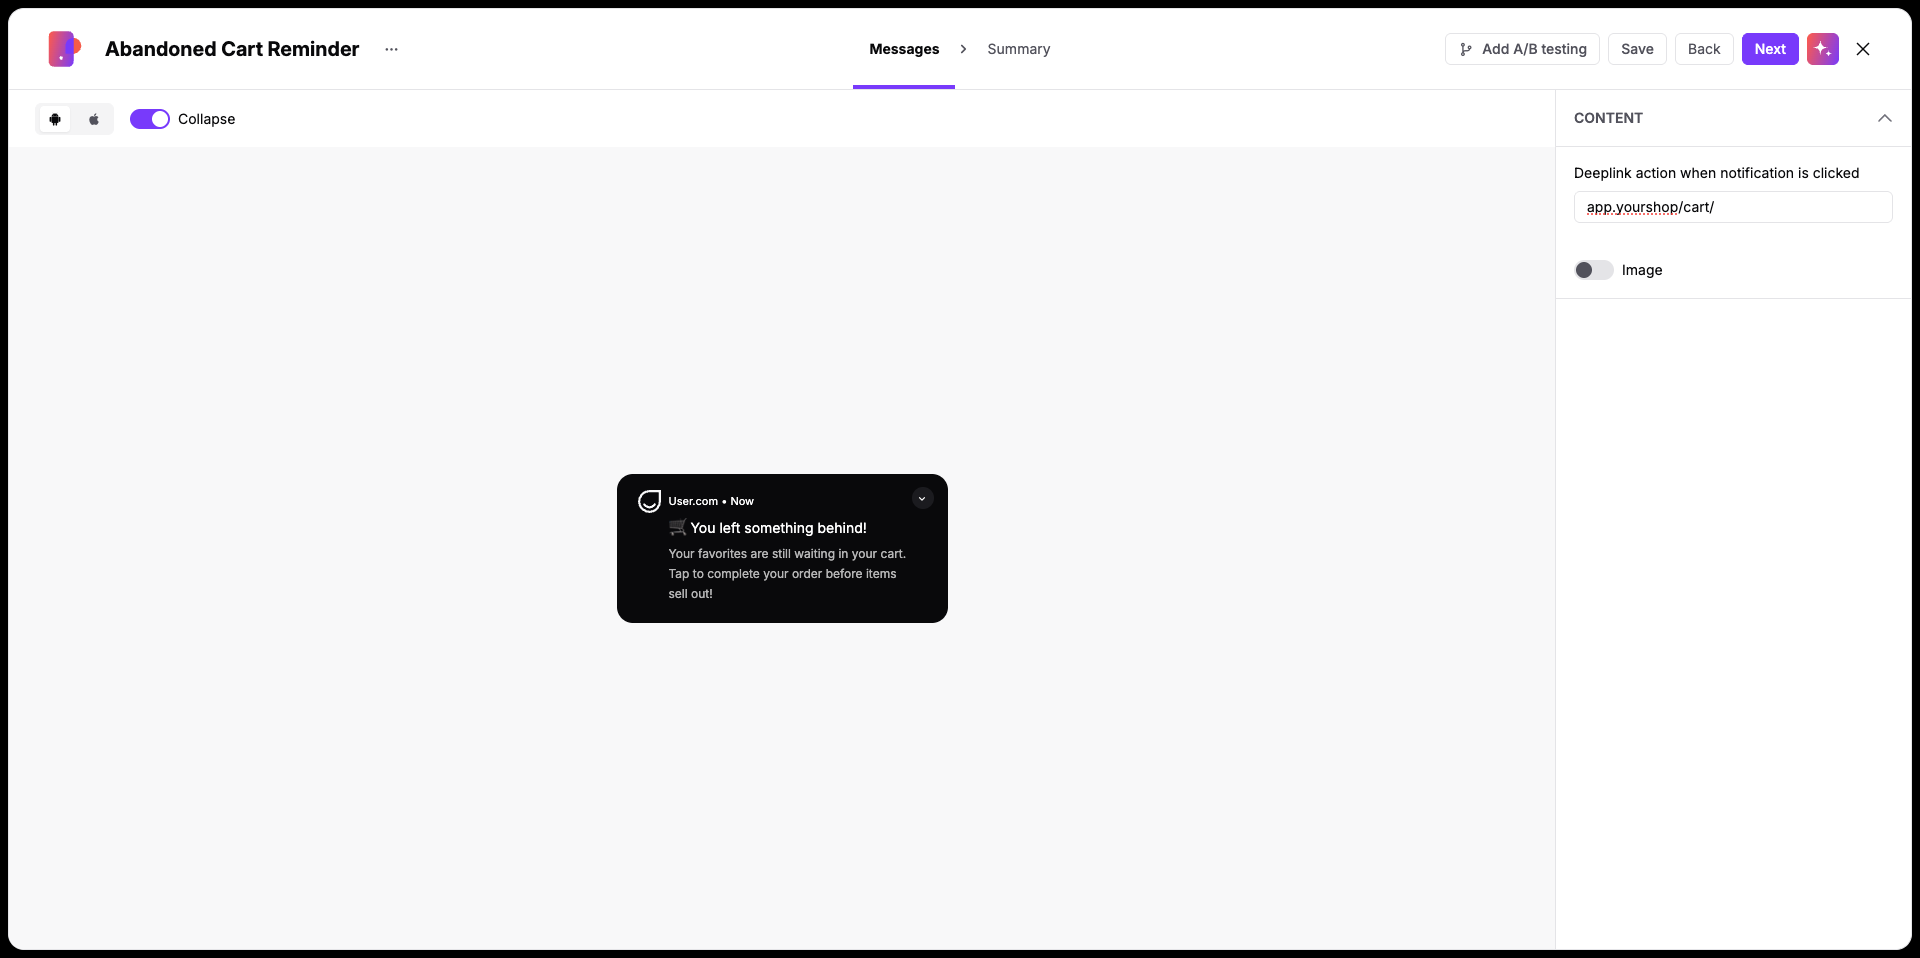
On the "Messages" step, draft your notification using the interactive mobile phone preview:
Click the default "Welcome" title field and enter your headline, such as "🛒 You left something behind!".
Click the text field below the headline and enter your copy up to 150 characters, such as "Your favorites are still waiting in your cart. Tap to complete your order before items sell out!".
Optionally, add an "Image" to include visual media in your lock screen notification.
Optionally, add a "Deeplink" to direct contacts straight to a specific page or section in your mobile app, such as their active cart.
Click "Next".
Keep your message clear and concise. Most mobile devices display only the first two lines of text on the lock screen, so place your primary offer and call to action at the beginning.
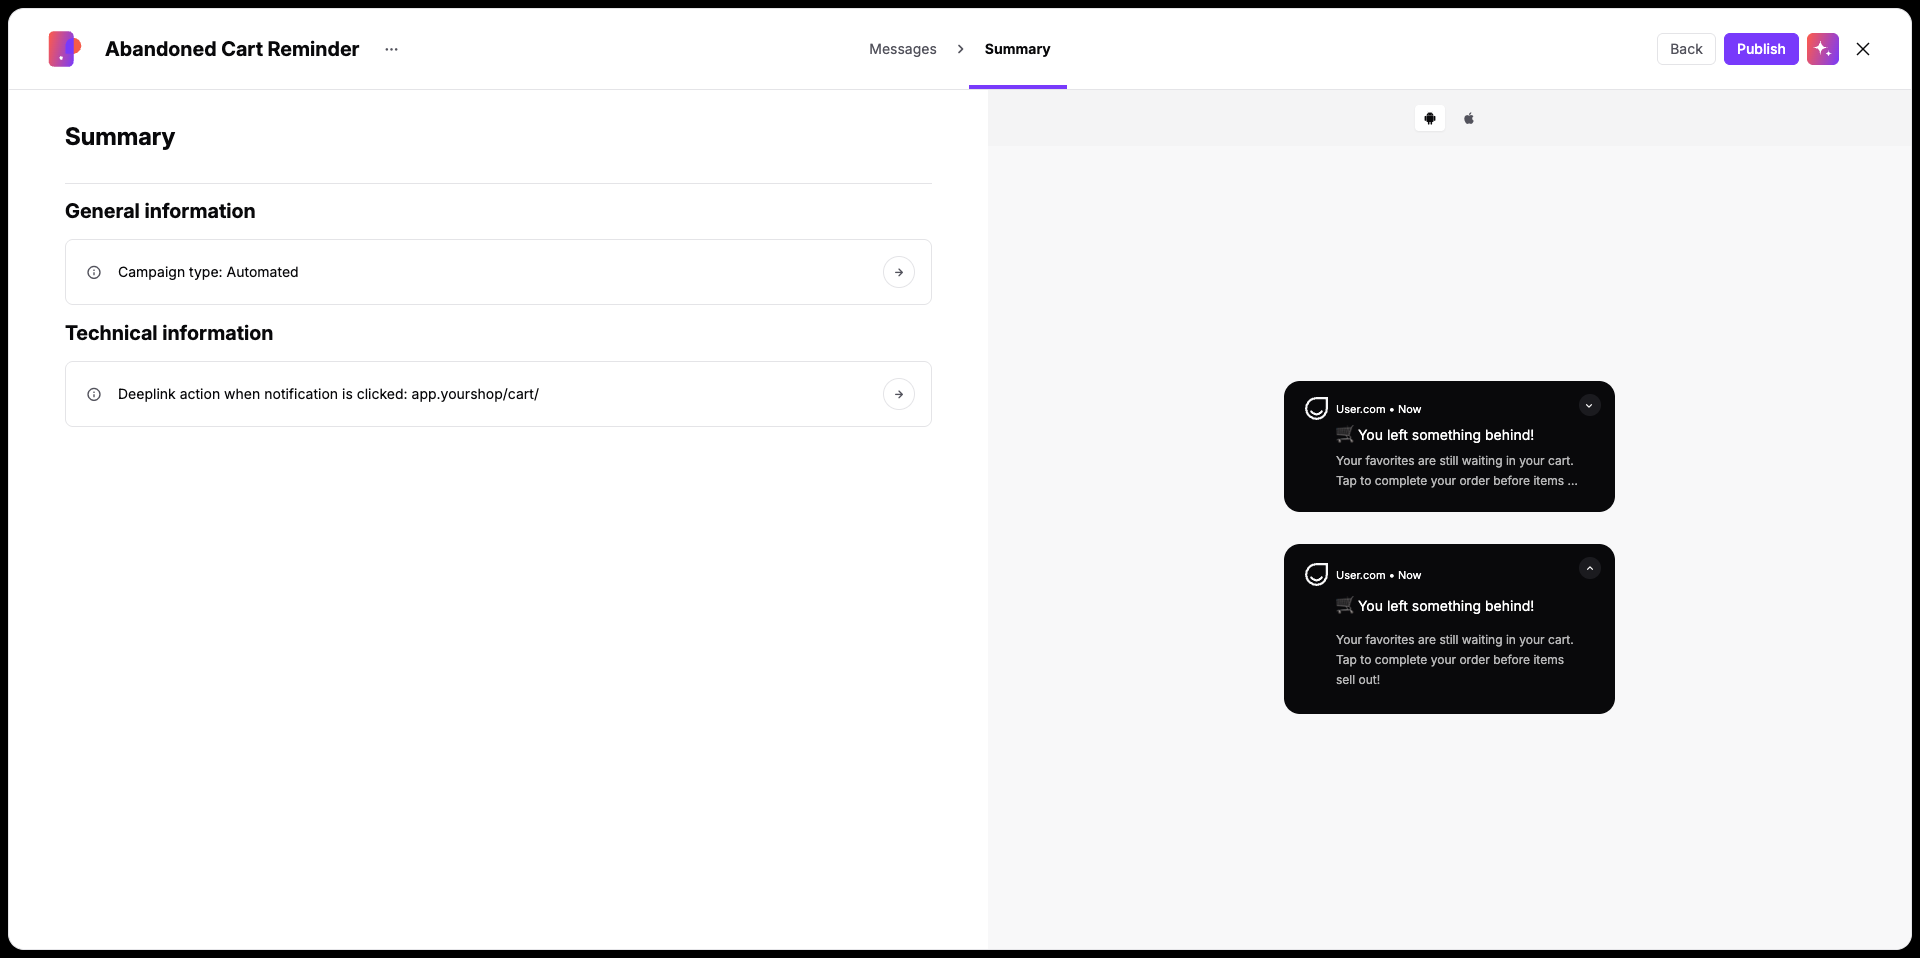
The "Summary" step provides an overview of your campaign configuration before you connect it to an automation:
Campaign type.
Notification title and body text preview.
Configured deeplink or media attachments.
Because delivery timing and audience selection are managed entirely by your automation flow, this summary does not display a fixed recipient count or scheduled delivery time.
If you need to make changes, click the "Messages" step in the top navigation bar to return to your draft.
When your setup is complete, click "Publish".
After that you can be redirected to the automation where this campaign is going to be used.
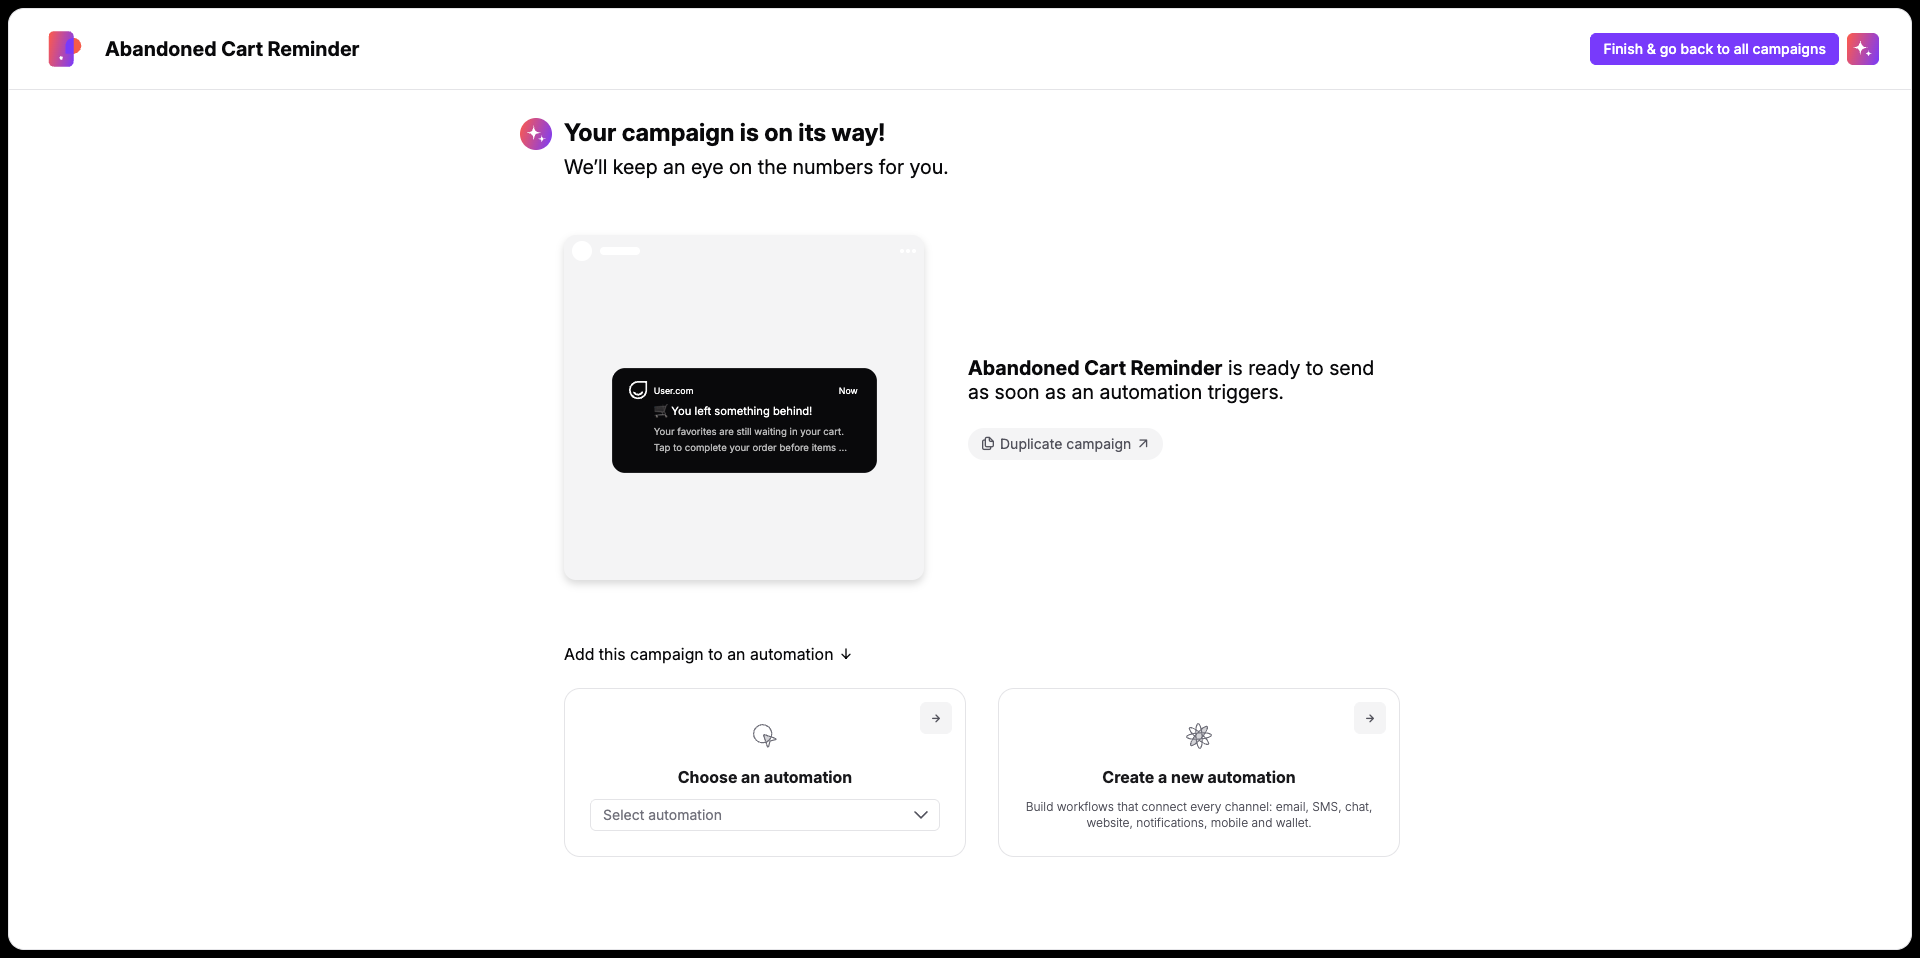
Automated mobile push campaigns are designed to be dispatched as part of an automation flow. Once your campaign is saved, go to your existing automation (or build a new one) and select your campaign inside one of the following modules:
“Mobile push action” trigger
“Send mobile push notification” action
Every successful automation starts with a clear scenario. Outline your customer journey first, then select the triggers and conditions that suit your goal. After that, attach your push campaign to the action module.
Example:
User story: After adding an item to their cart, each contact who has not completed checkout within 2 hours should receive an abandoned cart push notification. The notification should go out a maximum of once per day per contact.
Automation:
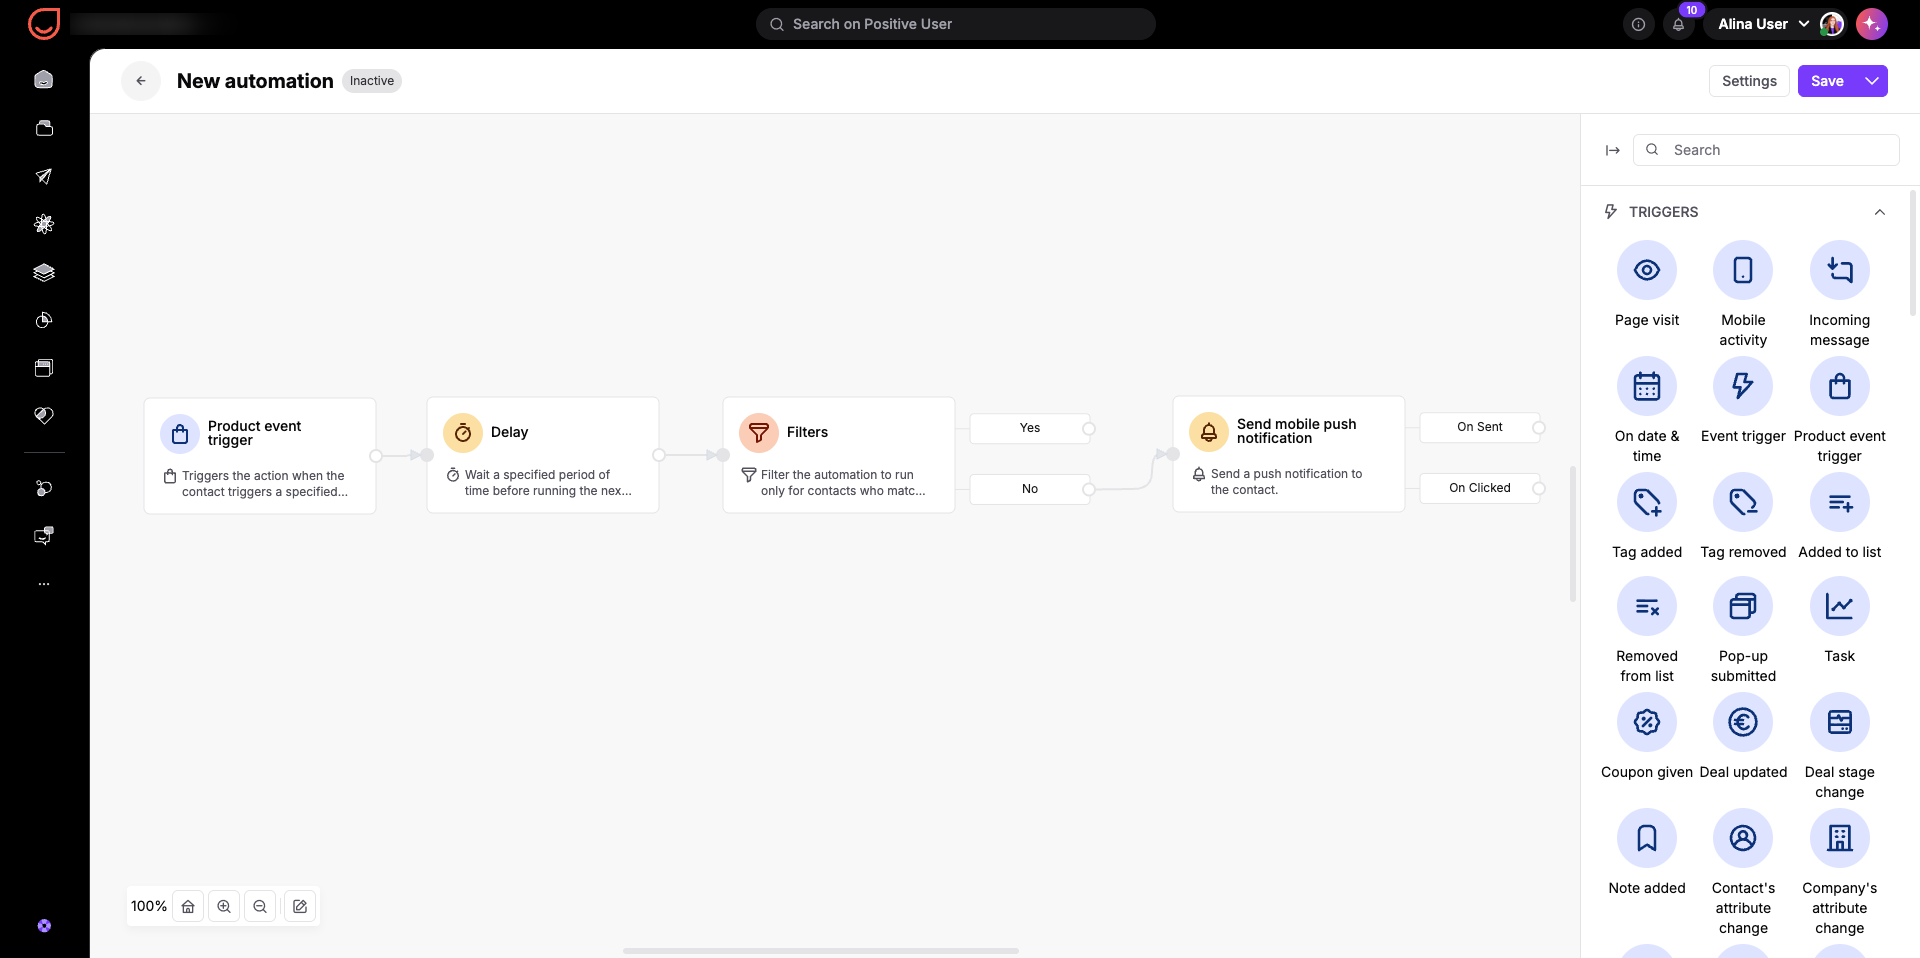
The flow initiates with an "Product event trigger" for "add to cart", followed by a "Delay" module set to 2 hours. A "Filters" module checks whether an "purchase" event occurred during that window. If no purchase took place, the "Send push notification" action automatically dispatches your "Abandoned Cart Reminder" campaign to the contact.
Abandoned Cart Reminders: Re-engage contacts who browse items and leave them in their cart, using deep links to send them straight back to checkout to complete their purchase.
New Contact Onboarding: Send a welcome push notification shortly after account registration or app installation to introduce contacts to core features and drive early engagement.
Inactivity Win-Back: Trigger a re-engagement push notification when a contact has not opened your mobile app for 14 or 30 days, offering a personalized incentive to return.