In-app messages appear inside your mobile application while a contact is actively using it, giving your team a direct way to catch their attention at high-intent moments. An automated campaign lets you trigger contextual banners and prompts based on live contact actions (such as abandoning a cart or completing onboarding) rather than relying on a fixed calendar date. Setting up your campaign in Positive User allows you to design your layout, refine your copy, and connect the message to your automation flows.
Learn more about the core concepts in “What is an In-App Message Campaign”.
Choose an automated campaign when you want a message to appear in response to a contact's specific behavior or account milestone, rather than a general calendar window. Because automated campaigns are controlled by automation flows, your team does not need to select recipient lists or choose a delivery schedule manually during campaign setup. Instead, your automation rules evaluate triggers and conditions dynamically to decide who qualifies and when the banner displays.
Make sure your team has these three essentials ready before building your campaign:
A connected mobile app: Integrate your mobile application with your Positive User Workspace so the platform can send banners to contacts' devices.
Contacts with active FCM keys: When someone installs your app, their device receives a unique Firebase Cloud Messaging (FCM) key. Only contacts with an active key saved on their profile can receive in-app banners.
An automation flow: Your team needs an active or planned automation flow where the campaign will be connected and triggered based on contact behavior.
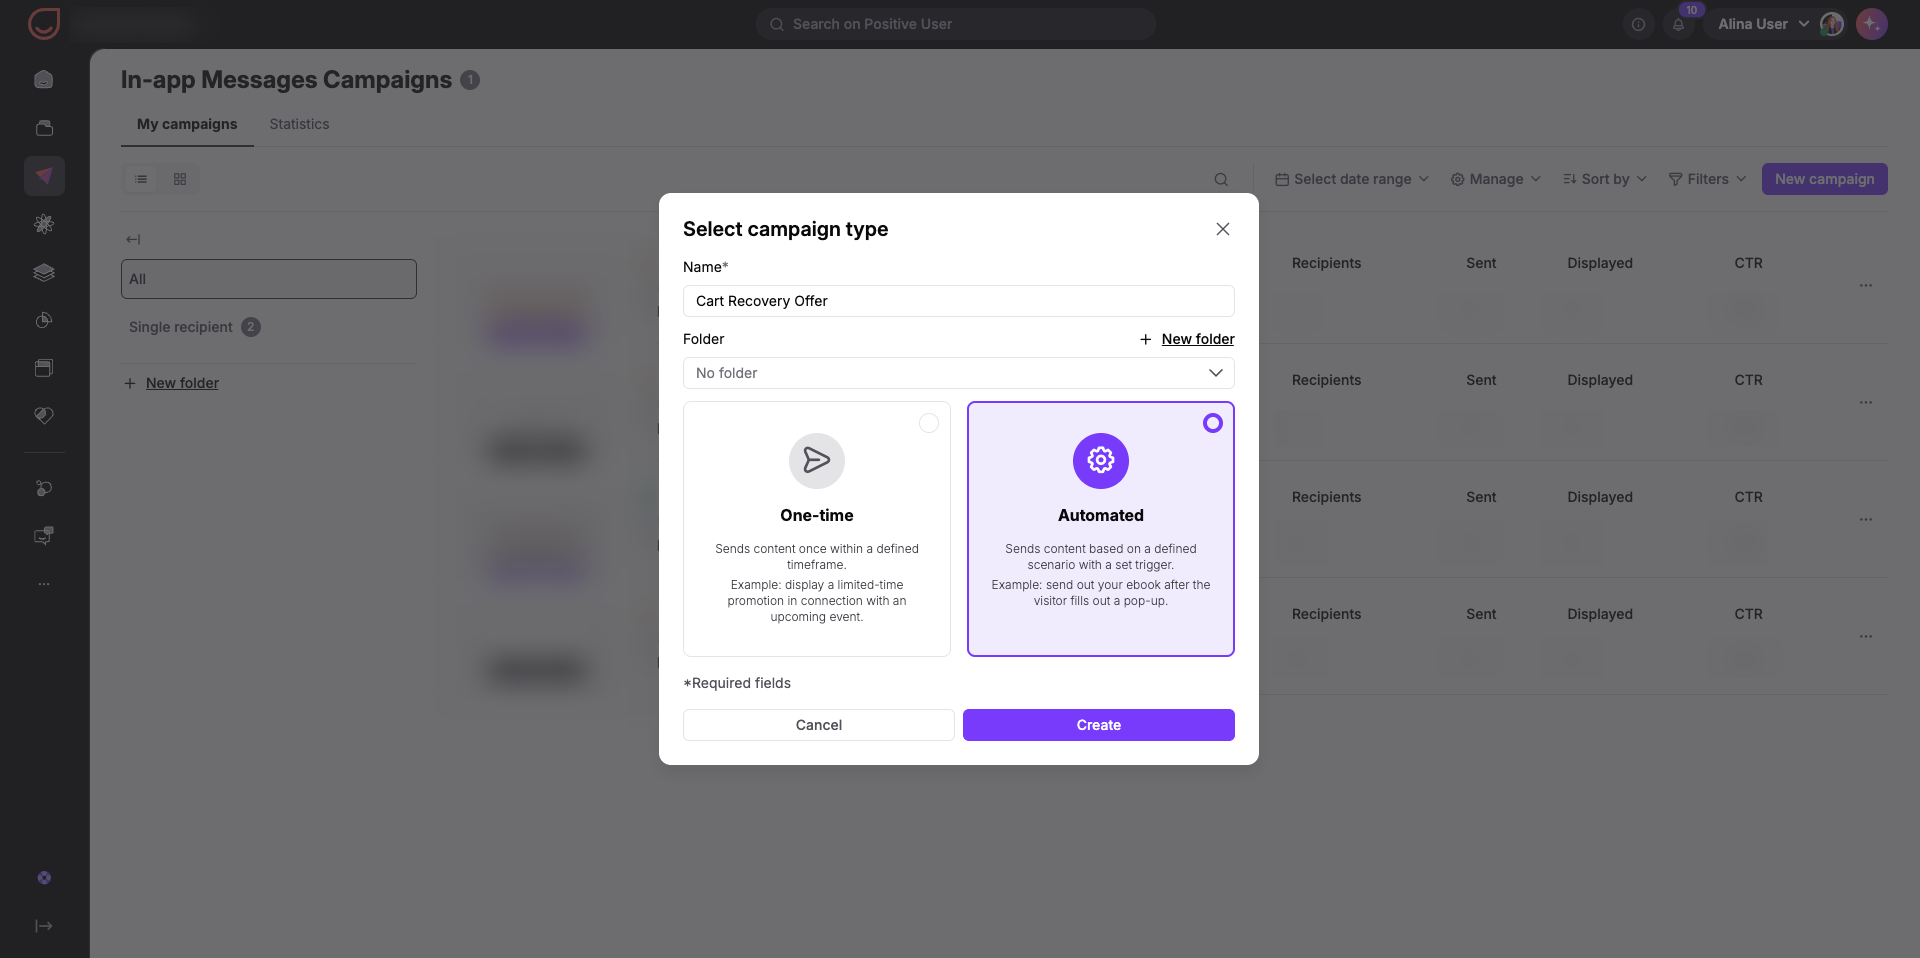
Go to "Campaigns" → "Mobile App Marketing" → "In-App Messages". Click the "New campaign" button located in the top-right corner. Configure the basic parameters in the window that appears:
Enter an internal title in the "Name" field (for example, “Cart Recovery Offer”). Your contacts never see this name.
Optionally choose a "Folder" to keep your campaigns organized.
Select "Automated" under the campaign type options.
Click "Create".
Your campaign is saved as a draft, and the editor displays setup stages across the top navigation bar.
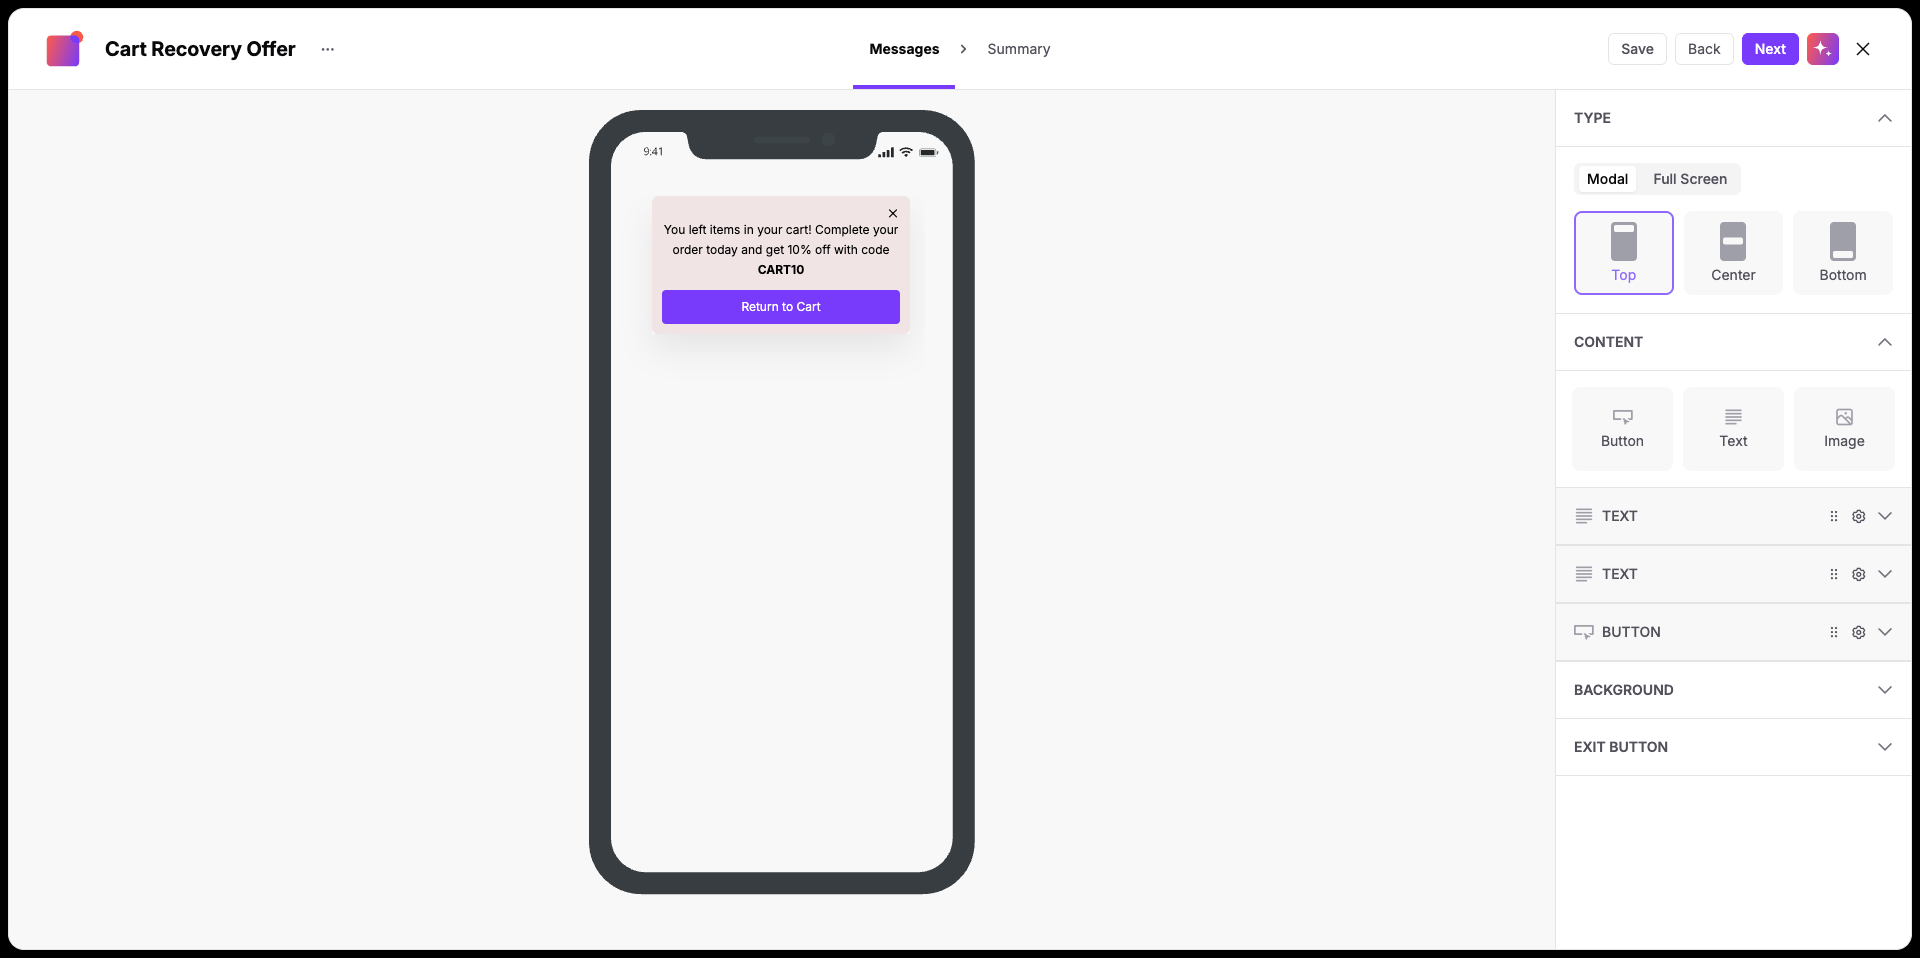
Assemble your banner structure, write your copy, and customize styling in the drag-and-drop editor.
Add content blocks: Go to the right-side panel under "Content" and click "Button", "Text", or "Image" to insert blocks onto your preview canvas.
Write and format text: Click the text area in the mobile preview to type your message. Type your headline and add your descriptive copy (for example, “You left items in your cart! Complete your order today and get 10% off with code CART10”).
In the "Text" section of the side panel, fine-tune spacing using "Top margin", "Bottom margin", "Left margin", and "Right margin".
Configure the button: Double-click the button in the canvas to edit its label (for example, “Return to Cart”). Expand the "Button" section in the right panel to customize its settings:
Enter your target destination in the "Button URL" field or add an internal app screen deep link.
Set the "Background color" using a hex code or color picker.
Adjust "Top margin", "Bottom margin", "Left margin", and "Right margin" to position the button relative to other elements.
Choose layout and screen placement: Expand the "Type" section at the top of the panel. Select "Modal" for a floating pop-up card or "Full Screen" for an immersive display. Under position, choose whether the modal appears at the "Top", "Center", or "Bottom" of the screen.
Customize the background: Expand the "Background" section. Enter a hex code or pick a shade in the "Color" field (default is #FFFFFF). To display a graphic background, paste an image link into the "Photo URL" field.
Set up the exit button: Open the "Exit button" section and turn on the "Enable Exit button" switch so contacts can easily close the banner. Pick an icon shade in "Color", choose "Left" or "Right" in "Placement", and set "Top margin" and "Side margin" to position it cleanly.
Click "Save" in the top bar to record your changes.
Click "Next".
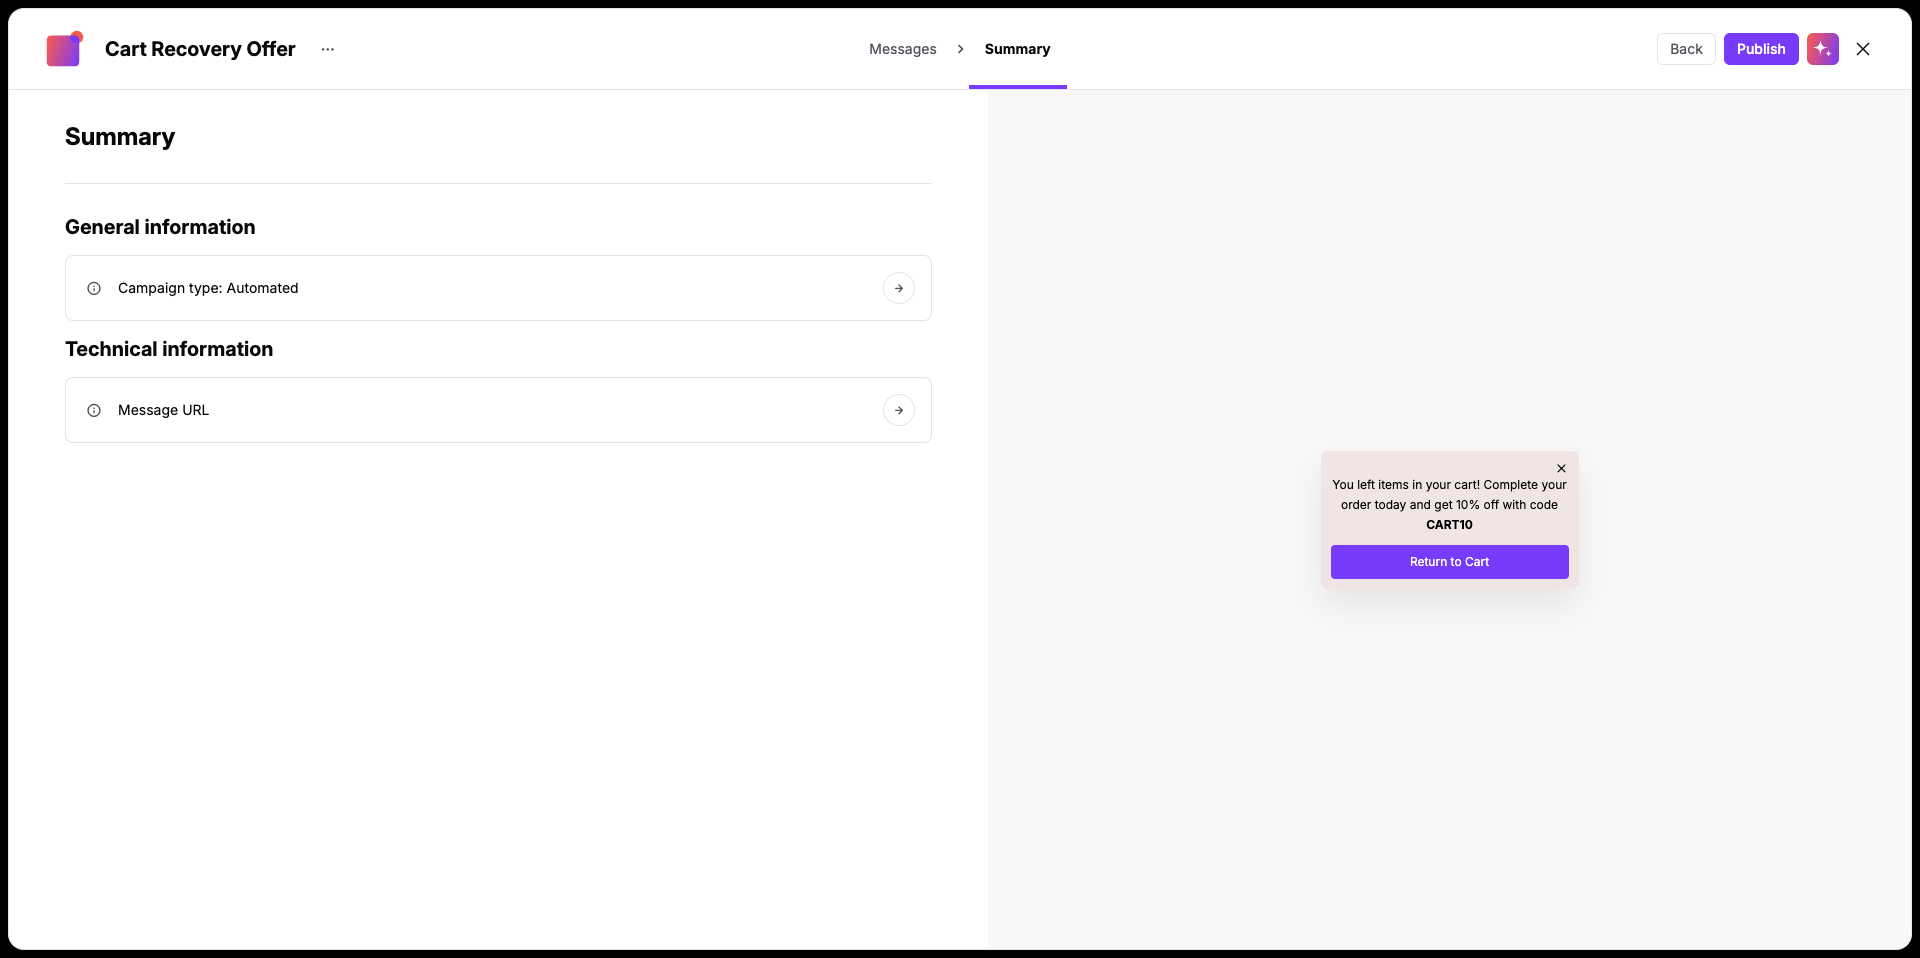
Review your automated campaign specifications before finalizing:
Campaign type (Automated).
Message URL.
Visual layout check covering your copy, images, and button styling.
To edit any details, click the step name in the top navigation bar to go back. When everything looks right, click "Save" to finish creating your message.
Automated in-app banners do not trigger immediately after saving. They only show inside your app once linked to an active automation flow.
Automated in-app campaigns must be triggered through an automation flow. After saving your campaign, navigate to "Automations" to connect your banner to an existing sequence or design a new one. You can trigger your banner using the "Send in-app message" action module. [LINK]
Every successful automation starts with a clear scenario. Map out your story first by identifying the trigger event, contact criteria, and the message you want to display.
Example:
User story: When a contact adds a product to their cart but leaves checkout incomplete after 20 minutes, display a reminder card the next time they open the app. Limit this message to once per contact every 4 days.
Automation:
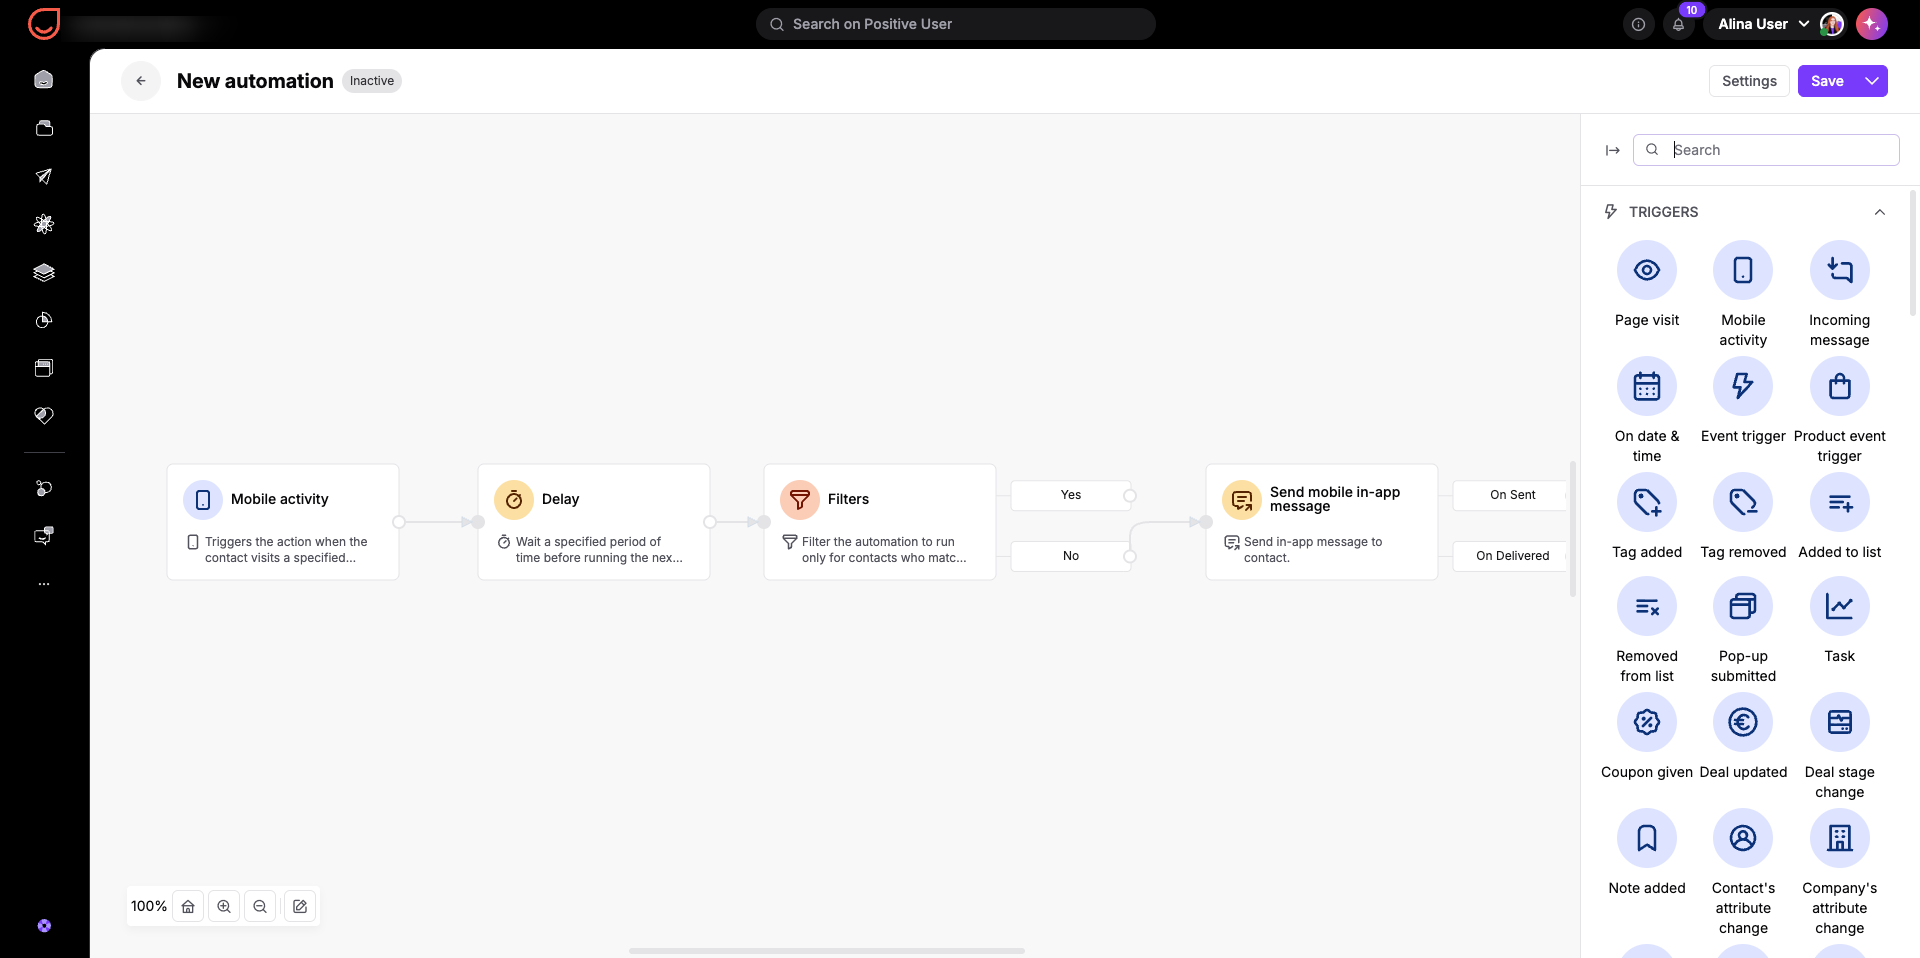
The flow is triggered by the “add to cart” mobile activity. Then after a short delay the system checks if the user of the app finalized the purchase. If no, then next time they open the app they will see a notification about the products left in a cart.
First-session welcome offers: Greet newly registered contacts with an introductory discount the first time they open your app.
Free shipping threshold reminders: Display a banner nudging contacts to add one more product when their active cart subtotal is close to qualifying for free delivery.
Feature discovery and tool walkthroughs: Introduce a new mobile feature or tool when contacts navigate to a specific screen in your app.
Loyalty milestone celebrations: Display a congratulatory card with reward points as soon as a contact completes their third purchase.