Segments help you organize your data based on specific conditions. They allow you to group contacts, companies, deals, tickets, tasks, or products dynamically and use these groups across automations, campaigns, and filters.
If you’re new to segments, read “What is a Segment” to understand what they are and how to create them.
If you want to learn how recalculation works and how to control it, see “How to Recalculate Segments”.
This article explains how to manage existing segments in your workspace.
This method allows you to see and manage all segments grouped by object type.
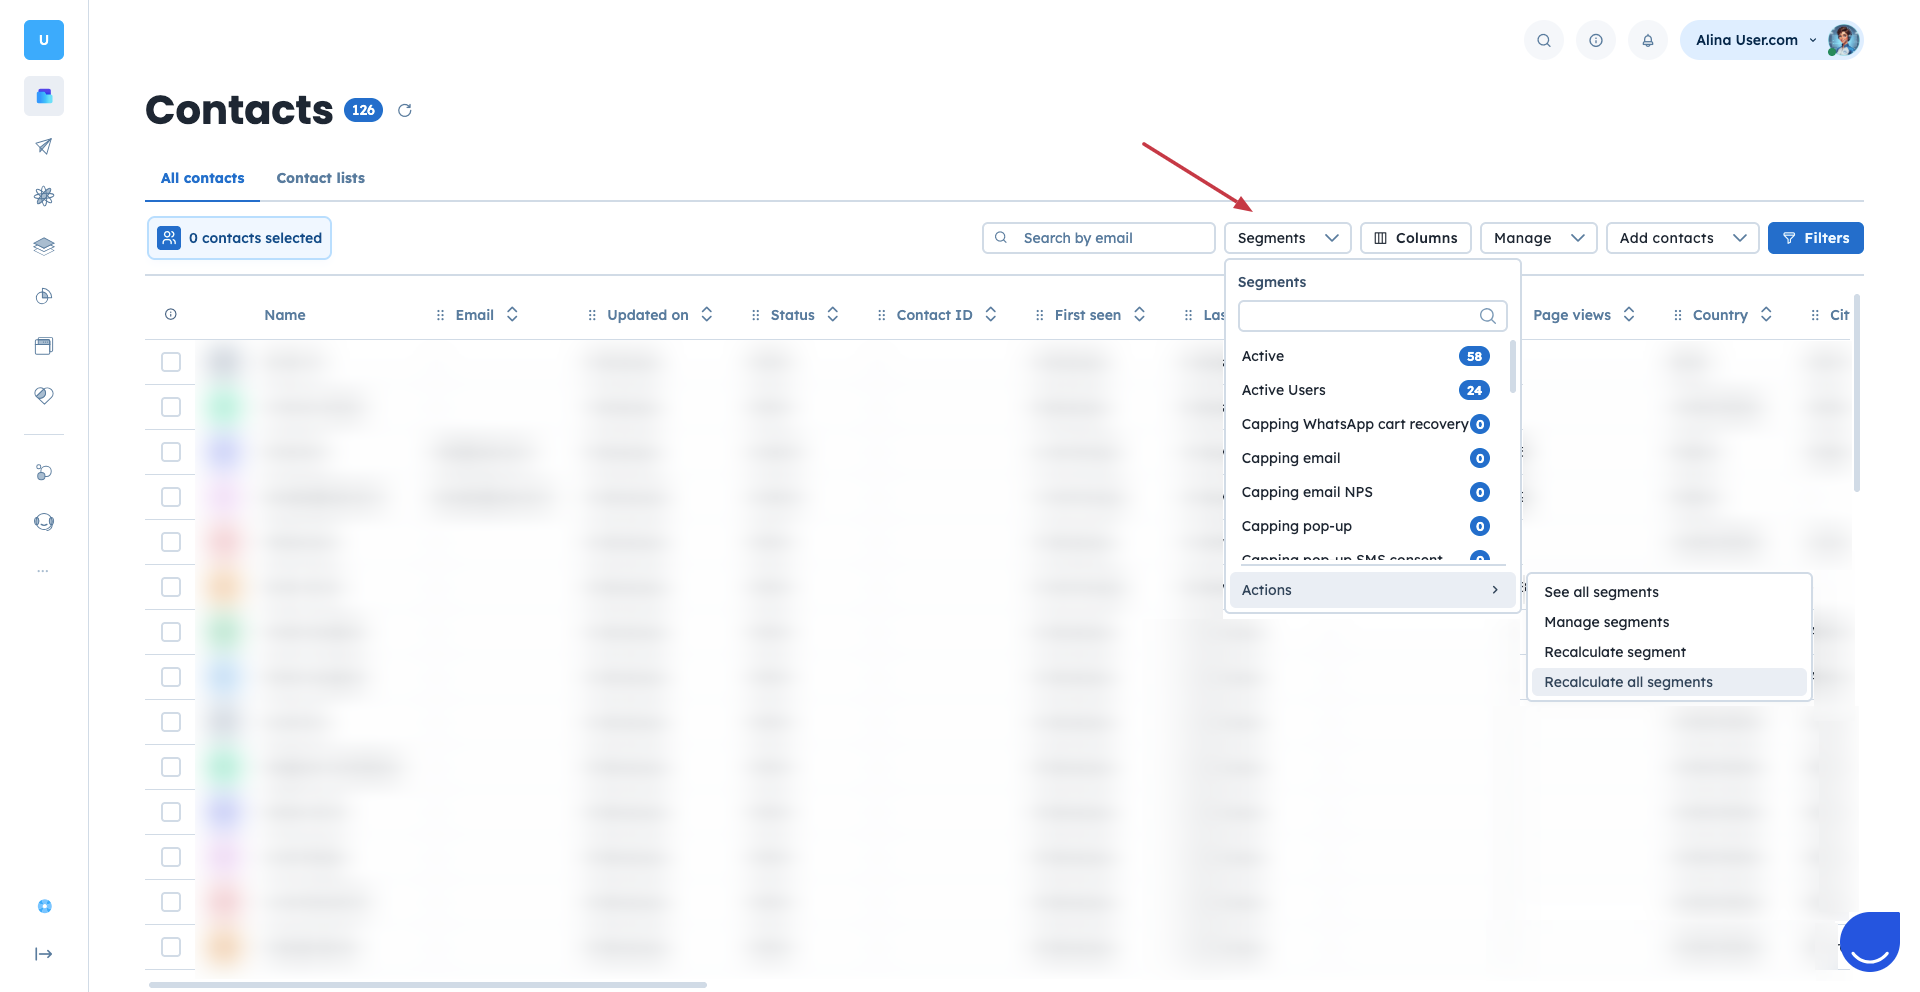
Go to any “Data” section. (E.g. “Contacts”, “Tickets”, “Companies”)
Click “Segments” in the top panel.
Choose “Actions” → “See All Segments”.
OR
Go to “Settings” → “Workspace Settings” → “Segments” section.
Here, you will find separate views for:
Contact segments
Product segments
Company segments
Deal segments
Task segments
Ticket segments
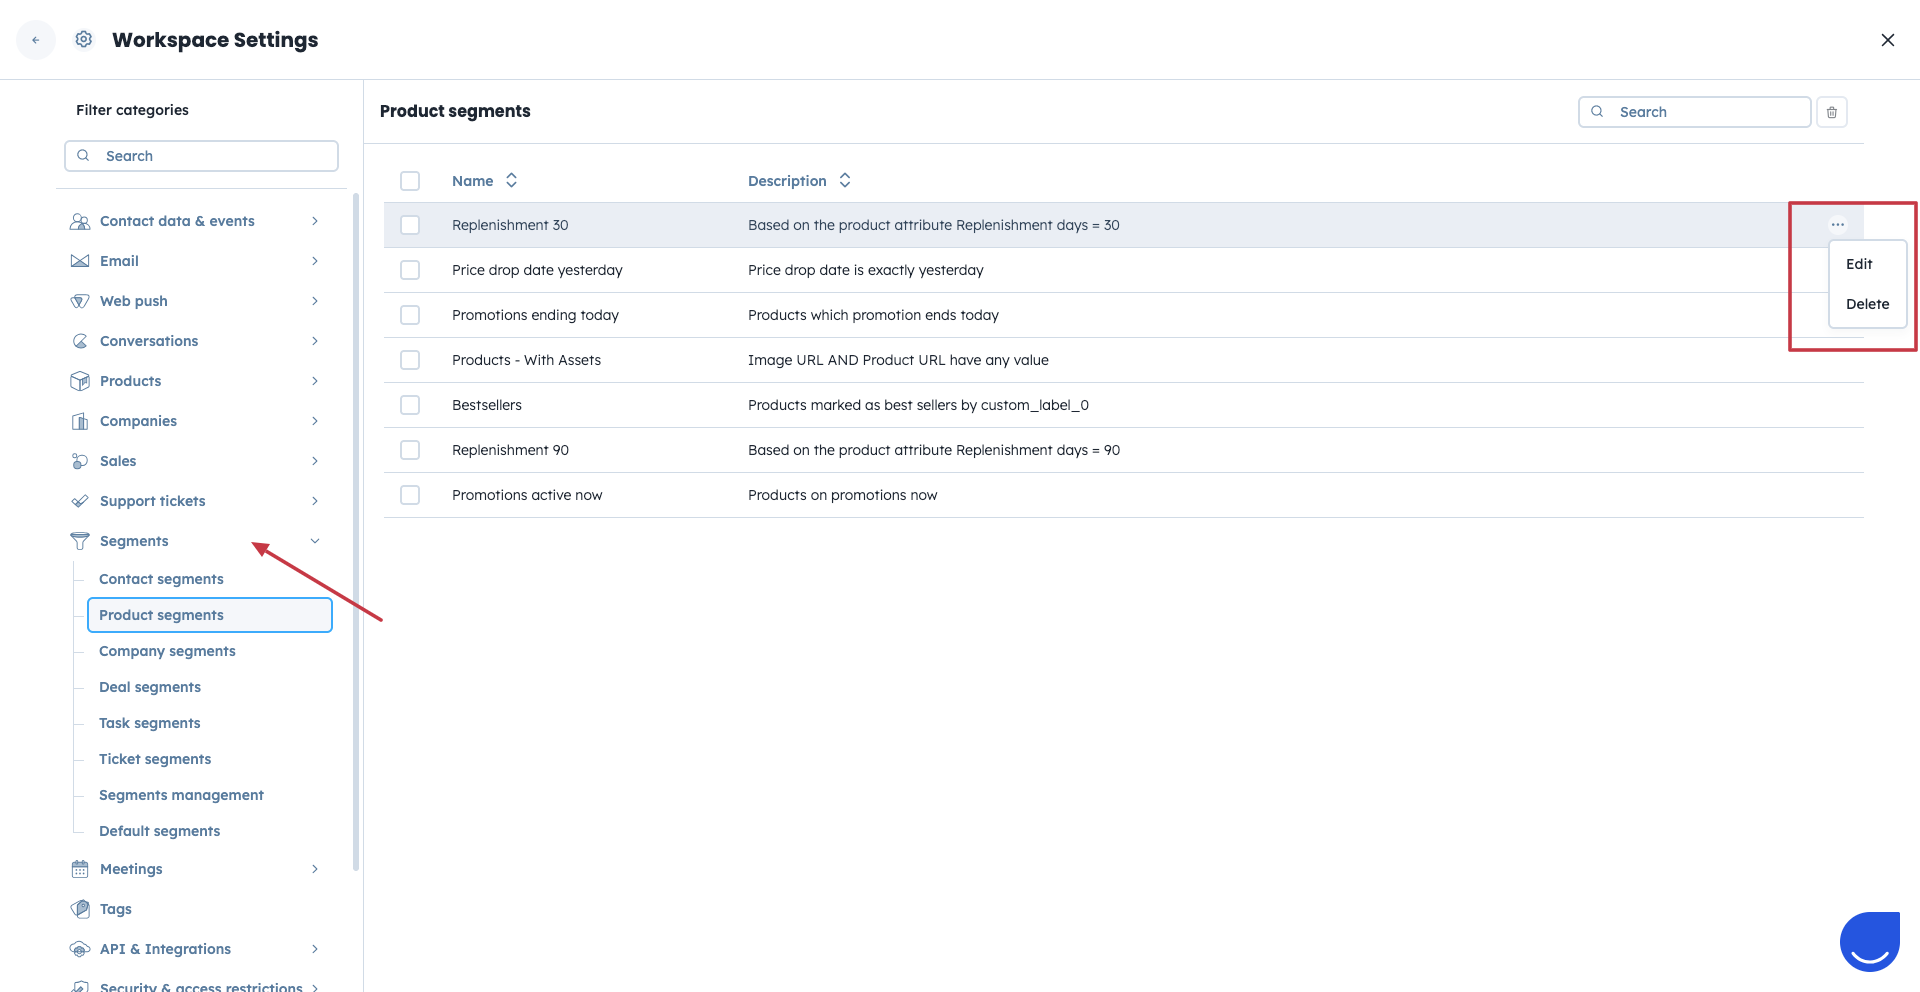
In each view, you can see the segment name and its description. Next to each segment, click the three dots menu. From there, you can:
Edit the segment
Delete the segment

When you choose “Edit”, you can:
Change the segment name.
Update the segment description.
Set the segment as invisible for selected team members.
This option helps you hide unnecessary segments from colleagues while keeping them available for specific team members.
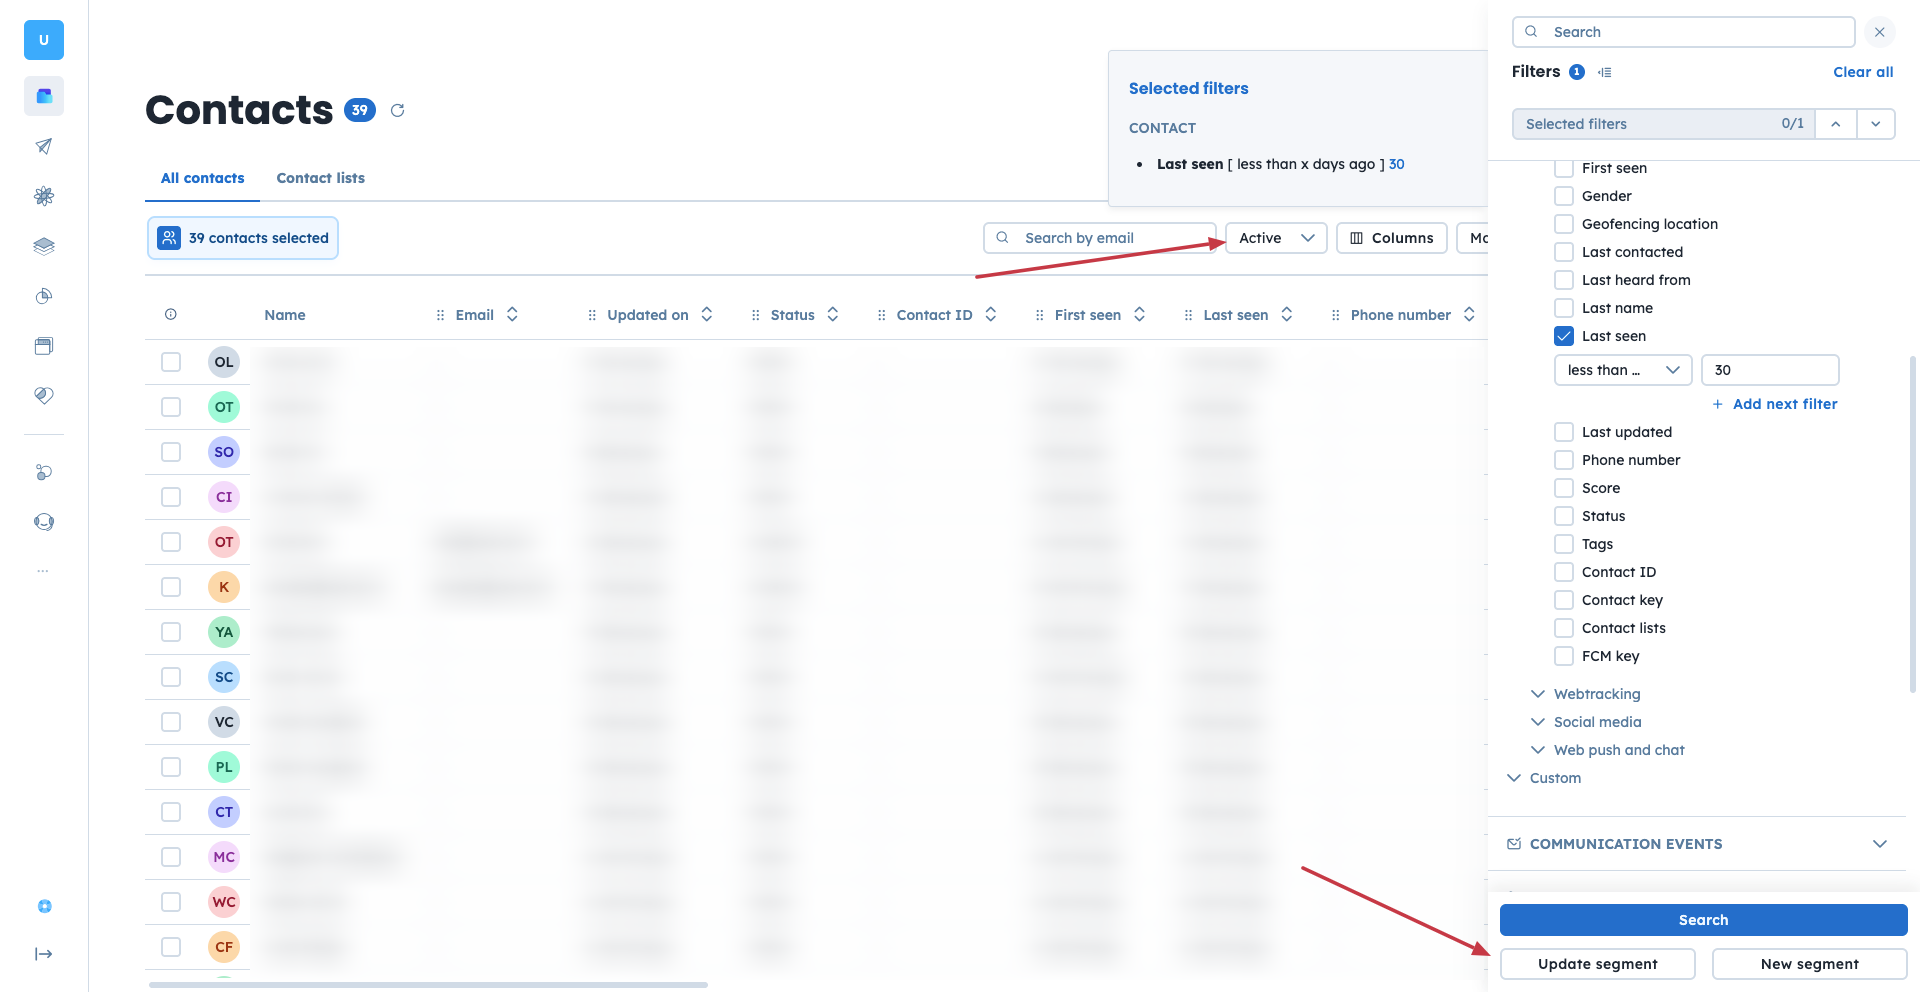
You can also update the conditions that define which records belong to a segment.
This method allows you to access the segment management view directly from a specific data section (for example, “Contacts” or “Deals”).
Go to the “Data” section in the main navigation. (For example, “Contacts”, “Tickets”)
Click the “Segments” button in the top panel.
Choose “Actions” → click “Manage Segments”.
OR
Go to “Settings” → “Workspace Settings” → “Segments” → “Segment Management” section.
In this view, you can analyze and control how your segments work. For each segment, you will see:
Name – the name of the segment.
Type – the object type the segment refers to (for example, contact, deal, ticket).
Interval – how often the segment is recalculated.
Count – the number of objects currently included in the segment.
Last Counted – the date when the segment was last recalculated.
Date Modified – when the segment definition was last changed.
Too Heavy – indicates whether the segment significantly impacts workspace performance.
Recalculate – a button that allows you to trigger recalculation manually.
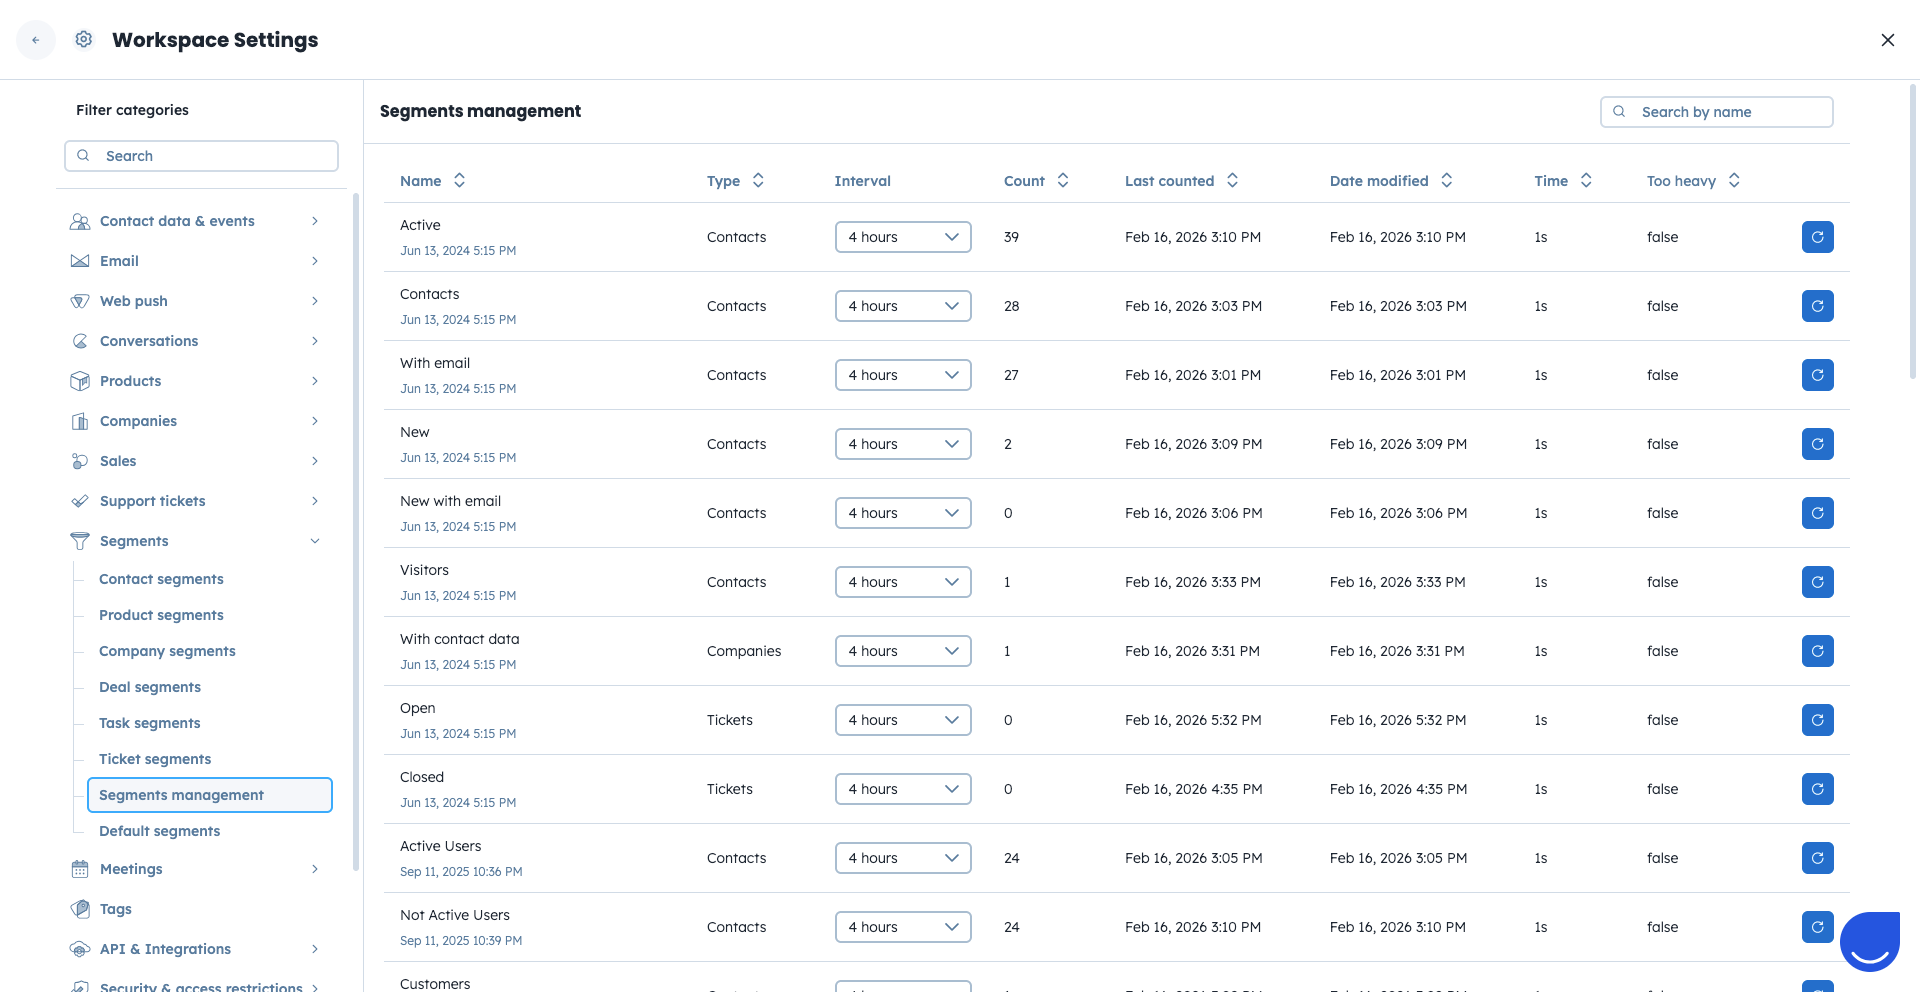
From this view, you can:
Change the recalculation interval.
Recalculate a segment immediately.
If you need more details about recalculation logic and intervals, see “How to Recalculate Segments”.
You can also manually trigger recalculation for one or multiple segments using the following options.
Go to the “Data” section. (For example, “Contacts”, “Companies”).
Click “Segments” in the top panel.
Choose “Actions” → “Recalculate Segments”.
In the pop-up window view, you can recalculate a specific segment
OR
Go to the “Data” section. (For example, “Contacts”, “Companies”).
Click “Segments” in the top panel.
Choose “Actions” → “Recalculate All Segments”.
This button allows you to update all segments at once.
To read more about recalculation, please check the following article.
You can define which segments appear as default for your team in specific “Data” sections.
Default segments define which view is shown when you or your teammates open a specific section in the application.
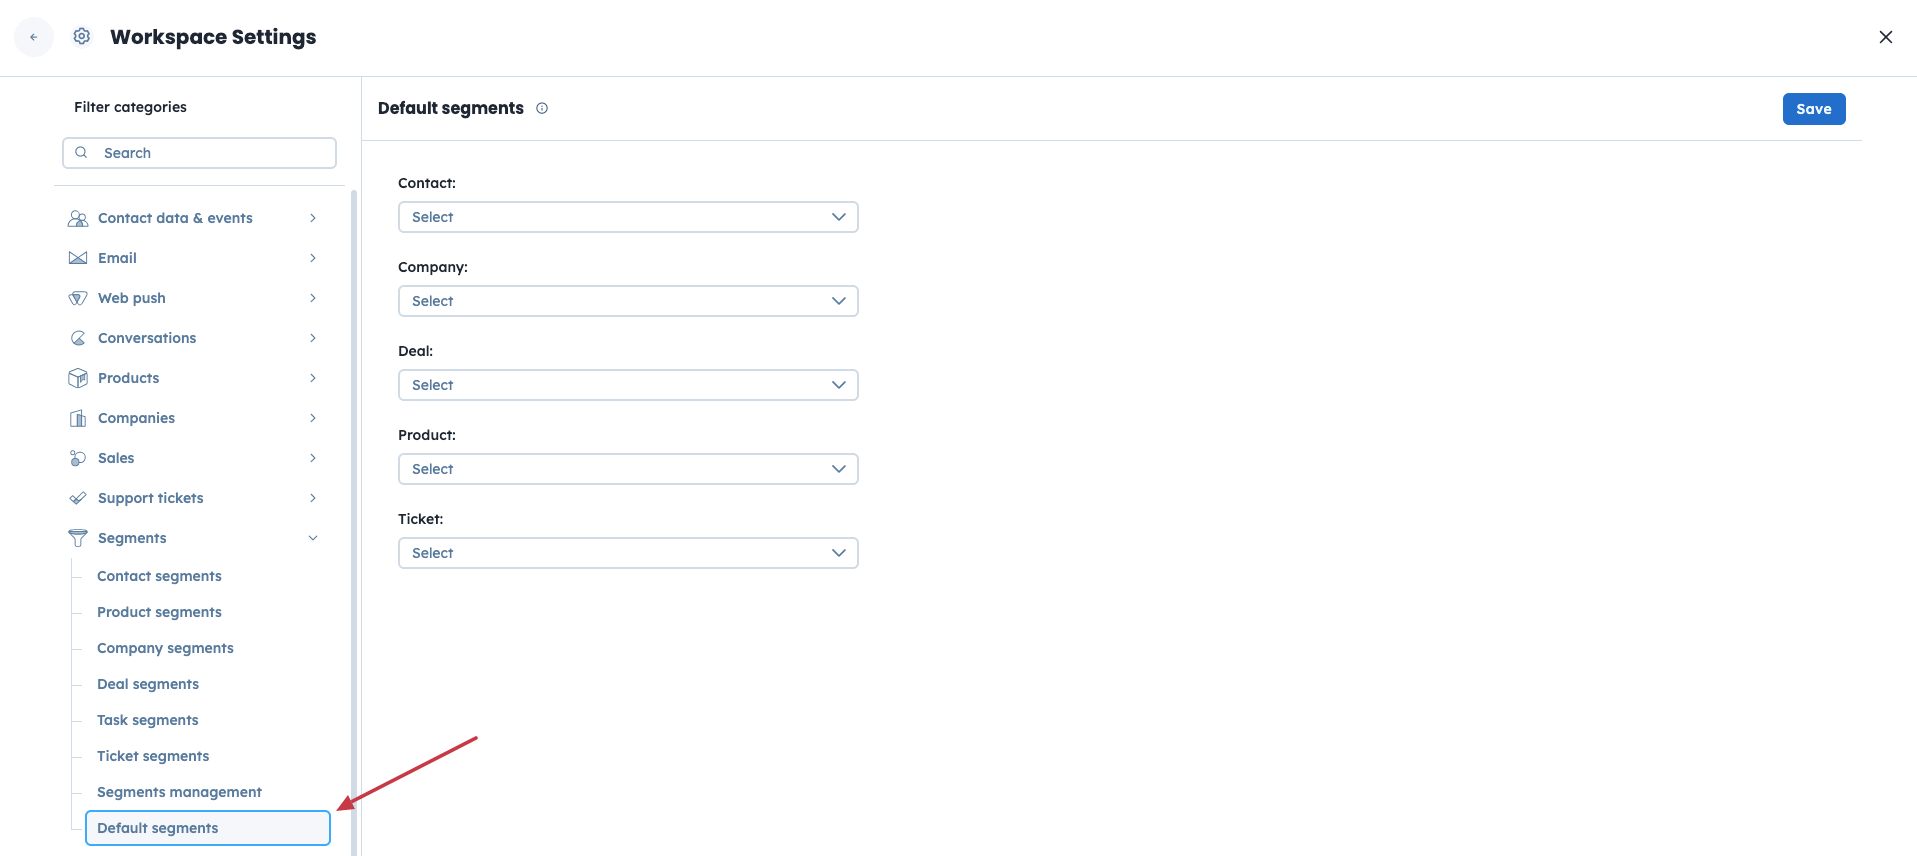
Go to “Settings” → “Workspace Settings”.
Choose “Segments” from the menu on the left.
Go to “Default Segments” view.
Here, you can set a specific segment as a shared default view for a selected Data section. All team members will see the defined segments as the first and default ones in the related Data section.
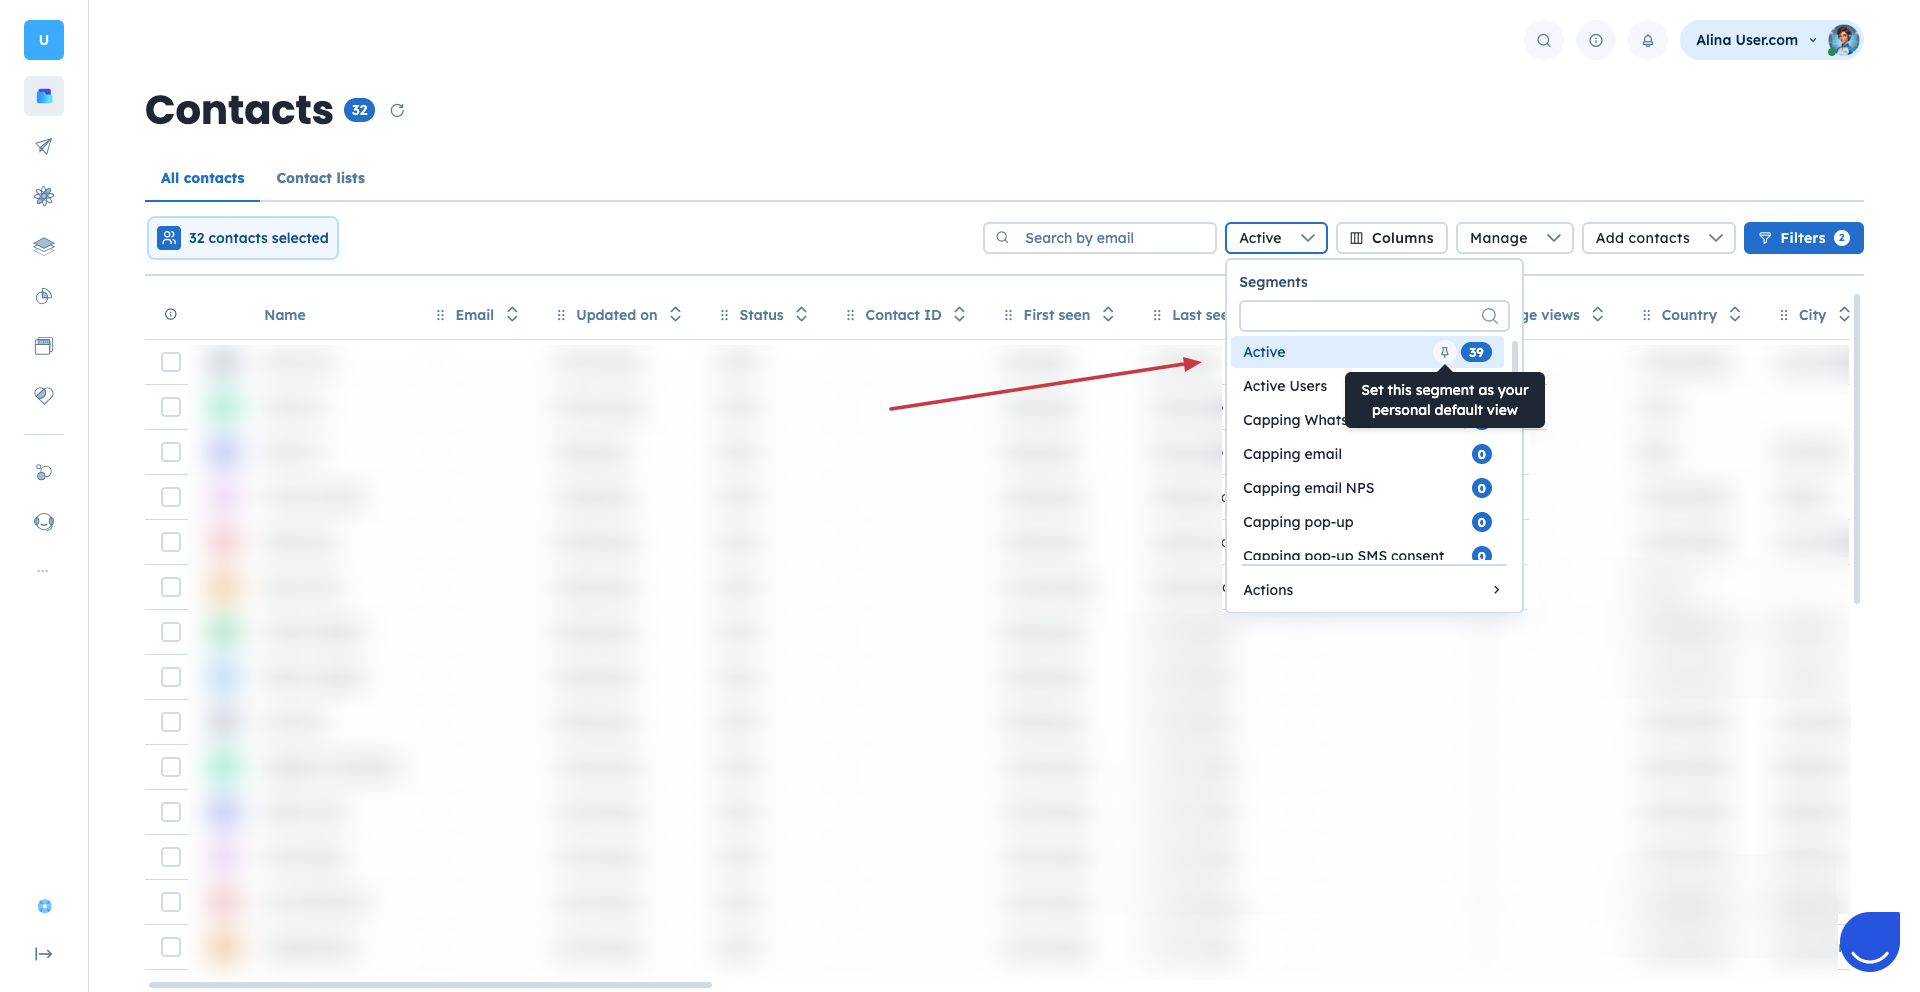
There is a possibility to pin the segment as default one for your view only.
Go to the “Data” section. (For example, “Deals”, “Companies”).
Click “Segments” in the top panel.
Find the “pin” icon in front of the segment’s name. It appears when you hover over the line.
Click on it to set the segment as default.
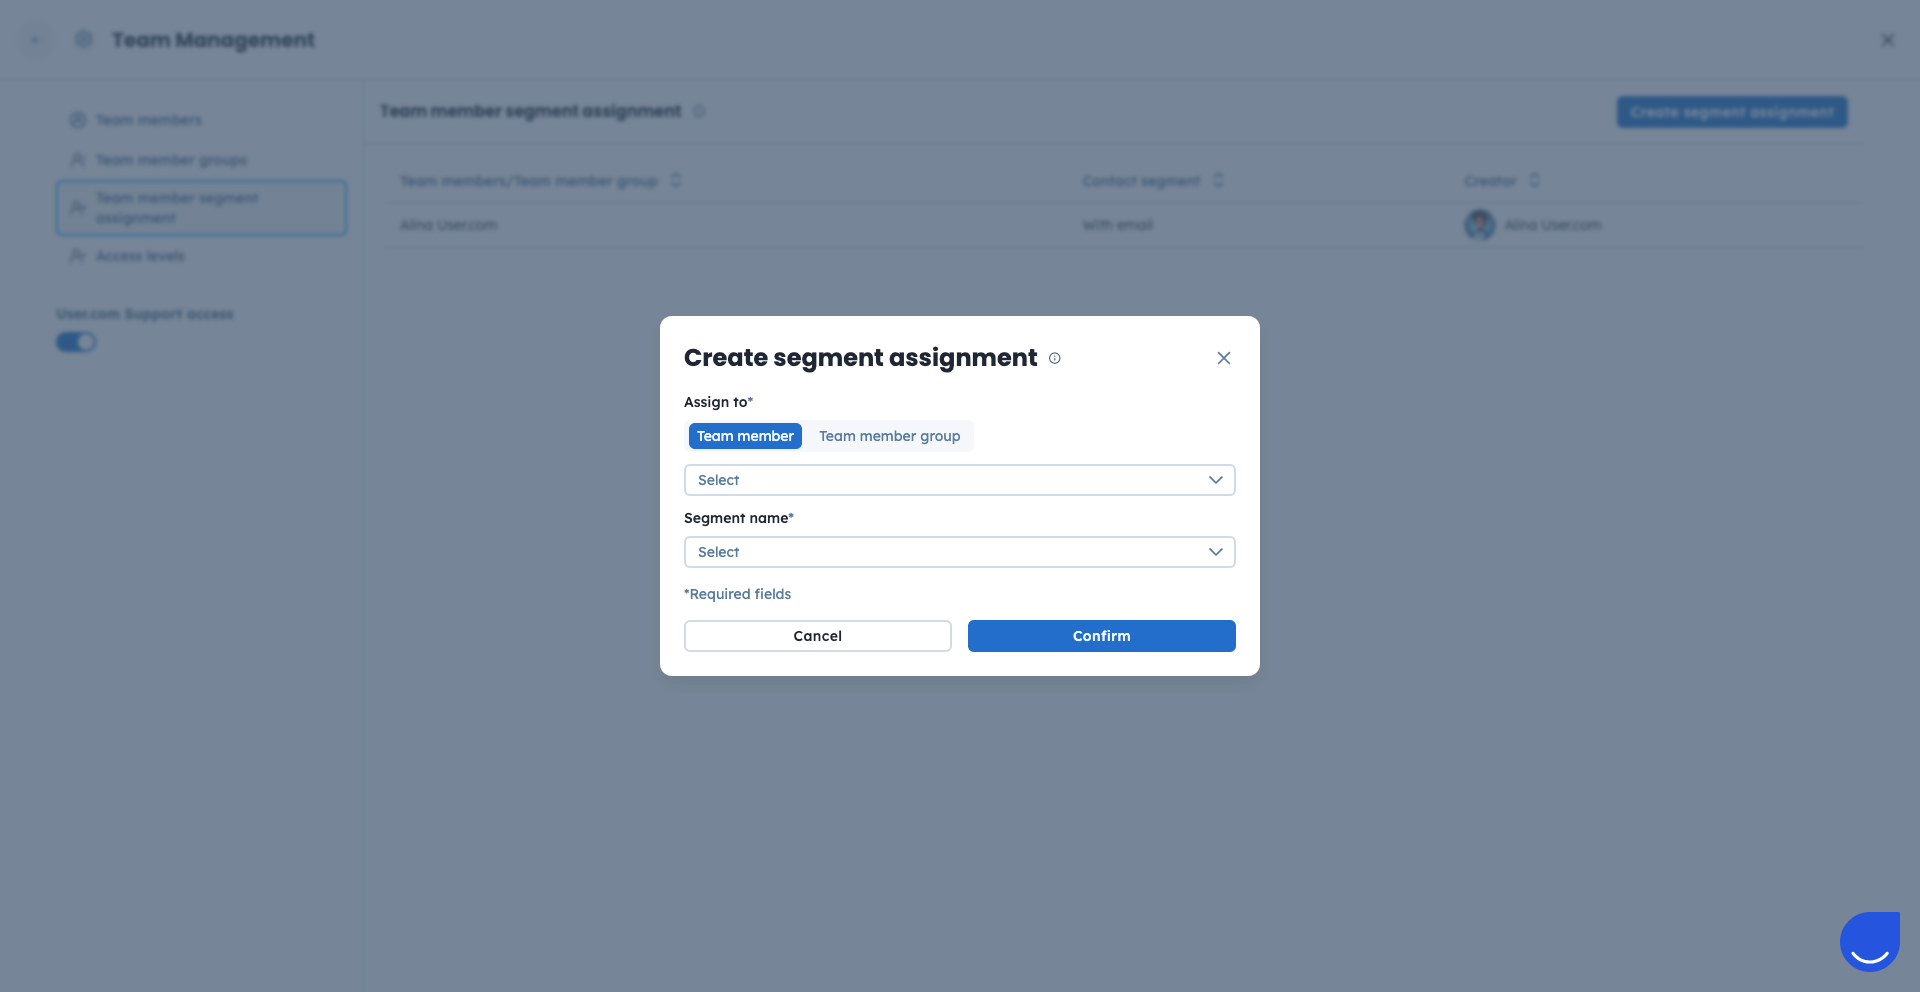
You can assign chat conversations automatically to specific team members or team member groups based on the segment a contact belongs to.
When a new conversation is created on chat, the system checks whether the contact belongs to a segment that has an assignment rule defined.
If a match is found, the conversation is automatically assigned to the appropriate team member or team member group.
The assignment happens at the moment the conversation is created.
Go to “Settings” → “Team Management” section.
In the left-side menu, click “Team Member Segment Assignment”.
Click the “Create Segment Assignment” button on the right.
Define which segment should trigger the assignment and which team member or team member group should receive the conversation.