Tracking UTM (Urchin Tracking Module) parameters allows you to measure the ROI of your marketing efforts by attributing specific contact actions to their original traffic sources. By pushing this data into Positive User, you can personalize communication based on a contact's journey and optimize your budget toward the highest-performing channels. For a deeper dive into data structure, see our "What Is an Attribute" article.
Example URL, UTM parameters highlighted, after the question mark (?):

You can use Google UTM Builder. Thanks to it you will easily create links with UTM parameters.

To track the most recent campaign data, you must first ensure the application is prepared to receive these specific values.
To make it work you need to follow the steps:
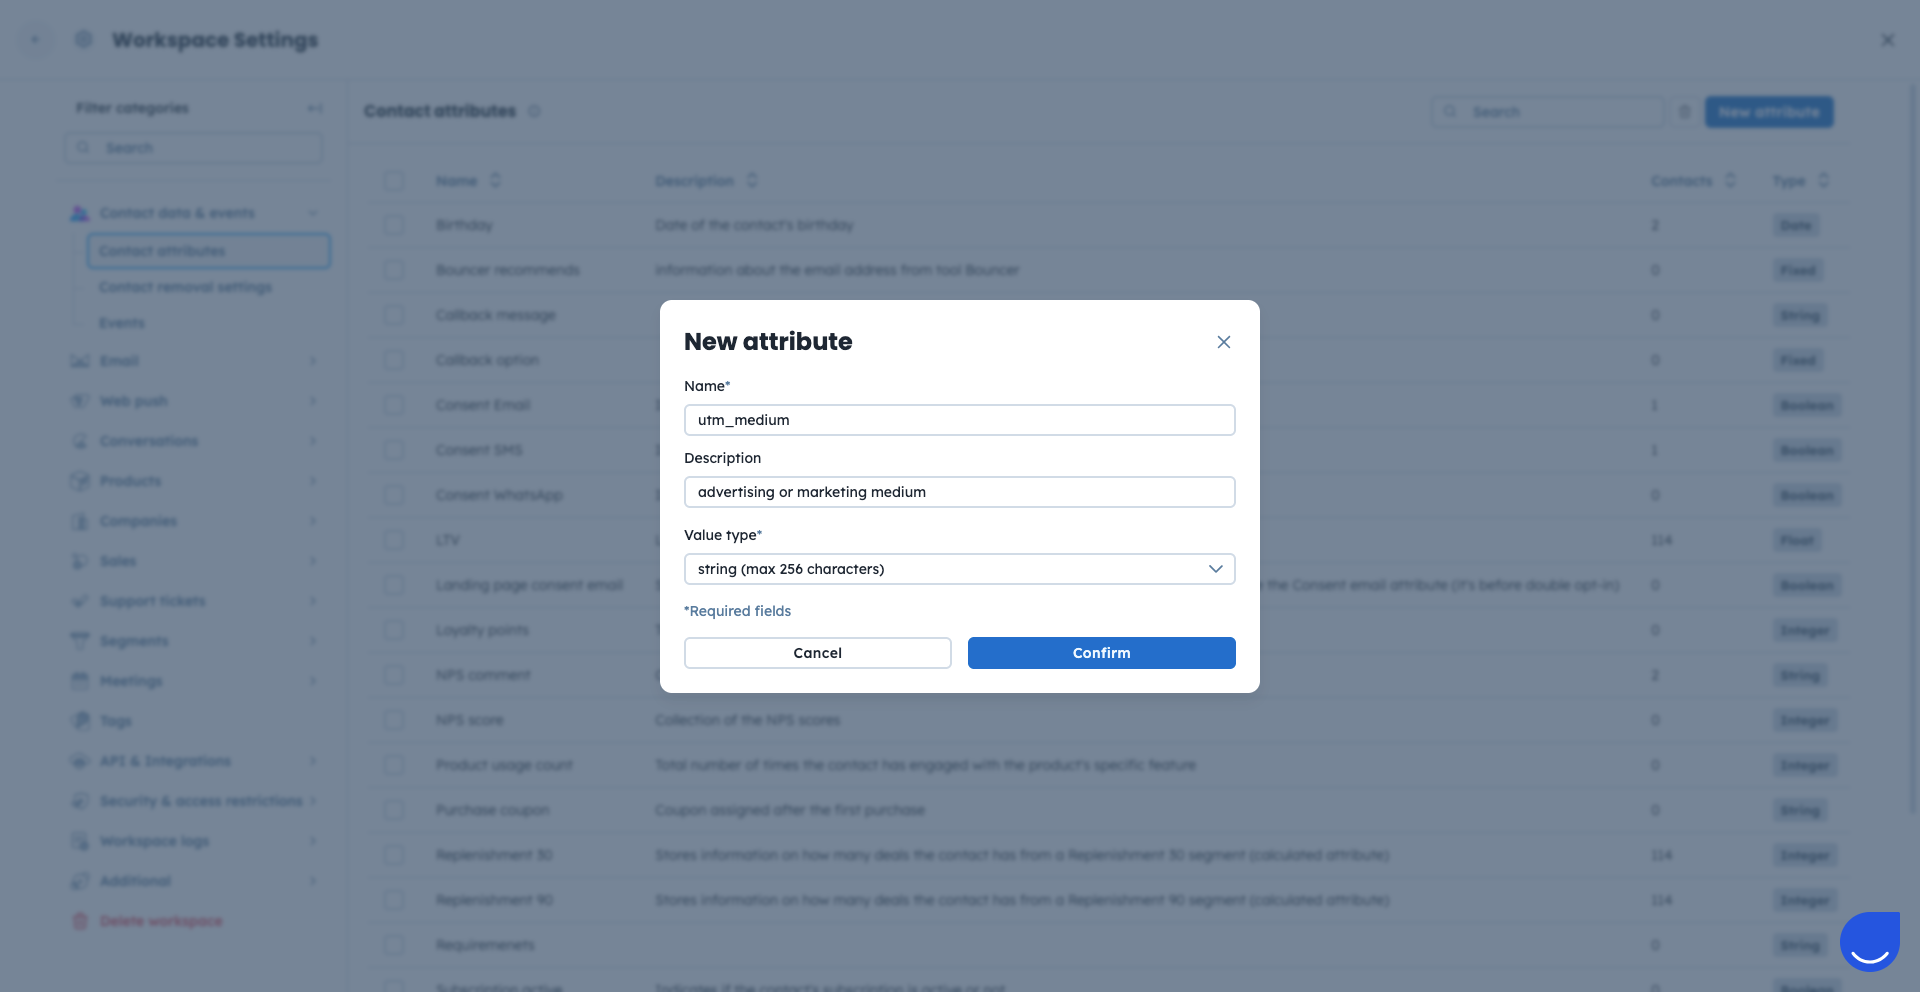
To store the values you need to create the attributes for UTMs. Go to “Settings” → “Workspace Settings” → “Contact attributes”.
Here find the “New attribute” button inn top right corner.
Create the attributes for all the UTM tags you want to store in the contacts’ profiles. Use “string” as the attribute type.
Use the UTM tags in the URLs in your campaigns.
When a contact clicks a link containing UTM parameters, the data is captured by Positive User.
To view a contact's UTM parameters, go to the contact’s profile → “Personal information” section.
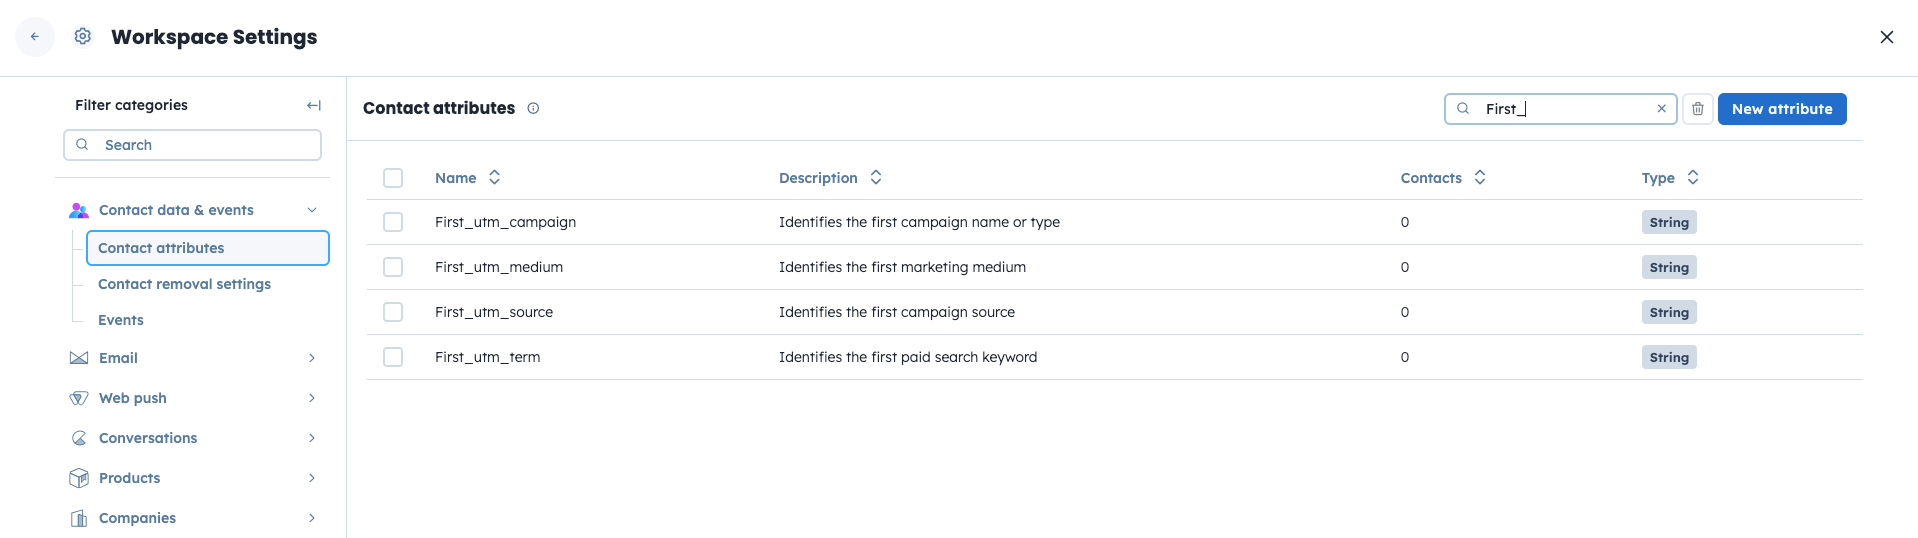
Because standard "utm_" attributes only store the most recent data, you should save the "first_utm_" values to understand the original point of acquisition.
Create the “first_utm_” attributes the same way as you created attributes for standard UTM tags. To store the values you need to create the attributes for UTMs. Go to “Settings” → “Workspace Settings” → “Contact attributes”.
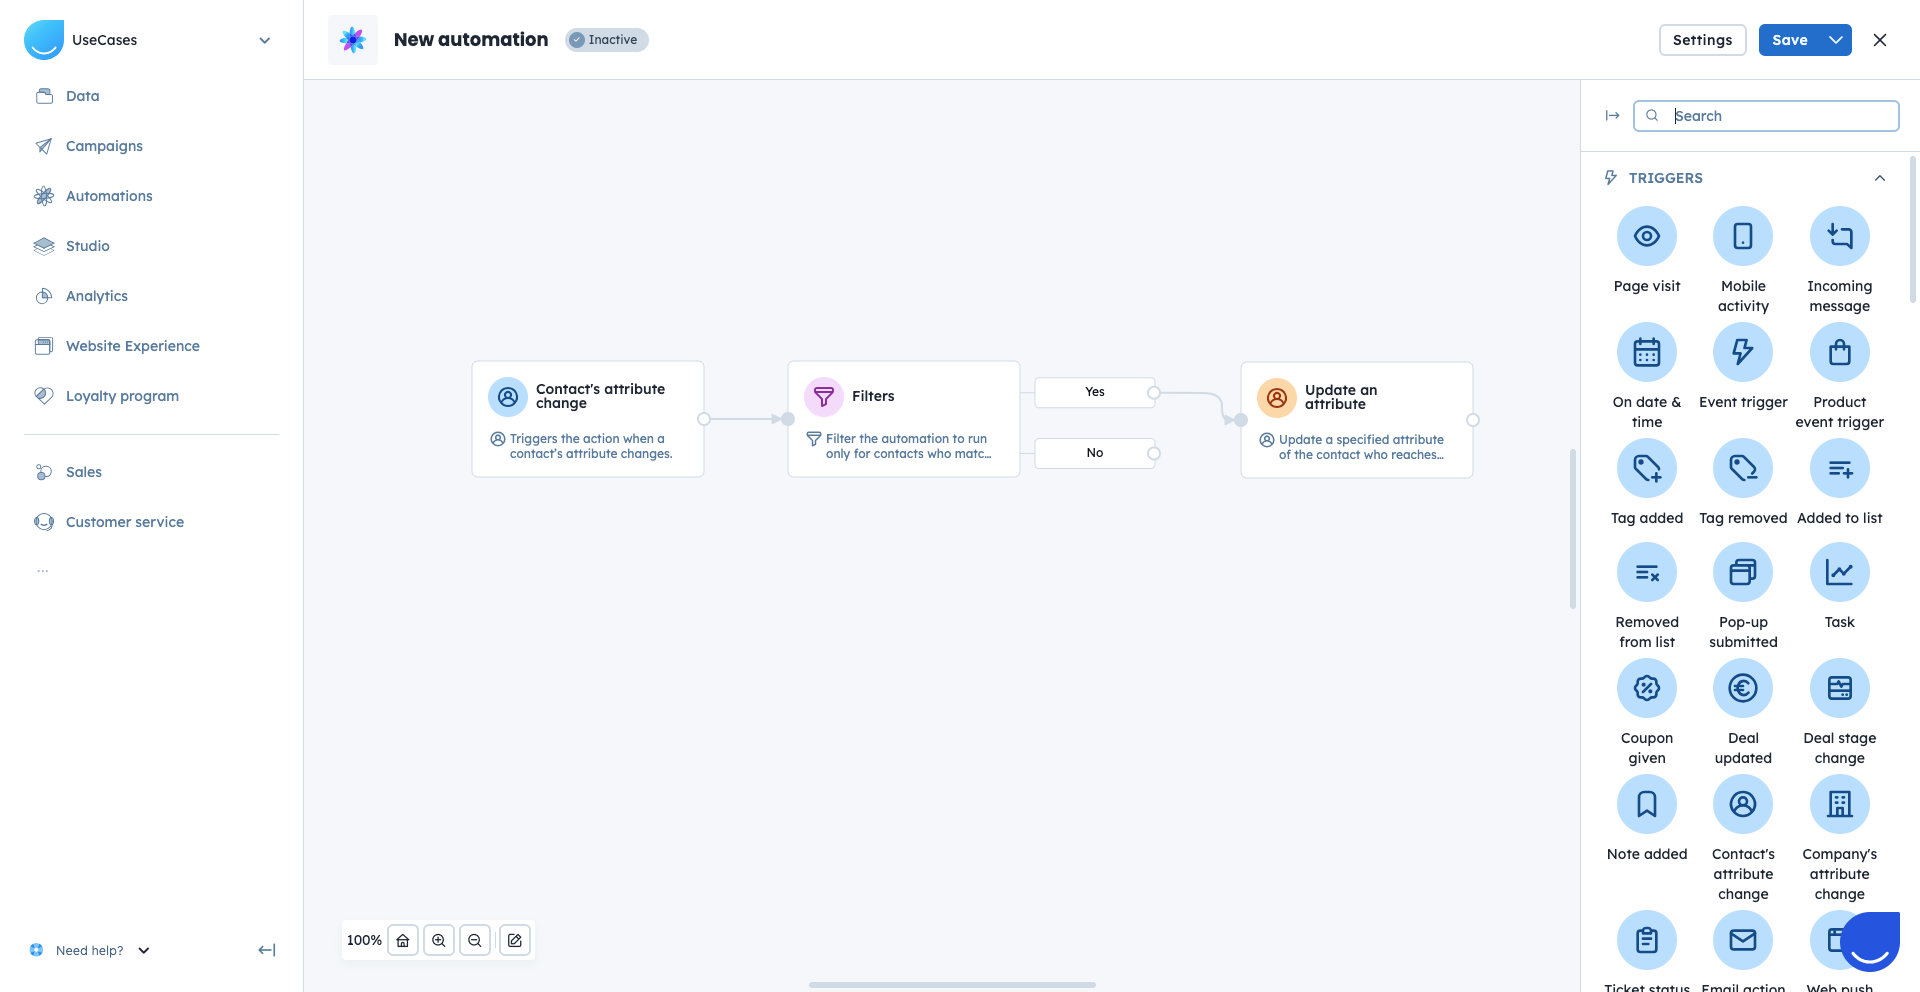
Now you need to create an automation to save the very first UTMs to the newly created attributes. Go to “Automations” → “New automation”.
Pick the “Contact’s attribute change” trigger, then “Filter” action, and then the “Update an attribute” action module. Connect them:
Trigger: choose one of the UTM attributes. The trigger will start when this attribute receives its first value. Example: ”utm_medium”
Filter: make sure the value is not empty. Check the attribute from the trigger for having a value. Example: “utm_medium” = has any value.
Action module: use a snippet tag to take the value from the regular UTM attribute and print it to the “first_utm_” attribute. Example:
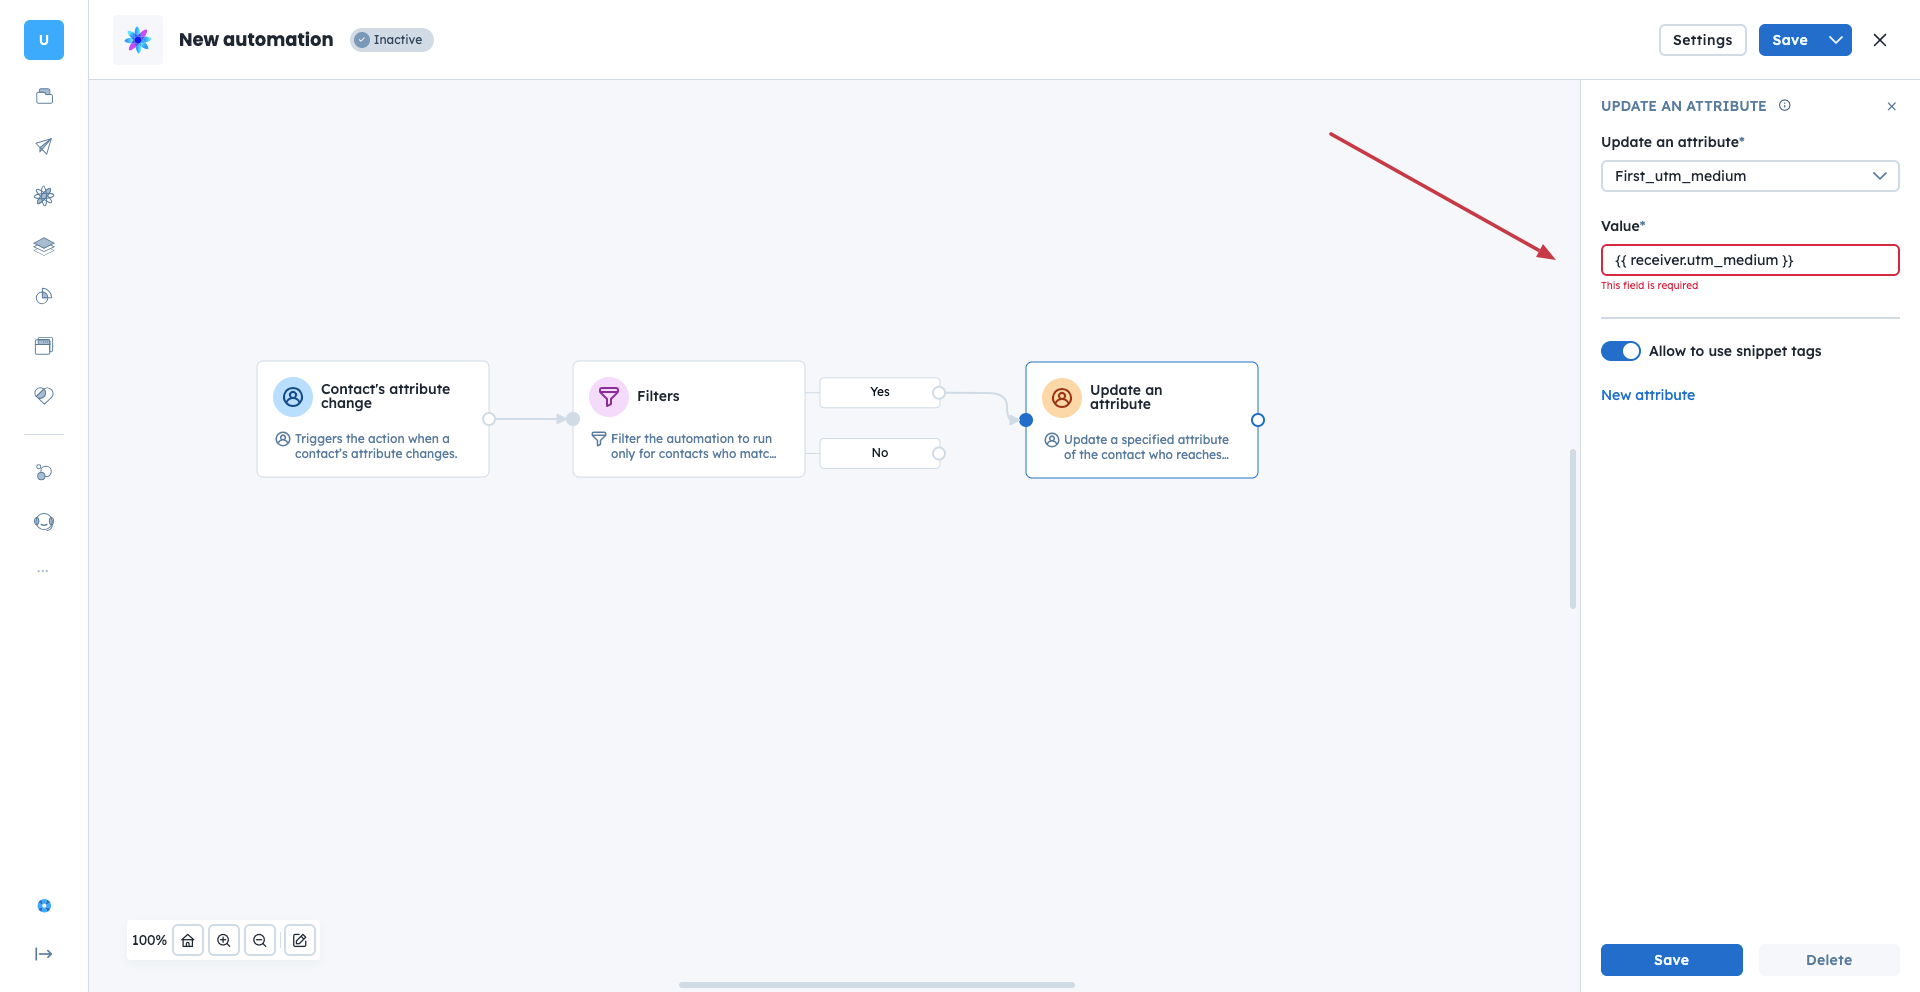
Use “Update an attribute” action module for every UTM tag you want to save.
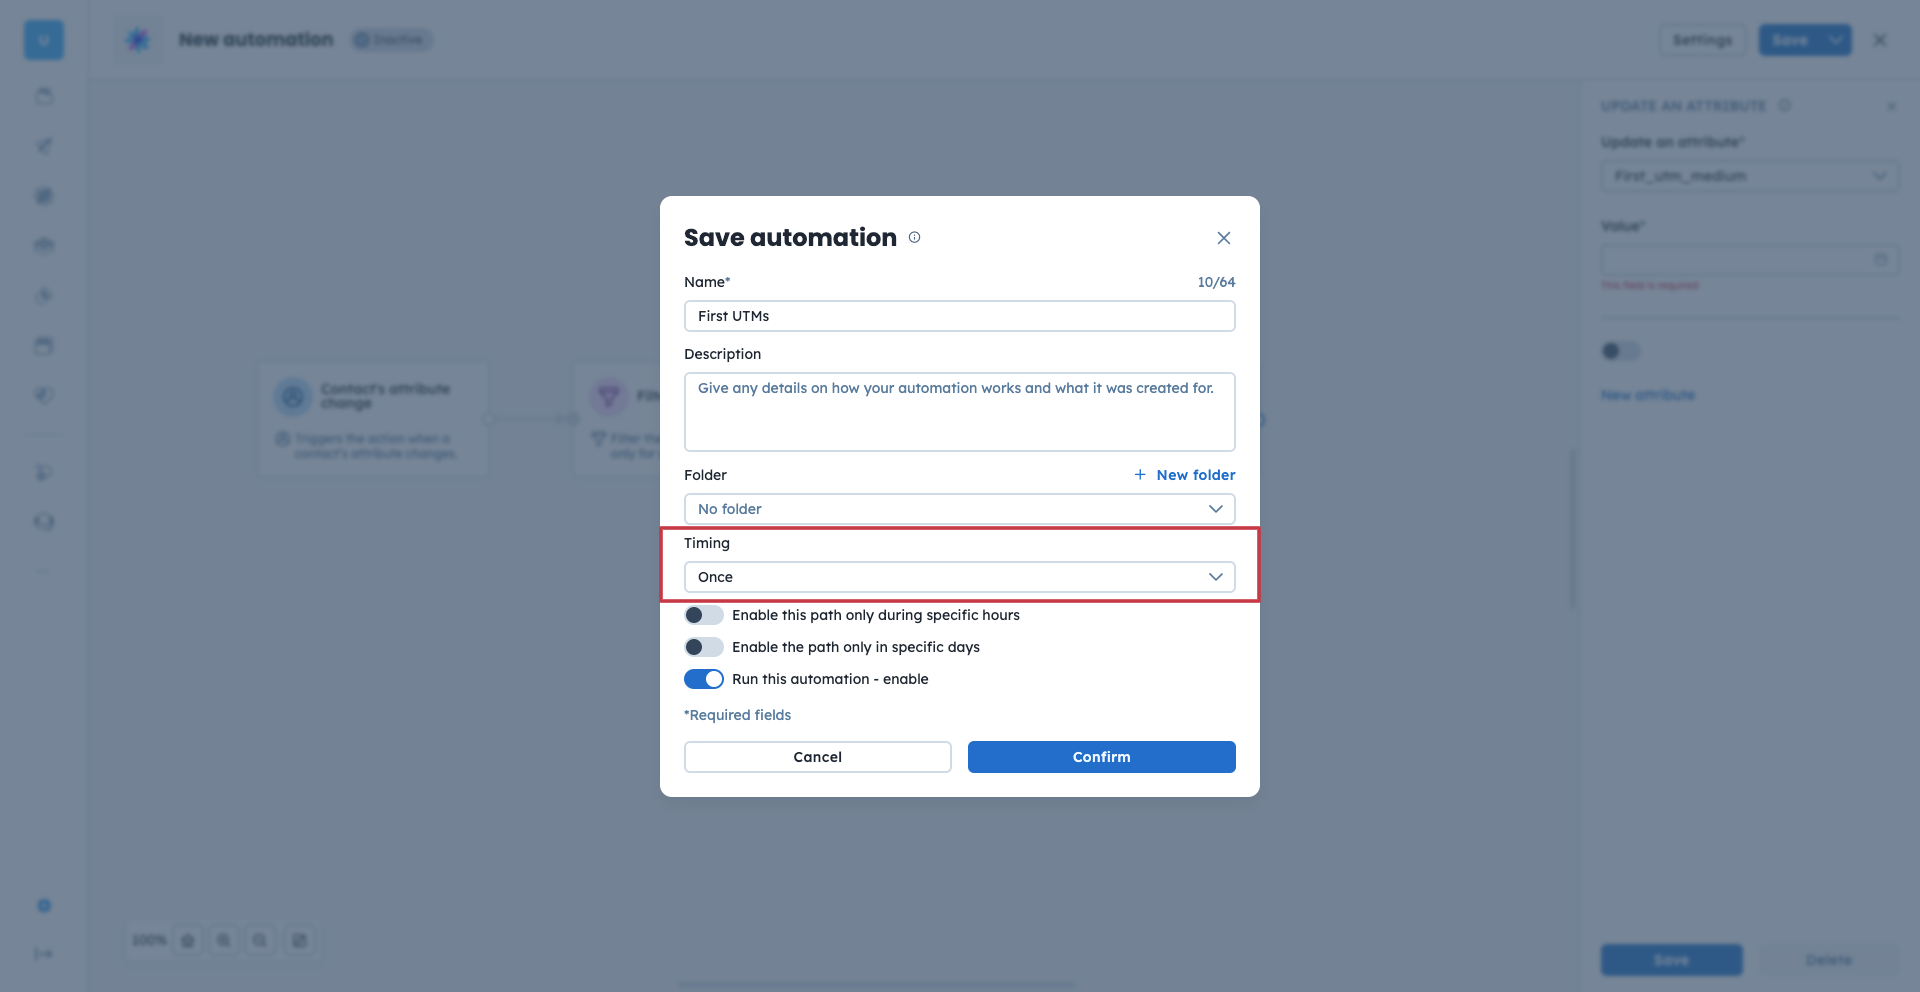
While saving the automation choose “once” timing. It’s important to perform this action only once per contact to save only the first value of the UTM tags.
The attributes store only the lasted information. If you want to have access to the history of the UTM tags for a specific contact, you need to use events.
Storing the history of UTM tags for a specific contact allows you to see every source they interacted with over time. By firing events with UTM tags as event attributes, you can store the exact timestamp and values of each interaction.
Create the attributes from the UTM parameters as described above in “Settings” → “Workspace Settings” → “Contact attributes”.
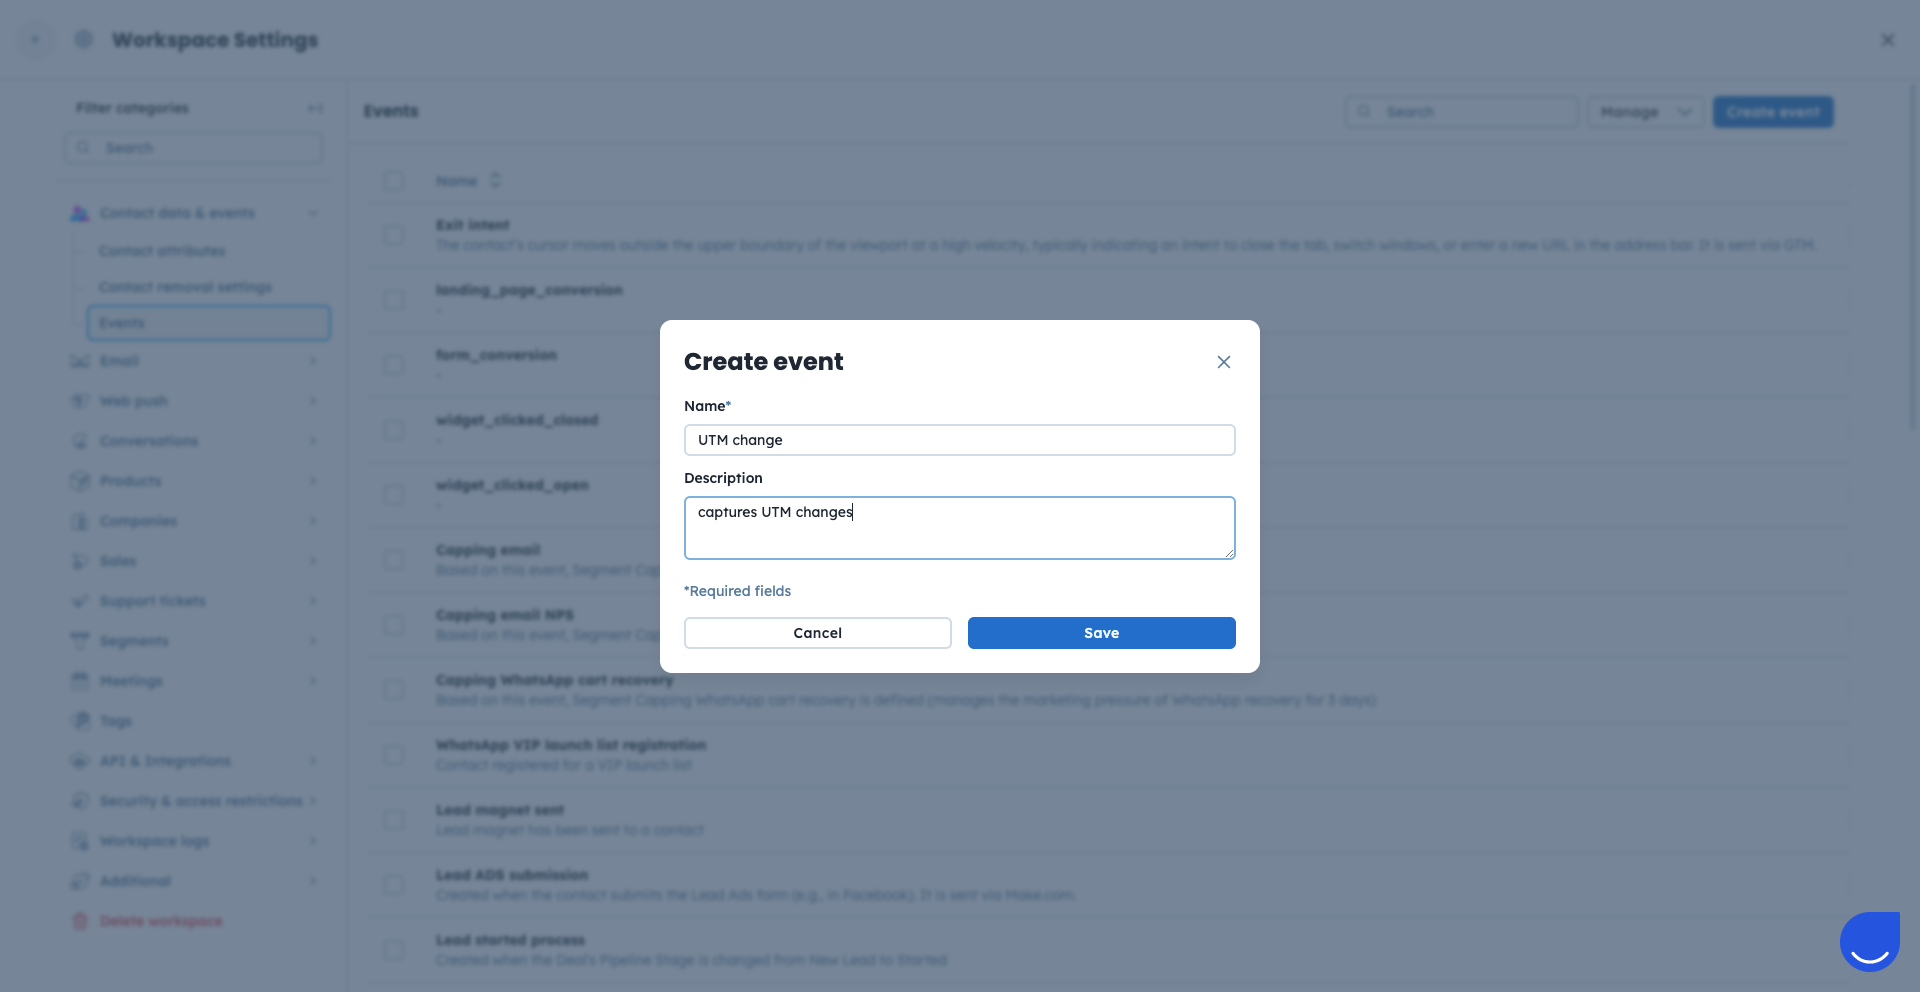
Create an event that you want to fire when the UTMs get updated. Go to “Settings” → “Workspace Settings” → “Events”. Example: “UTM change”
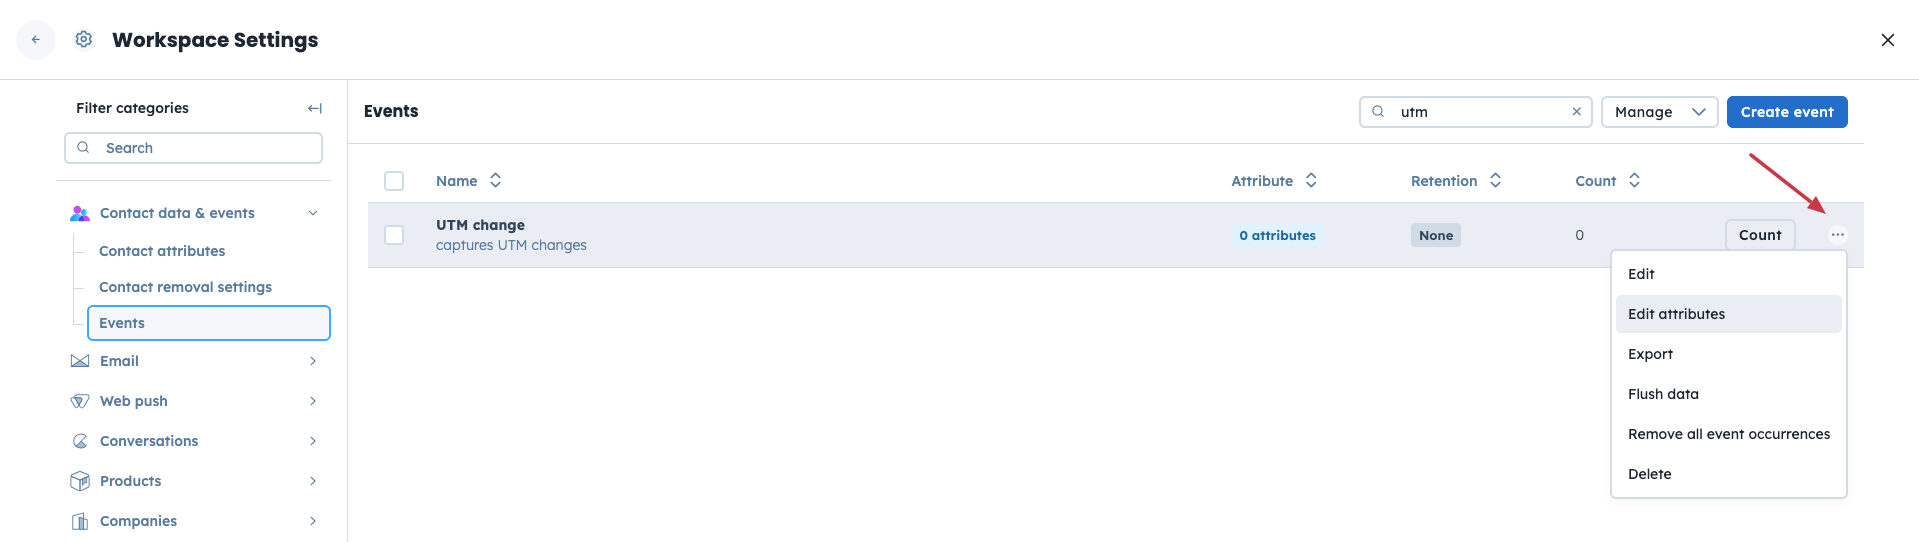
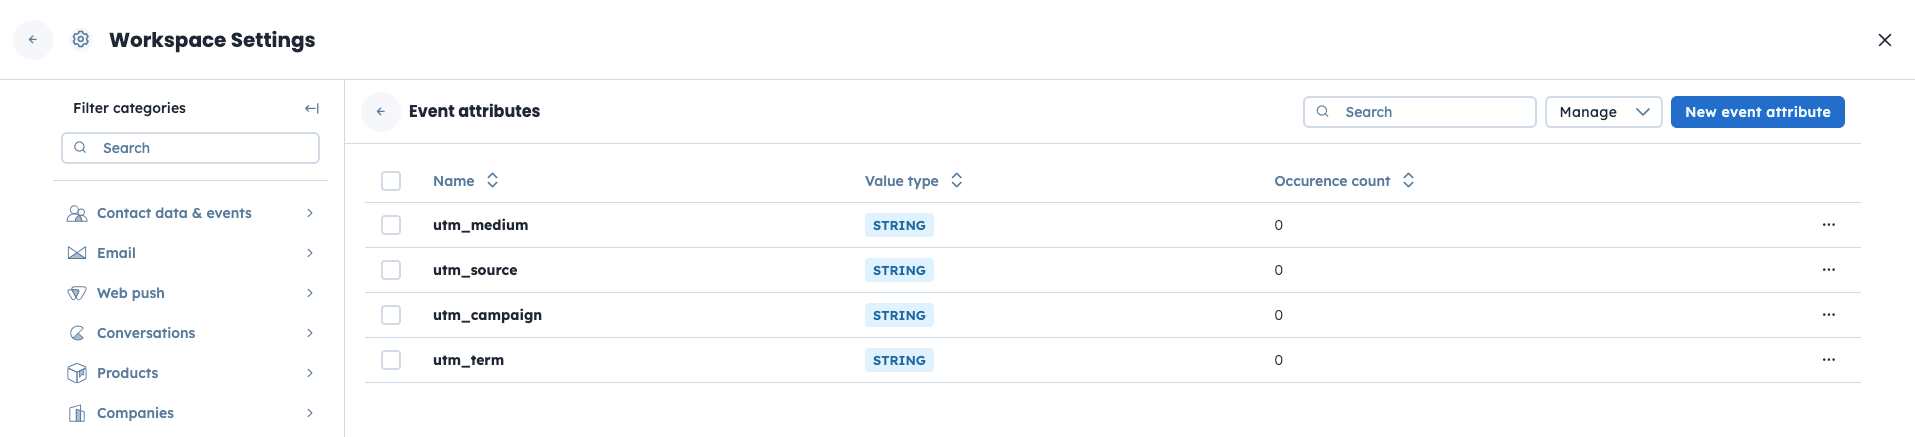
Create event attributes for this event. They can have the same names as the contact attributes for UTMs.
Now you need to create an automation to save the very first UTMs to the newly created attributes. Go to “Automations” → “New automation”.
Pick the “Contact’s attribute change” trigger and then the “Create event” action module. Connect them.
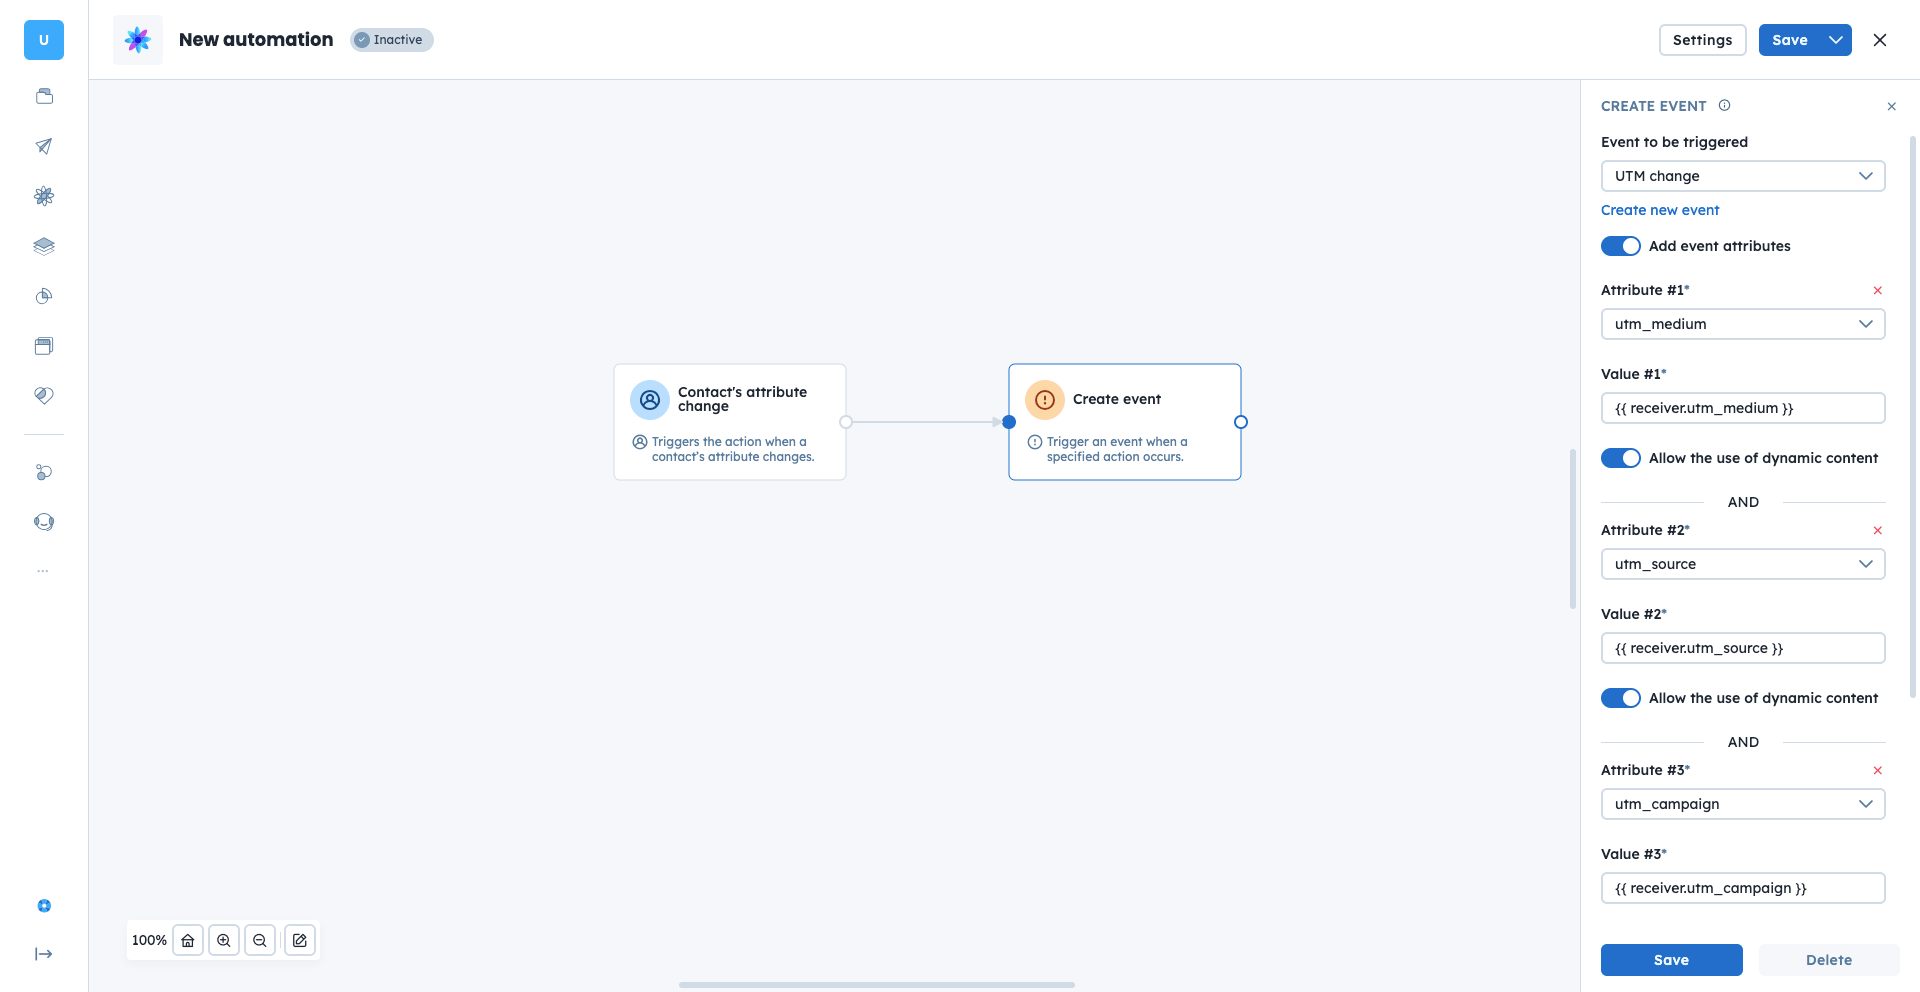
Trigger: choose one of the UTM attributes. The trigger will start when this attribute is updated. Example: ”utm_medium”
Action module: use a snippet tag to take the value from the regular UTM attribute and print it for the event attribute accordingly. Example: shown on the screenshot above.
Segmenting high-value sources: Create segments of contacts who arrived via "utm_medium" : "cpc" to analyze their conversion rate compared to organic traffic.
Personalizing email campaigns: Use the "utm_campaign" value to dynamically change the hero image in an email to match the ad the contact originally clicked.
Triggering sales tasks: Automatically create a task for a sales representative when an anonymous contact becomes a contact via a specific "utm_content" link.
Ensure your team uses a unified naming convention. UTMs are case-sensitive; "Email" and "email" will be tracked as two separate sources, which can fragment your analytics.
How to Send UTM Parameters via GTM [LINK]
