Help your emails be perfectly fit by showing contacts exactly what they care about. Using event data allows you to automatically insert details from a contact's recent actions directly into your message. Whether you want to summarize their recent product usage, remind them of an abandoned cart, or confirm consultation details, your team can easily generate the right dynamic snippet.
To start from the basics, check the following articles:
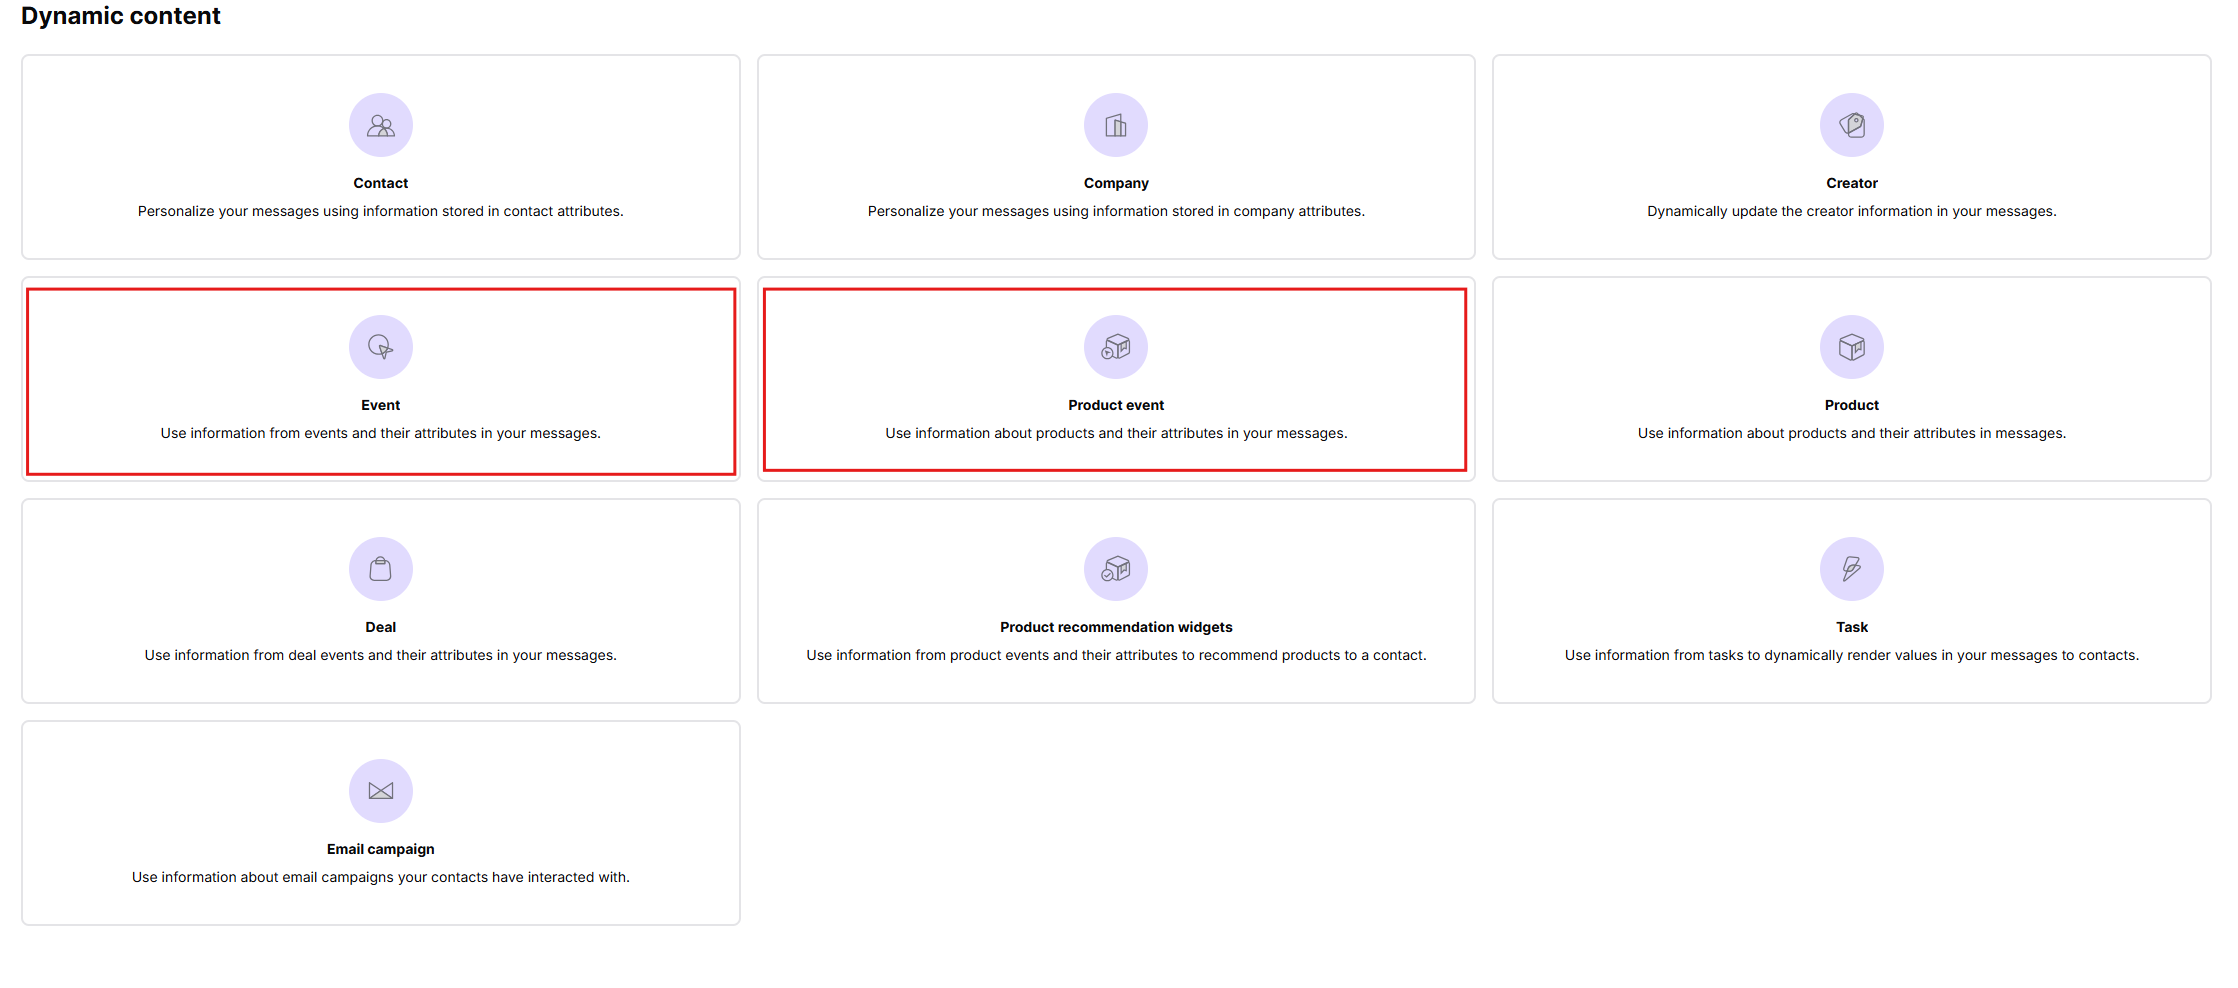
Go to “Studio” → “Dynamic Content” → “Events” / “Product events”.
Here, you will choose the type of data you want to use:
Event: Use these to pull data from general actions sent to your system, like filling out a form or booking a meeting.
Product Event: Use these to generate lists of products based on specific product interactions saved in the contact's profile, such as items they recently bought or added to their cart.
This step tells the system exactly which events to look for and how much data to show in the email. Select your specific event from the list, and then adjust the following parameters:
Standard Parameters (for all event types):
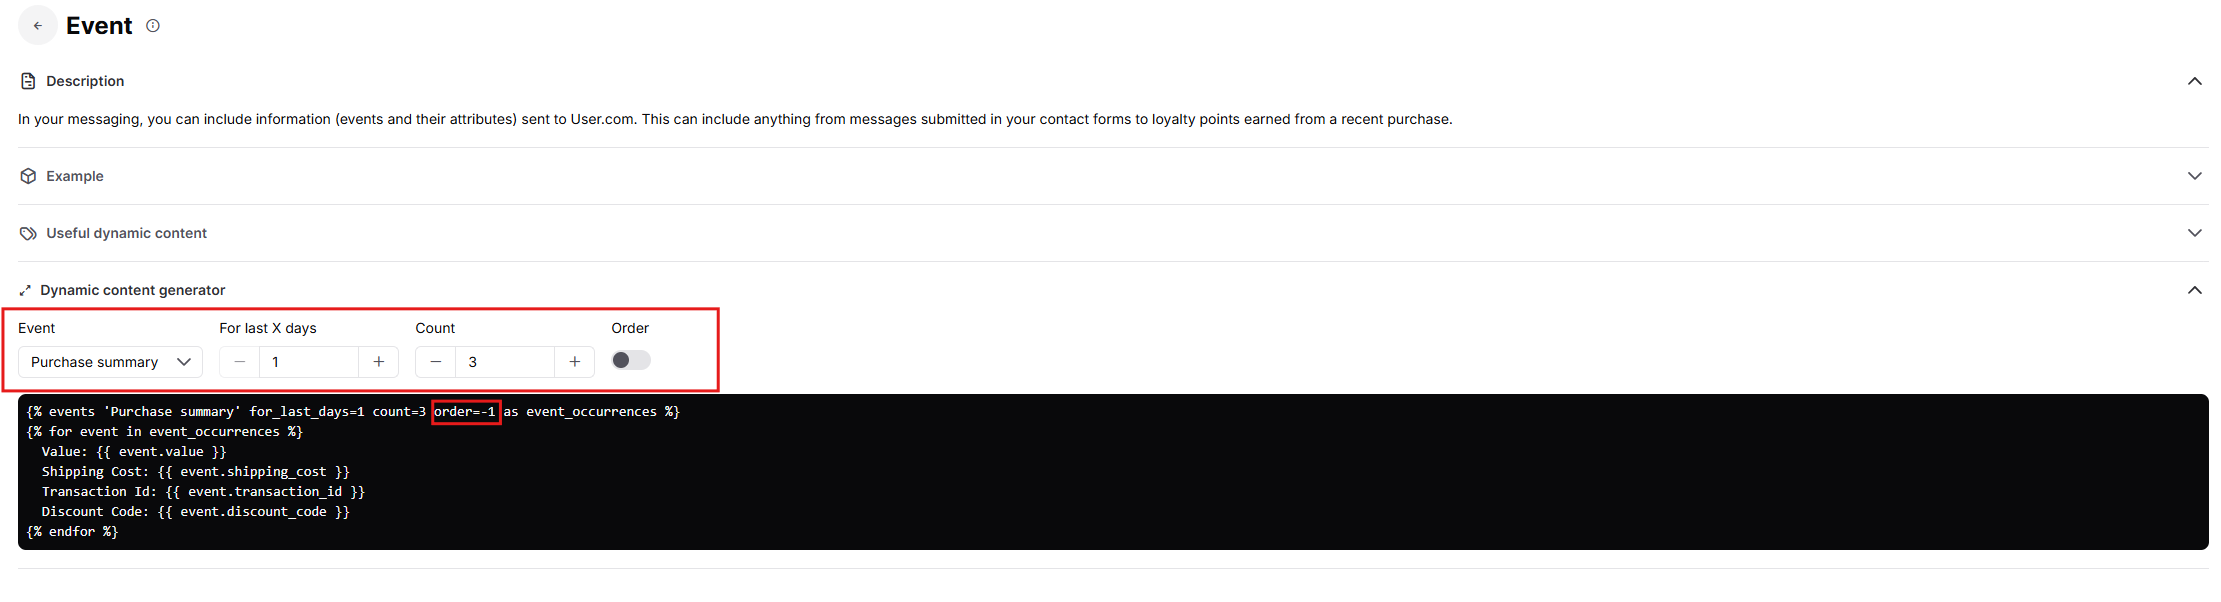
Event: Select the specific action you want to reference (e.g., add_to_cart, purchase, or consultation).
For last X days: Specifies the time range - how many days back the system should search for this event. For example, entering “1” pulls events from only last 24 hours.
Count: Defines the maximum number of event occurrences to display. For example, if you enter “3”, but the contact acted 7 times, the email will only show information about 3 events.
Order: Determines how the events are sorted. Turn the toggle off (value “-1” in the variable) to show the newest, most recent events first (descending). Turn the toggle on (value “1” in the variable) to show the oldest events first (ascending).
Additional Parameters for product event:
Category: Allows you to narrow down the generated list to products from a specific category (e.g., “Accessories” or “Men”).
Unique: That ensures products on the list are not duplicated, even if the event was performed on the same product multiple times: 1 = true, 0 = false. If you want to show just an event for the same product once, use value 1.
In stock: A toggle (e.g., in_stock='false') that allows you to decide whether to display products based on their stock availability.
Segments: Limits results to products within a specific segment (e.g., segment='Bestsellers'). This parameter is not in the generator by default; you can add it yourself instead of Category.
{% product_events event_type='add to cart' count=3 segment='Bestsellers' unique=1 order=-1 availability='in stock' as event_occurrences %}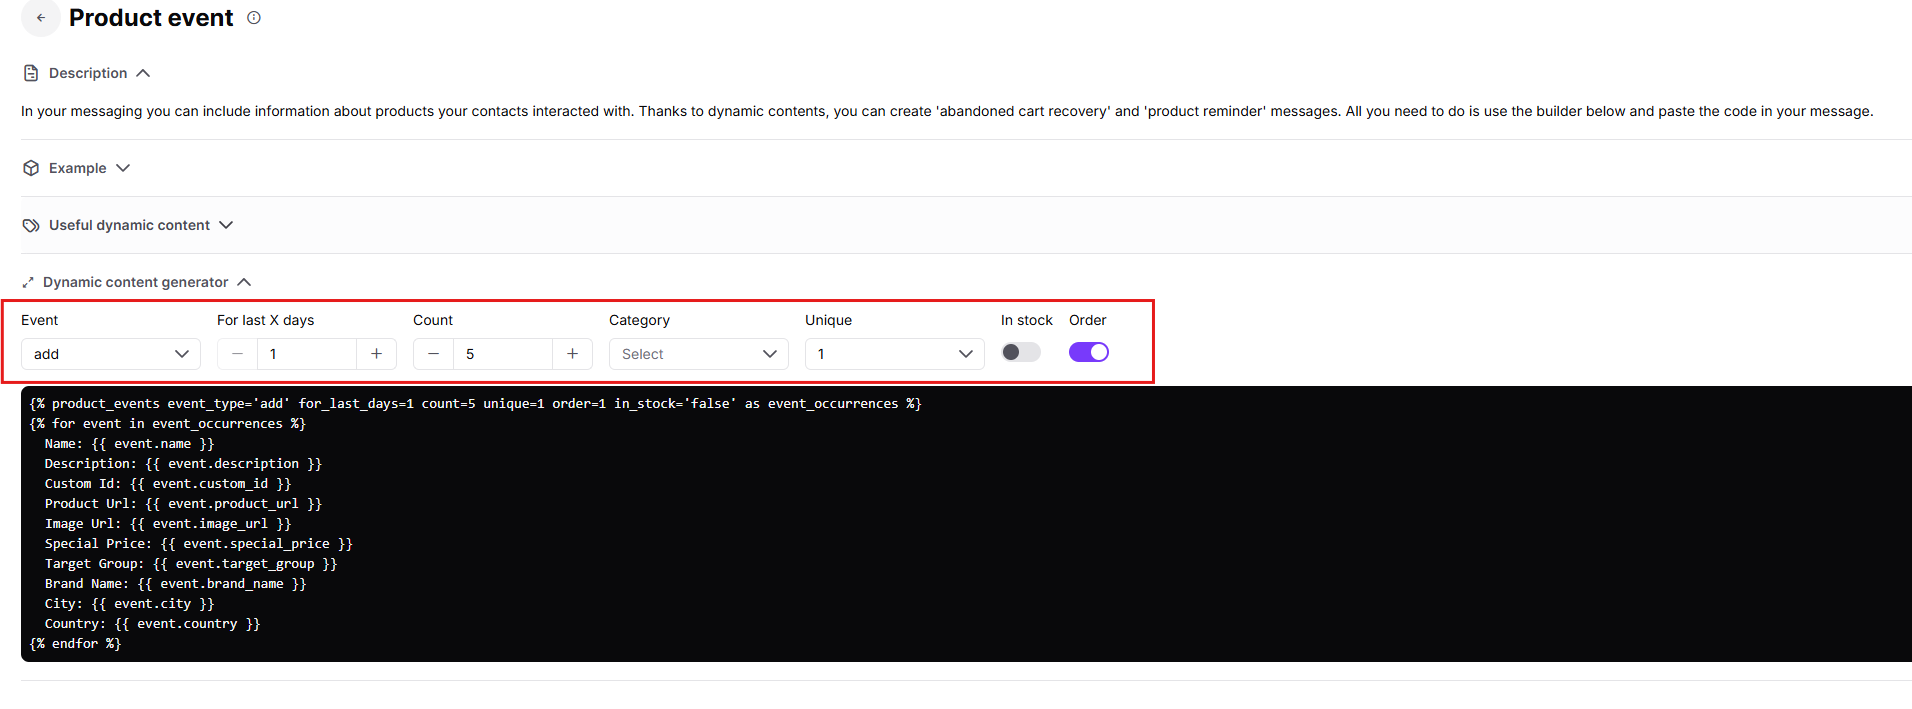
When using event-based dynamic content, it is important to understand that it always consists of three logical parts:
Opening the event loop – this part defines which events will be used.
Displaying event attributes – this is where you decide what data from the event will be shown.
Closing the loop – this part ends the dynamic content structure.
1. Opening the loop: This is the first line generated by the system. It tells the system which events to fetch. Don’t change this part. You should copy this part one-to-one and only adjust the parameters if needed.
{% events 'event_name' for_last_days=1 count=3 order=-1 as event_occurrences %}2. Add elements that display event attributes
Next, you define how each event should be presented in the email.
This is the part you can customize freely to suit your design and business needs.
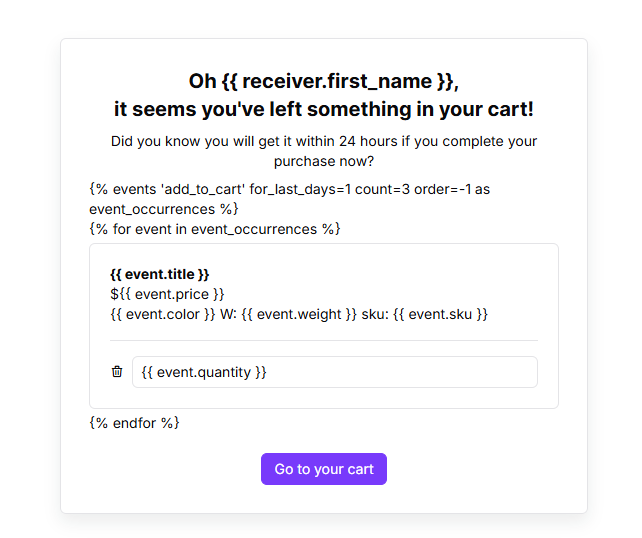
{% for event in event_occurrences %}
{{ event.title }}
${{ event.price }}
{{ event.color }}
{{ event.quantity }}
Everything written inside double brackets {{ }} refers to a specific attribute of the event.
To display an attribute, always use this structure:
{{ event.ATTRIBUTE_NAME }}
The attribute name must exactly match the attribute sent with the event.
You can mix dynamic values with regular text, HTML elements, images, or buttons.
This allows you to fully control how event data appears in the email.
3. Close the loop
At the end, you must close the loop:
{% endfor %}This line tells the system that all event occurrences have been rendered and no more data should be displayed.
Without this closing line, the dynamic content will not render correctly.

Example:
You can easily adjust how the pulled text looks right inside the email editor without touching the database. Just add these modifiers after your attribute name:
Capitalize the first letter: Add |capfirst to make the first letter uppercase (for example, {{receiver.last_name|capfirst}}).
Provide a fallback word: Use |default:"Your Word" to show a backup phrase if the contact's field is empty (for example, {{receiver.first_name|default:"Friend"}} ensures the email says "Hi Friend" instead of a blank space).
Shorten long text: Use |truncatewords:2 to cut off the text after a specific number of words , or |truncatechars:10 to limit the exact number of characters (for example, {{event.description|truncatewords:2}}.
Format prices correctly: Add |floatformat:2 to always display prices with two decimal places (for example, {{event.price|floatformat:2}} could change 89.9 to 89.90).
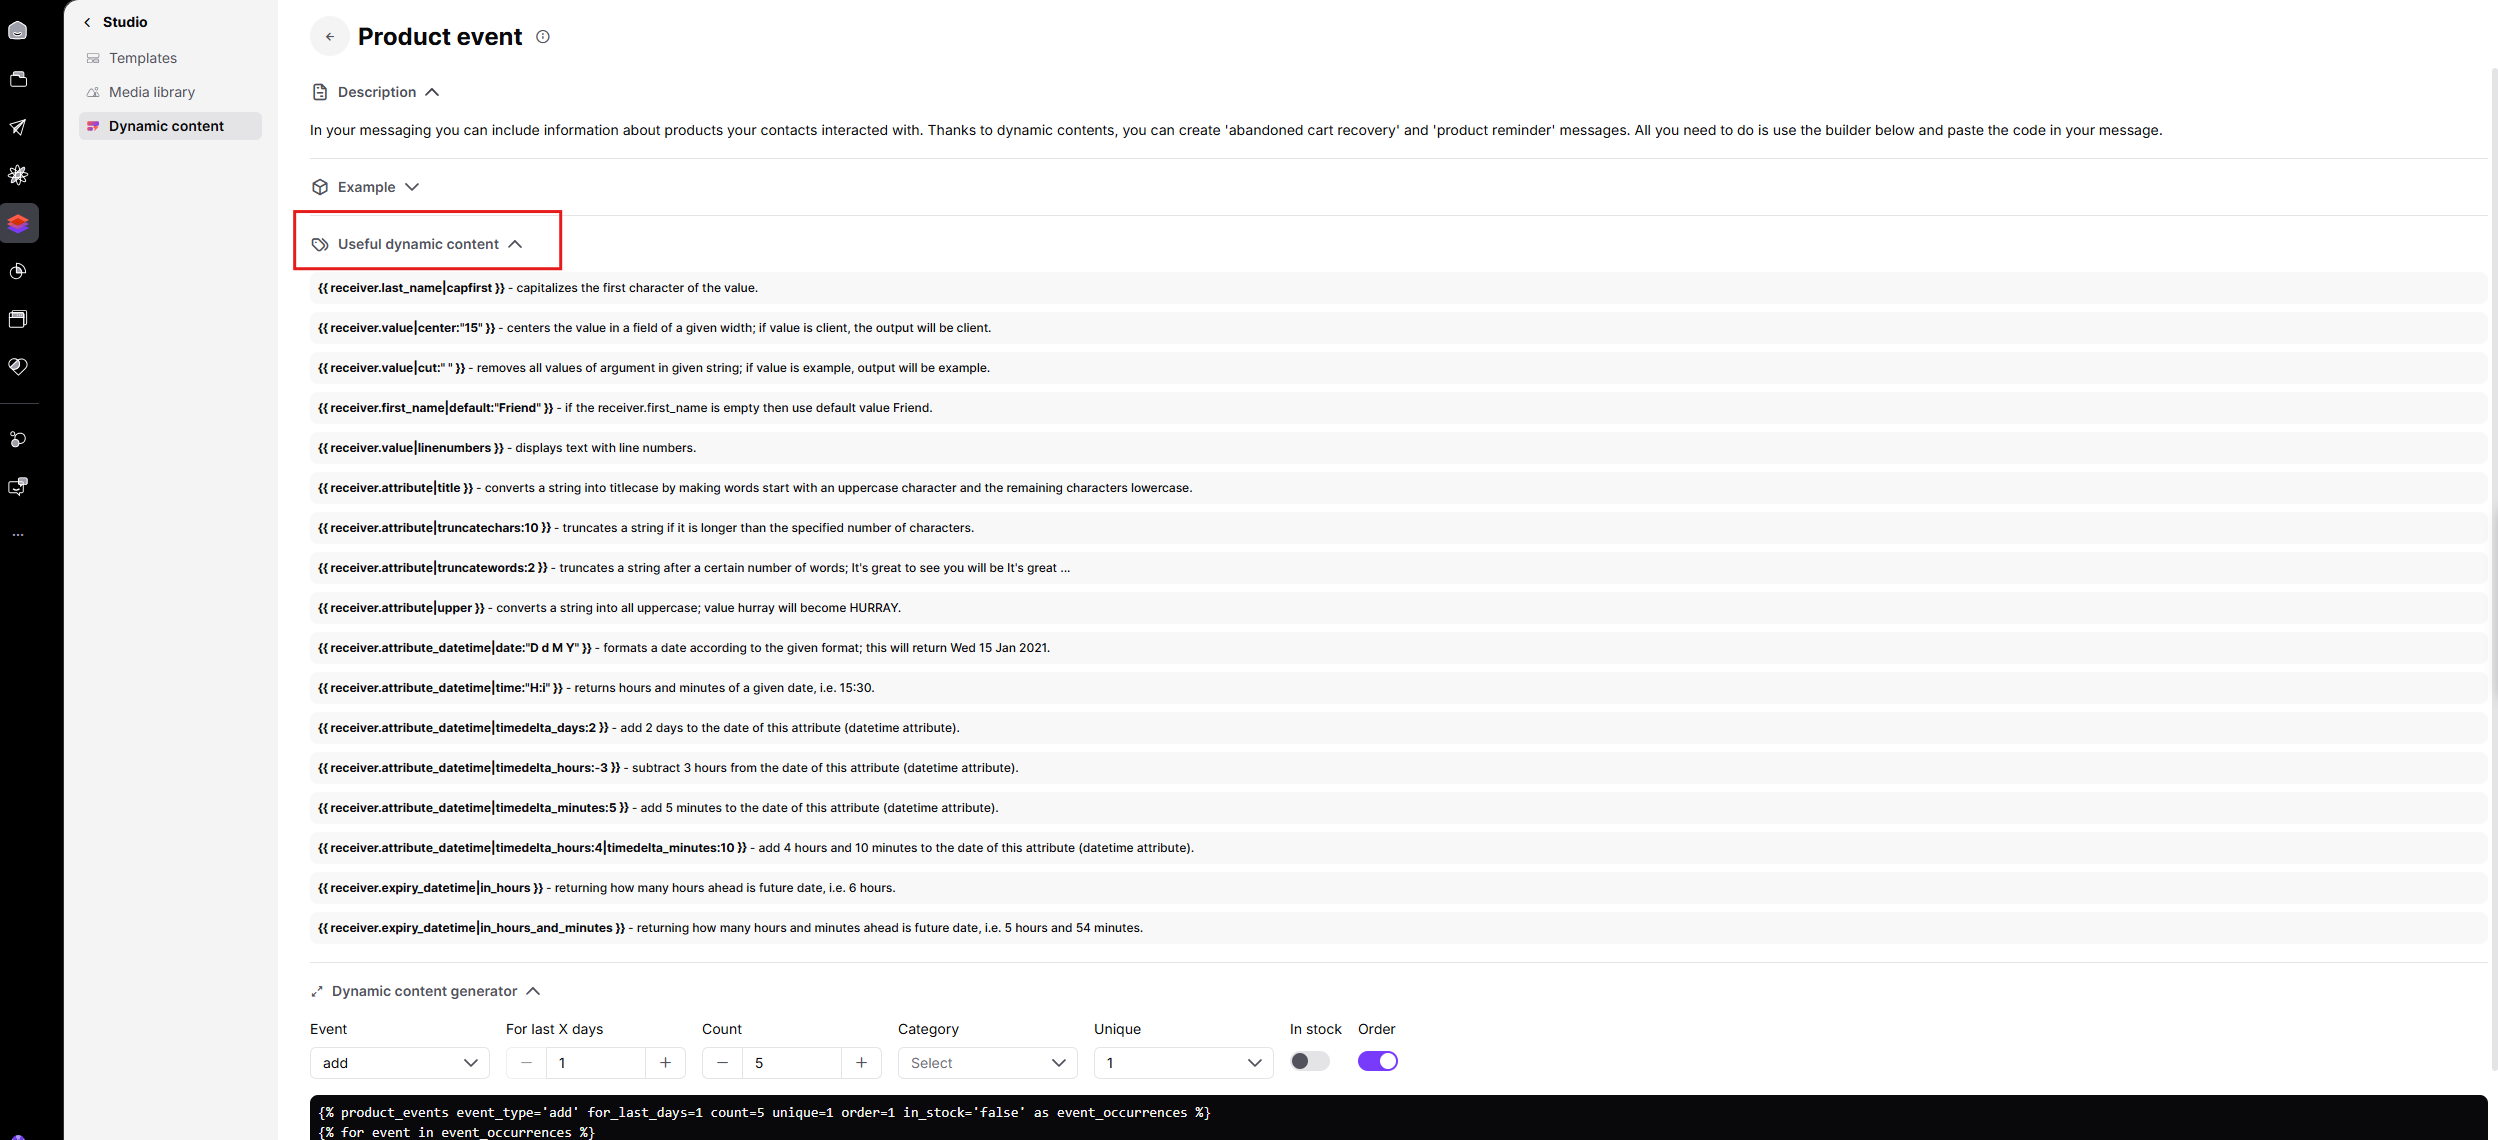
You can find a list of all modification options in the Useful dynamic content section behind the Dynamic content generator or in this article.
In Positive User, you can render different data based on a contact's attributes or the specific details of an event. You can accomplish this using If/Else conditions.
For example, to show a special 20% discount only if a contact has made more than three purchases, and a 5% discount to everyone else, your team would write:
{% if receiver.number_of_purchases > 3%}
Here is your 20% discount code!
{% else %}
Here is your 5% discount code!
{% endif %}
{% endif %} tag.More about conditional rules you can find in this article [LINK]
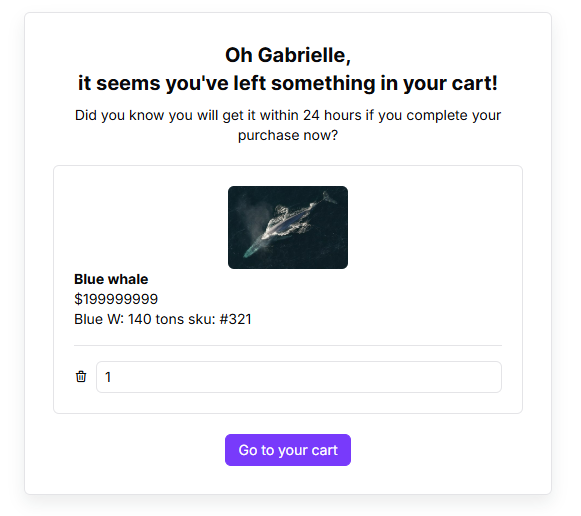
Abandoned Carts: A contact leaves items in their cart without checking out, and you can remind them of exactly what they left behind. Use product event tags to automatically display the name, price, and image of the specific items they forgot to buy. You can use conditional logic to show the discount price if products have a lower price for now.
App Usage Summary: You can send a weekly automated email showing a contact how much value they are getting from your software. For that use standard event tags to print out the number of tasks completed or projects created in the last 7 days.
Booking Confirmations: You need to confirm the specific details of a booking right after a contact signs up. Use event tags to pull the specific consultation topic and the exact date from the booking event directly into the welcome email.
Trial Expiration Warnings: If you need to warn a contact that their free trial is ending soon and encourage them to add their billing details, then use standard event tags to reference the "trial_started" event. Inside the snippet, apply the date modifier to the starting date (for example, |timedelta_days:14) to automatically calculate and display the exact date their access will be cut off.
Webinar Follow-Ups: To send a personalized thank-you email immediately after a contact attends a webinar, giving them the specific recording link they need, use standard event tags to pull the attributes from the "webinar_attended" event. Your email will automatically insert the exact topic of the presentation and the unique recording URL directly into the text.
Loyalty Point Updates: If you want to gamify the shopping experience by updating a contact on their reward points right after a purchase. then apply event tags to pull the "points_earned" event. Display the exact amount of points they just gained from their last transaction, and use the math addition modifier (for example, |add: receiver.current_points) to calculate and display their new total balance in real time.