Email campaigns are one of the most powerful and versatile tools in digital marketing, helping businesses build relationships, drive engagement, and deliver personalized messaging at scale. Whether you’re sharing updates, nurturing leads, or promoting new offers, email gives you direct access to your audience in a channel they trust.
Automated email campaigns are best used when you want to deliver timely, relevant messages triggered by a subscriber’s actions or lifecycle stage. They’re ideal for onboarding new users, nurturing leads, sending abandoned-cart reminders, or re-engaging inactive customers - situations where consistency and personalization make a big impact.
Because these emails are sent automatically based on defined conditions, they ensure every contact receives the right message at the right moment, without requiring manual effort. This makes automated campaigns especially valuable for improving conversions, strengthening customer relationships, and providing a seamless, scalable user experience.
In User.com email campaigns are understood as a combination of content and settings which allow you to send email.
Due to that, the process of the campaign creation is divided into several steps. Let’s through all of them.
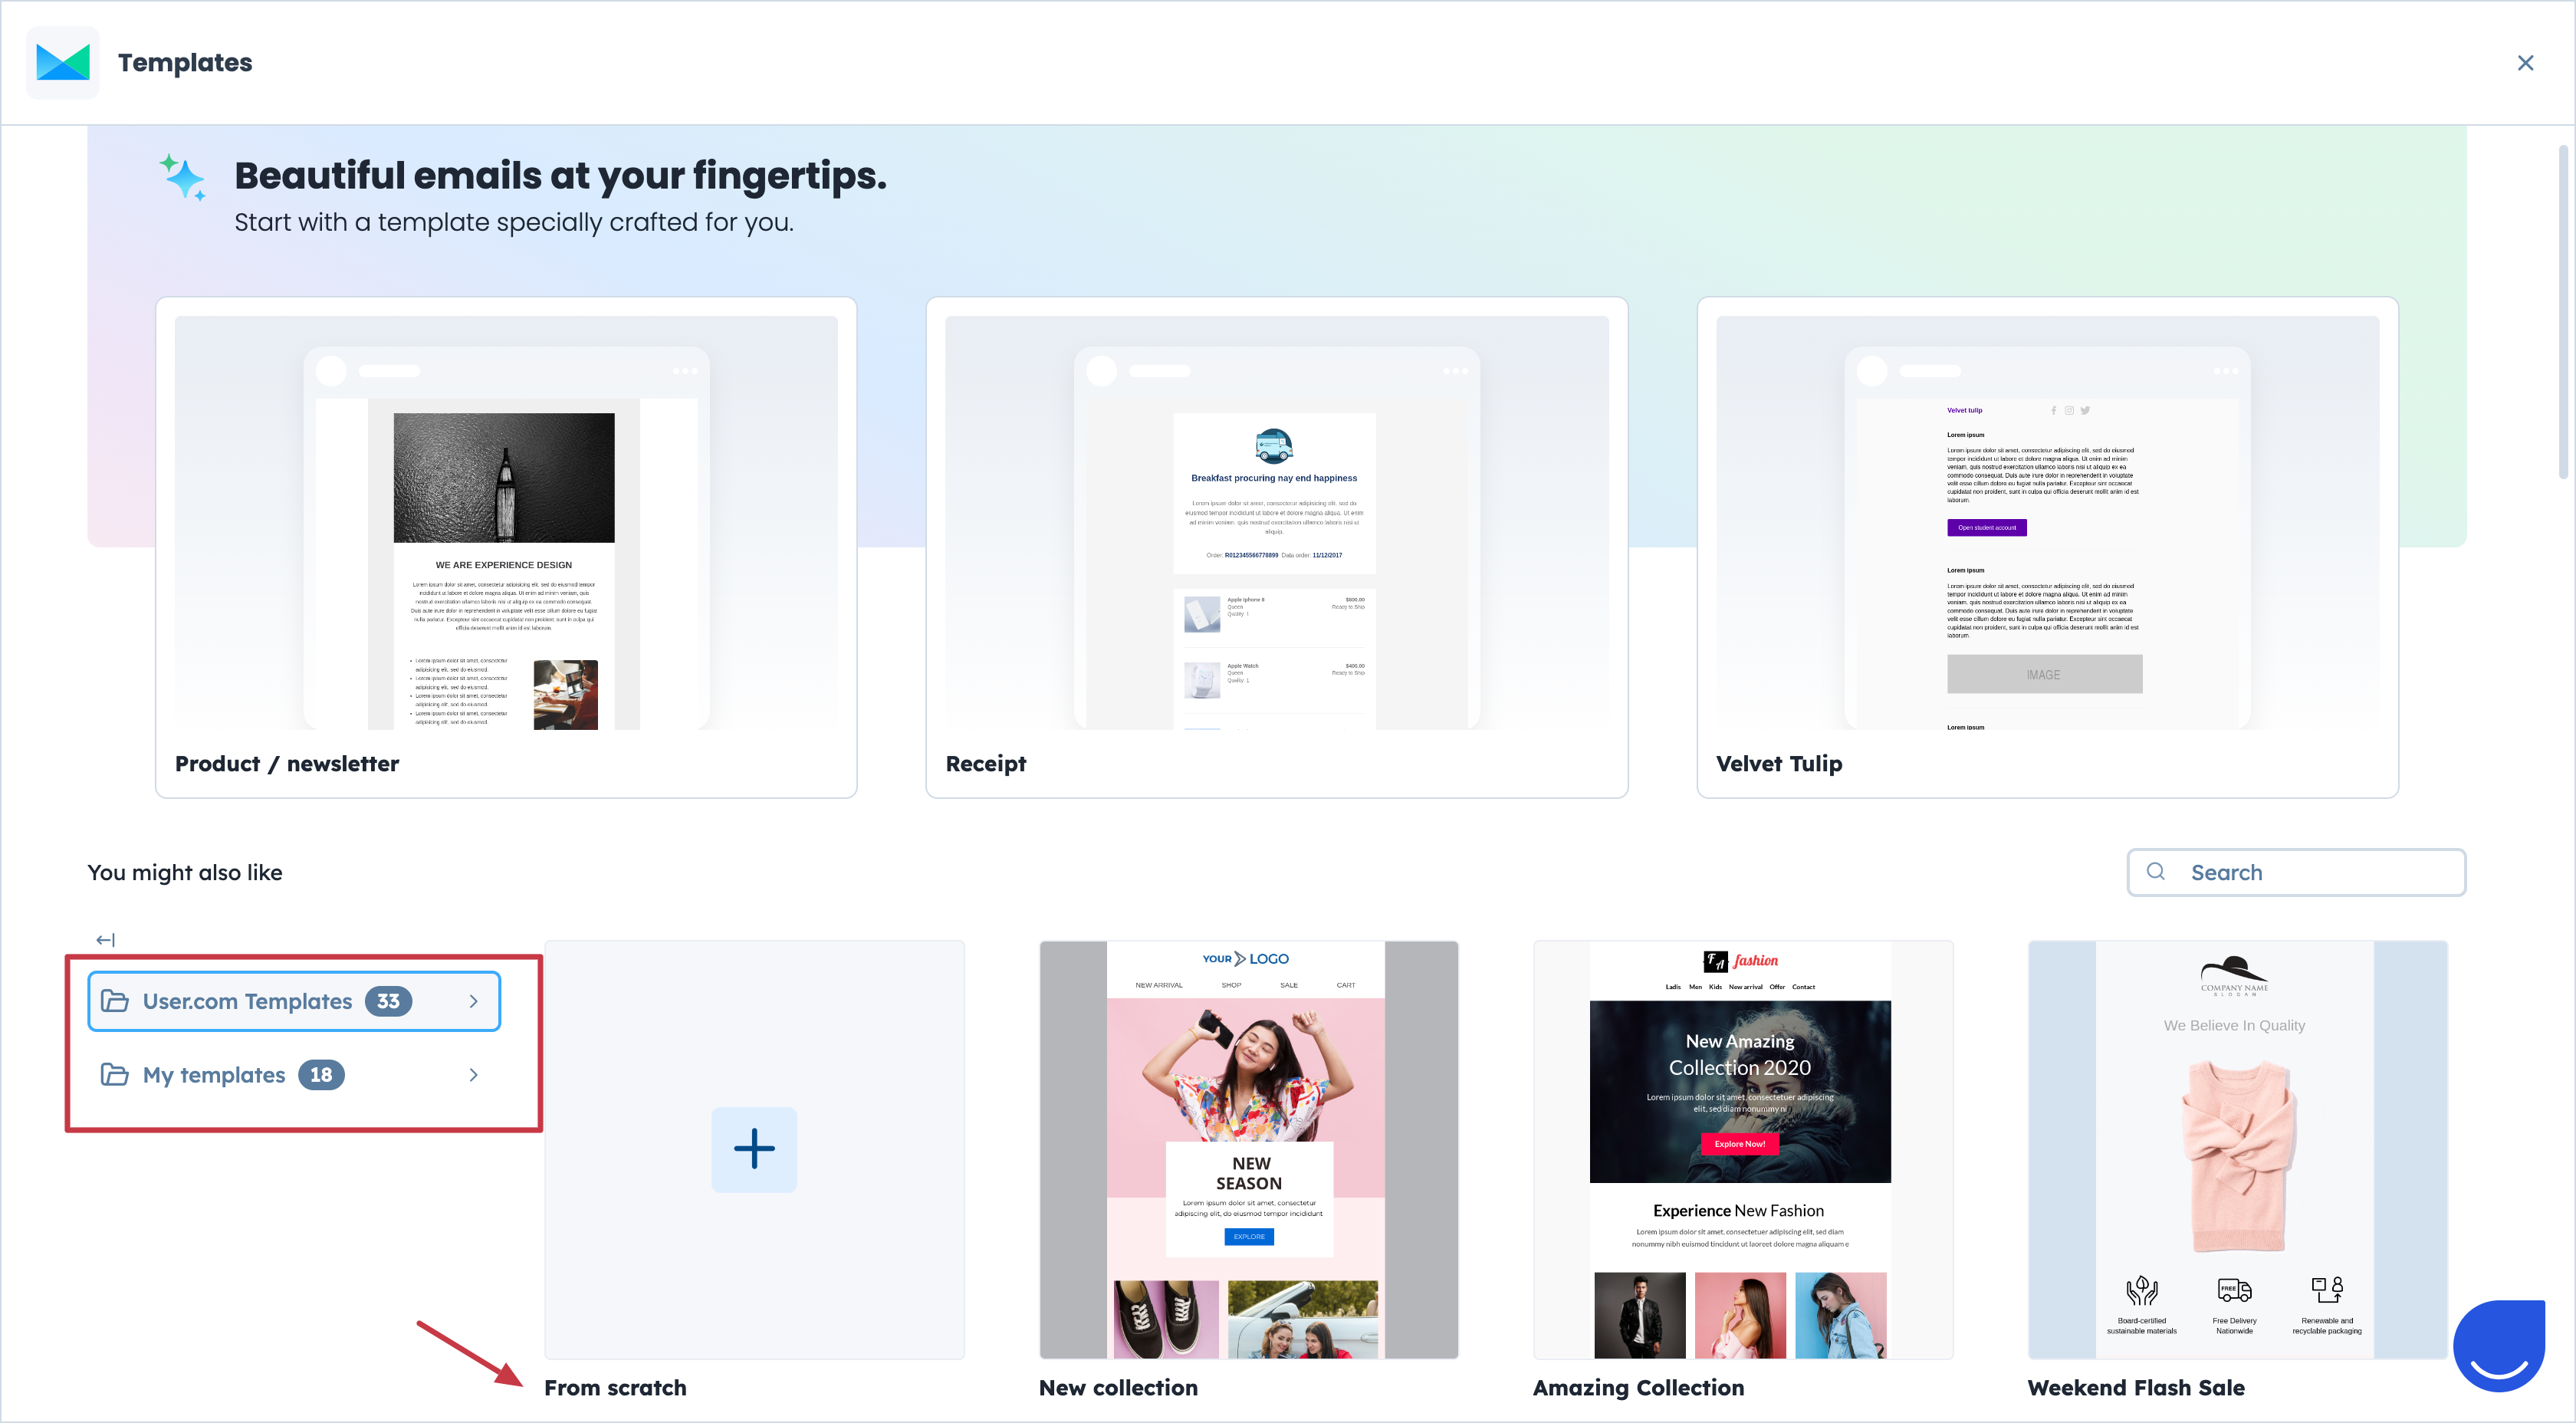
Go to “Campaigns" → "Email" → "New campaign".
Choose one of the existing templates or create your own from scratch.
“User.com Templates”: predefined templates that can be modified & adjusted to your needs.
“My templates”: library of the templates created by your team previously.
“From scratch”: you can create a new template for this specific campaign.
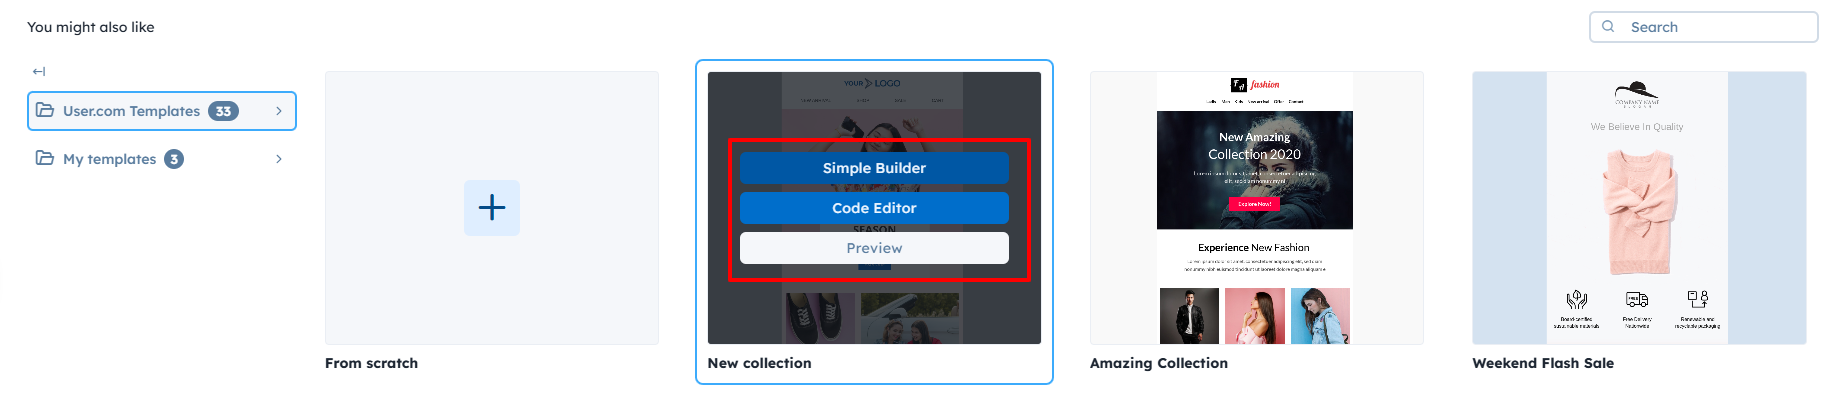
Hover over the chosen template to see 3 options:
Simple Builder: selected template opens in Drag&Drop Editor.
Code Editor: selected template opens in Code Editor.
Preview: you can preview chosen template to check the details before working with it.
This choice confirms which tool you are going to use for the work with the content.
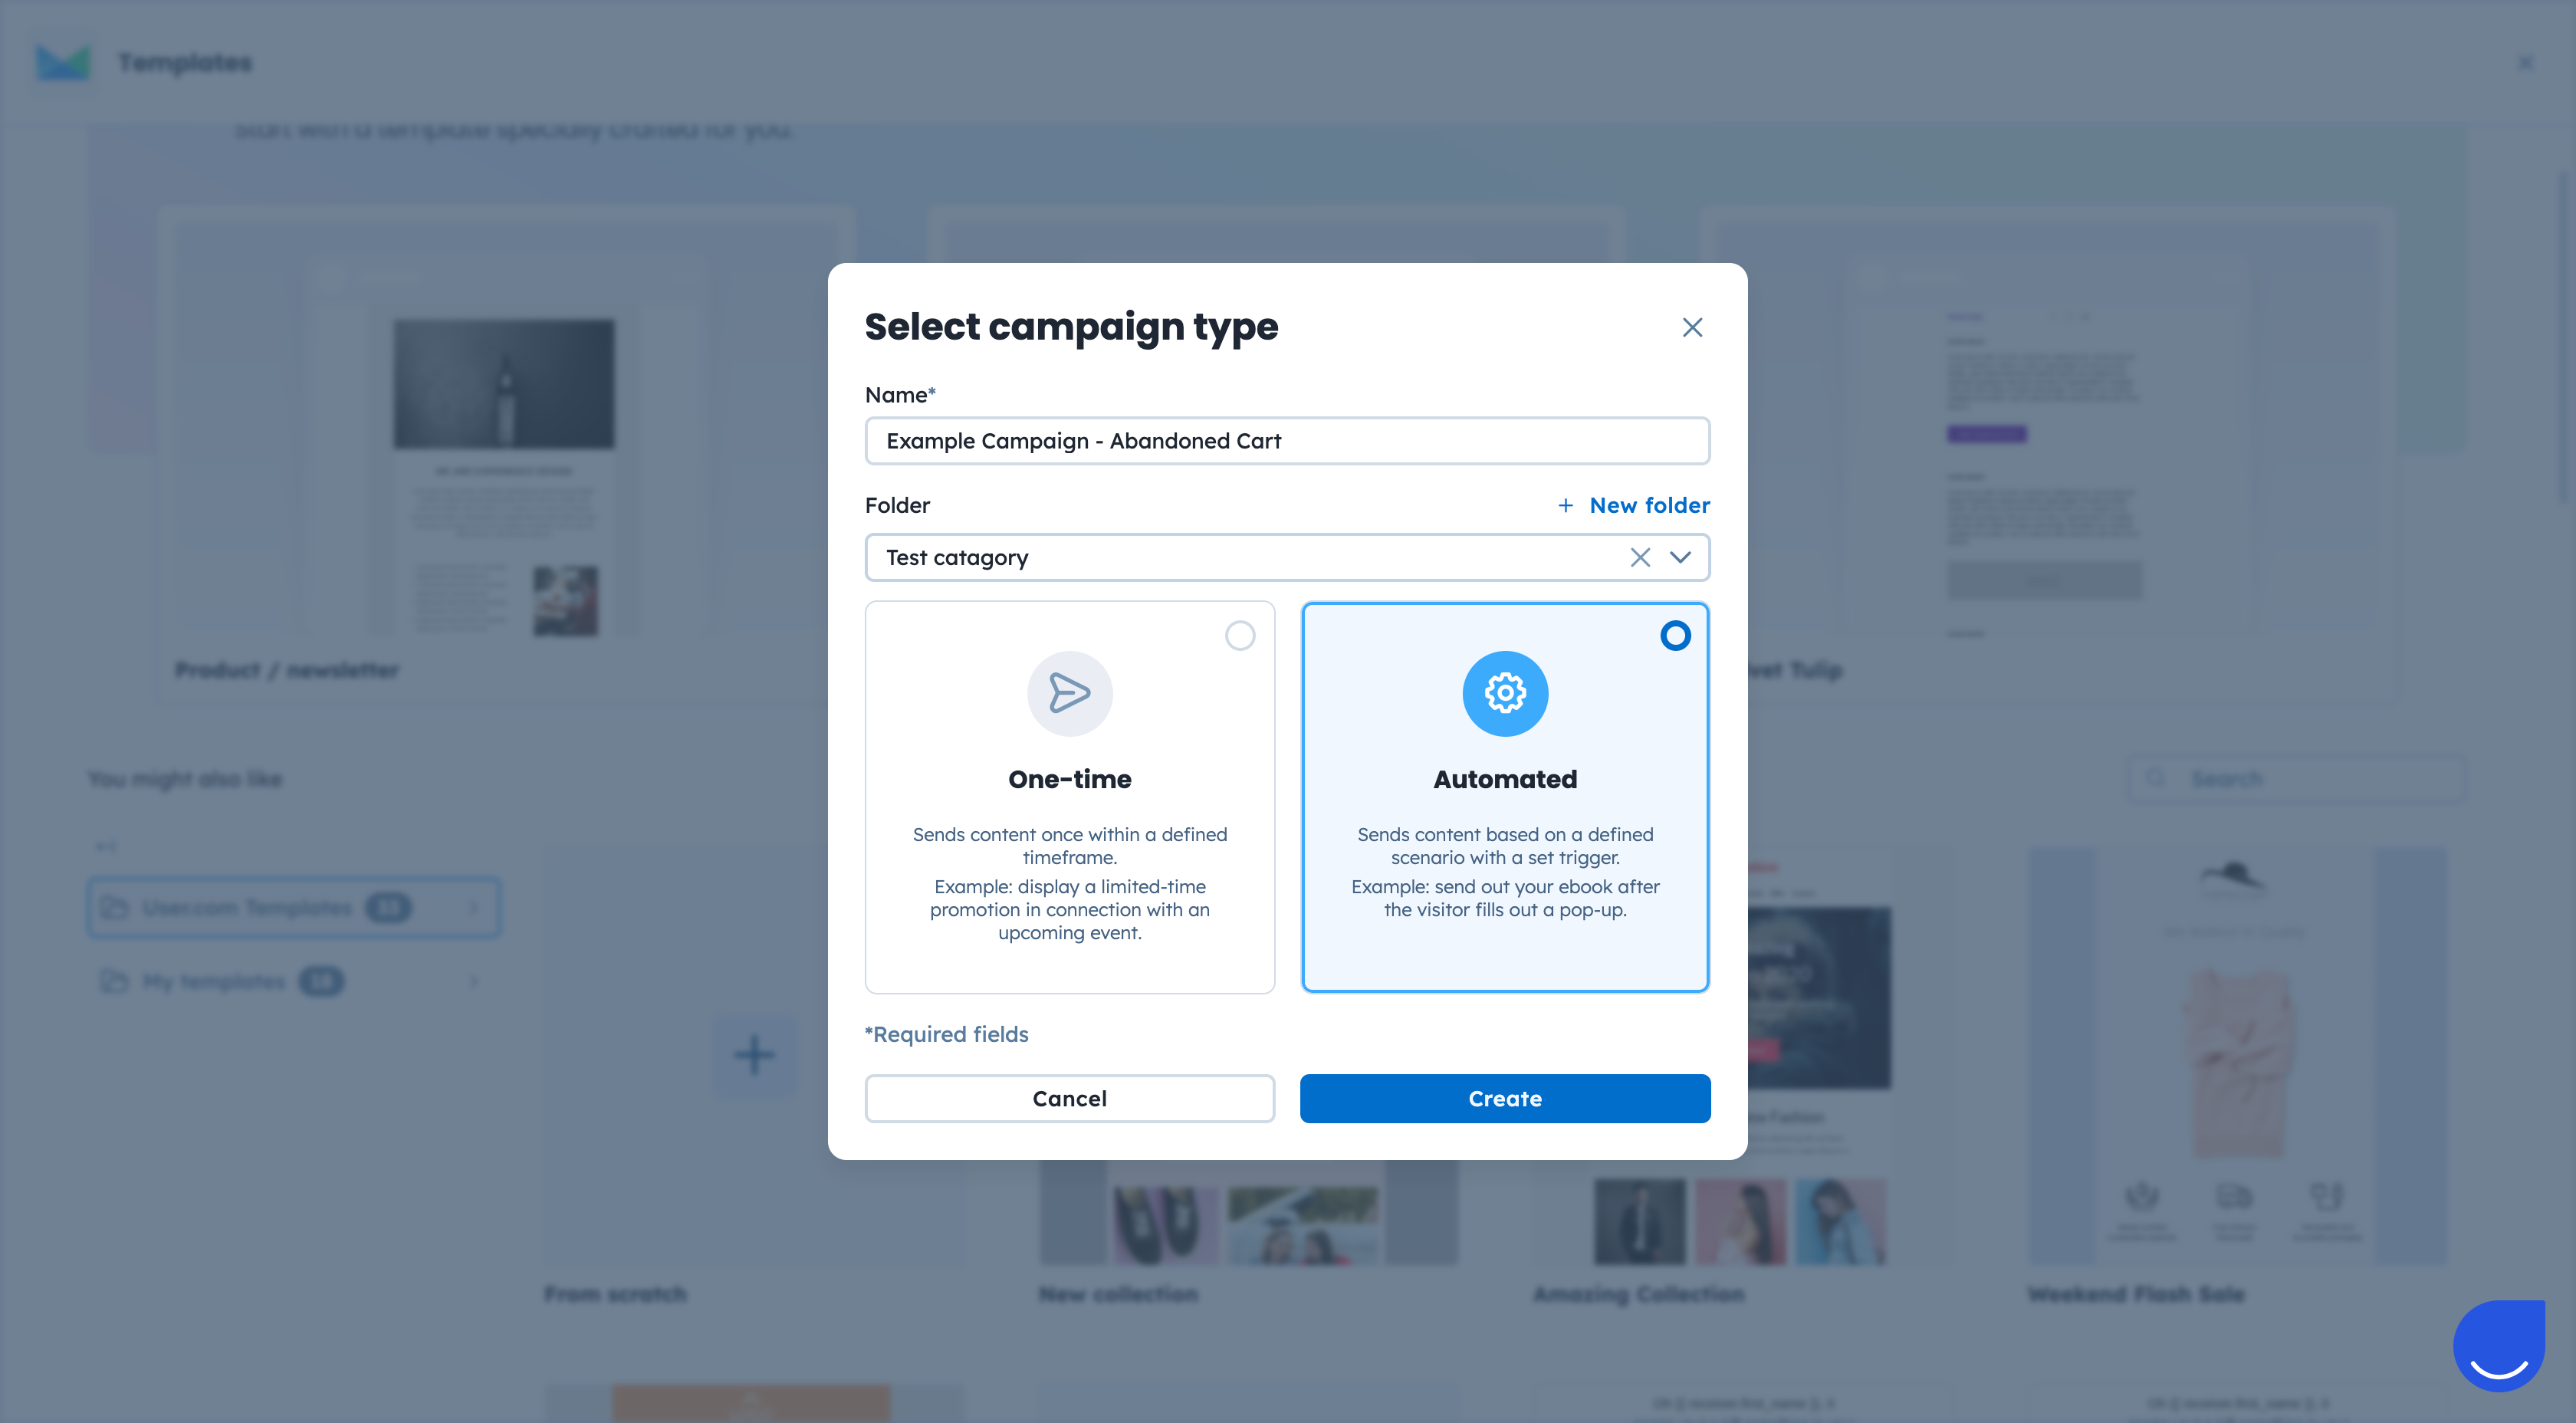
Once you define the content type, decide on the name of the campaign and assign it to the folder, if needed.
Choose the “Automated” option and click “Create”.
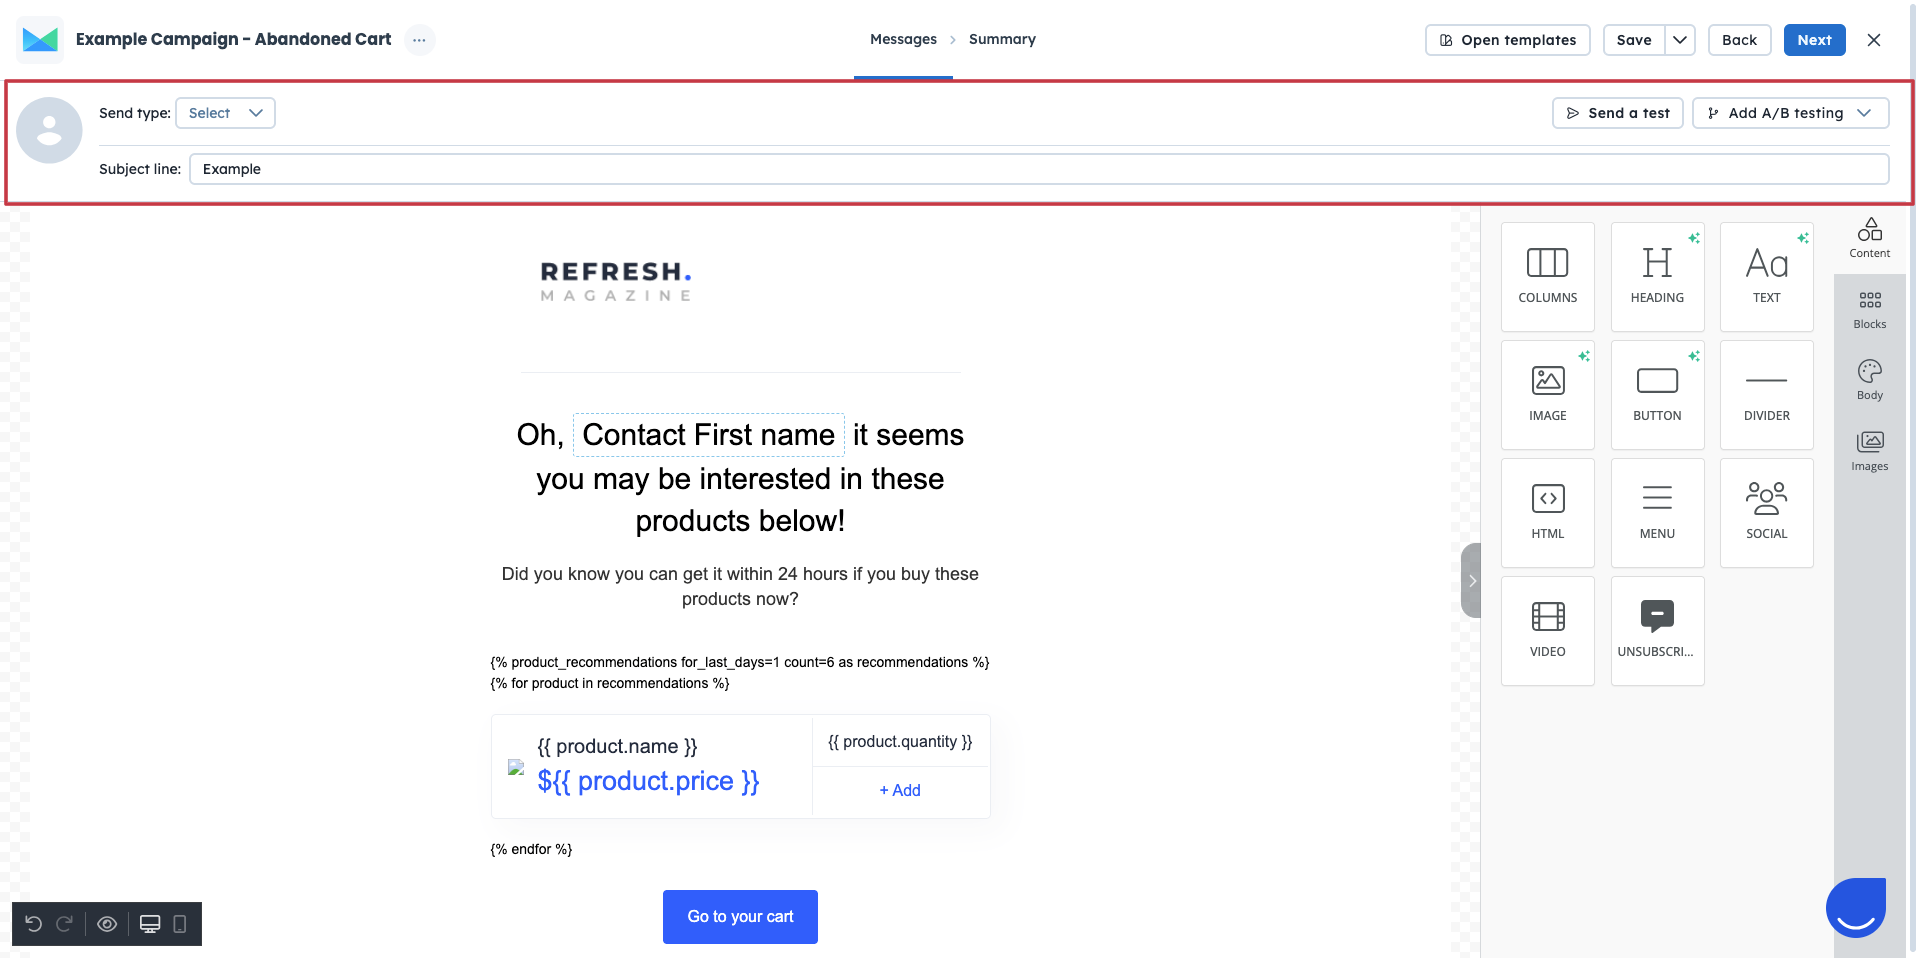
At this step you need to cover several important elements of the email campaign:
Edit or create the content of the email campaign.
Write the subject line. (Remember, you can use dynamic content in this field)
Select the domain and sender of the campaign.
Send a test message before setting the final version of the email content.
Decide whether you want to proceed with the A/B testing or not. [LINK]
Sender Settings:
Choose the “Send Type” for the email campaign. It can be either your custom SMTP provider or User.com one.
Then decide on the domain and a particular sender, that will be shown in the email inboxes of your recipients.
To find more info on how to choose a correct sender, please check the following article.
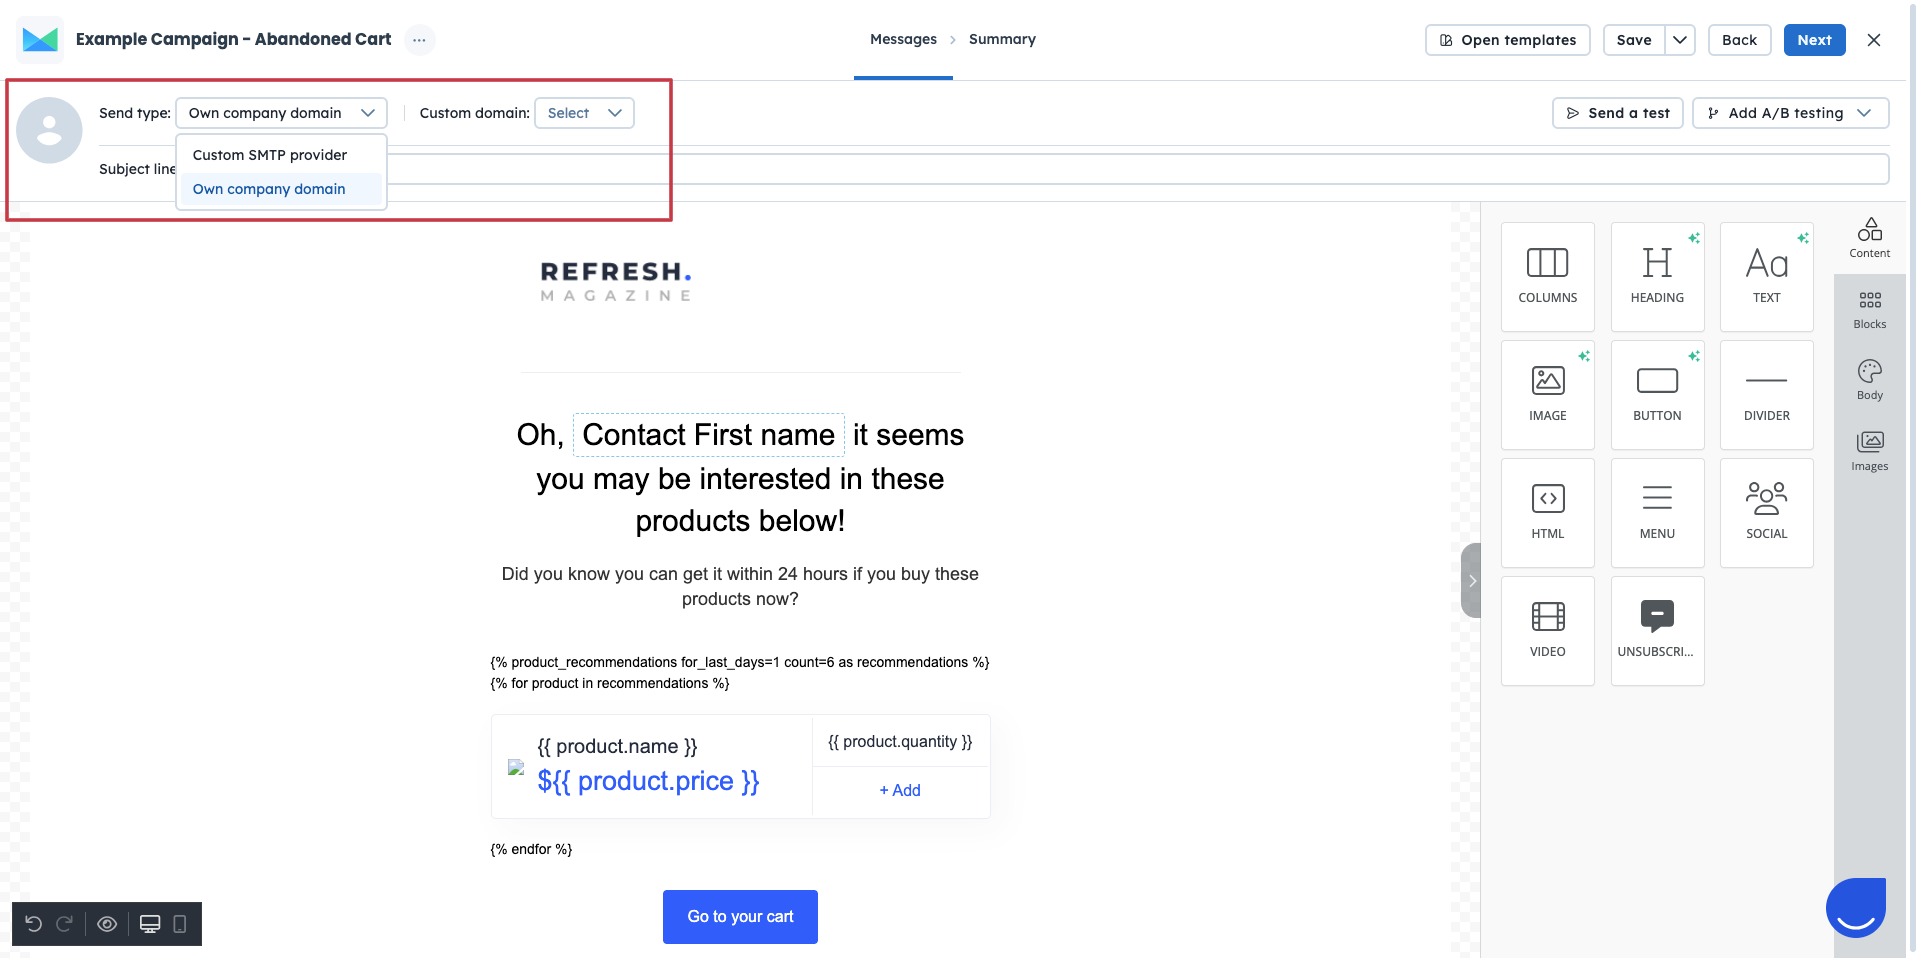
Content:
You can adjust the content of the email message with different visual elements and dynamic content. Also, you can always change the template by clicking on “Open Templates” button.
There is a possibility to preview your email content and apply changes before saving the final version by sending a test.
Remember, to define the subject line, which will be visible in the recipients’ inboxes.

Moreover, on this step, you can can decide if you want to apply A/B testing into the email campaign. Just click the “Add A/B testing” button to add the next email version. More info about the A/B tests you can find in the following article. [LINK]
This step includes all main elements of the campaign:
General information (campaign type, unsubscribe type).
Technical information (sending domain, message size, behavioural tracking).
Preview of the content along with the subject line.
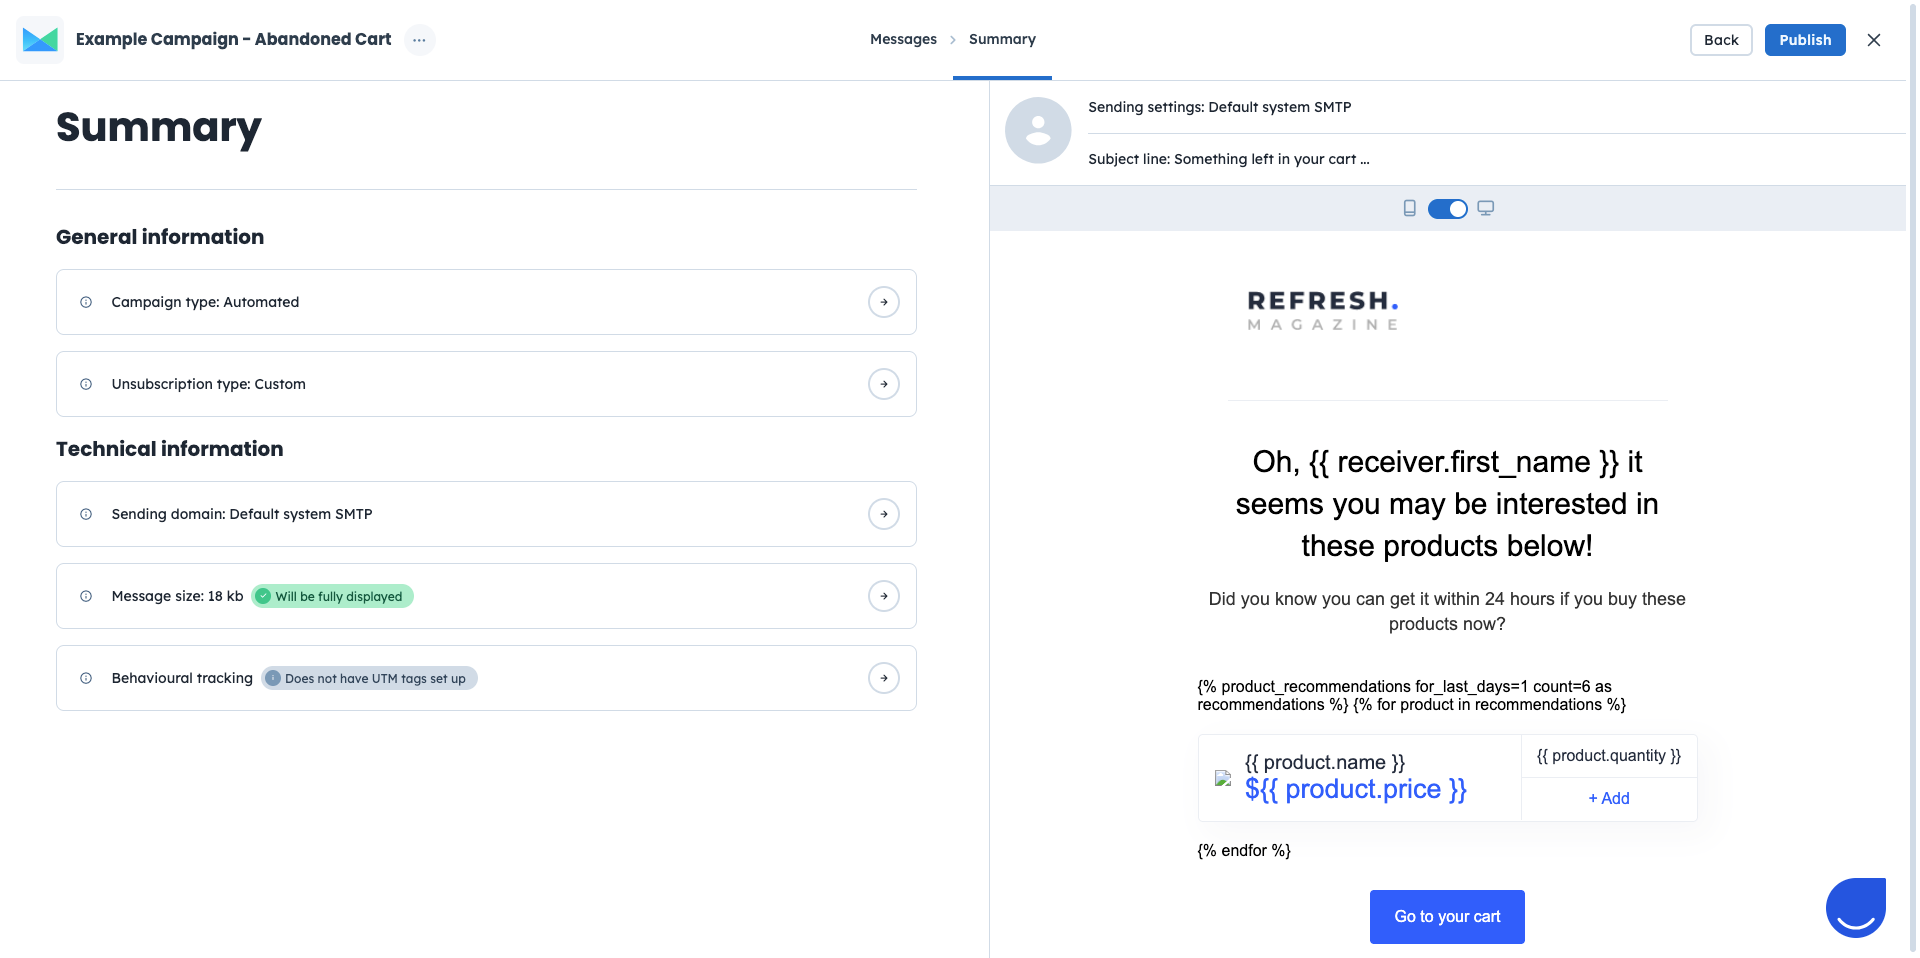
In summary you can set a “Behavioural tracking” - to track how users engage after the click - set custom UTM parameters per campaign to get clearer insights into performance.
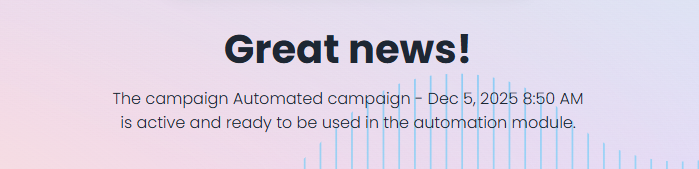
Once you are ready - just click “Publish button. It will activate the email campaign and make it available in the automation modules.

If you feel you need more time or additional details to finish the campaign - just click on the “X” icon and confirm saving the changes. It will save the campaign as a draft. Check the difference between active and campaigns here. [LINK]
Difference Between Draft and Active Campaigns