Managing your data effectively often means needing to move it between the tools. This guide shows you how to export various types of information from Positive User so you can perform deep-dive analysis or update your external records.
Use this method when you need to download information from your main databases.
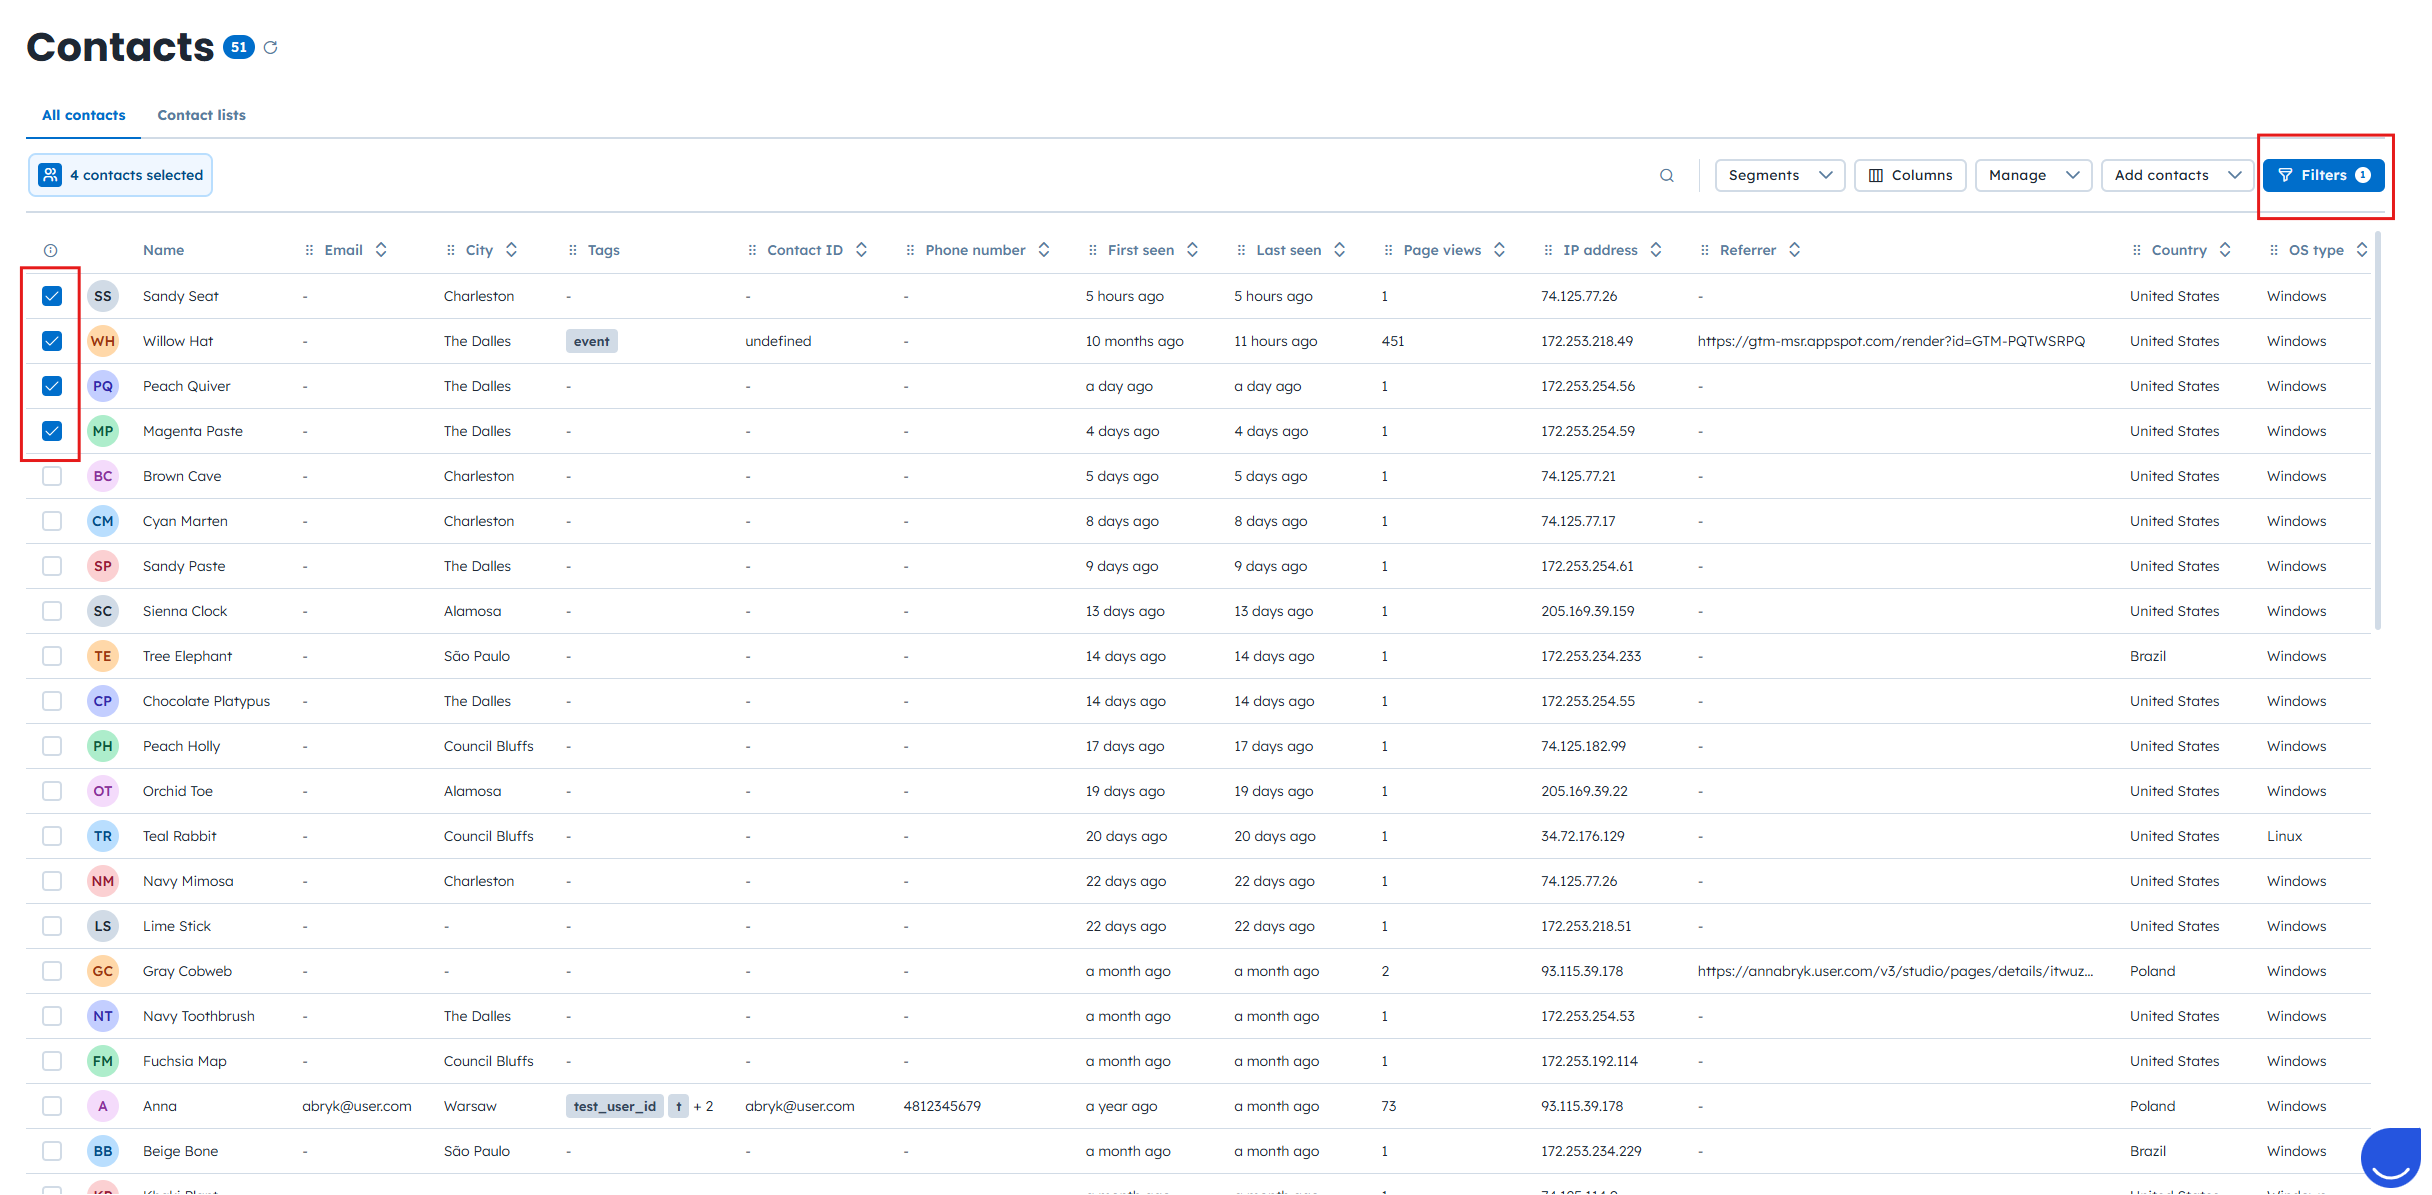
1. Select your records. Navigate to the on of chosen tab:
“Data” → “Contacts” / “Companies” / “Products” section
OR
“Sales” → “Deals” (switch to “table view”) / “Tasks” section
OR
“Customer Service” → “Support tickets”
Use filters on the right side of the screen to select the needed data or check the boxes next to the items you wish to download.
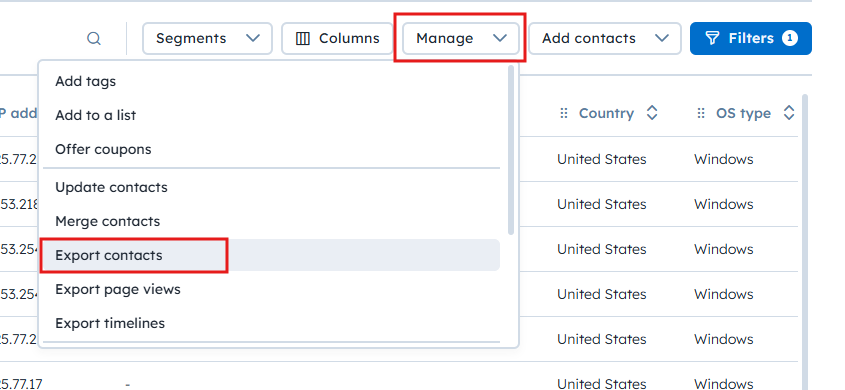
2. Trigger the export. Click on the “Manage” button at the top right corner and select “Export contacts” (or the relevant category, e.g. companies).

3. Select Attributes. In the “Export” pop-up window, choose whether to export all attributes using the toggle. If you disable this, you can manually select specific fields like “First name” or “Email”. Click “Confirm” button to start the process.

4. Download the file from the “Export Logs”. After clicking “Confirm”, you will be redirected to the “Export logs”. Your file may take a moment to generate. Refresh the page to update the status (green check icon means that file is ready); once it is completed, click the name of the file to download it.

Use this for high-level performance data or granular automation history.
Specific Campaign:
Go to “Campaigns”, then choose the type of campaign (Email / SMS, etc) and click the campaign name.
Then select “Delivery logs” tab from the top menu, and click “Export” button on the top-left side.
You can export data from the “Opens” and “Clicks” tabs in the exact same way.

Download from the export list. After clicking “Export”, you will be redirected to the “Export logs”. Your file may take a moment to generate. Refresh the page to update the status (green check icon means that file is ready); once it is completed, click the name of the file to download it.

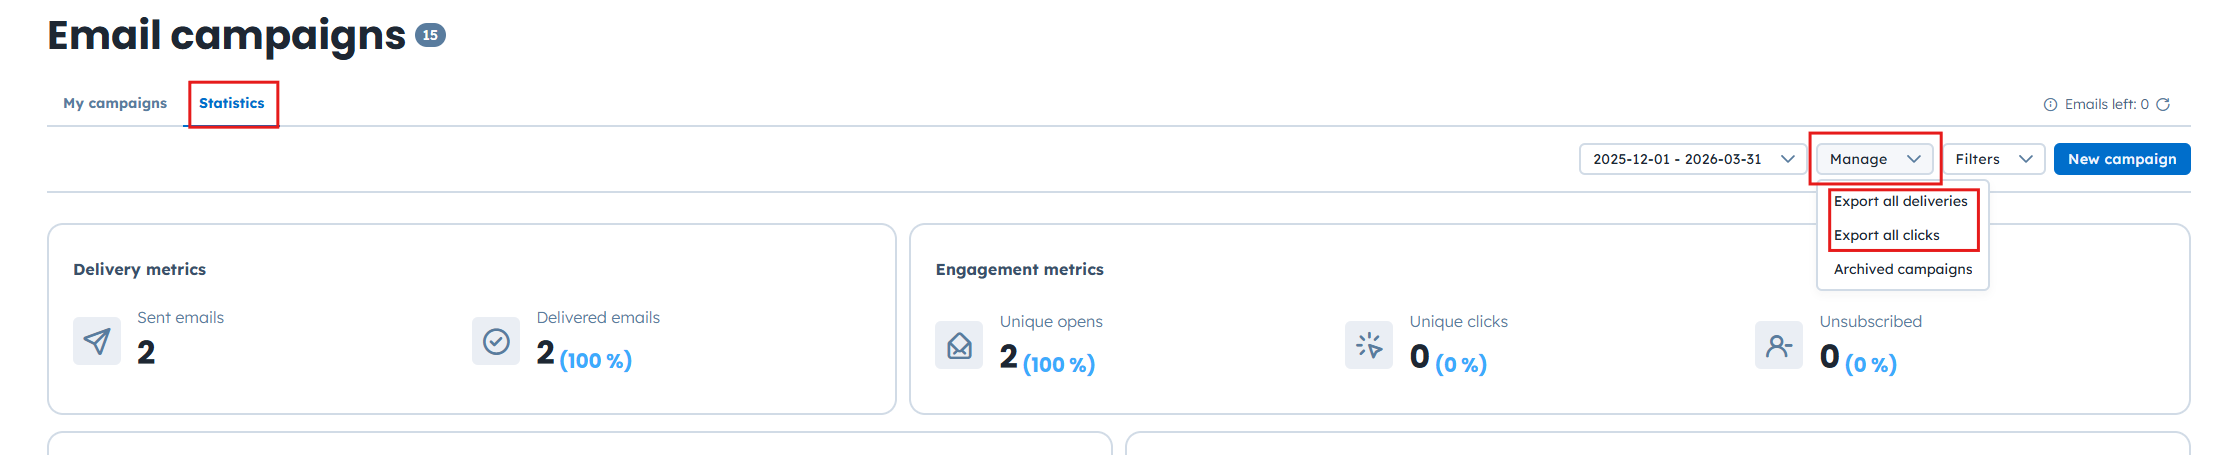
Global Statistics (for email campaigns only):
To export stats for all campaigns, go to “Campaigns” → “Email” → “Statistics”.
Click “Manage” button and select “Export all deliveries” or “Export all clicks”.
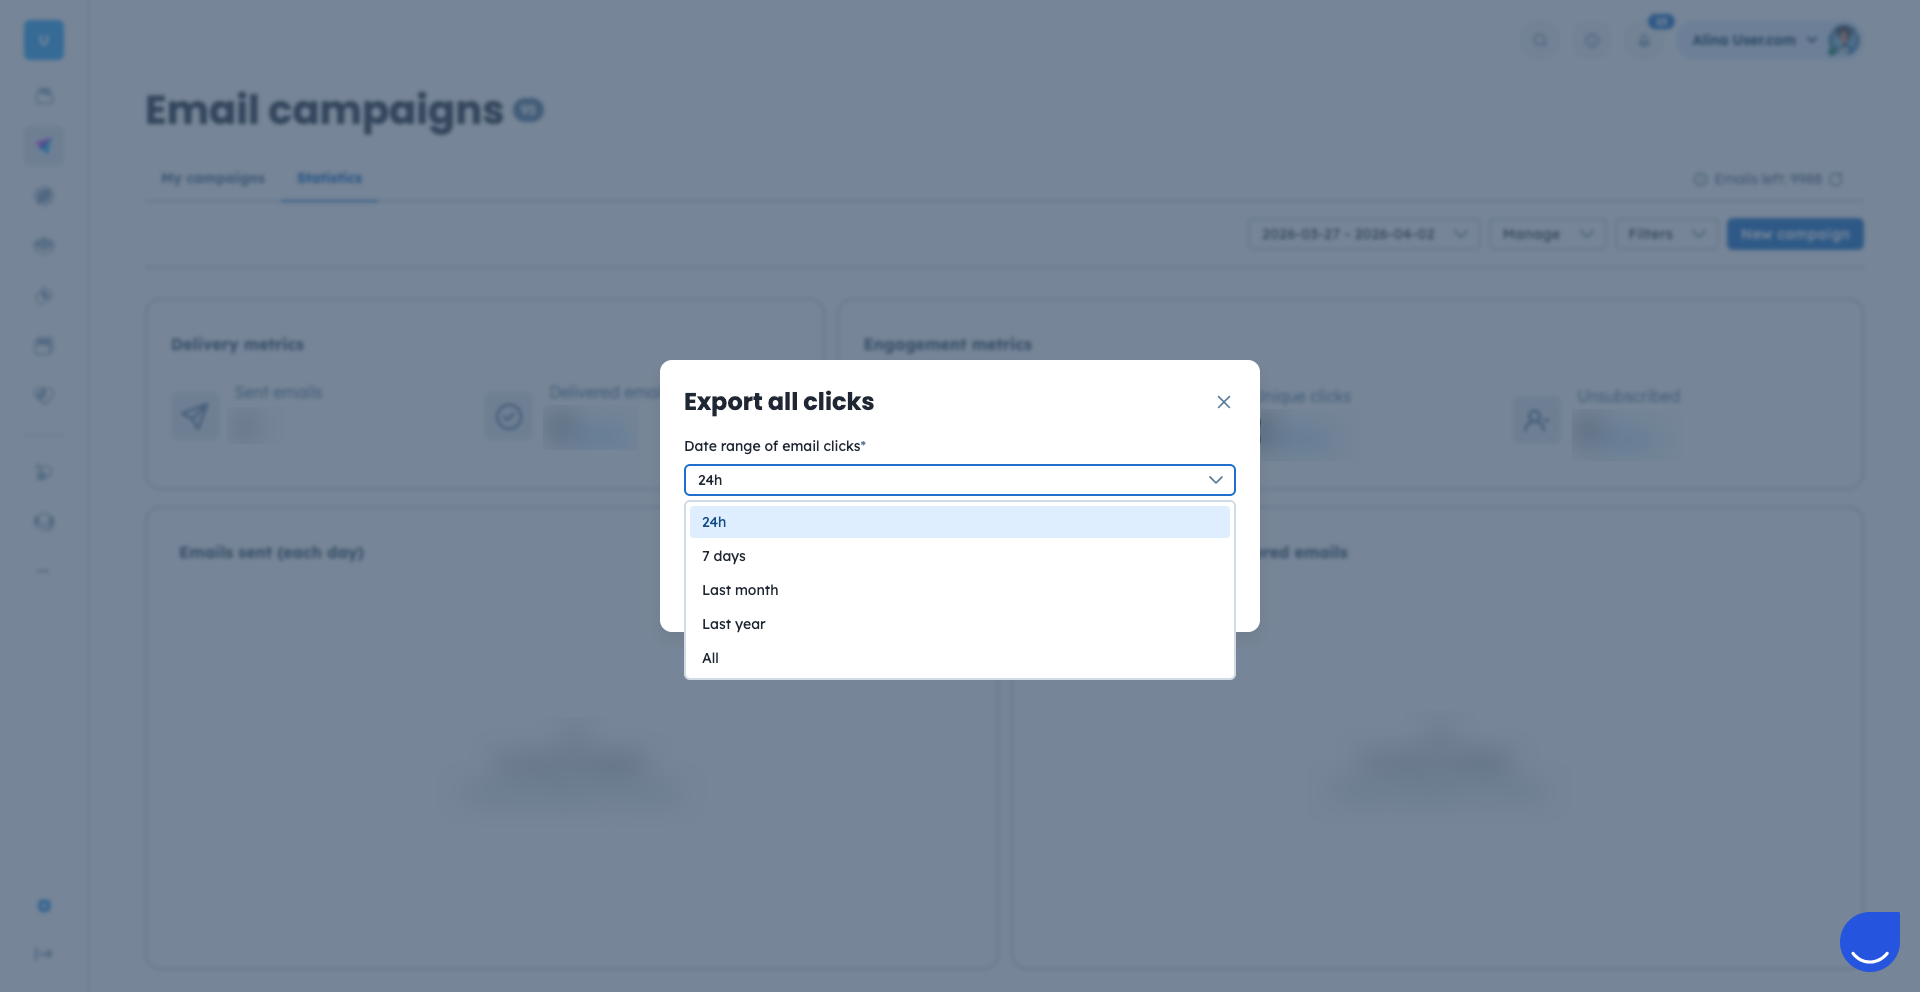
Then you need to choose the time period you want to export data for.
Download the file. After clicking “Confirm”, you will be redirected to the “Export logs”. Your file may take a moment to generate. Refresh the page to update the status (green check icon means that file is ready); once it is completed, click the name of the file to download it.

Exporting automation logs might help you with auditing the performance of your workflows. To export history for a specific flow, follow the steps below.
Enter the “Automations” section
Choose the automation flow you want to export data about and click on the three dots in front of its name. Then choose “Go to automation logs” option.
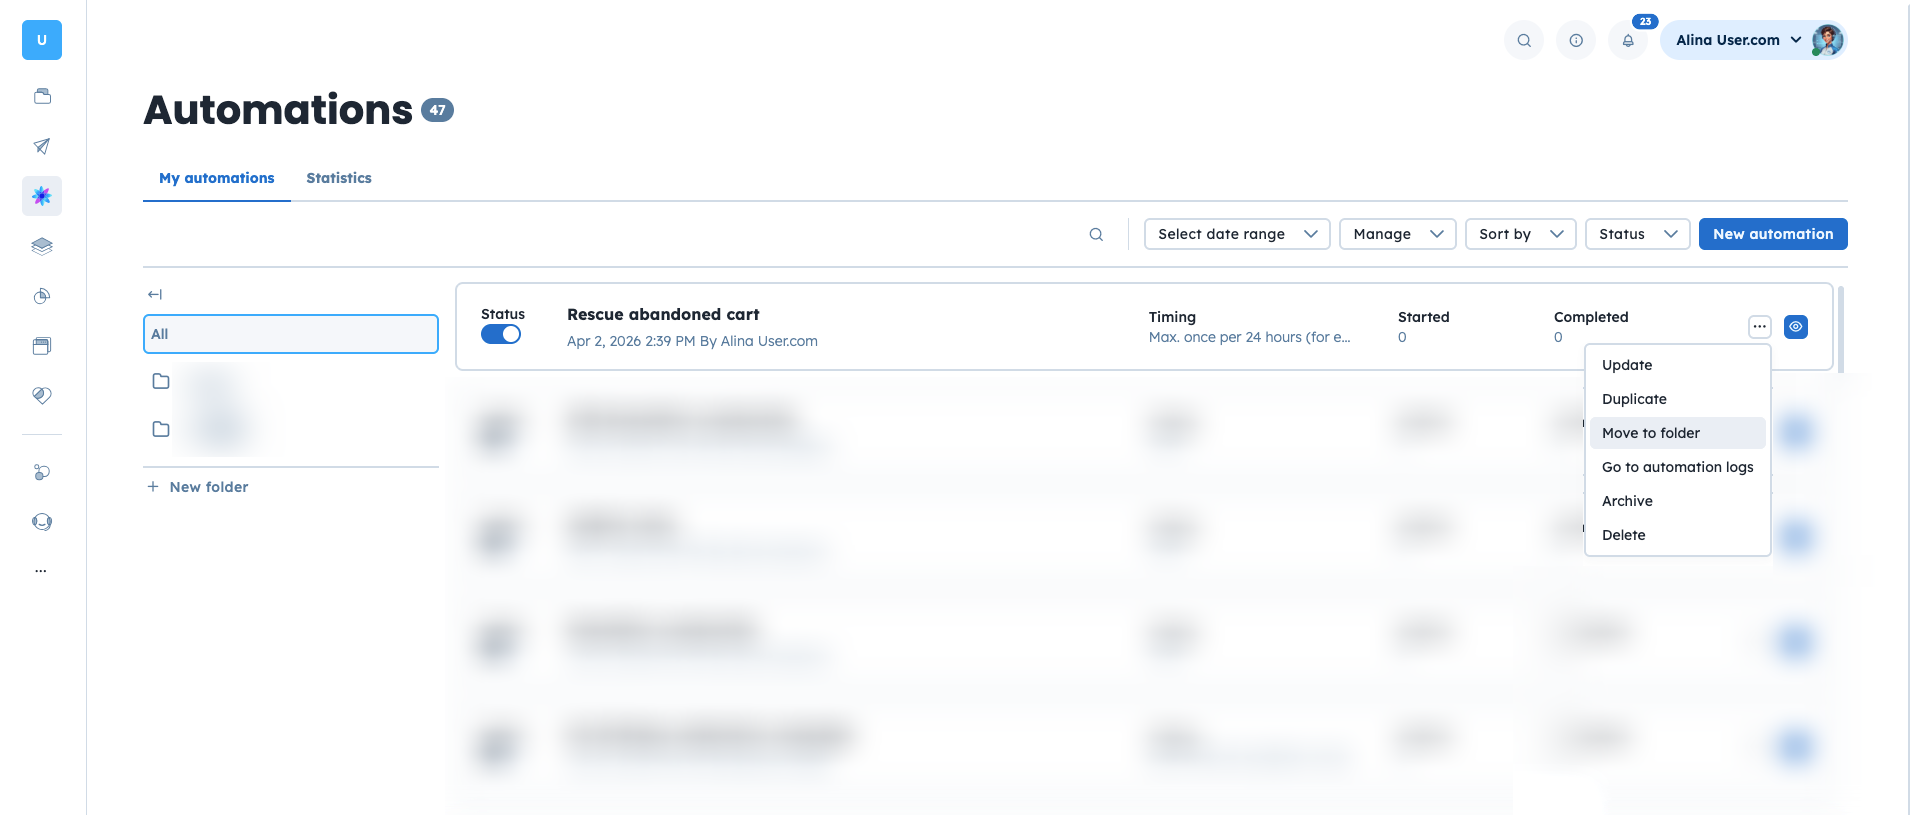
Click the “Export” button in the top right corner.

Download the file. After clicking “Export”, you will be redirected to the “Export logs”. Your file may take a moment to generate. Refresh the page to update the status (green check icon means that file is ready); once it is completed, click the name of the file to download it.
Generating an export of your conversation history allows you to maintain a permanent archive of customer interactions outside the platform for long-term storage or sentiment analysis.
Open “Customer Service” → “Conversations” section and go to the chosen chat conversation.
Click the three dots in the top right corner of the conversation’s view and select “Export conversation”.
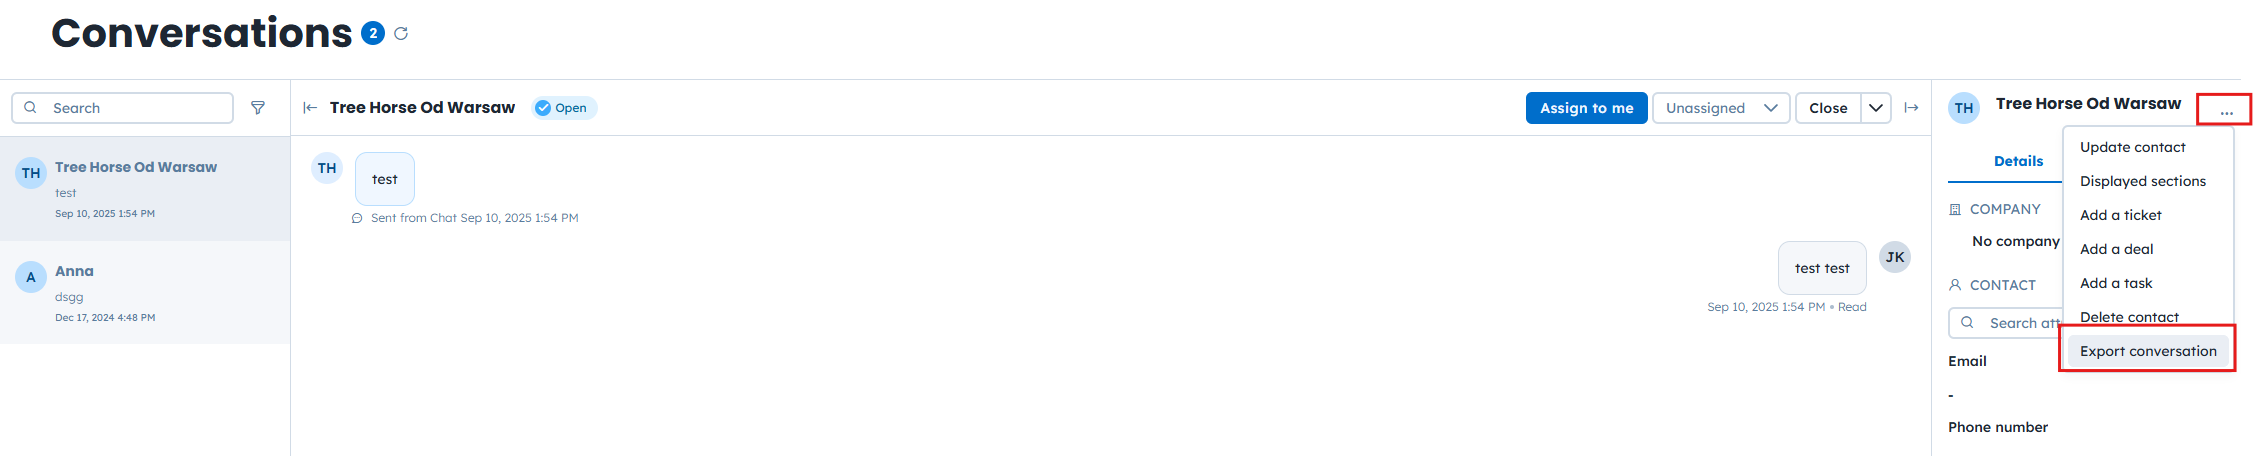
Download the file. After clicking “Export conversation”, you will be redirected to the “Export logs”. Your file may take a moment to generate. Refresh the page to update the status (green check icon means
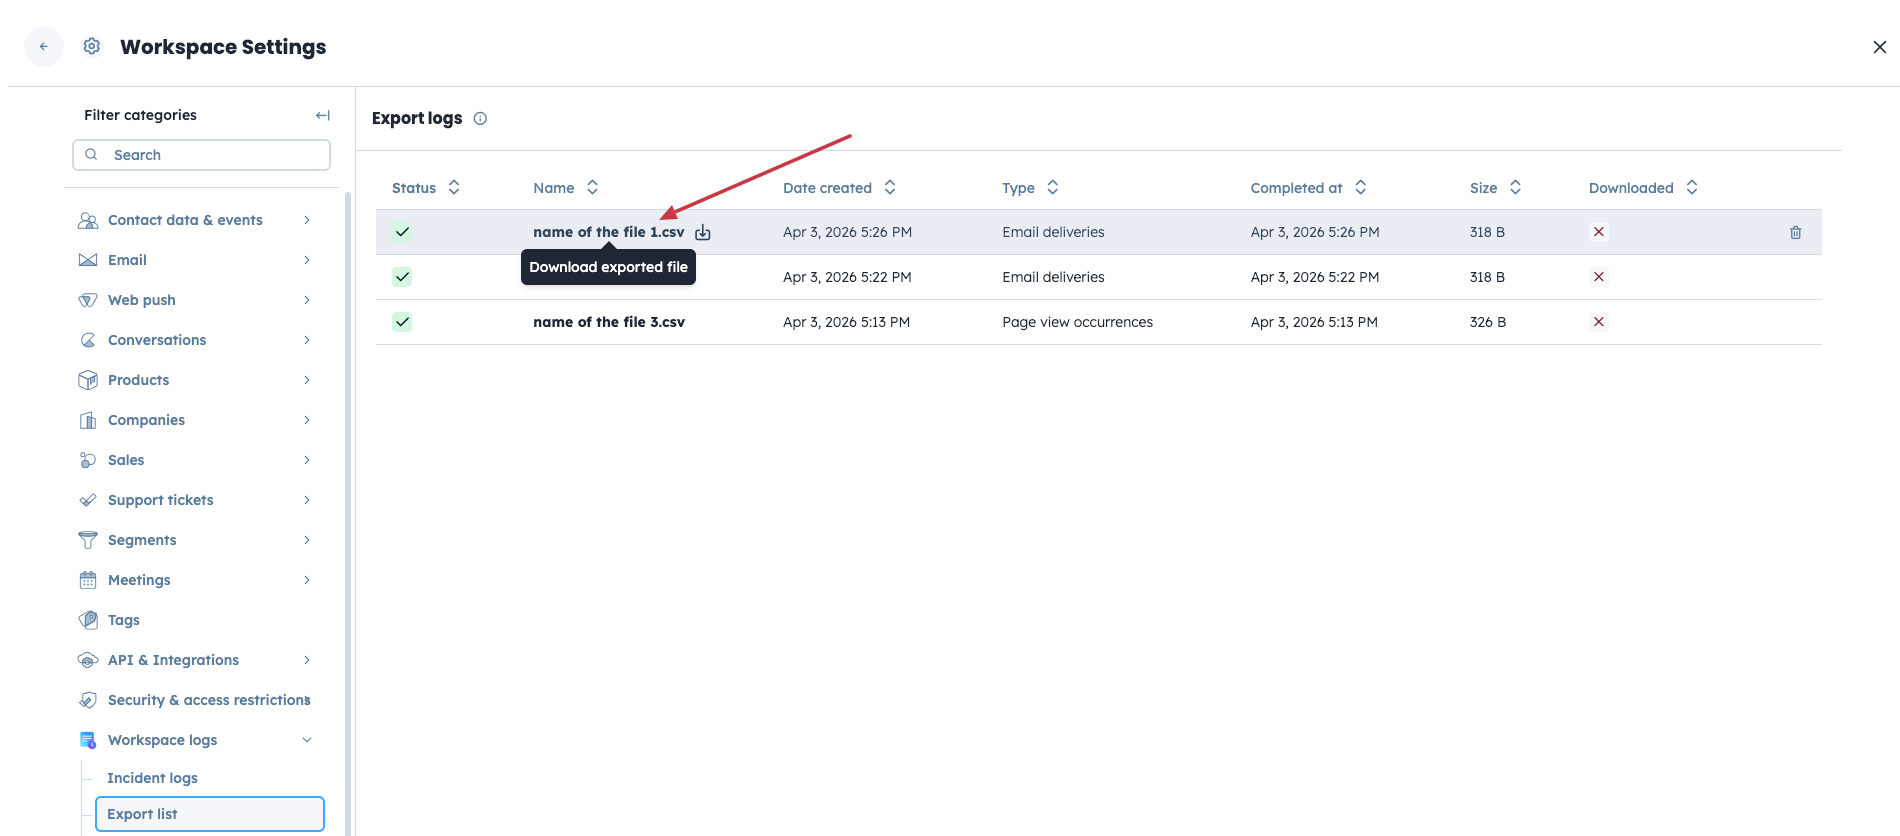
All CSV files generated by the system are stored in a single location. To access them at any time, go to “Settings”→ “Workspace Settings” → “Workspace logs”→ “Export list”.
This method is perfect for teams who want to keep their various tools perfectly in sync without any extra effort. You’ll likely use this when your business grows and you need your contact/campaign details or updates to show up instantly in your other software, ensuring all your records are always up to date.
You can export objects data, campaign logs based on segments.
