If you already have a company database, you can quickly bring it into Positive User using a CSV or XLSX file. This is a simple way to transfer your existing account data into the platform without having to add companies manually.
Before you begin, make sure your file is properly structured and that you understand how company data is stored in Positive User. The platform uses both standard attributes (built-in fields such as company name or domain) and custom attributes (fields you create yourself).
Match Standard Attributes: If your spreadsheet columns match standard attributes, you can import the file immediately.
Create Custom Attributes: If you want to include additional information that is not supported by default, you will need to create the relevant custom attributes first. Follow the steps in “How to Create a Custom Attribute“.
Verify Data Types: Make sure that each column has the correct attribute value type. For example, if you want to import "Scoring", make sure your attribute is an integer. If you want to import a "Date", set the attribute as date. Refer to “What Is an Attribute” for details on specific data types.
If you are exporting a CSV file from Excel, make sure there are no cells left out.
If you are exporting from Excel, make sure that you set the correct data formats for each cell.
If you have multiple options in one column, please use "|" between them. They will be imported as separate values. It's mostly useful when importing tags.
Before uploading, ensure your file is formatted correctly. If you aren't sure how your file should look, you can download a ready-to-use template directly from the app by clicking the “xlsx” or “csv” button in the “Data” → “Import” section.
To find more tips about data formatting, check our dedicated article.
Required Fields
You must have a unique identifier for each company. This can be either a name or a company ID. You can have several companies with the same name but with different Company IDs.

Column Headings
Always include column headings in the first row of your file. Try to give your columns exactly the same names as the existing in Positive User attributes have. If the column name is identical to the attribute name, the system will match them automatically during import.
Encoding
What is encoding? Encoding tells the computer how to interpret the text characters in your file. The default and most highly recommended format is UTF-8. Choosing UTF-8 ensures that special characters, accents, and symbols are imported correctly without turning into random symbols.
Separator
What is a separator? In CSV (Comma Separated Values) files, a separator is the punctuation mark used to divide your text into distinct spreadsheet columns. Common separators are commas (,) or semicolons (;).
Multi-value Fields
If one column contains multiple values (for example, “Tags” or any attribute with the fixed choice type with multiple values allowed), separate them using the pipe character: “|”
Example: tag1|tag2|tag3
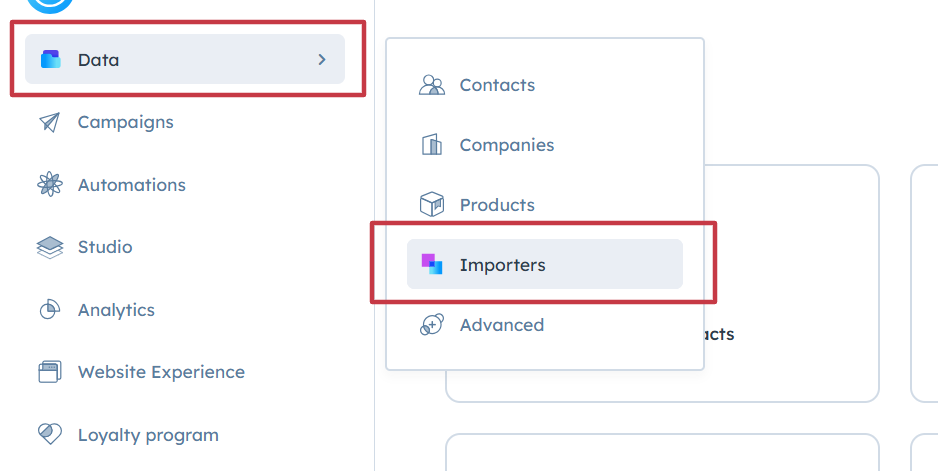
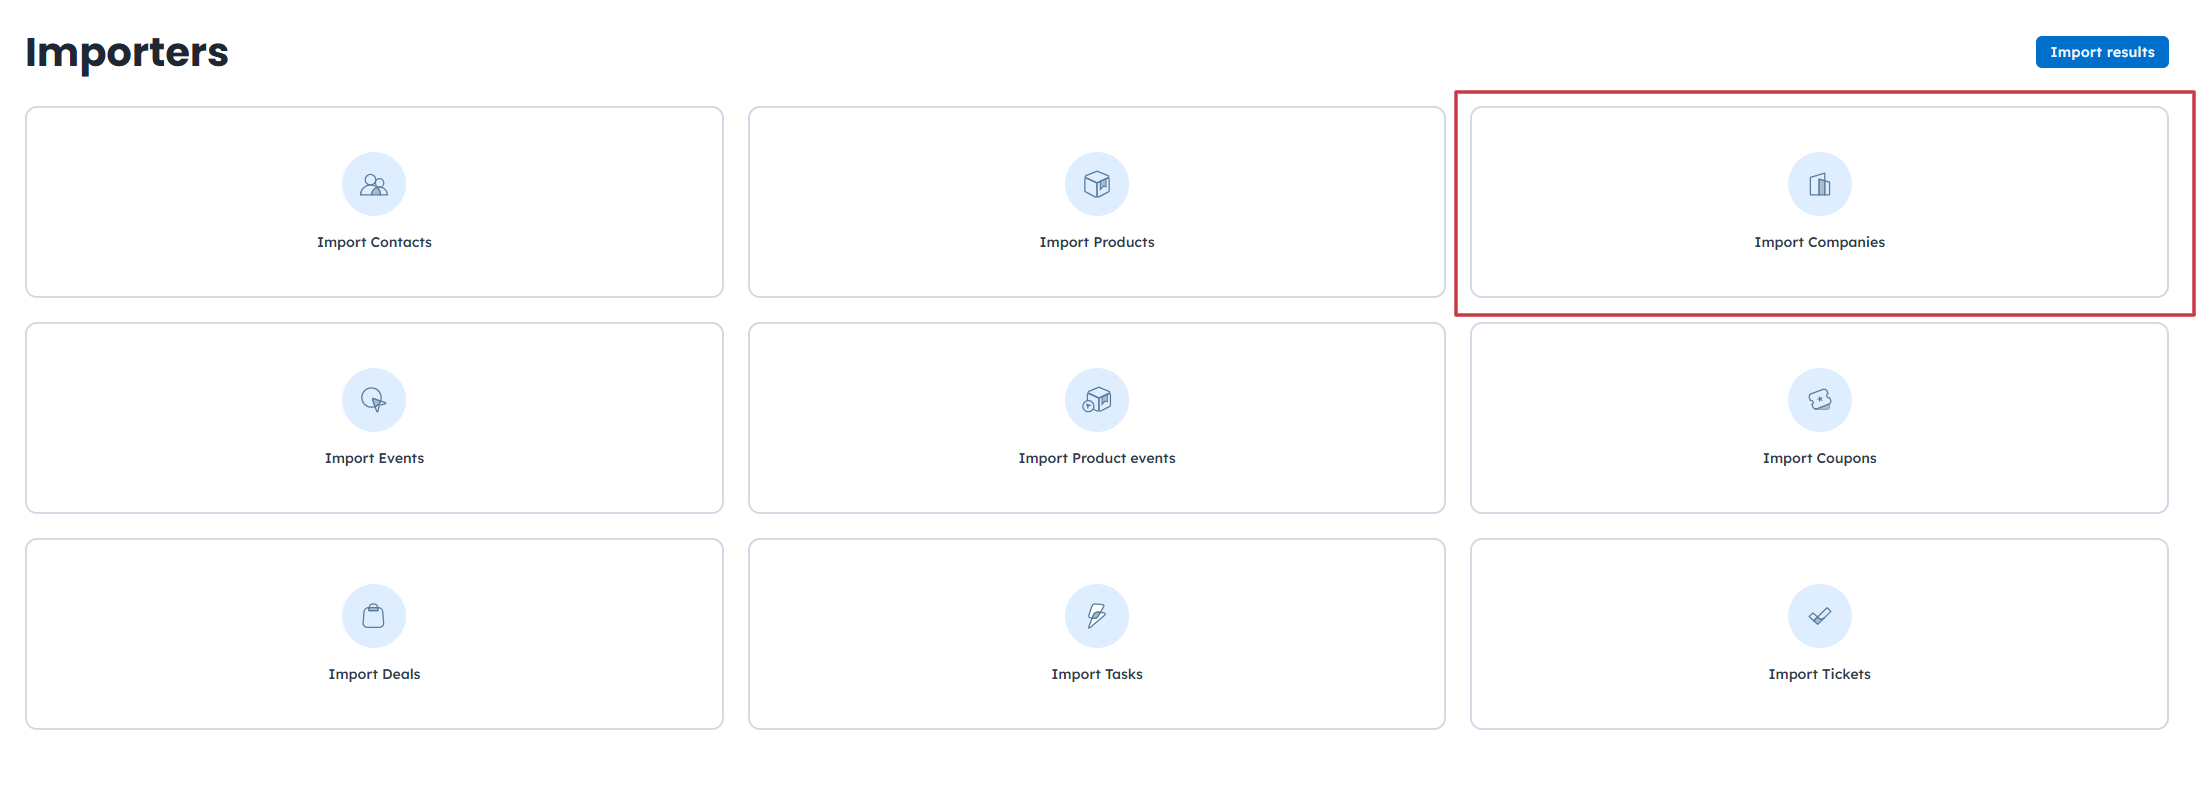
Go to “Data” → “Importers” and click the box “Import Companies”.
OR
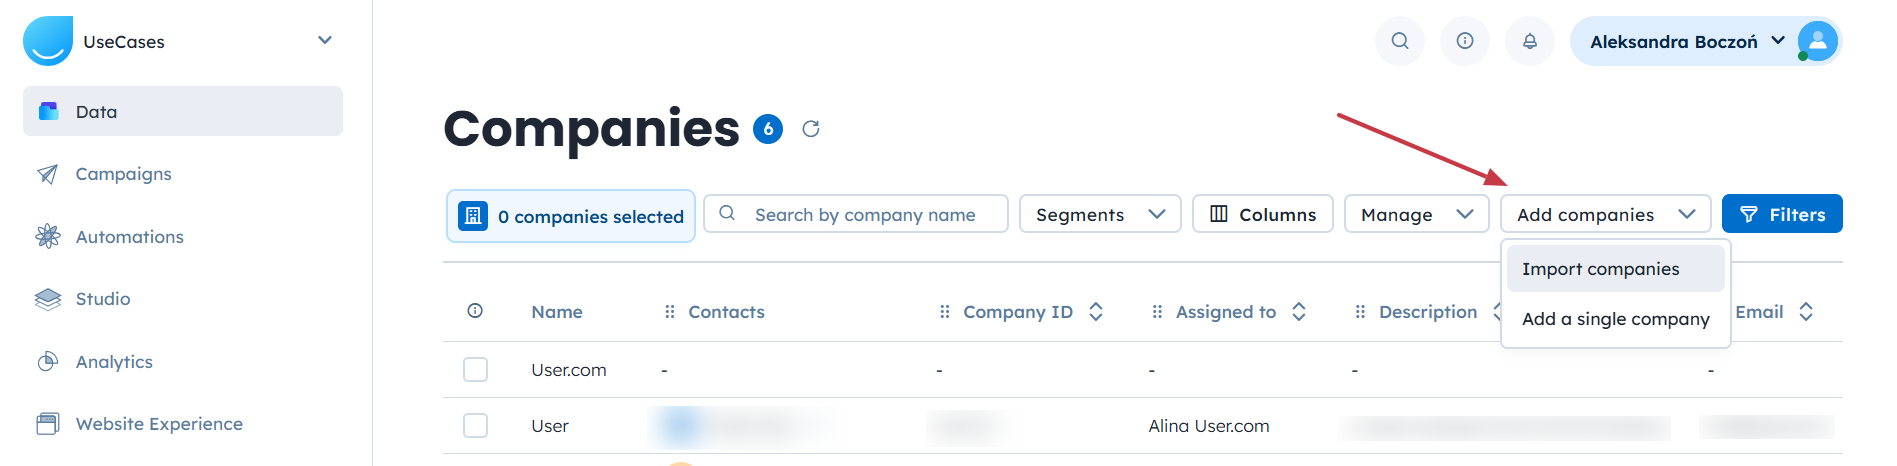
You can go with “Data” → “Companies” → “Add companies” → “Import companies”
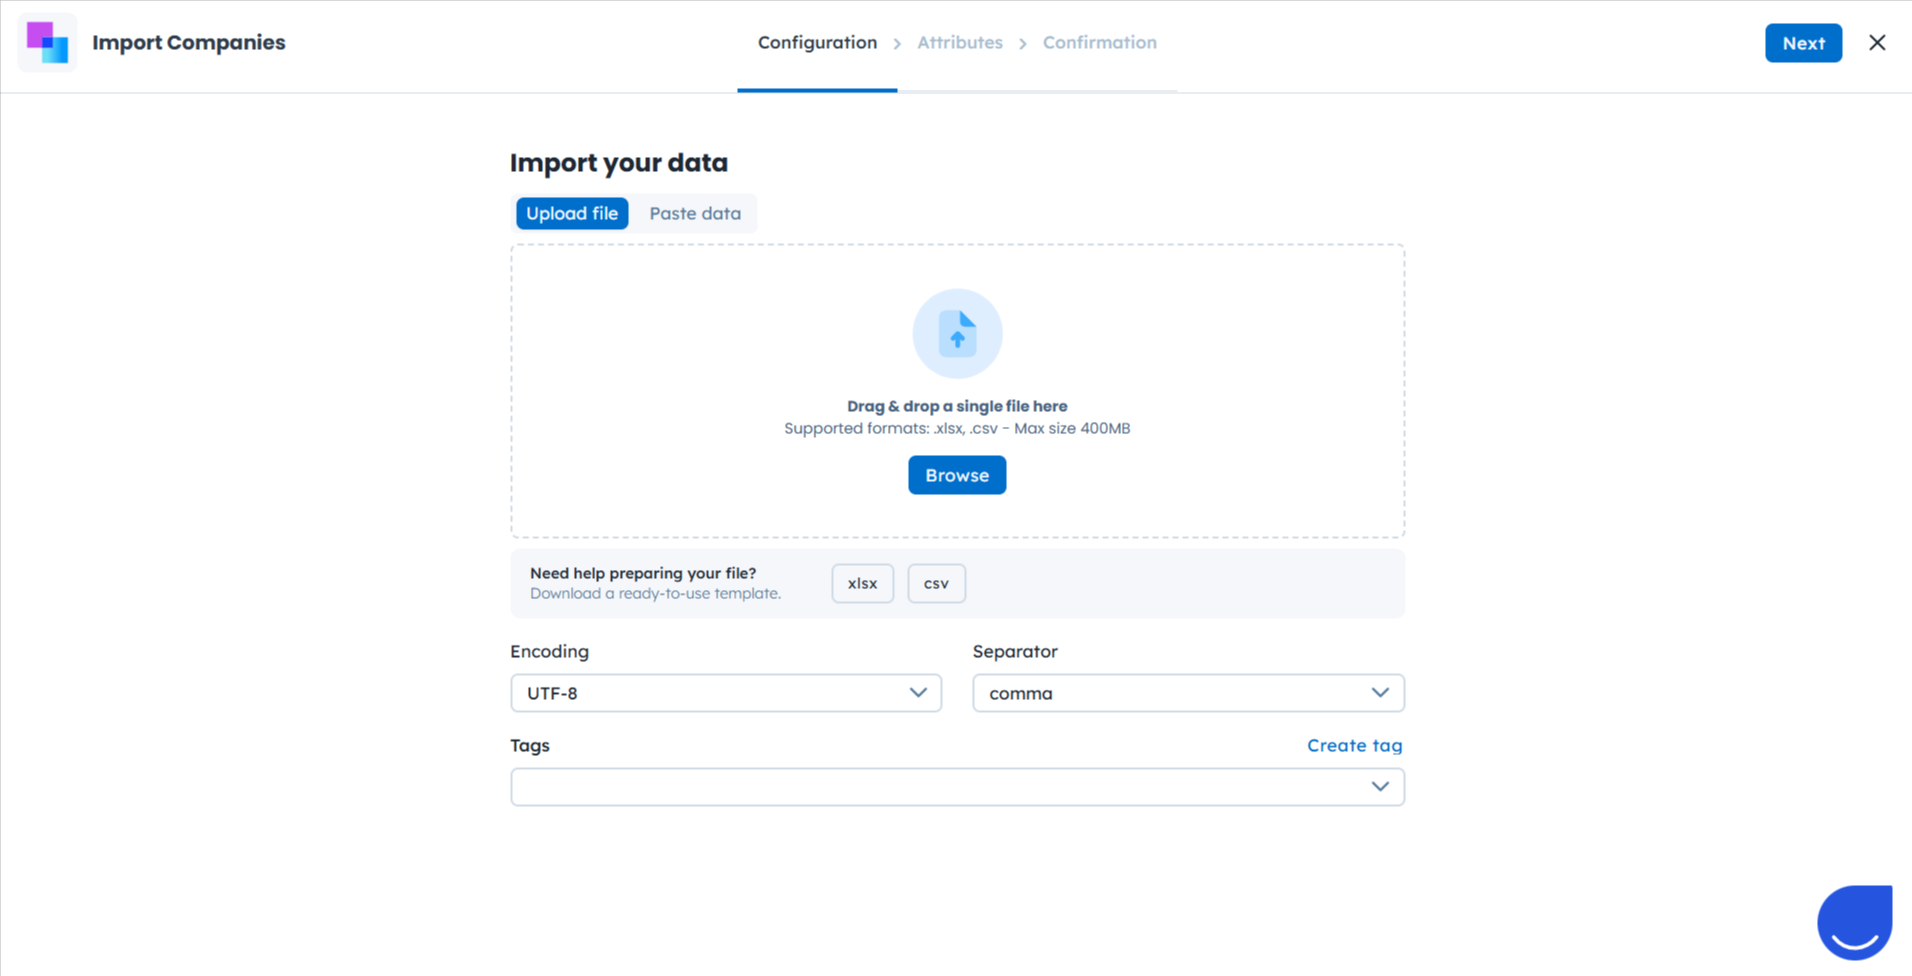
Upload or drag&drop the file.
Choose the encoding to be suitable to your file. (UTF-8 is a default one)
Choose the separator used in your file.
Add tags if you want them to be applied to the companies.
This step is about mapping the column headers from your file to the existing attributes in Positive User.
Auto-matching: If the name of the column in your file is exactly the same as the attribute name in the system, they will be matched automatically.
Manual matching: For unmatched columns, simply select the correct existing attribute from the drop-down menu to connect them.
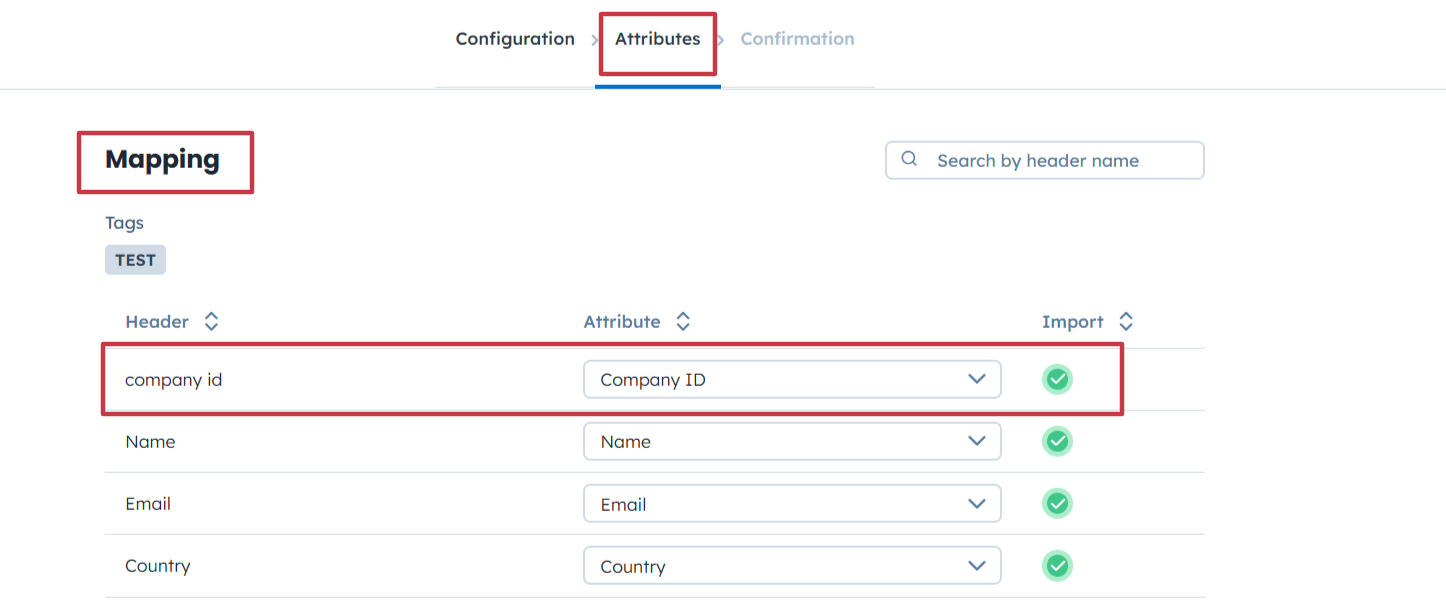
Once all the columns from your file are matched with attributes, click “Next”. You will be redirected to the “Confirmation” step.
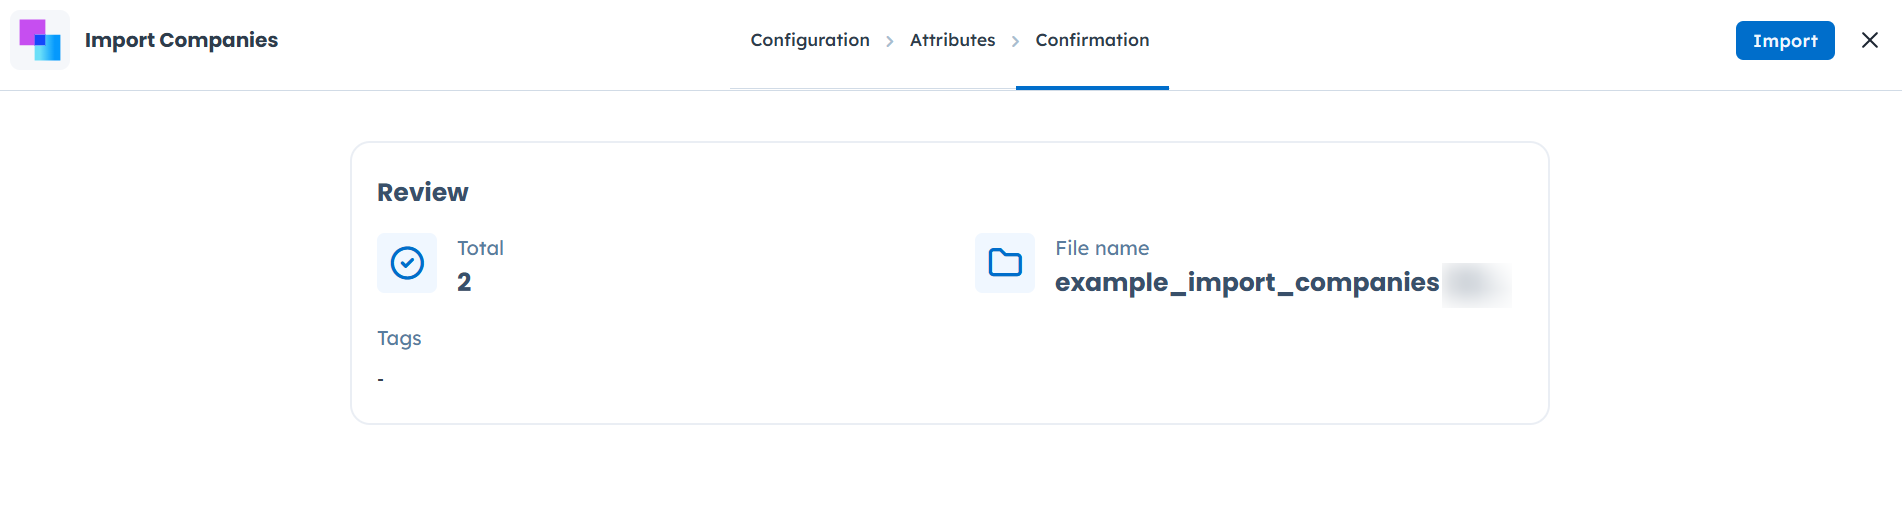
In the “Confirmation” step, you review the summary of the import and confirm the process. After confirmation, the system starts processing your file.
You can monitor the import process and check the final results in the “Import Results” section, where you are redirected automatically.
You can visit this section any time via “Data” → “Importers” → “Import Results” path.
Here you will see:
Import status (Started/Pending/Complete/Archived)
Date created
Completed at
Type (what kind of data was imported)
Created by (team member who uploaded the file)
File name
Total rows (from your file)
Succeeded (final number of rows imported)
Failed (shows number of failures)
If something goes wrong during the import, click on the file name to view a detailed error report.
To view the newly imported profiles, go to “Data” → “Companies”. You can filter your database by the specific tag you attached during the import to easily review the imported data.
You can use the same import process to update existing companies. To update a company, the system must recognize it by:
The same name
or
The same company_id
