Email templates are one of the core elements of your email campaigns. You use them as a base to create email messages for campaigns and automation flows. A well-designed template helps you stay consistent, save time, and personalize communication at scale.
There are three methods to create an email template in User.com:
Simple Drag&Drop Builder
HTML Editor
ZIP File Import
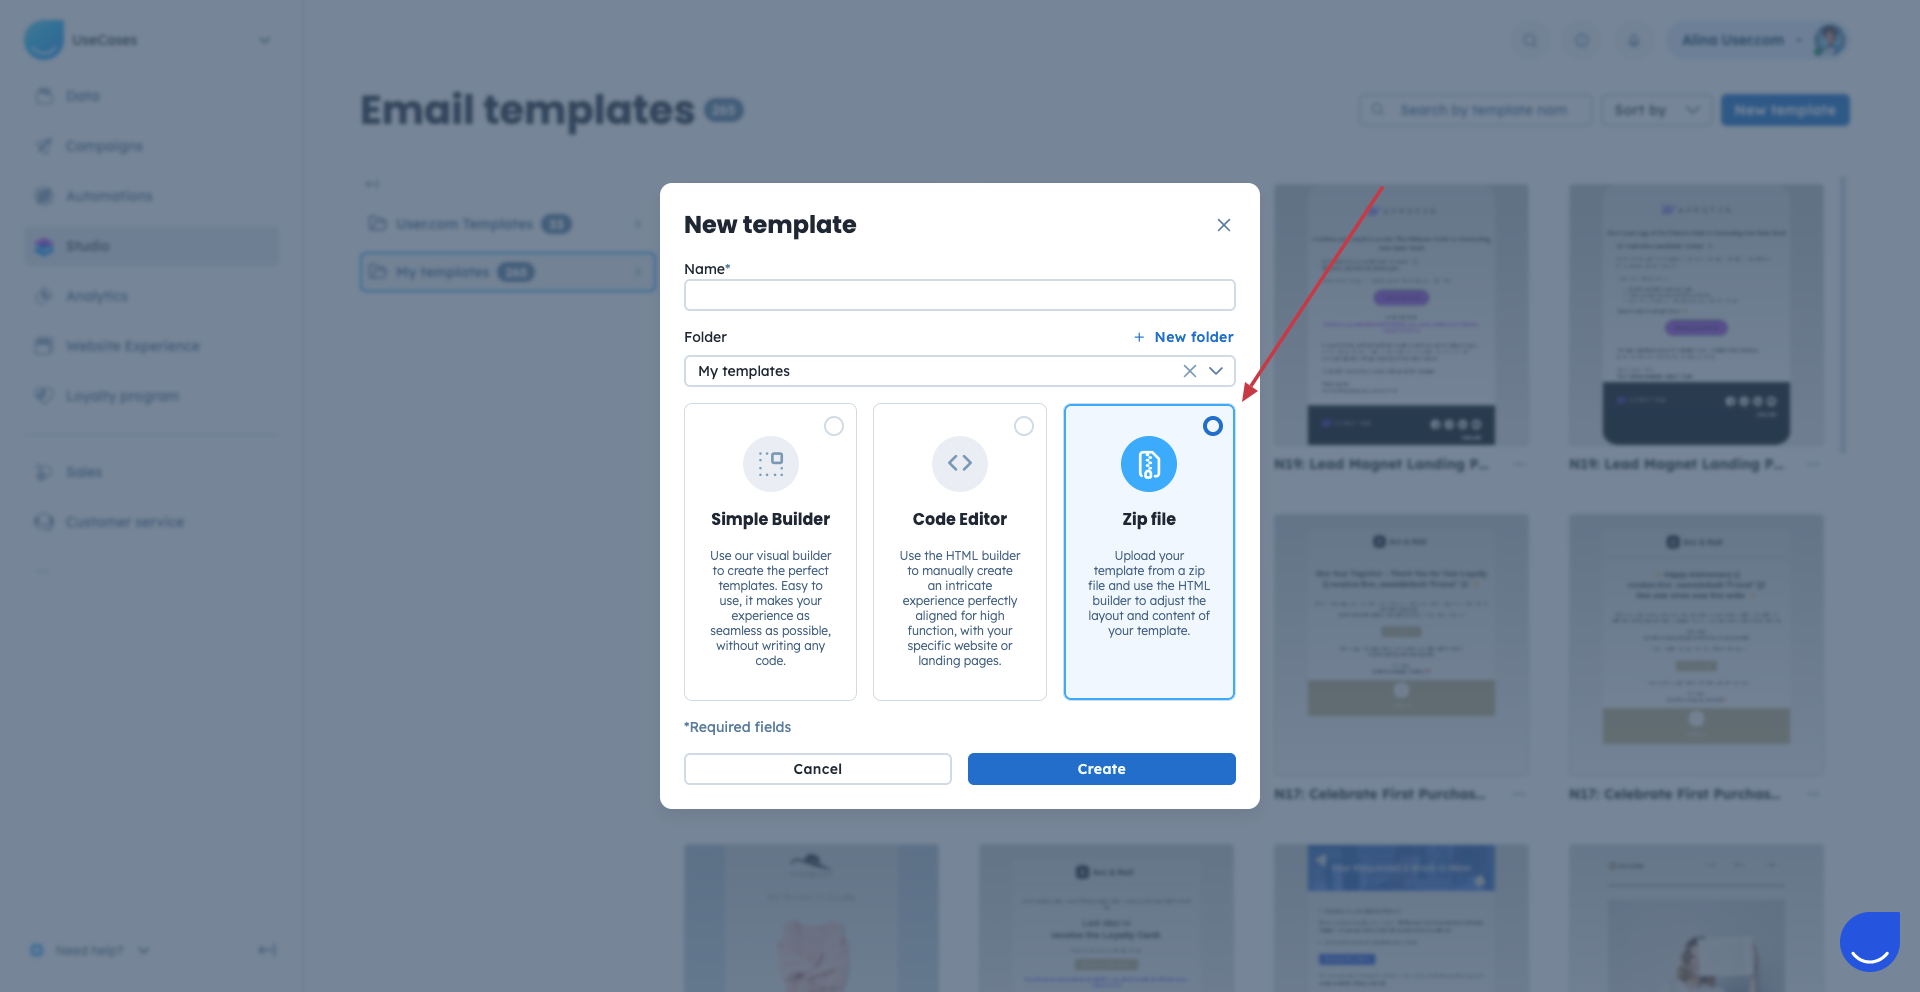
To create an email template you need to go to “Studio” → “Templates” → “New Template” and give the name to your template and choose one of the available options:
Use the Simple Builder if you want to create an email template with a drag-and-drop editor and no technical skills.
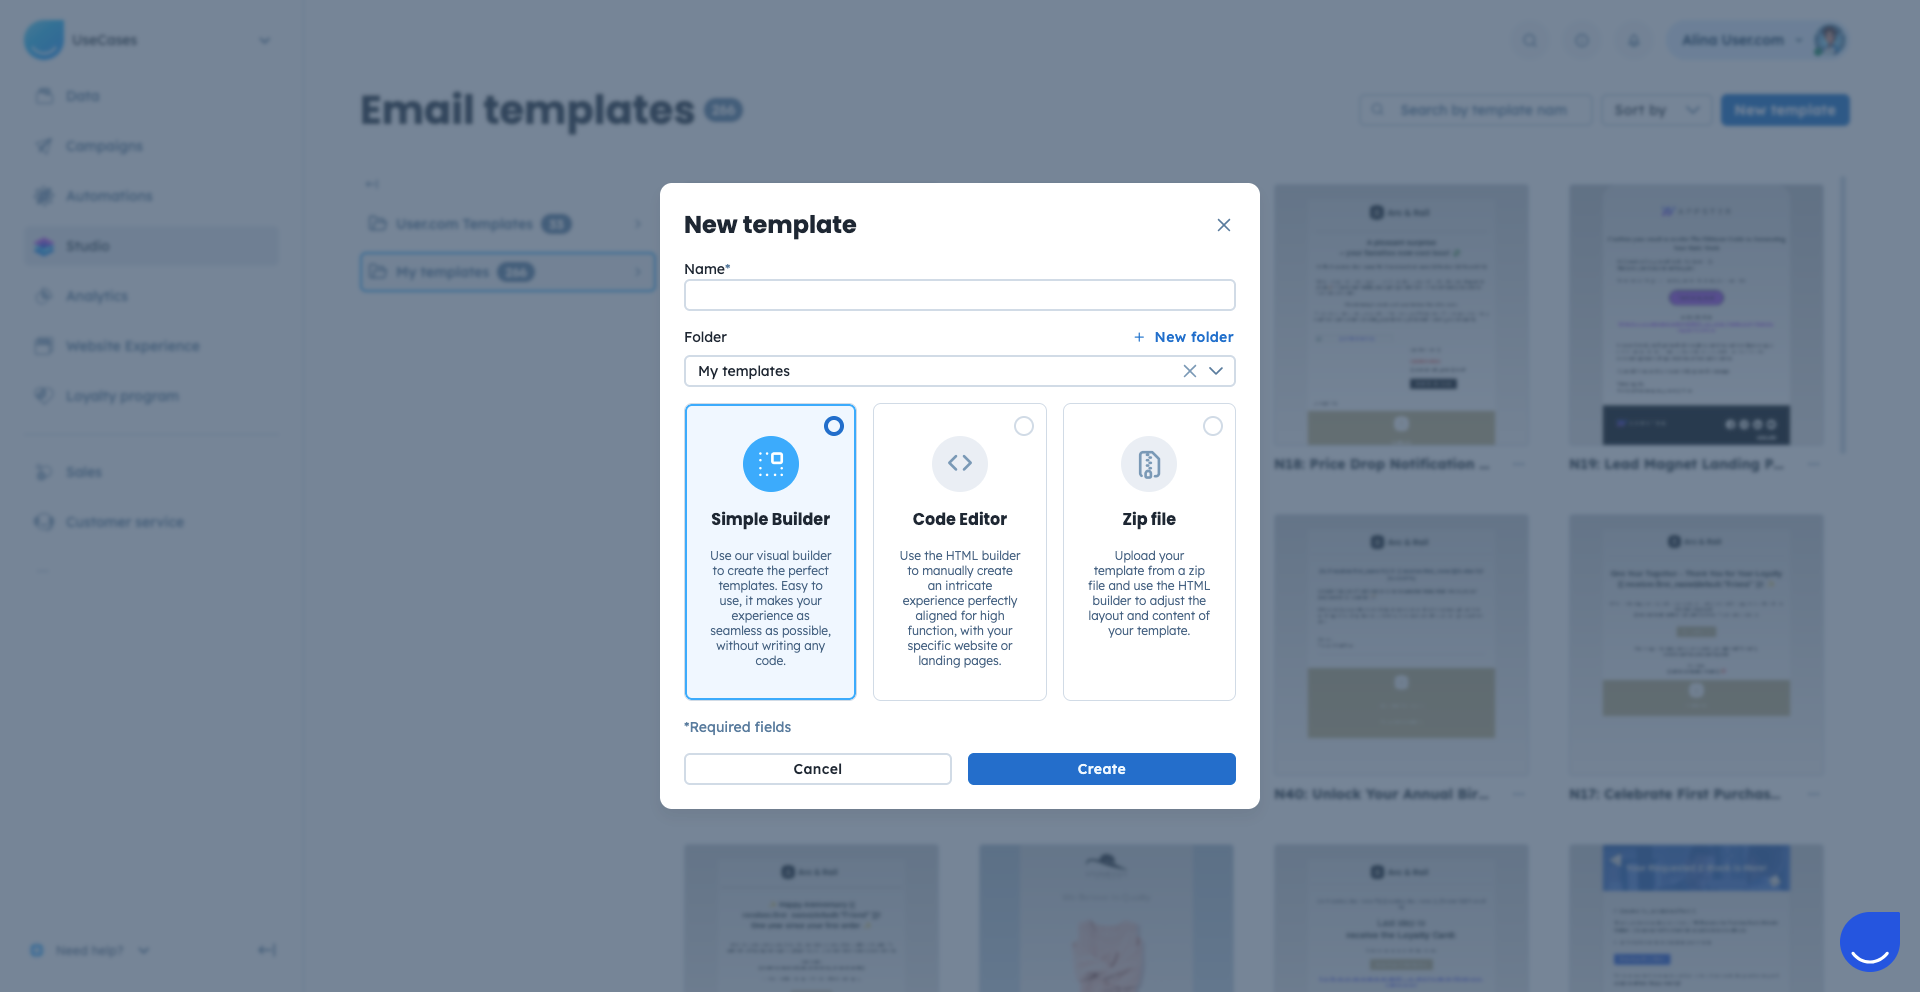
Go to “Studio” → “Templates” → “New Template”, give the name to the future template and choose the folder it should be stored in.
You start by building the structure of your email using layout blocks available on the right side of the editor. With their help you decide on the number of columns and create the basic skeleton of your email. Just drag the blocks and drop them to the canvas.
You also have access to the “Library” block, which contains content blocks you previously saved in other email templates.
Next, add content modules to your layout. You can choose from the following modules:
Image
Text
Title
Space
Button
Social media
Share
Separator
Code
Video
RSS feed
Floating image
Google Maps
To know about each module, please check a dedicated article.
To add a module, drag it into the selected block of your template. Click the content element to edit it. Then open its settings using the gear icon.
A configuration pop-up appears, where you can adjust properties such as colors, text, margins, column spacing, and other parameters depending on the selected module.
Remember to save the progress when you are working with the content - no changes are saved automatically. Use the “Save” button in top right corner.


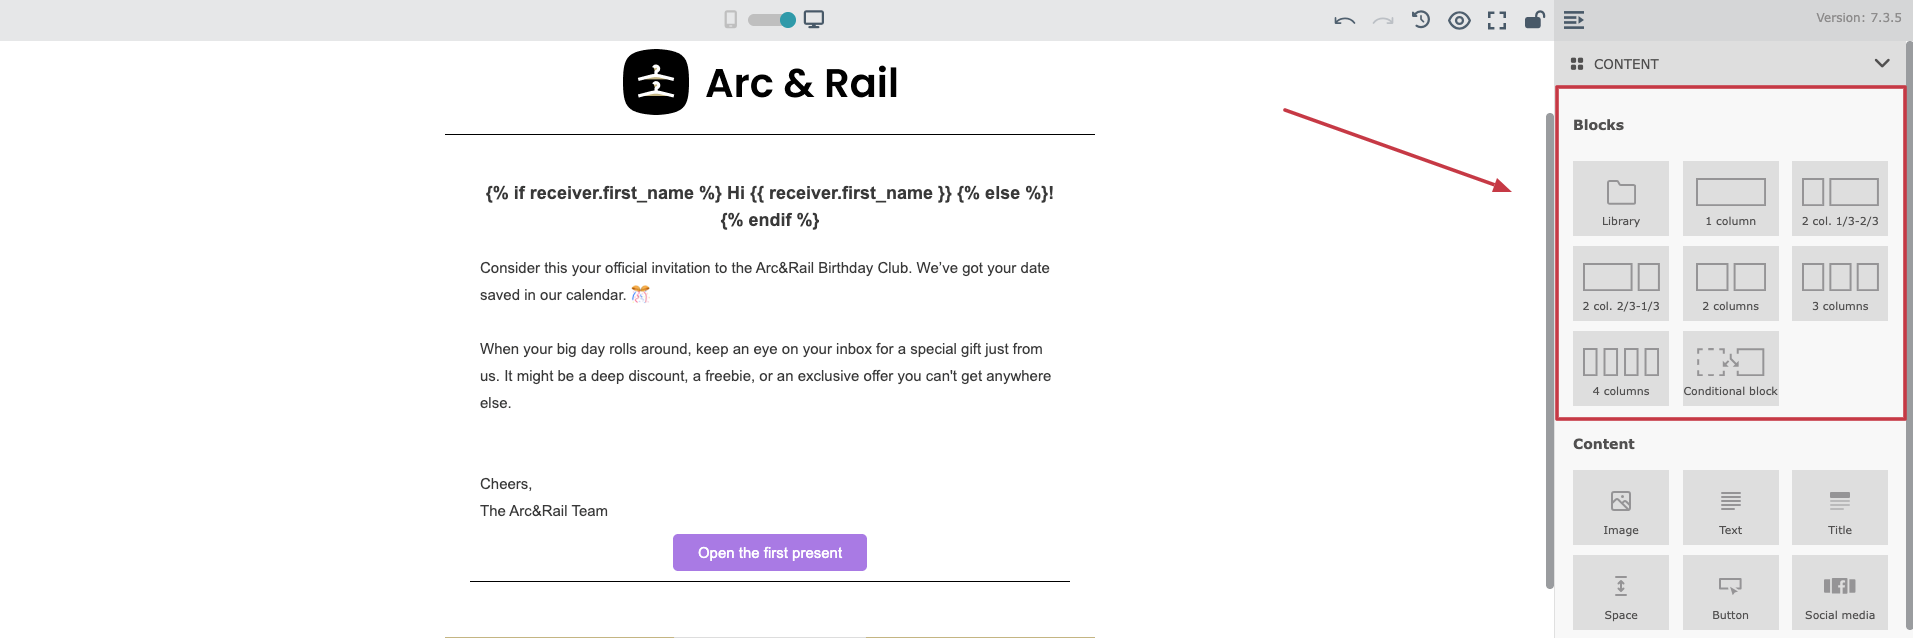
When your content is ready, open the global template settings in the “Style” section on the right panel.
Here you can configure:
Layout
Themes (color scheme)
Color dispatch (for main elements)
Settings (width of content, spacing, fonts, etc)
Preheader (preview text shown next to the subject line in email inboxes and strongly affects open rates)
You can switch between desktop and mobile views to make sure your email looks good on all devices. You can also set specific elements to appear only on desktop or only on mobile to follow your custom design decisions.
To review your design, use “Preview” with a contact email address to render real data. It’s especially important if you use dynamic content in your email template. You’ll see a realistic preview of the final email with dynamic content filled in. We strongly recommend doing this before using the template in a live campaign.
You can also send a test email. Just use a “Send a test” button on top of the panel. It’s an important step to ensure correct rendering in email inboxes.

Once you are ready with the content and configuration of the email template, remember to save the progress using the “Save” button in top right corner of the editor. Remember, that no changes are saved automatically!
When you want to exit the builder, choose “Save and exit” option. You can always find your template in “Studio” → “Templates” section and apply new changes.
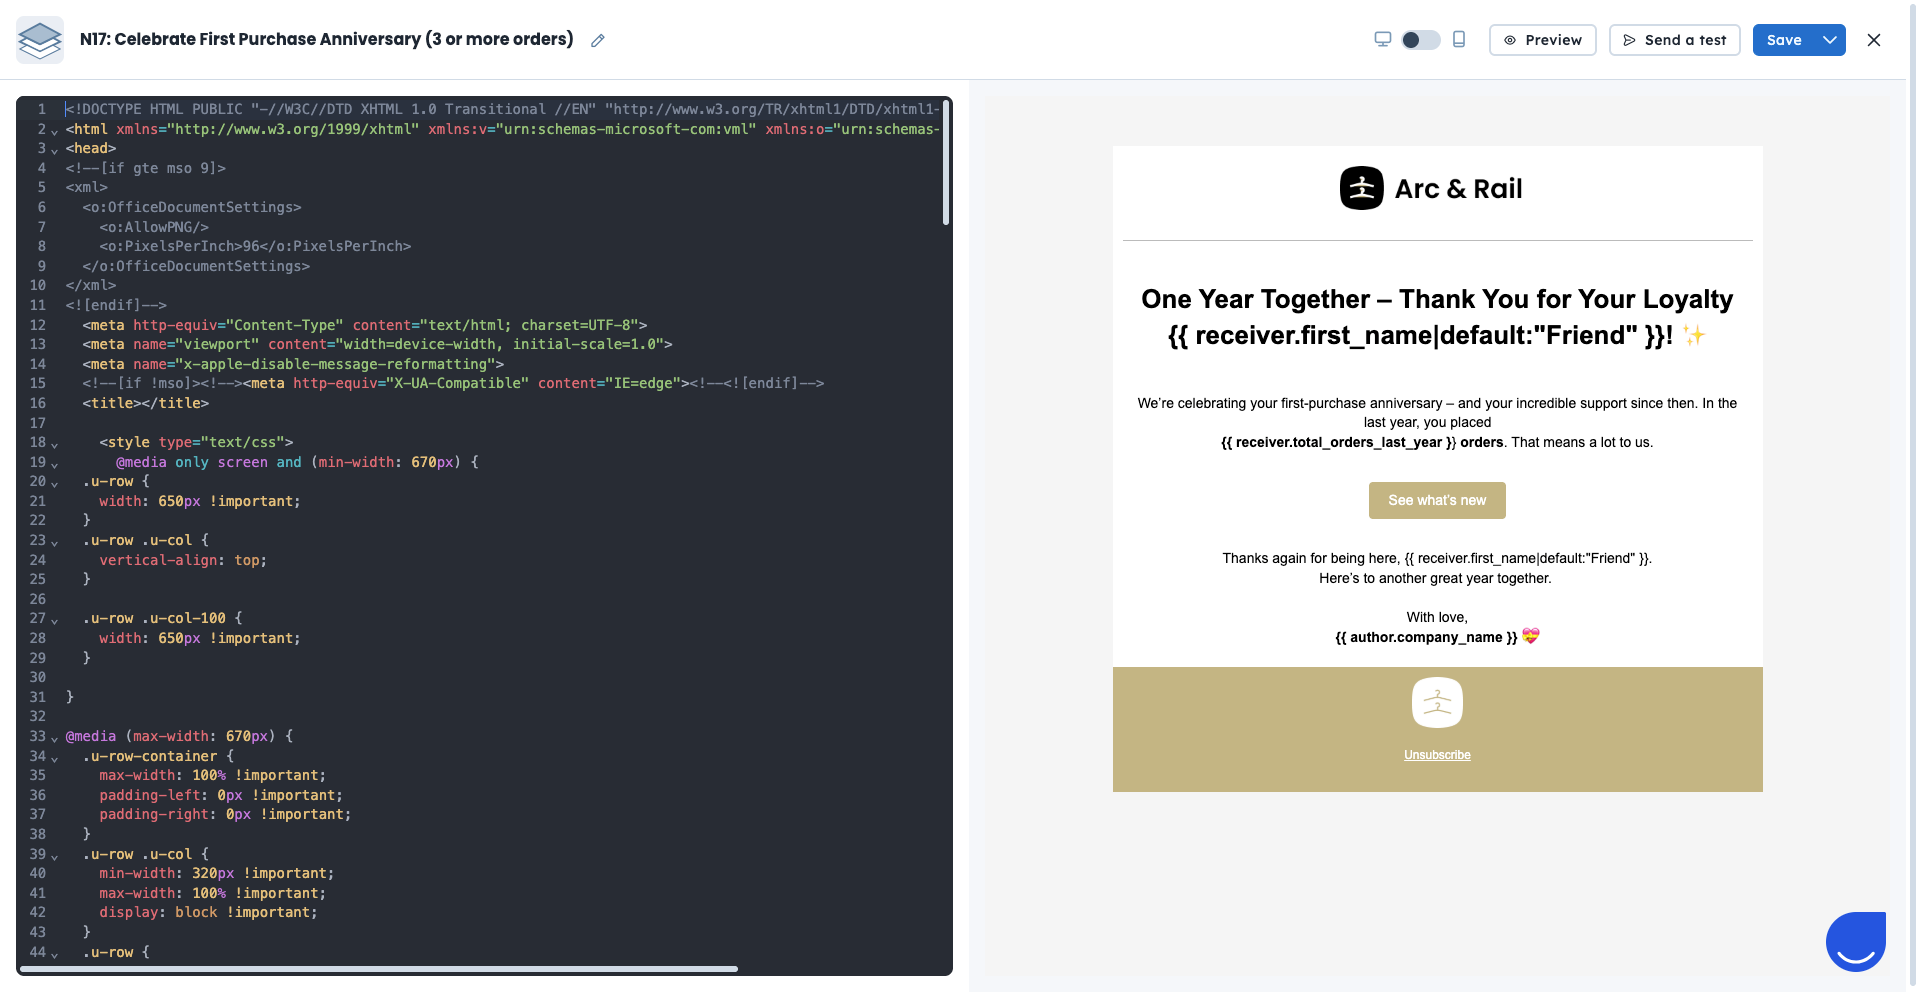
Choose the Code Editor if you need full control over the HTML structure and styling of your email template. This option is recommended if you have HTML knowledge and want your email design to closely match your website or brand guidelines.
Go to “Studio” → “Templates” → “New Template”, give the name to the future template and choose the folder it should be stored in.
The Code Editor provides a space for writing HTML code and a live preview.
You can switch between desktop and mobile views to verify responsiveness.
To review your design, use “Preview” with a contact email address to render real data. It’s especially important if you use dynamic content in your email template. You’ll see a realistic preview of the final email with dynamic content filled in. We strongly recommend doing this before using the template in a live campaign.
You can also send a test email. Just use a “Send a test” button on top of the panel. It’s an important step to ensure correct rendering in email inboxes.
Once you are ready with the content and configuration of the email template, remember to save the progress using the “Save” button in top right corner of the editor. Remember, that no changes are saved automatically!
When you want to exit the builder, choose “Save and exit” option. You can always find your template in “Studio” → “Templates” section and apply new changes.
You can also create an email template by uploading a ZIP file.
Your ZIP file must meet the following requirements:
Maximum size: 1 MB
Contains only one HTML file (if there are multiple, the first one found will be used)
All images and files must be placed in the root directory (no subfolders)
File names must include only letters, numbers, and hyphens
The upload is case-sensitive, so file names must match the code exactly
Go to “Studio” → “Templates” → “New Template”, give the name to the future template and choose the folder it should be stored in.
During the import, all images and files are uploaded to the “Media Library”, and absolute paths are created automatically.
This method is best if you already have a ready-to-use HTML email design.
Every marketing email template must include an unsubscribe option. This is required to comply with email regulations and to give recipients full control over their subscriptions.
You can add different types of unsubscribe and preference management links to your email templates:
A general unsubscribe link, which removes the recipient from all marketing communication.
An unsubscribe from a specific list link, which lets the recipient opt out of a selected list only.
A Manage subscriptions button, which redirects the recipient to a preference page where they can manage the lists they are subscribed to.
