If if you have your own provider for email delivery, you can connect your own SMTP (Simple Mail Transfer Protocol) to personalize how your emails are delivered. It means that Positive User will send the emails, but your provider will be responsible for delivering these emails to recipients.
This option is helpful if you want more control over deliverability settings or prefer to use an existing email infrastructure.

Make sure your email provider allows SMTP connections. If you use Gmail, you may need to update security settings. If you use Google Workspace, only the administrator can change these settings.
Go to “Settings” → “Workspace Setting” → “Email” → “SMTP Settings”.
Click “Create SMTP” to open the configuration form.
Fill out the required fields.
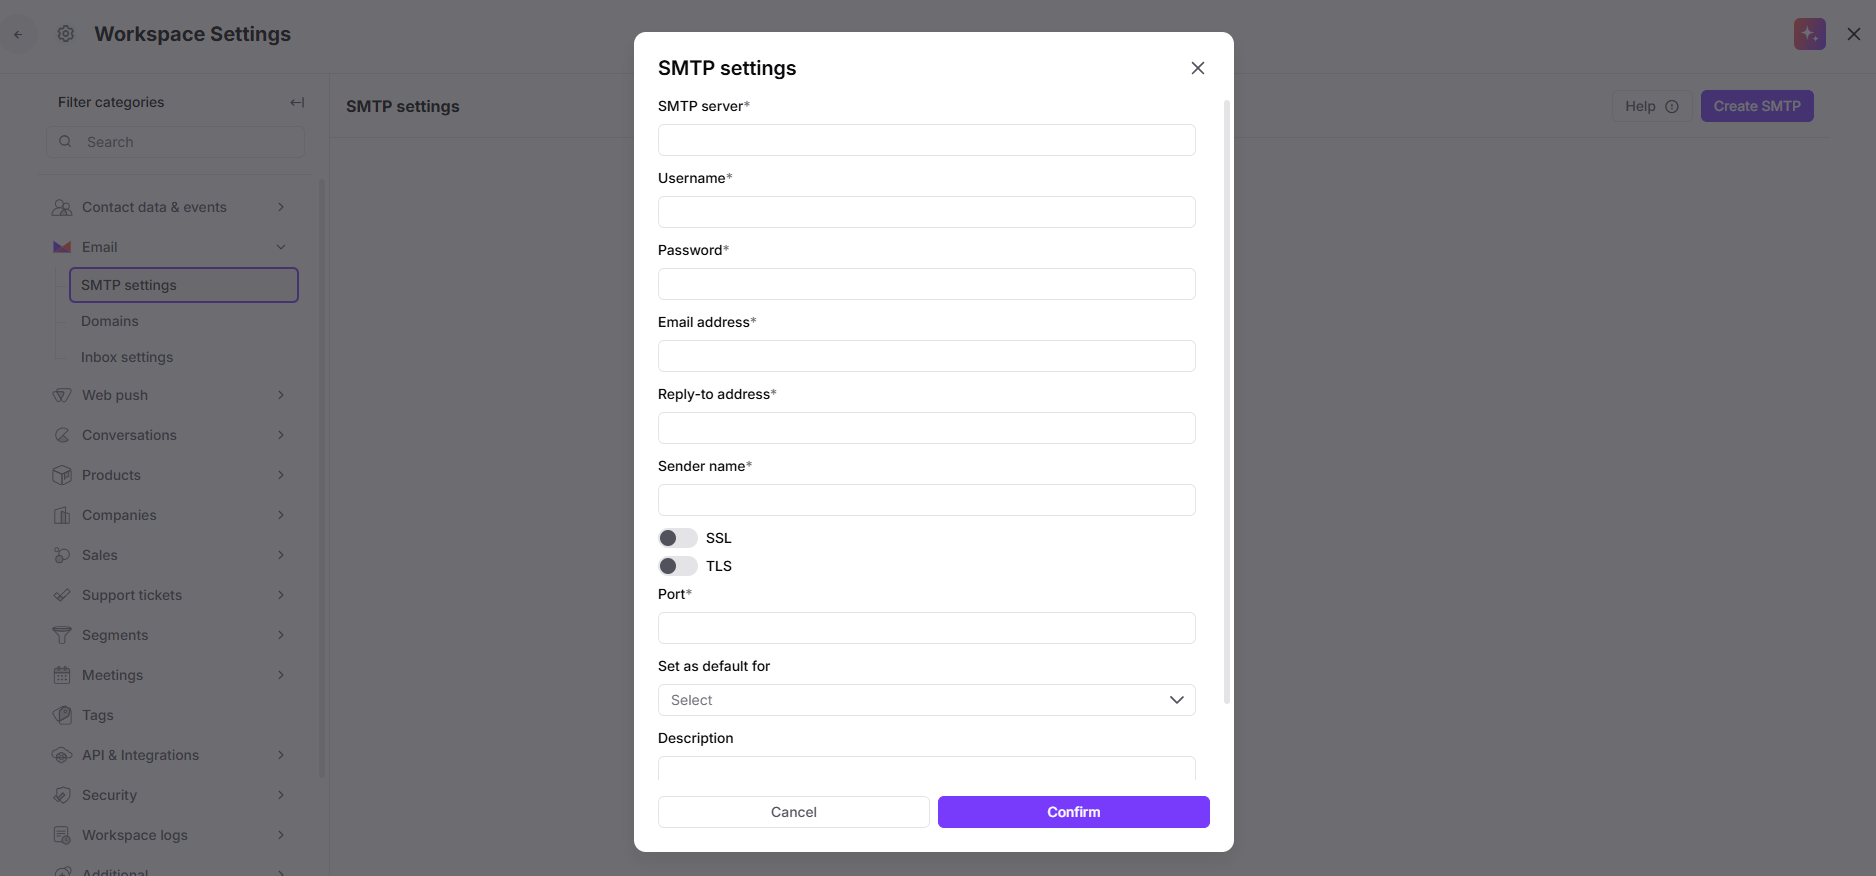
SMTP server: Enter the host address provided by your email service. (For example, Gmail uses smtp.gmail.com.)
Username: Usually the email address of the account you want to send from.
Password: Use your account password or an app-specific password if 2-step verification is enabled.
Email address: The email address that will appear as the sender.
Reply-to address: The address where replies should be delivered. You can use your workspace email address to receive replies directly in the chat.
Sender name: A display name that helps recipients recognize your messages.
SSL: A security certificate. Use it if your provider supports it. (Gmail requires SSL to be turned off.)
TLS: A security protocol. (For Gmail, TLS must be turned on.)
Port : Depends on your provider. (Gmail uses port 587.)
Set as default for: Choose which agents should use this SMTP profile by default.
Description: Add a short label for easier organization.
After you save the configuration, your new SMTP profile appears as a sender option. You can use it when creating an Email Campaign or anywhere else in the app where email sending is supported.
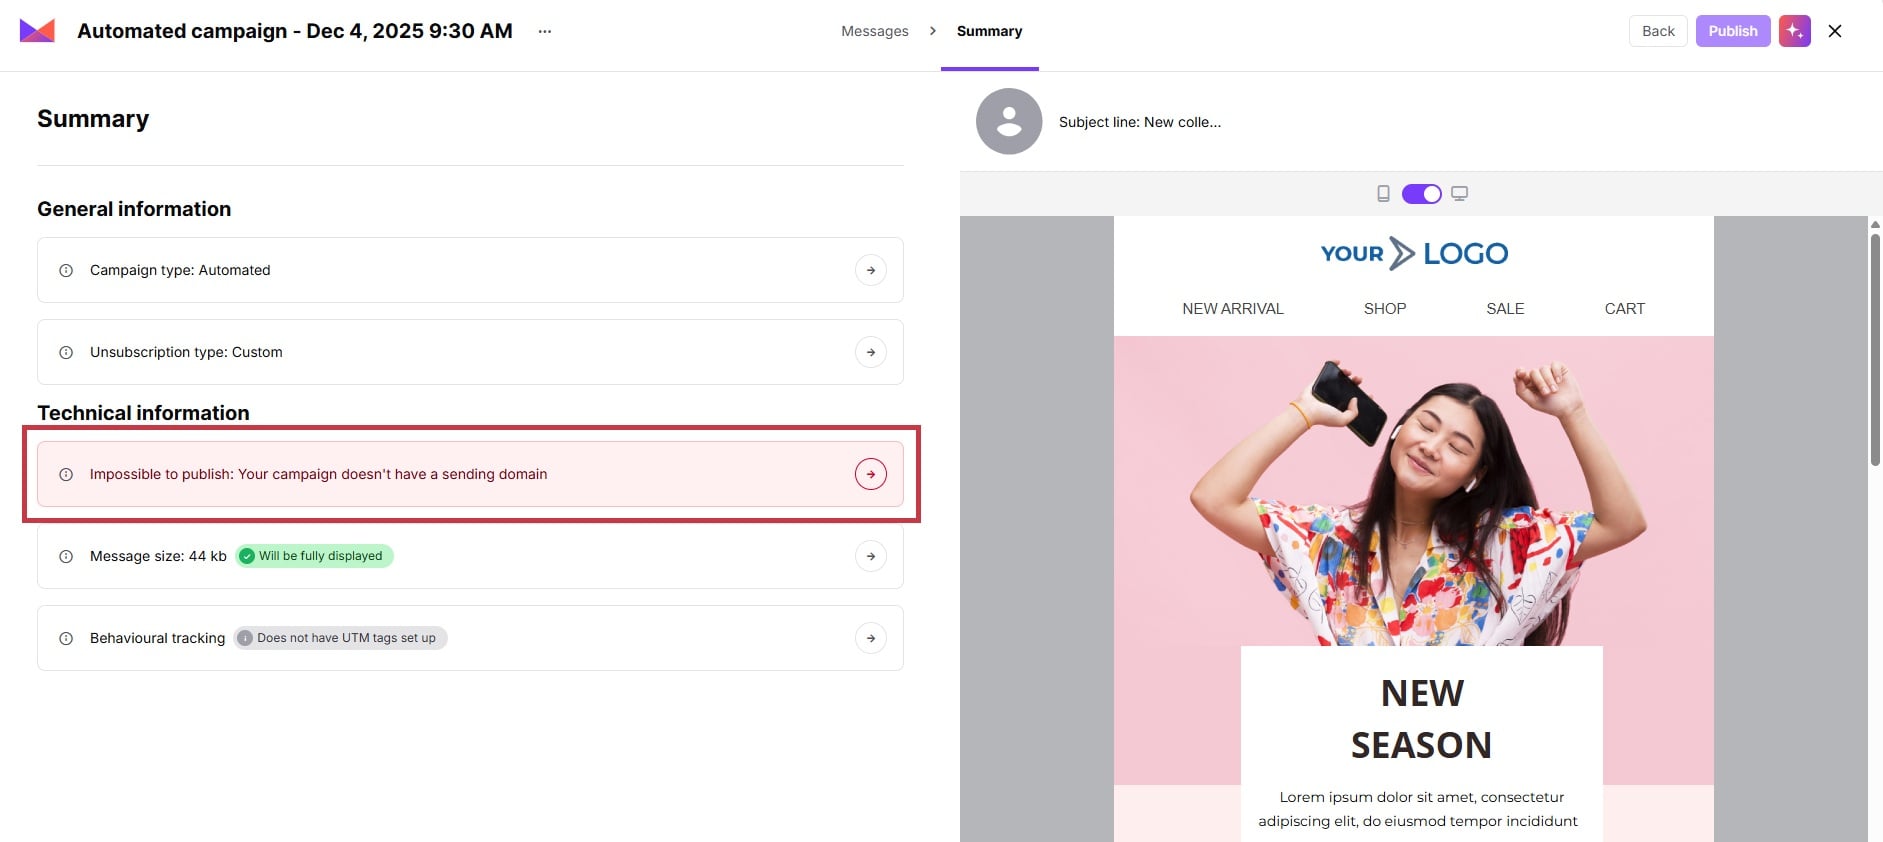
Once you reach the “Message” stage in the campaign creation flow, you need to decide on the email domain and email sender for this specific delivery.
There are the following fields to be completed:
Send type: here you choose the type of the email domain. Go with “Custom SMTP provider”.
Select SMTP: decide on the sender from the dropdown.

Later on, on a “Summary” stage the system once again shows the chosen settings. In case of any issues with the sender settings, you will see an alert.
Example of the alert when sender settings were not complete:
Positive User is designed to send emails very efficiently, even at a rate of hundreds per second. However, some SMTP providers enforce stricter limits. When those limits are exceeded, you may notice delivery issues.
If your Email Campaign report shows failures in the “Delivery Logs” with messages like:
“SMTP Error 454 b'Throttling failure: Maximum sending rate exceeded’”
this indicates that your SMTP server is receiving messages faster than it can handle.
There are two ways to address this:
Ask the administrator of your SMTP service to increase the allowed sending rate.
If that’s not possible, consider sending email campaigns through the automations. To manage the speed put a “Delay” before “Send Email Campaign” module and enable the “Randomize” option. This will naturally slow down message delivery and keep it within your provider’s limits.
