Configuring senders for your domain ensures that each type of communication - marketing newsletters, sales outreach, and support messages - is delivered from the correct, trusted address. Setting up multiple senders under one authenticated domain helps maintain brand consistency, improves deliverability, and keeps your messaging aligned with each team’s purpose.

If you decide on connecting your company’s domain with the Positive User platform, you will gain access to an additional option that allows you to define senders for that specific domain.
First you need to connect the chosen domain with Positive User and verify all the DNS settings.
To do so, please, follow the steps from the following article.
Once your domain is successfully connected and all DNS records have been verified, you can proceed with creating senders.
Navigate to “Workspace Settings” → “Email” → “Domains”.
Open the “Senders List” (in top right corner) and click “Create Sender”.
Complete the form with the required details.
Emails settings: choose the domain from the list.
Name: give the sender a name visible in the workspace.
Sender name: define a name visible to your recipients in the email inbox.
Email from: type full email address (within a chosen domain).
Reply-to: choose what email address the recipients’ responses will come to.
Description: add useful details for your team members.
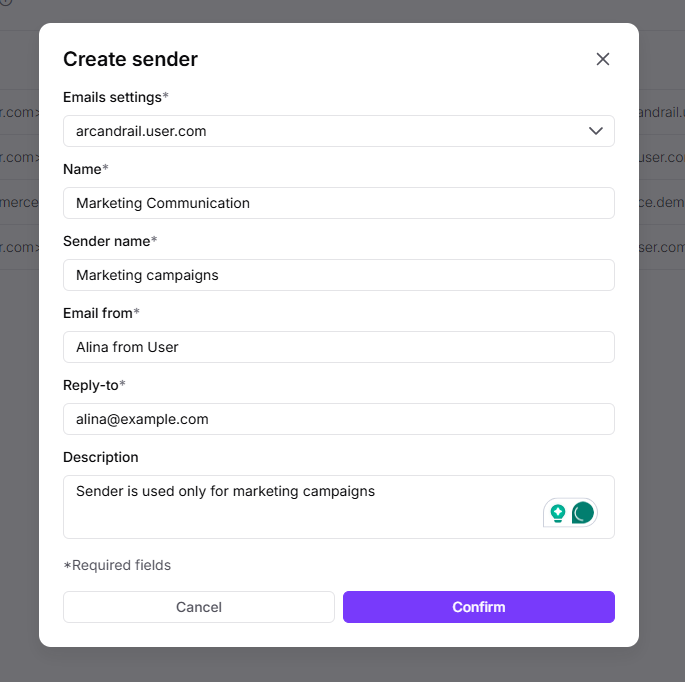
Click “Confirm”. Sender is added.
Now you can use this sender inside your email campaigns. Feel free to add as many senders as you need.
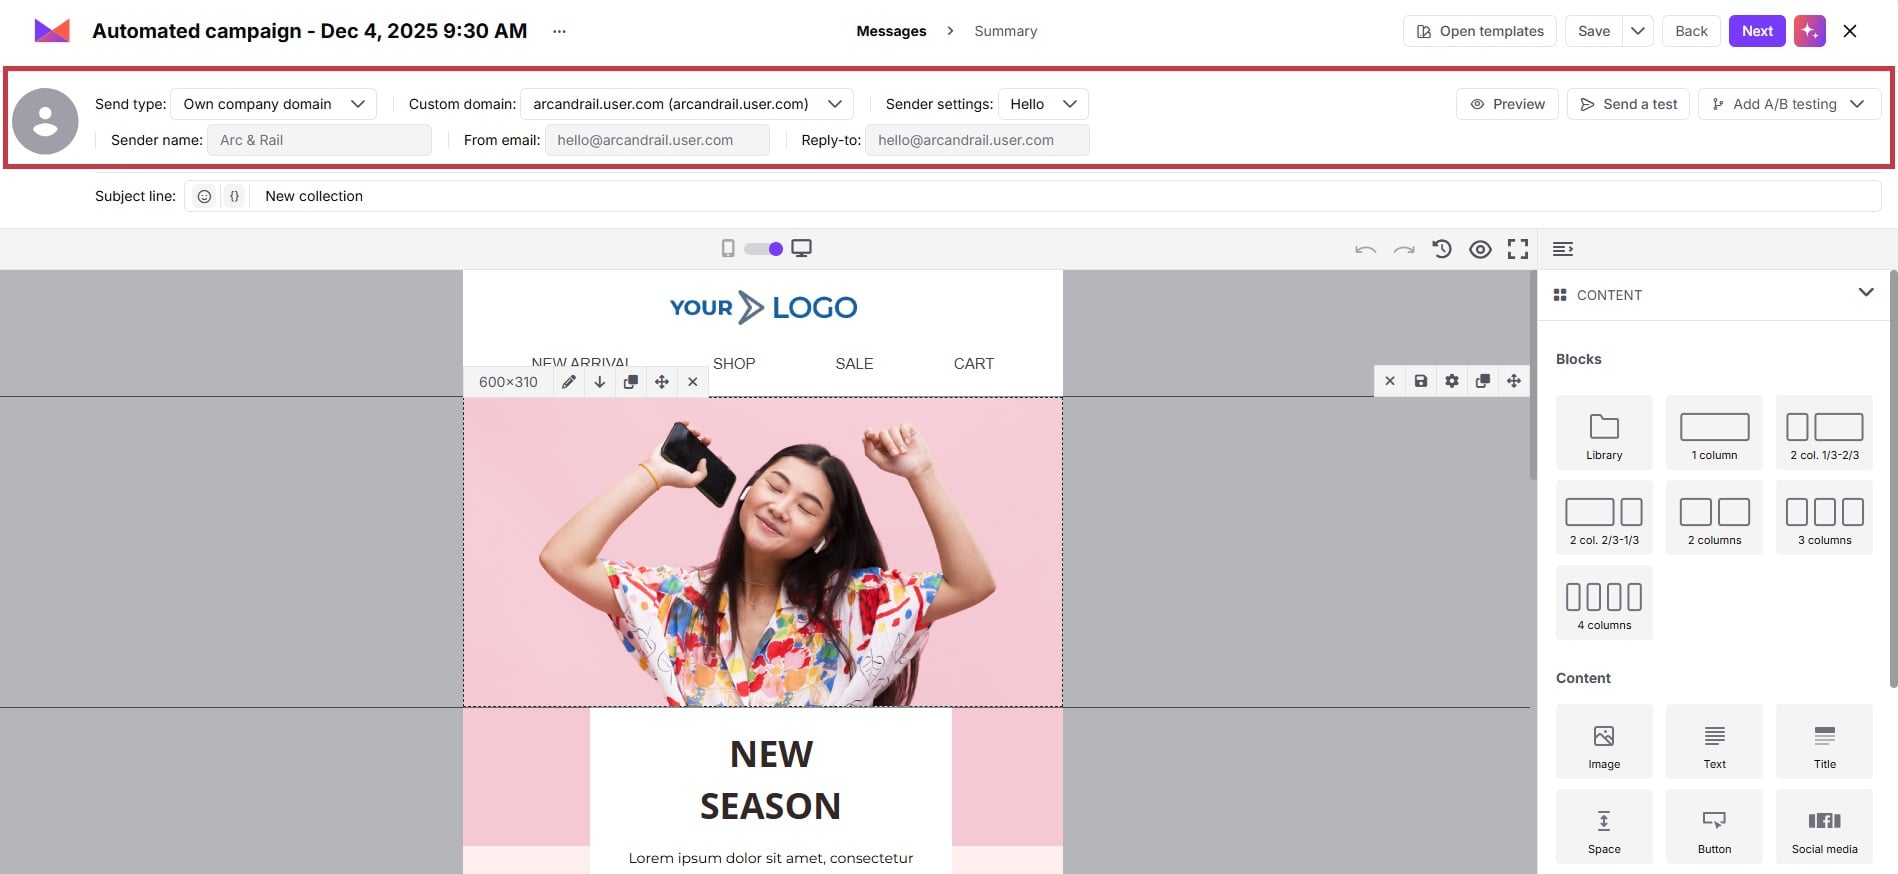
Once you reach the “Message” stage in the campaign creation flow, you need to decide on the email domain and email sender for this specific delivery.
There are the following fields to be completed:
Send type: here you choose the type of the email domain. Go with “Own company domain”.
Custom domain: pick one of the connected domains to use it for this specific campaign.
Sender settings: decide on the sender from the dropdown.
Right after that three additional fields will appear for confirmation: “sender name”, “from email” and “reply-to”.
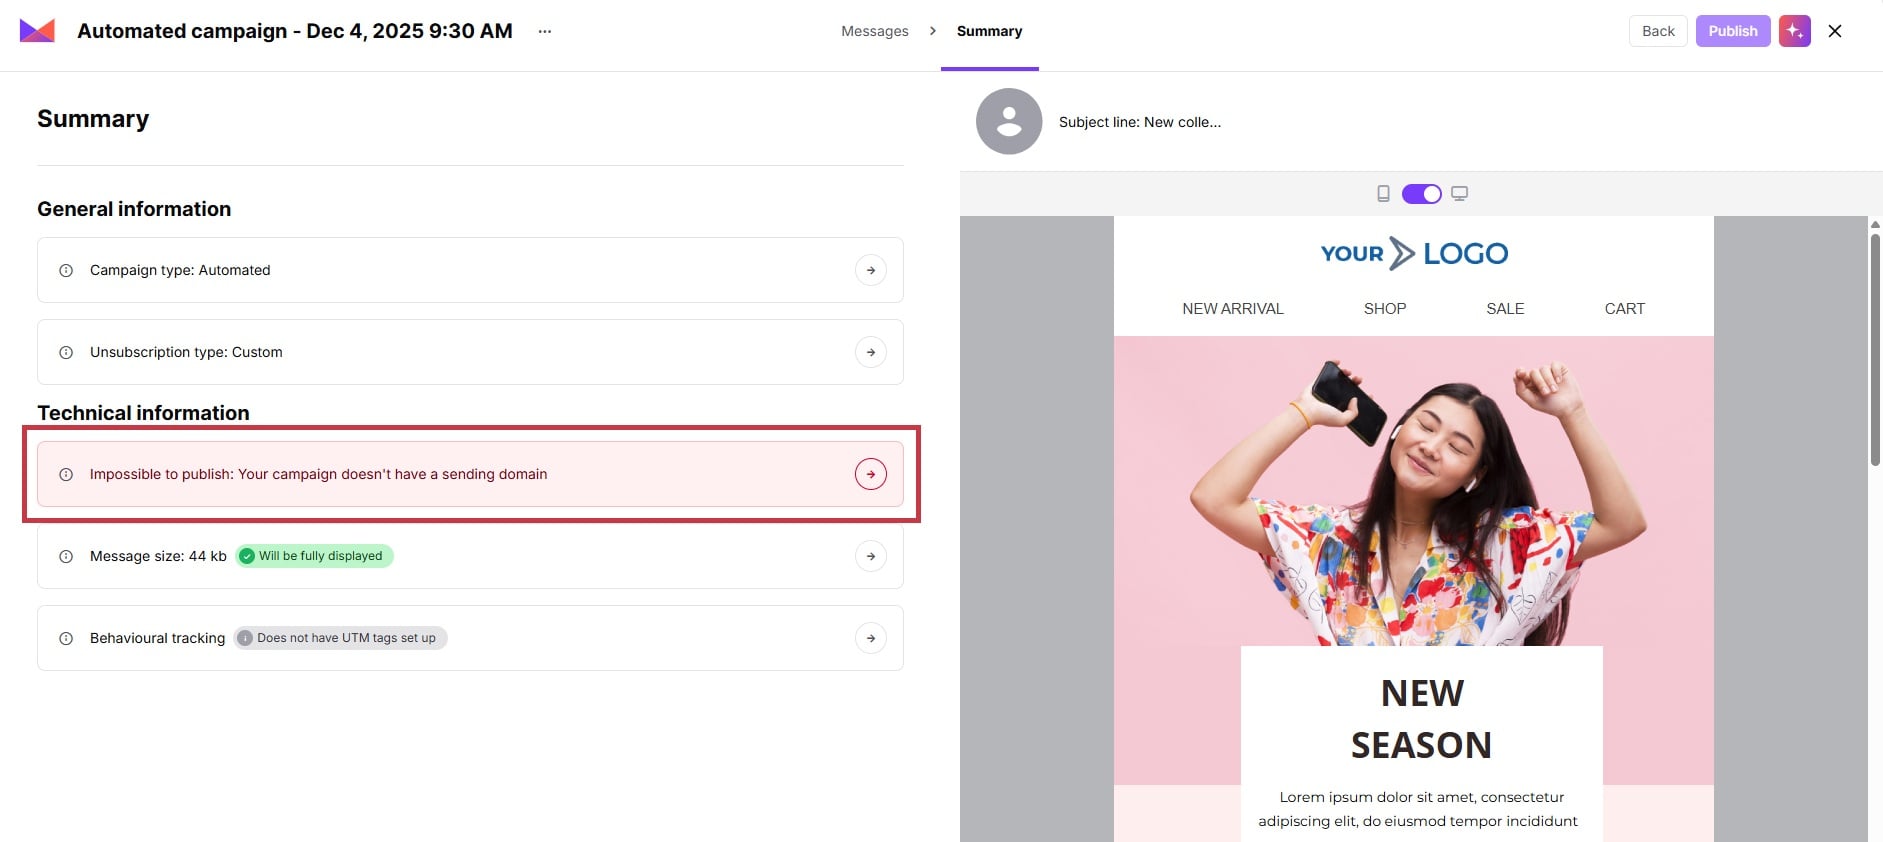
Later on, on a “Summary” stage the system once again shows the chosen settings. In case of any issues with the sender settings, you will see an alert.
Example of the alert when sender settings were not complete: