In Positive User, you can define access for your team members across the application. Access levels specify which parts of the app are available to each role and what data is visible, helping you safeguard sensitive information and tailor permissions.
In this article, you’ll learn how to create access levels, configure visibility rules, and assign permissions to individual team members or groups.
Access levels define which parts of the application team member can access and what actions they can perform.
By default, Positive User includes two access levels:
Administrators
Agents
You can create additional access levels to better match your organizational structure.
To create a new access level:
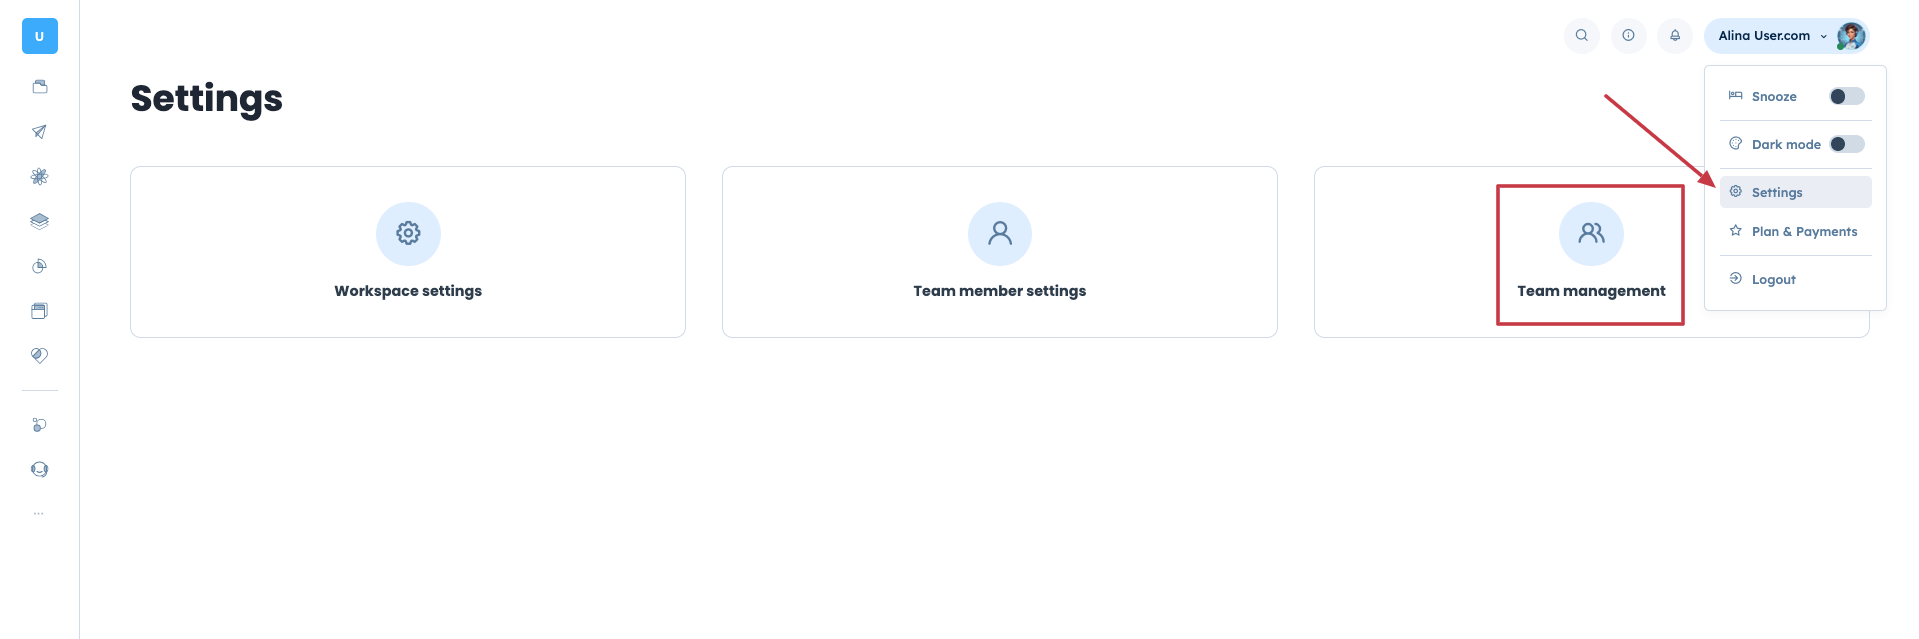
Go to top right corner of the panel → “Settings” → “Team Management”.
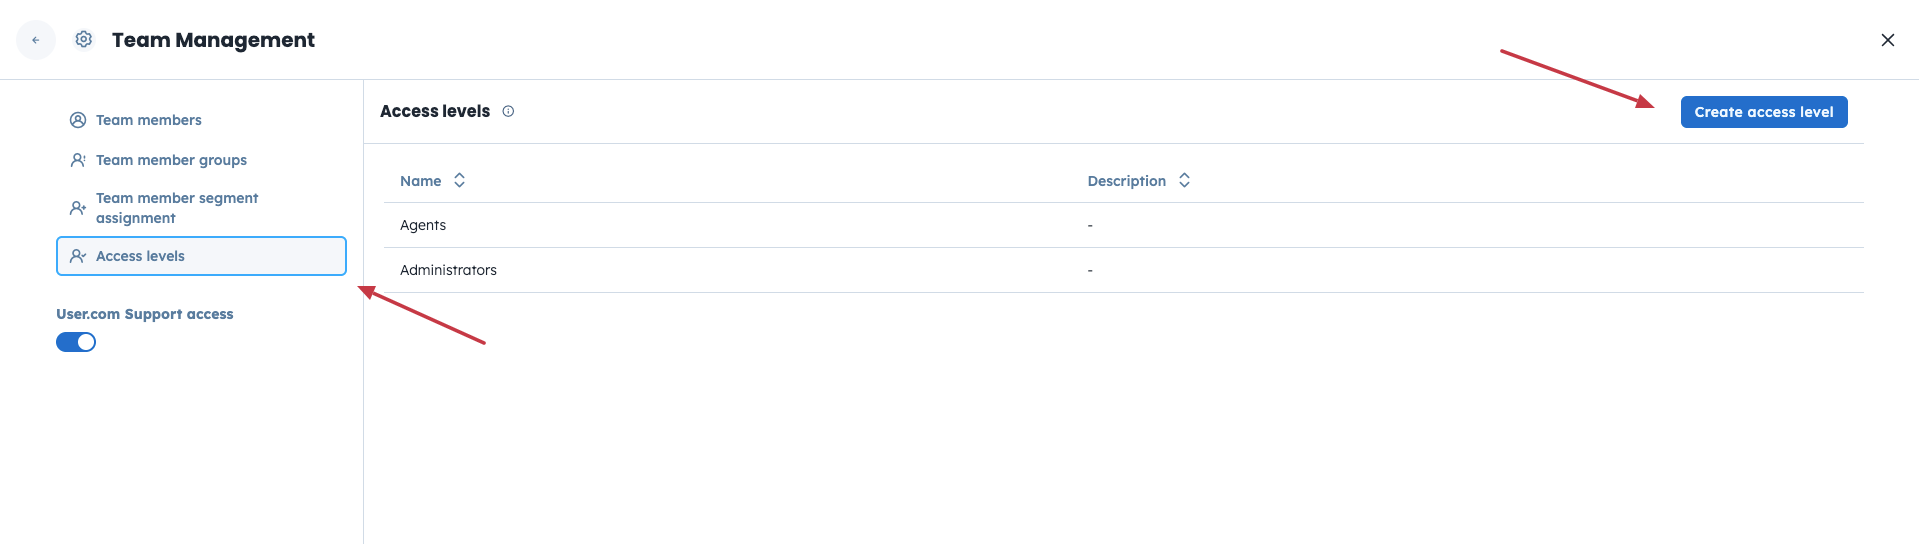
Find “Access Levels” on the left and then click the top-right corner “Create access level” button.
Define the name and which sections of the application this access level can view and manage.
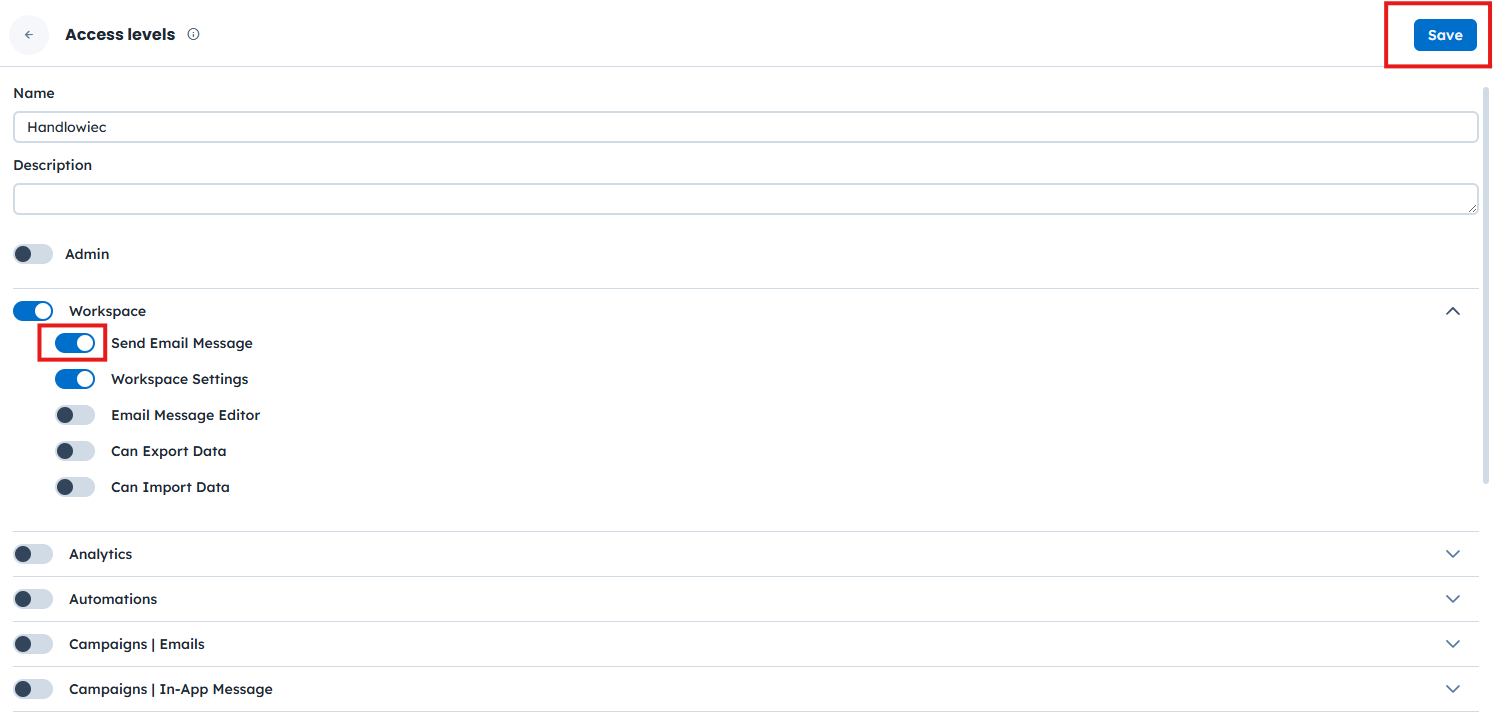
Save the changes.
Access levels can be updated at any time, so you can adjust permissions as your team or processes evolve. You can update it by clicking the three dots next to the access level name.

Example: You may create separate access levels for Sales, Support, or Marketing teams, each with access only to the tools they need.
In addition to section access, you can control object visibility. This determines which elements (such as deals, tickets, or contacts) a team member can see.
Before setting visibility, you must enable “View” access for the given object type. Then you can choose one of the following visibility levels.
Visibility: See All
The team member can see all objects, regardless of assignment. Unassigned objects are visible only with this visibility level.
Visibility: User Group
The team member can see:
Objects assigned to them
Objects assigned to other team members in the same team member group

Visibility: Assignee
The team member can see only the objects that are directly assigned to them.
Visibility: Unassigned
The team member can see only the objects that are not directly assigned to them.
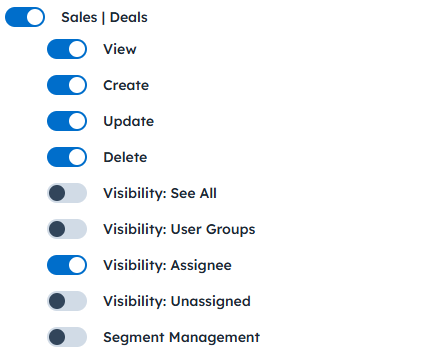
Example: Configure Visibility for a Sales Team
If you want sales representatives to work only on deals they own:
Assign deals to individual sales team members
Grant “View” access to deals
Set visibility to “Assignee”
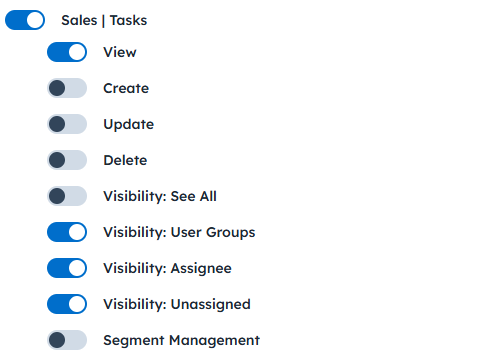
This way, sales agents can view, create, update, and delete deals, but only those assigned to them:
If you want sales representatives to see all deals handled by the entire sales team, use “Visibility: Team member Groups”.
This step is not obligatory. You can further restrict access by limiting which contact/company attributes the team member/group can view or edit. These restrictions are configured according to each access level.
This allows you to hide sensitive fields while still giving team members access to the same objects.
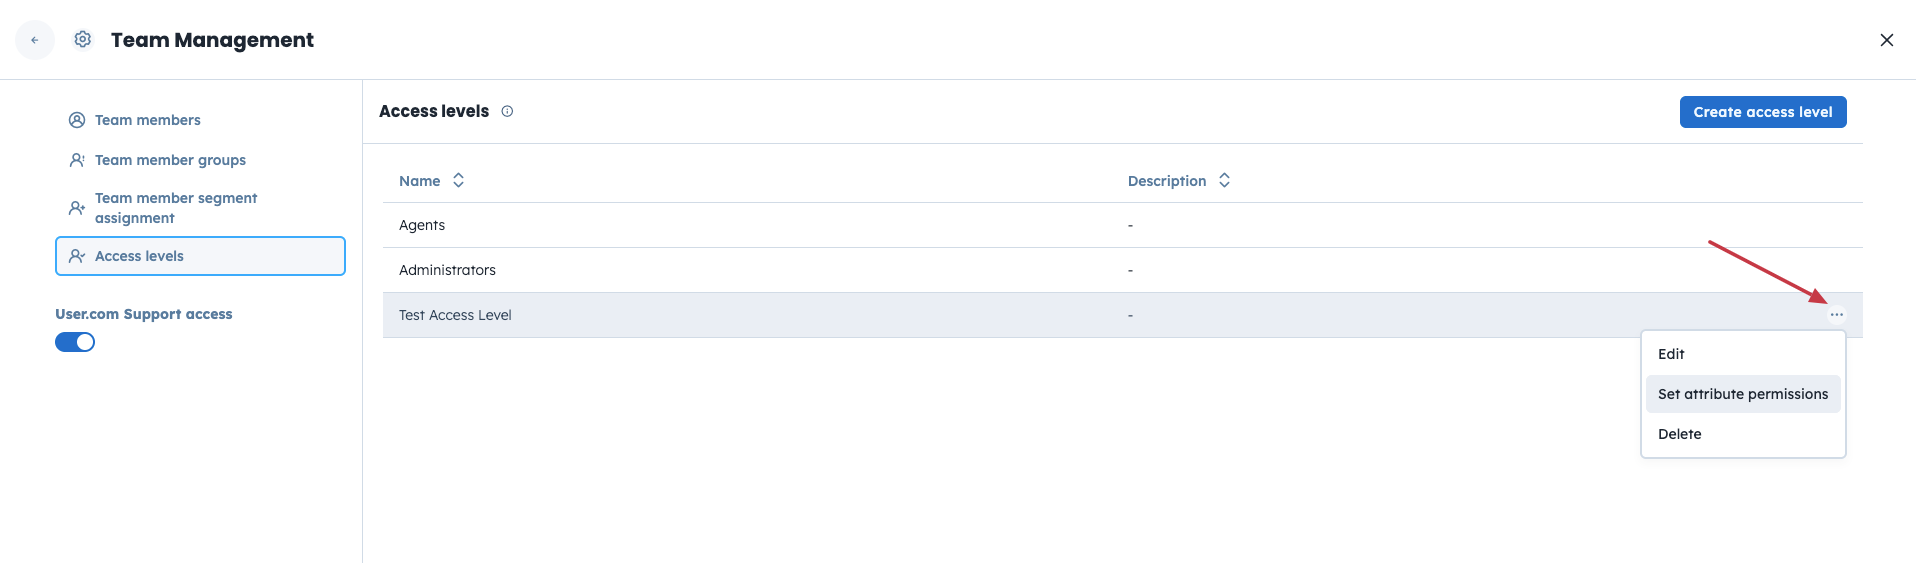
Go to top right corner of the panel → “Settings” → “Team Management” → “Access Levels”
Hover over the chosen access level and click on the three dots in front of the level name.
Go with “Set attribute permissions”.
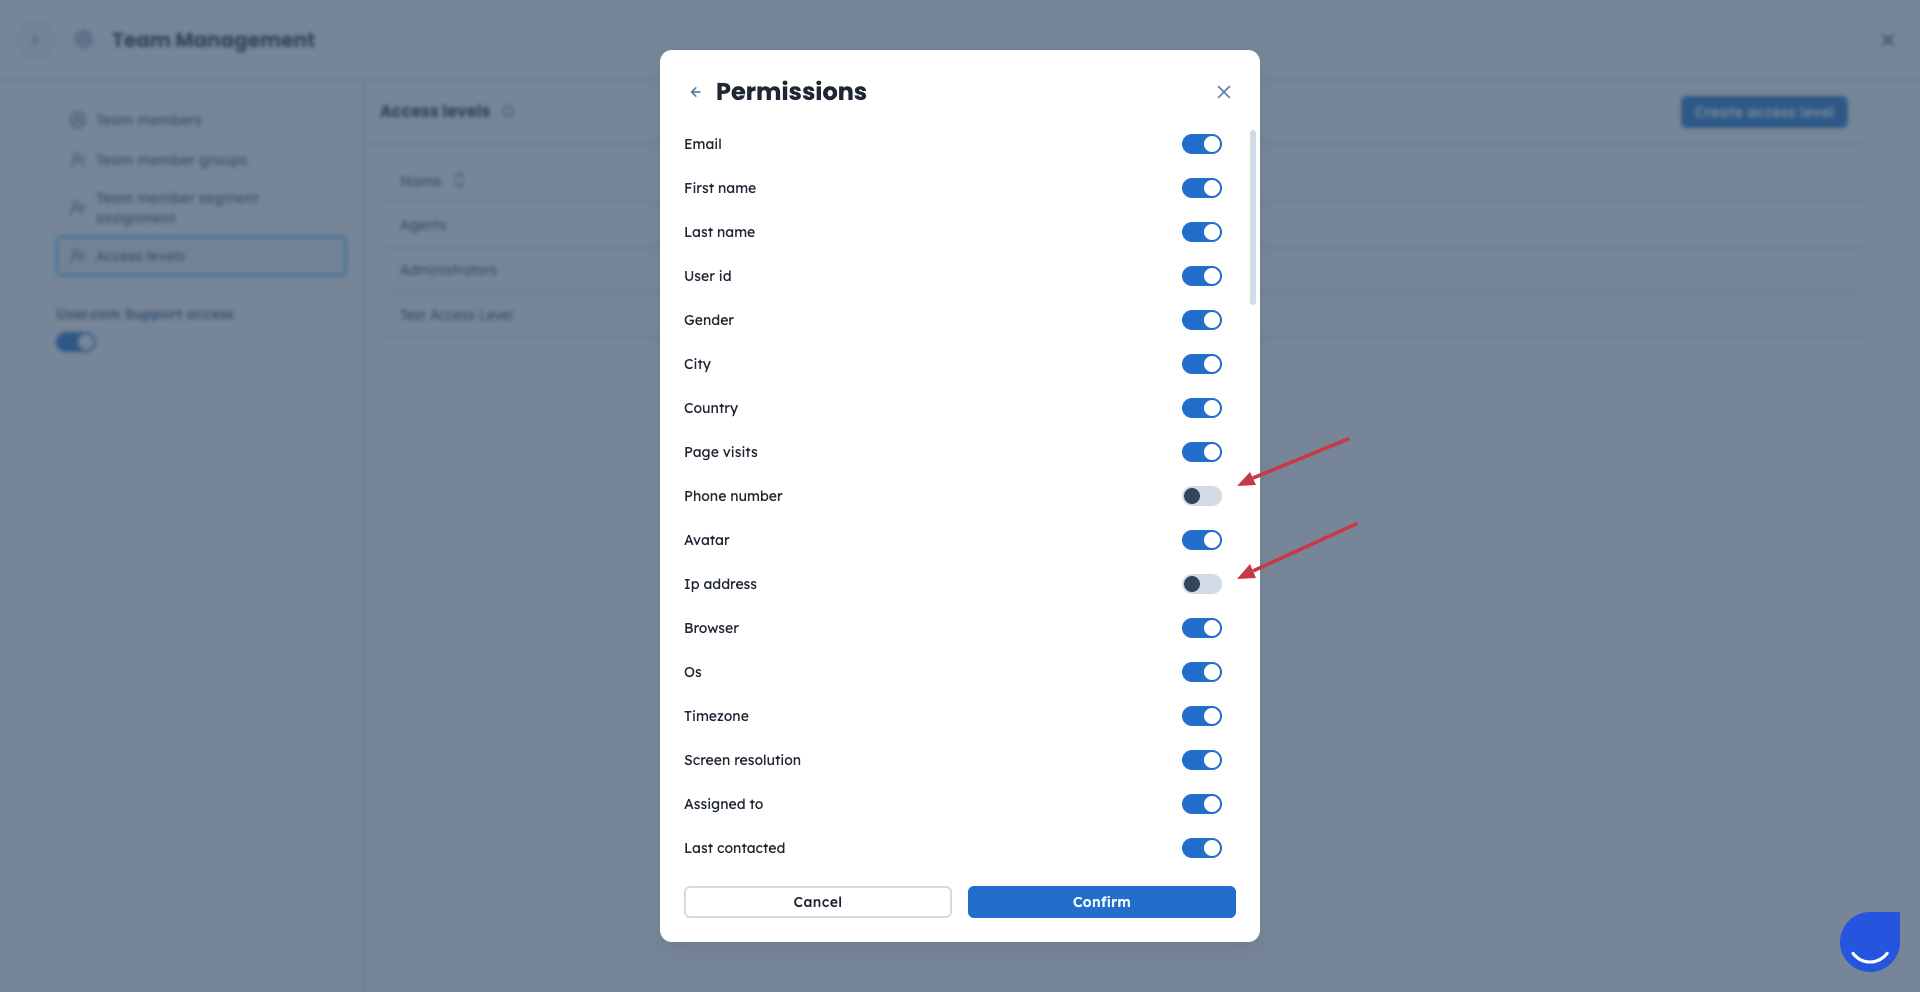
Choose between “Contact” and “Company” attributes.
Define which attributes should be invisible for the chosen access level by turning them off with the slider.
Confirm your choice.
Access levels can be assigned to:
Individual team members
Entire team member groups
To assign an access level to a team member you need to:
Go to “Team Members” section.
Choose an access level from the dropdown for every team member on the list.
To assign an access level to the team member group you need to:
Go to “Team Member Groups” section.
Choose an access level from the dropdown for every team member group on the list.
