Positive User lets your team build custom embed forms to capture information from potential leads directly on your website. By connecting these forms to an automation, you can ensure your team responds instantly, whether that is sending a confirmation email or updating a contact record.
To trigger an automation o landing page form submit you need to have:
a form (“How to Create an Embed Form”)
a draft of the automation (“Create Your First Automation”)
Setting up an automation for an embed form involves identifying the specific form and creating a workflow that reacts to its activity.
To target a specific embed form in your automation, you need its unique identification number. Go to "Website Experience" → "Forms", click on the name of the form you want to use and find “Form details” in the profile. This section includes “ID” information.
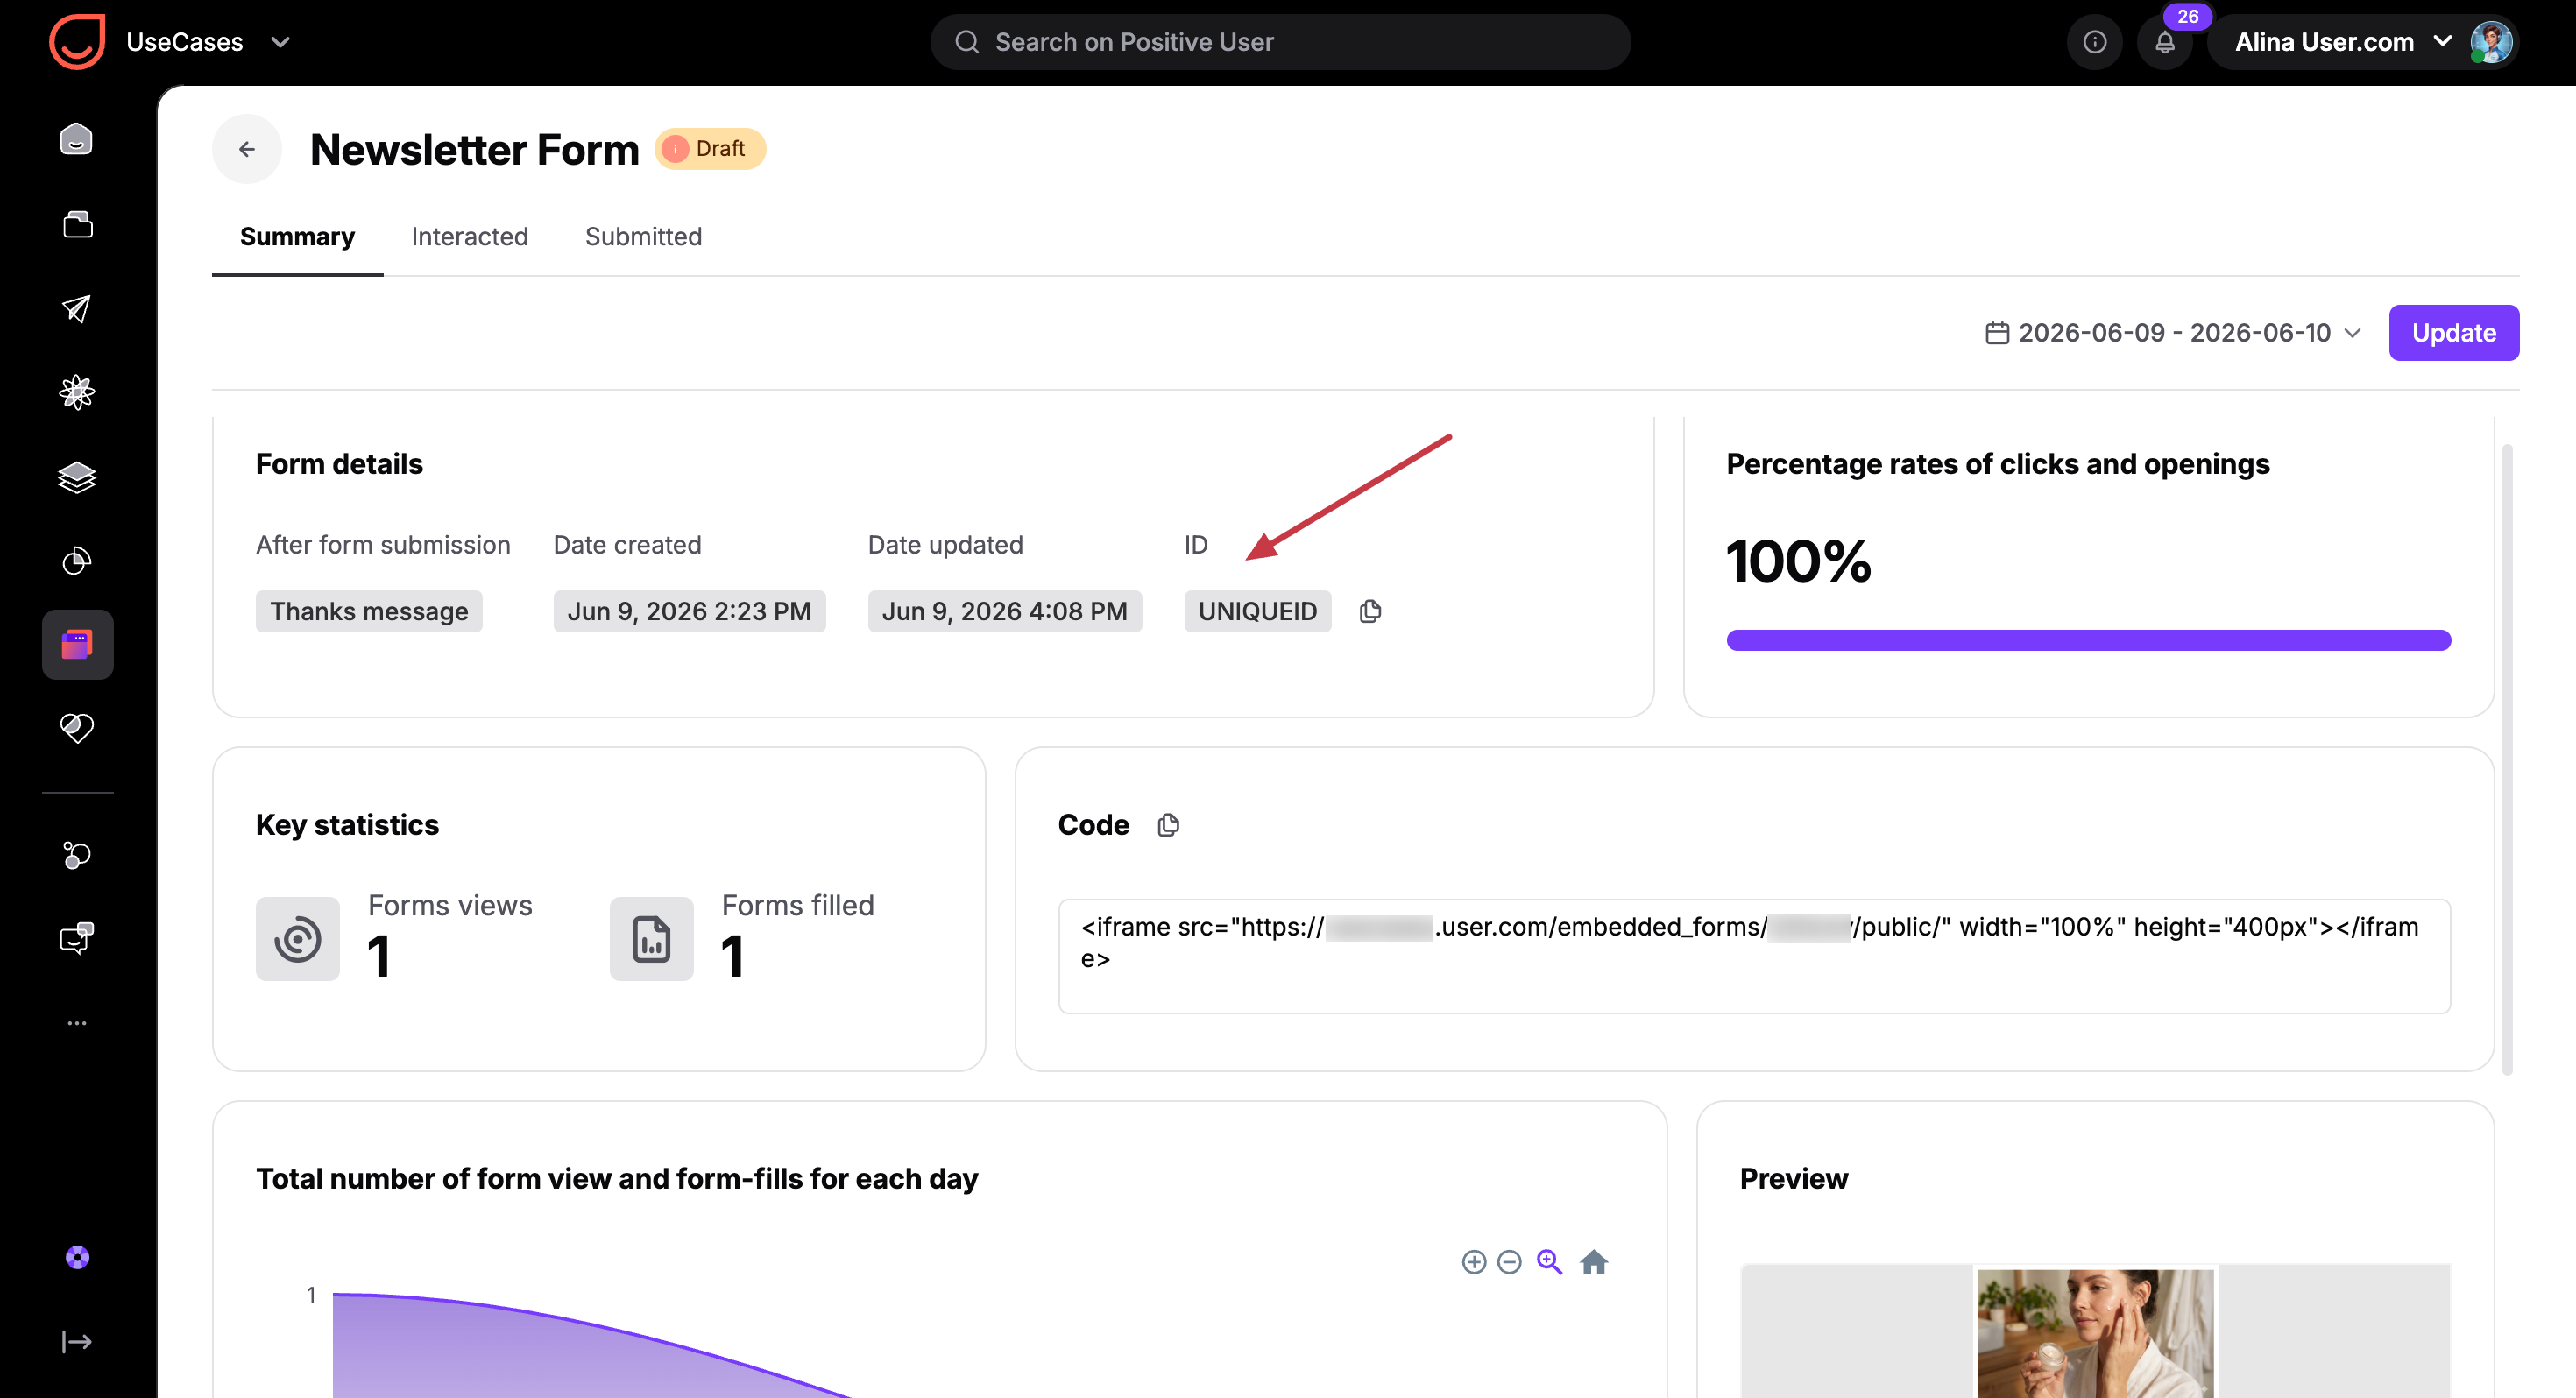
Also, you can check the browser’s address bar - the unique sequence of characters at the end of the URL is the ID. Moreover, you can find unique ID in the code that you insert on the website to activate the form.
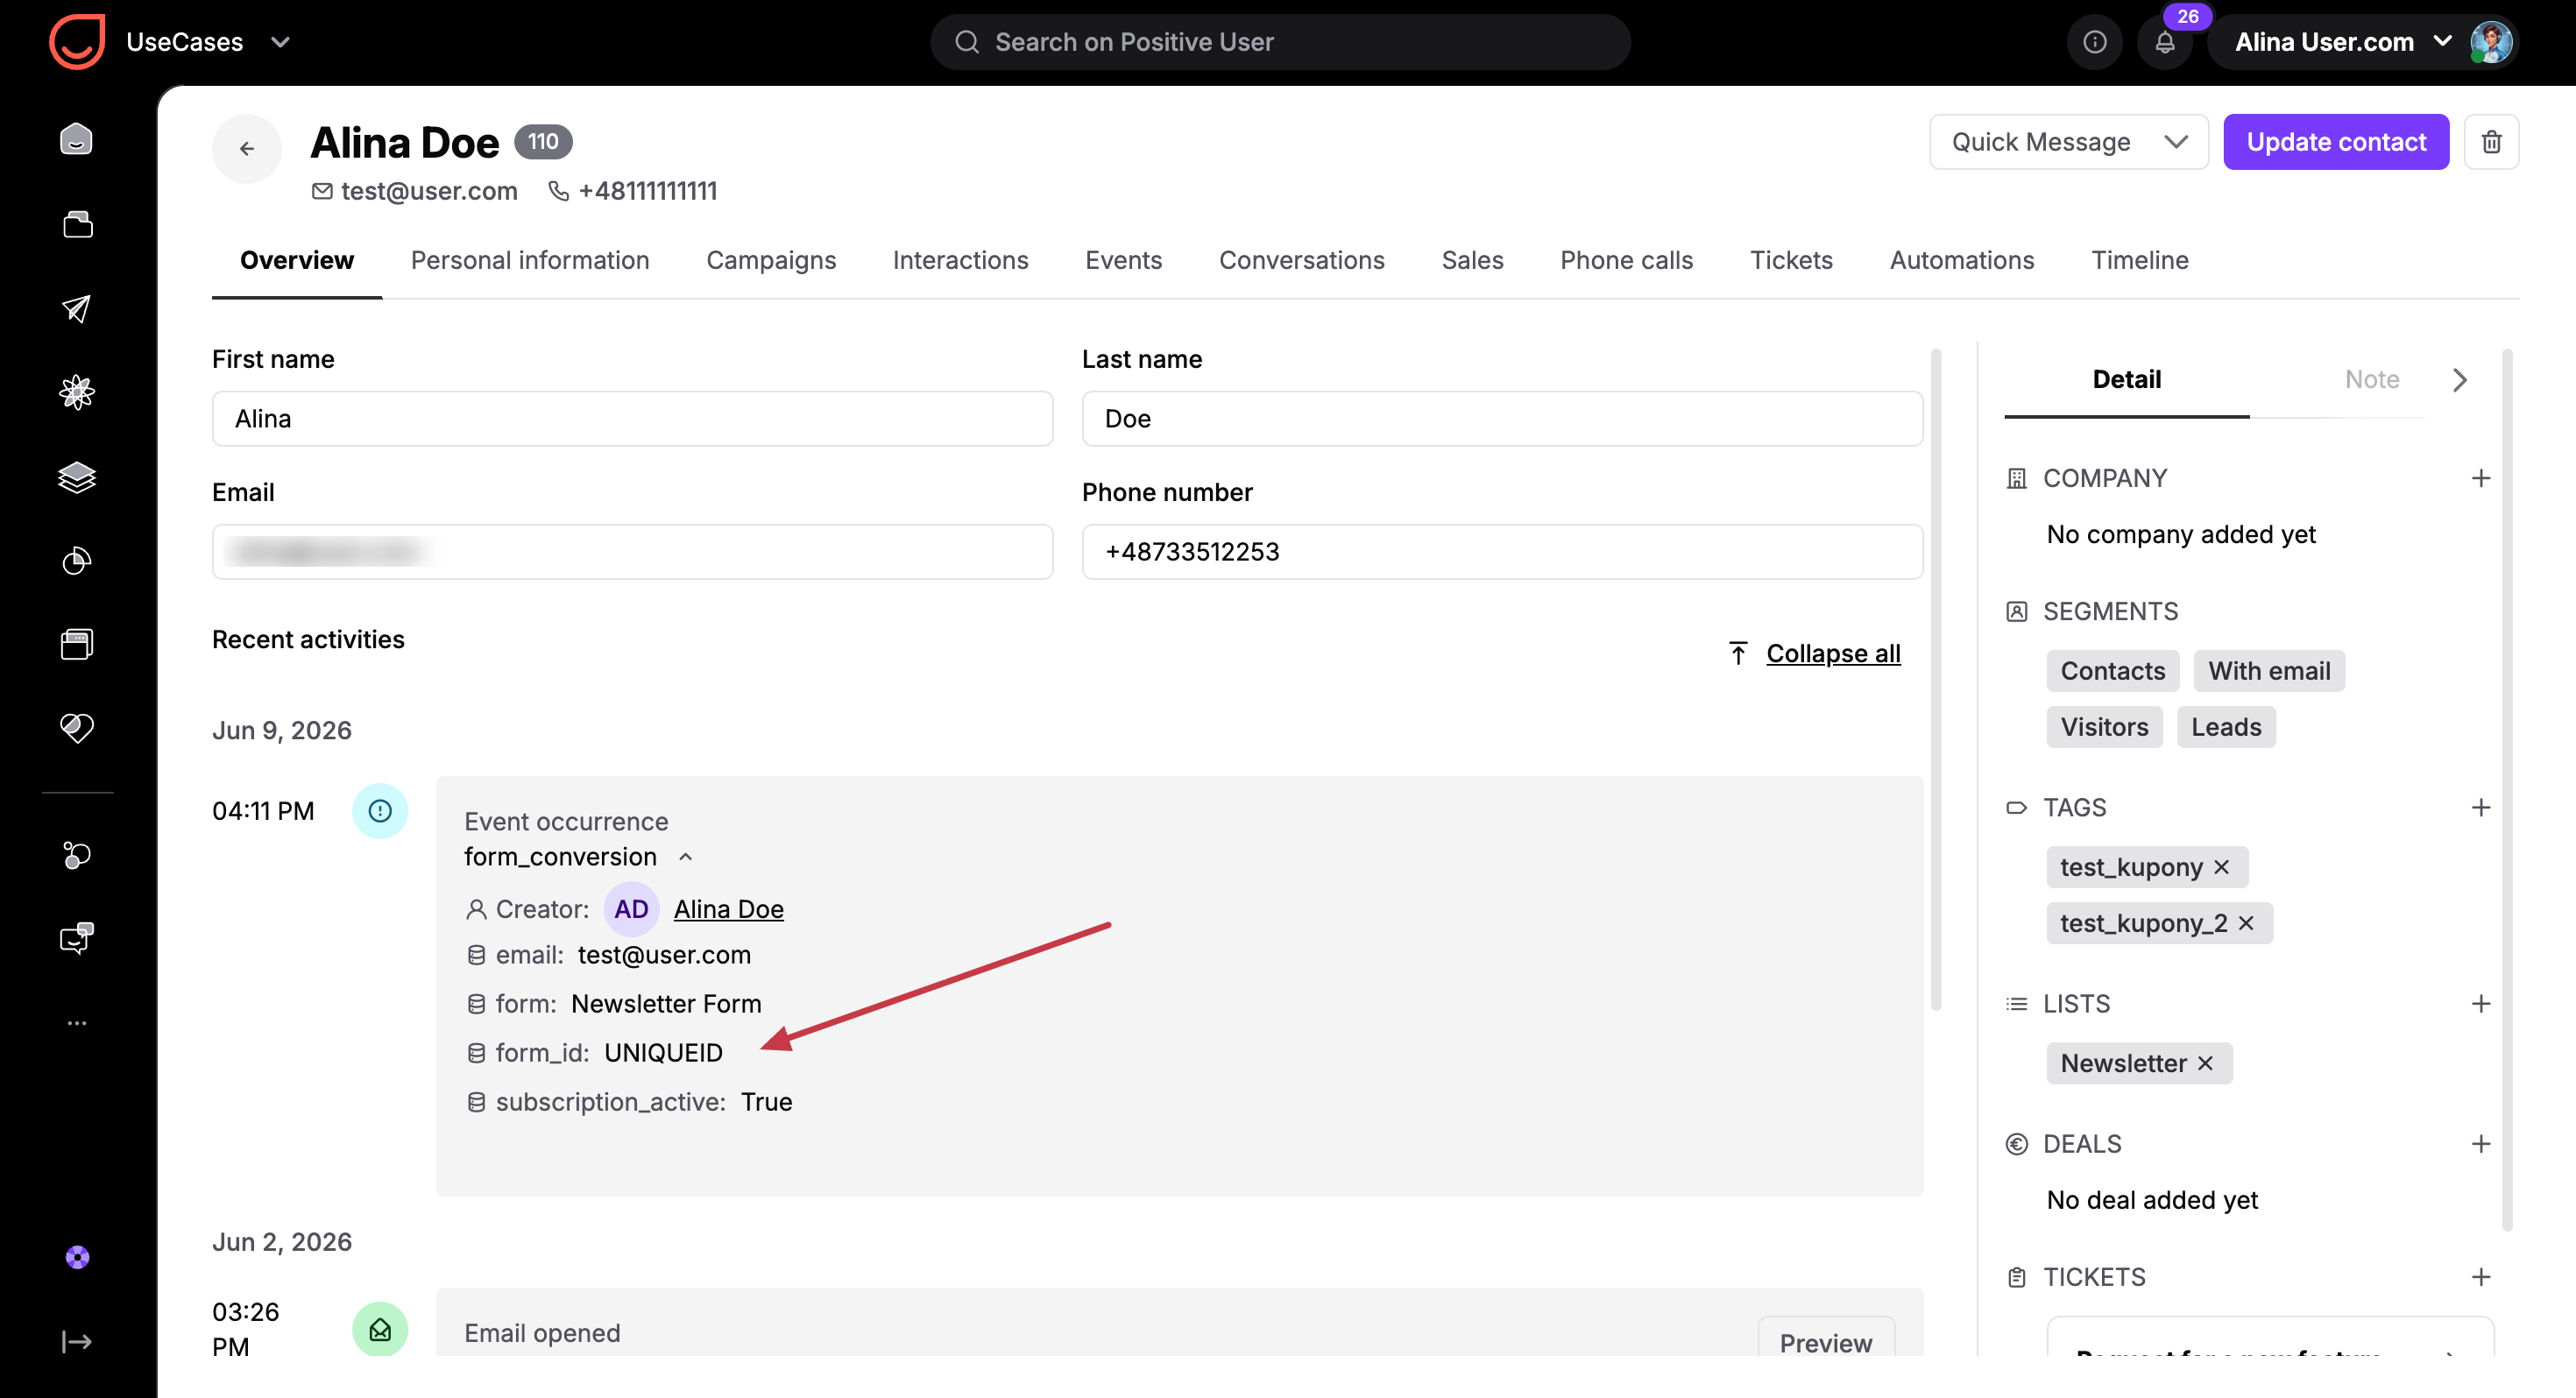
Additionally this information is sent along with the “form_conversion” event as “form_id” attribute.
Navigate to "Automations" and open the draft of your automation or click the "New Automation" button.
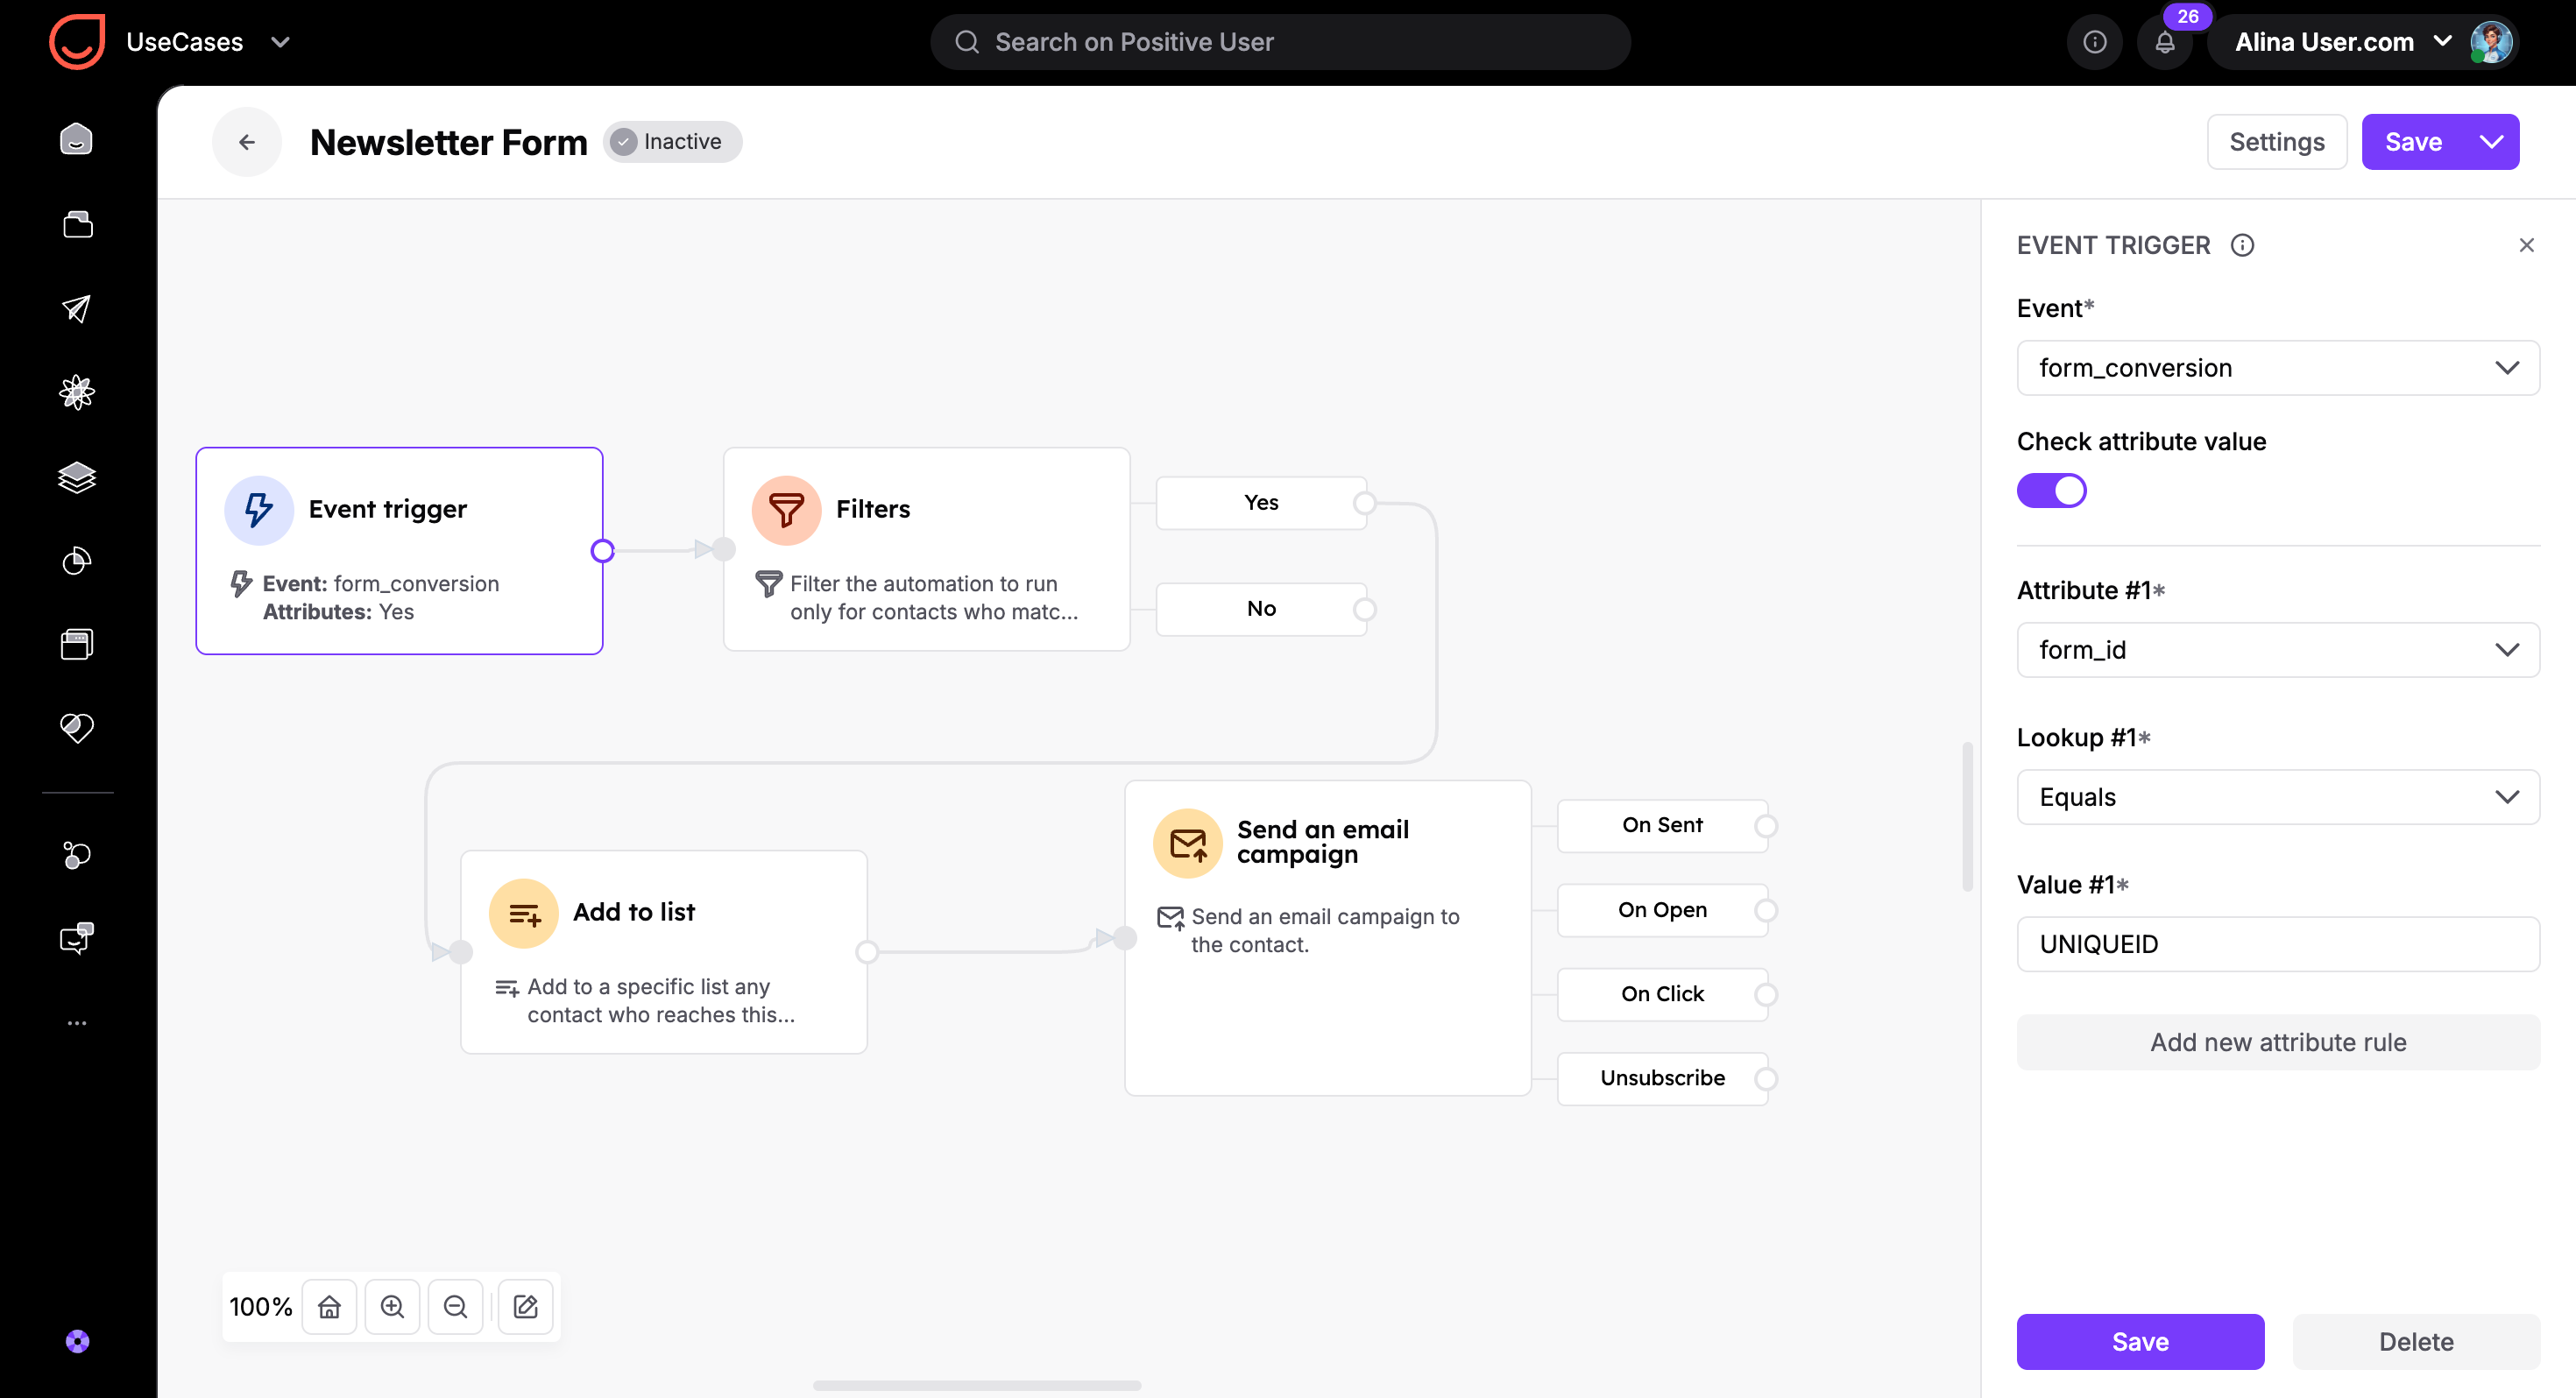
Each flow that should run after a form submission must start with the "Event" trigger. You do not need to create a custom event, as the “form_conversion” event fires automatically for every embed form.
In the module settings, select the system event “form_conversion”. Now the trigger will react to every form submission. Since your team may use multiple forms across your website, you must tell the automation which specific form to watch. This is where you use the form ID information collected in the first step.
Inside the "Event" trigger settings, turn on the "Check attribute value" option and use the “form_ID” attribute. Select the "Equals" filter and paste the exact ID you copied in Step 1. This ensures the automation only runs for this specific form.
Connect the trigger to the actions you want to perform. For example, drag the "Send Email Campaign" module and select a campaign you have previously created. This ensures the contact receives an immediate response.
Then define how often this automation should run for a single contact. You can set it to trigger "each time the condition is met" if you want them to receive an email every time they sign up, or "once" for a one-time welcome message. To learn more about available timing options, check the "Automation Settings Overview" article.
Activate the automation and run a test.
Event Registration: Automatically send a confirmation email with the event agenda and date immediately after a contact registers via form on your website.
Content Delivery: When a contact submits a form to download a guide, use the automation to instantly deliver the file to their inbox and create a follow-up task for your team.
Double Opt-in: Send a confirmation email to each contact who wants to subscribe to your newsletter through a subscription form.
