SMS offers a direct line to your audience, ensuring messages are delivered instantly and seen almost immediately. Given that most texts are read within minutes, this channel is perfect for urgent communications that require fast action, such as service alerts, event notifications, or limited-time offers.
This guide provides a step-by-step walkthrough for managing automated SMS campaigns in Positive User, including connecting a sender, composing your text, and monitoring the results.
Automated SMS campaigns are the backbone of a "set-it-and-forget-it" strategy, designed to deliver the right message at the exact moment a person triggers a specific action. They are ideal for nurturing long-term relationships through behavior-based triggers, such as welcoming new subscribers, recovering abandoned carts, or sending personalized birthday discounts. Unlike one-time blasts, automated messages ensure consistent communication throughout the entire customer journey, providing a seamless experience that feels personal and timely without requiring manual effort for every send.
To build high-converting automated campaigns, you should focus on:
Relevant triggers
Logical workflows
Personalized data
Before creating your first campaign, make sure steps below are done.
An active SMS provider connected to Positive User. (check the instruction)
An opted-in audience segment.

In Positive User SMS campaigns are understood as a combination of content and settings which allow you to send text messages.
Due to that, the process of the campaign creation is divided into several steps. Let’s through all of them.
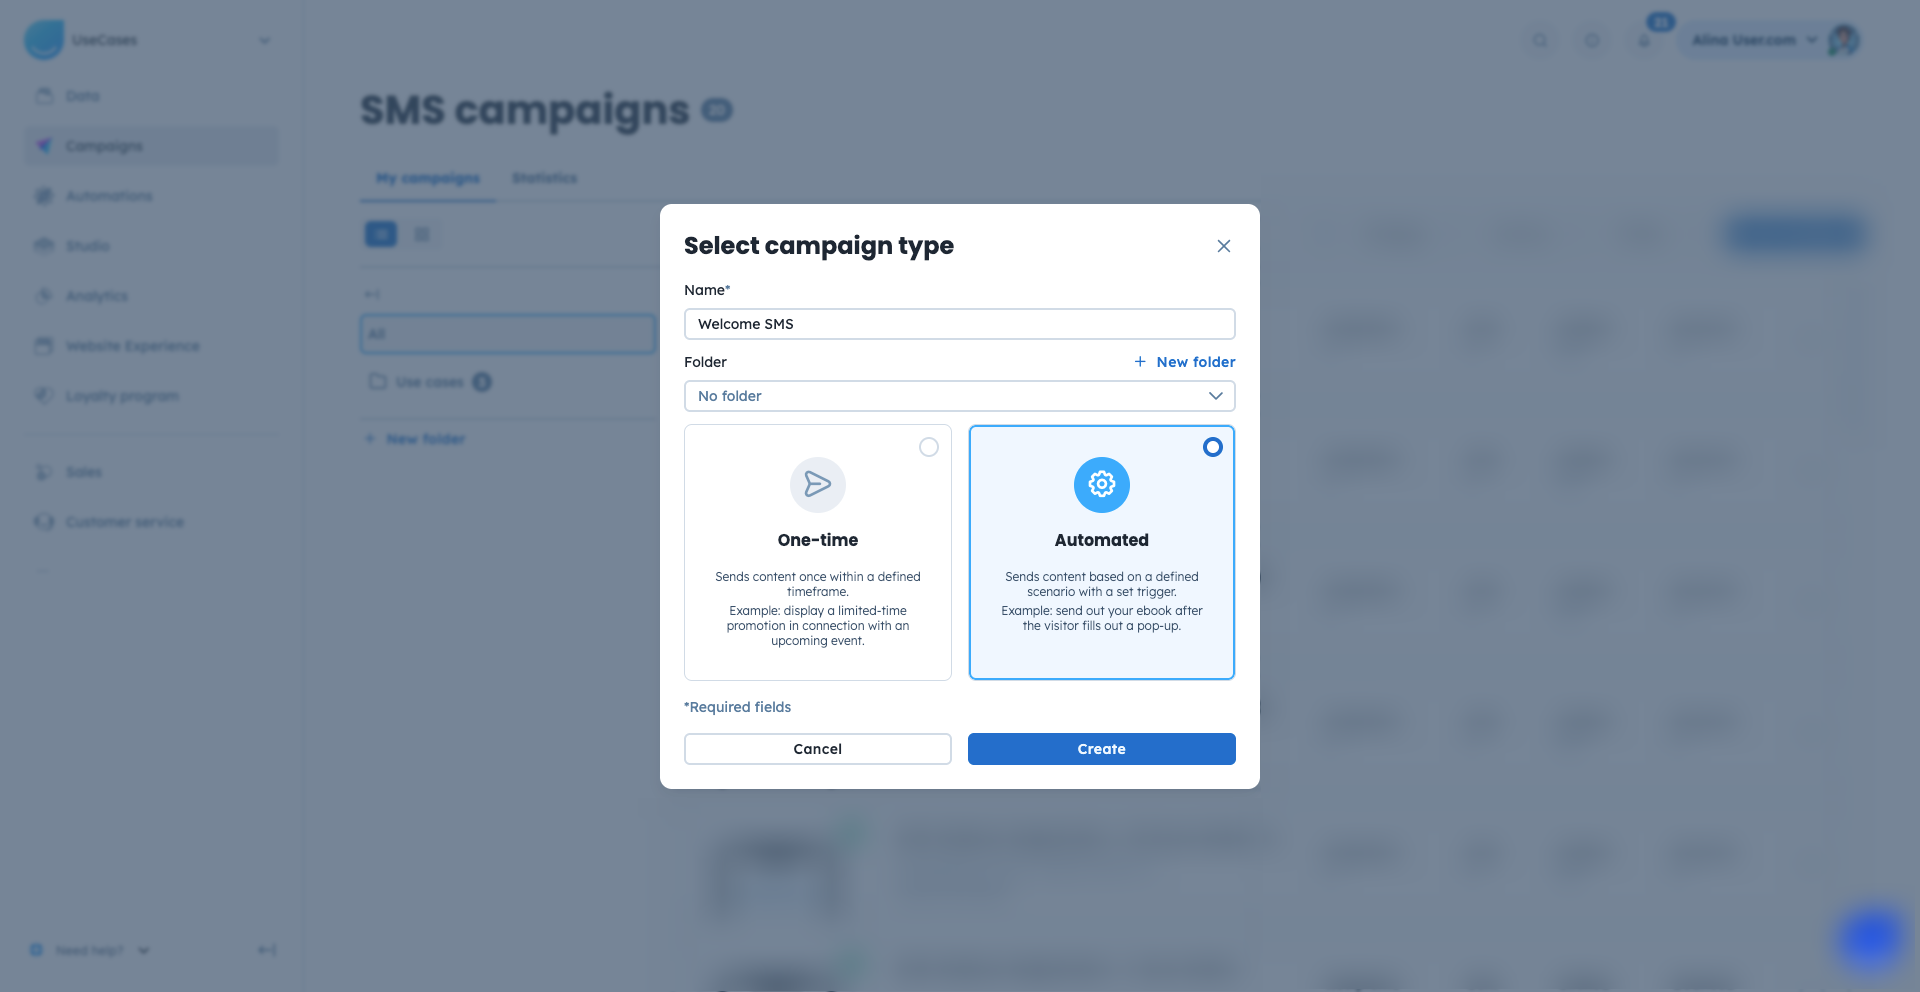
Go to “Campaigns” → “SMS” → “New campaign”.
Decide on the name of the campaign and assign it to the folder, if needed.
Choose the “Automated” type, and click “Create”.
The next step refers to the content of your SMS campaign. Here you need to create a message that will be sent to the contacts. Remember, that you can use dynamic content to personalize your content.
On the same page you need to choose the SMS account you want the campaign to be sent from.
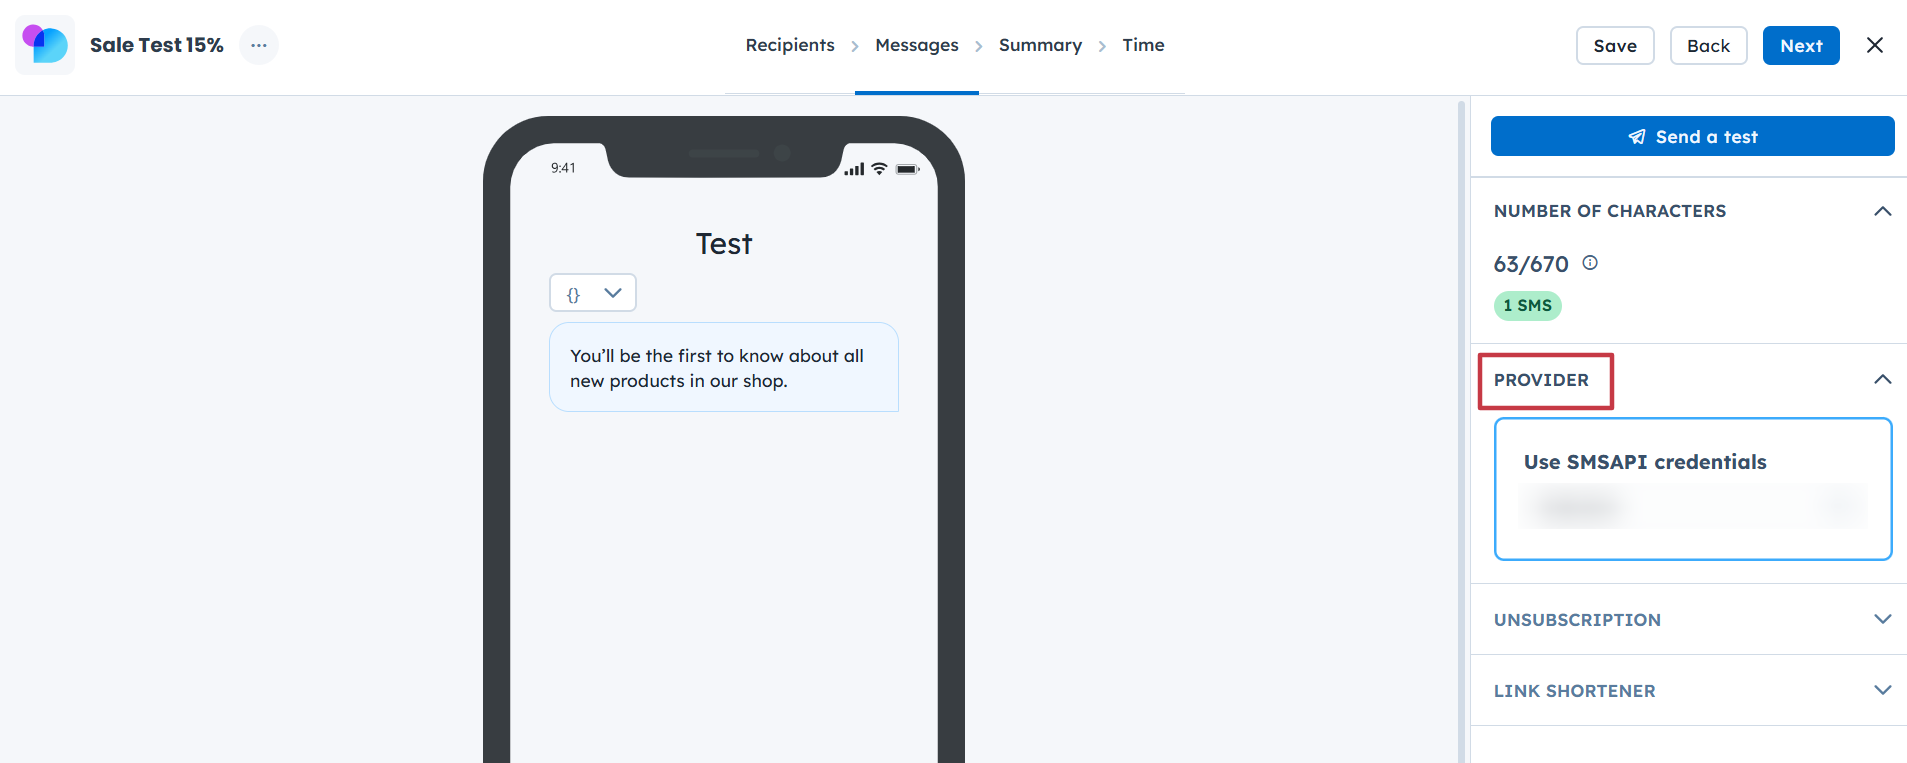
Write the content right in the preview mode. Easily insert variables to personalize the content.
Choose SMS provider from the list. (Integration must be done in prior)
Decide on the unsubscribe option. (Depending on the provider)
Use link shortener, if needed. It uses a default domain, that cannot be changed.

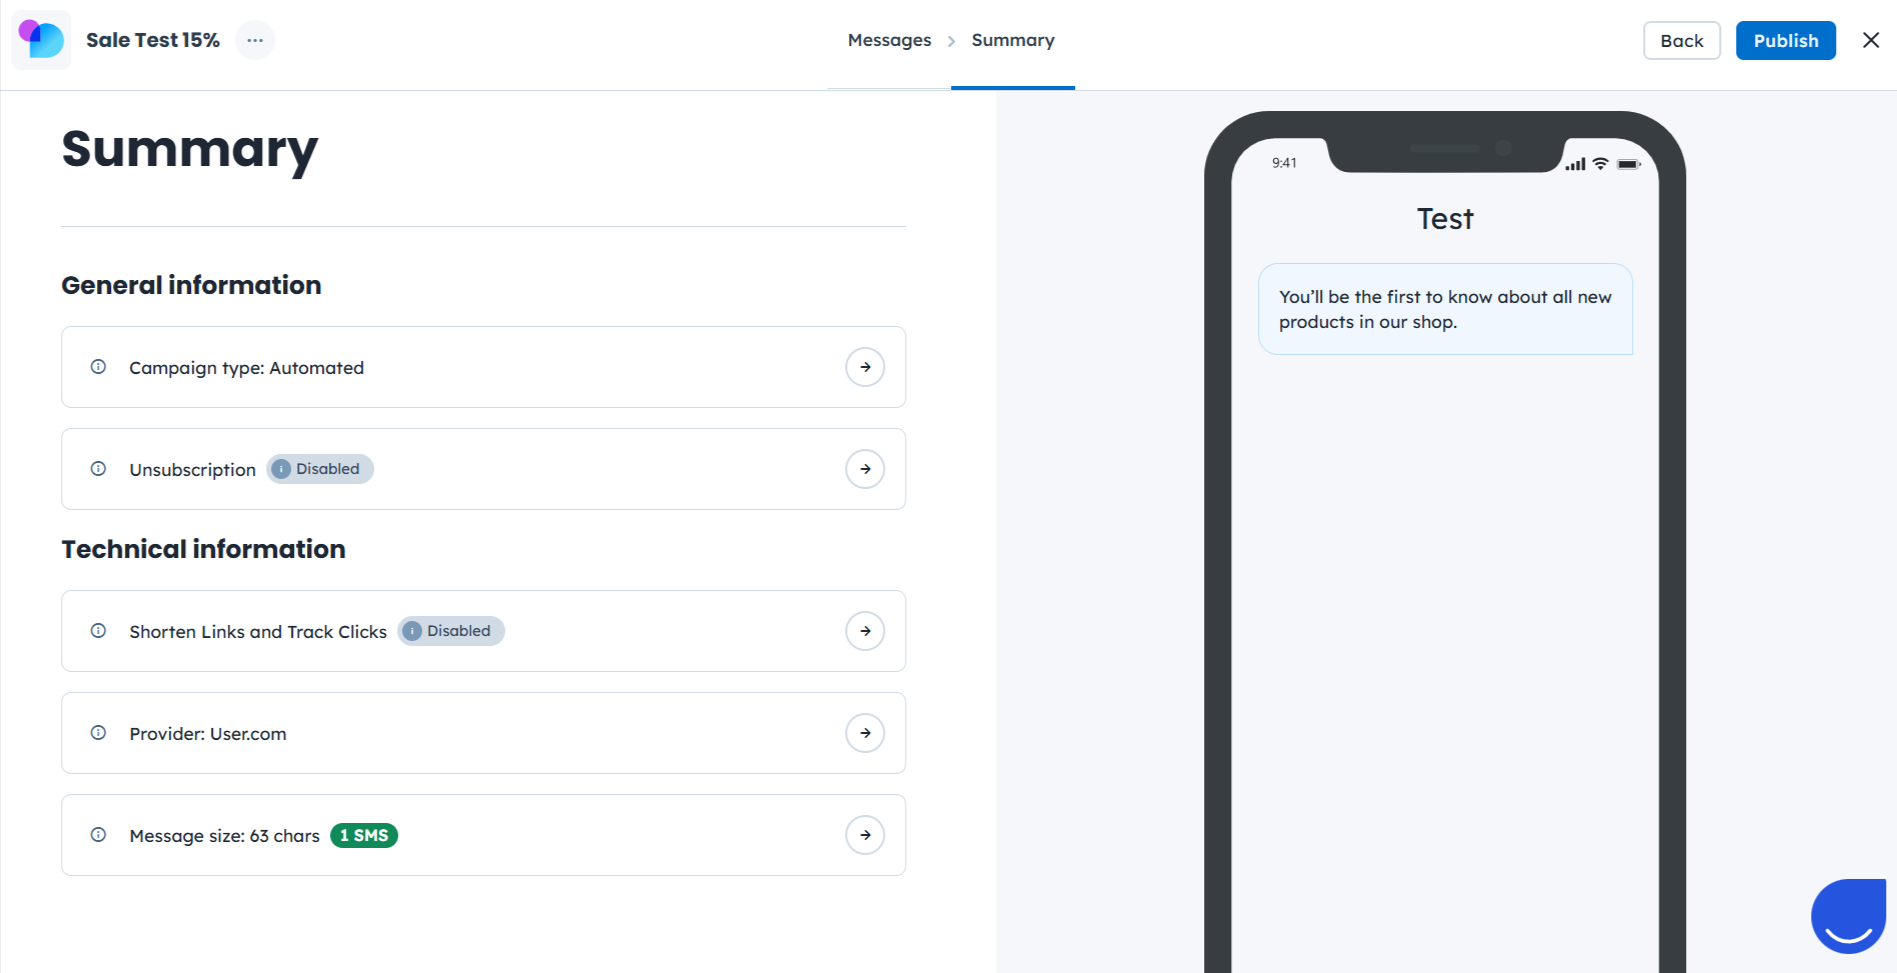
This step includes all main elements of the campaign:
General information (campaign type and unsubscribe type).
Technical information (link shortener and tracked clicks status, provider info, message size).
Preview of the content.
Make sure everything suits your expectations. If you are ready with the campaign, feel free to publish it. If you are planning to get back to this campaign later and add some changes - save it as a draft, then it will be available for editing.
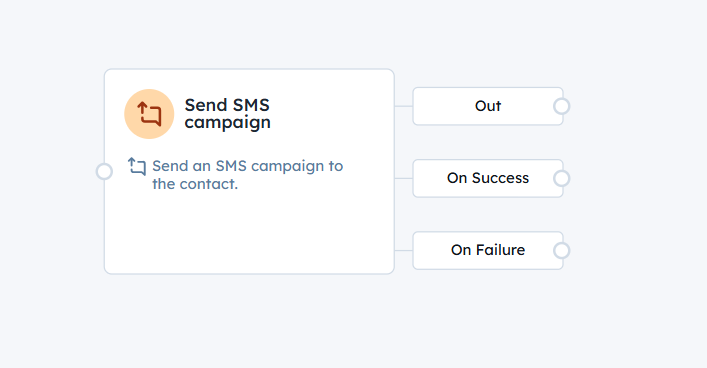
Automated SMS campaigns are created to be a part of the automation flow. Once you activate the campaign, you can move to your existing automation (or build a new one) and choose the campaign in one of the following modules:
“SMS Action” trigger
“Send SMS campaign” action
Each automation starts with a good scenario. You need to write it down and then start looking for the modules that suit your goal. After that you can fill the modules with content.
Example:
User story: after registration each contact should receive a welcome SMS campaign. SMS should go out max once per contact.
This will be a short automation:
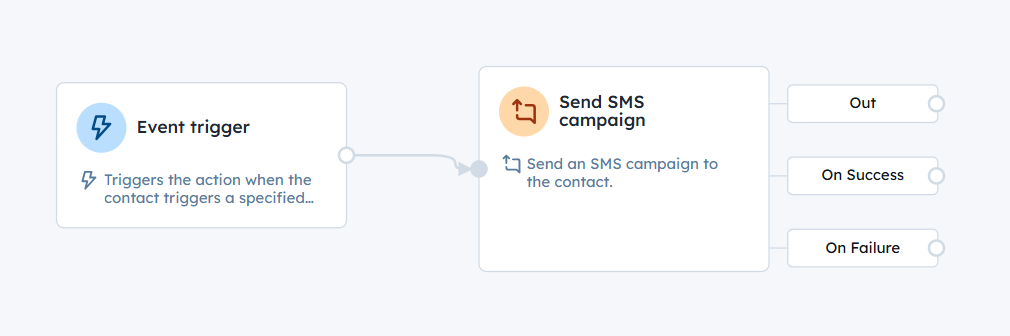
So, the SMS campaign will be sent to each contact in a unique moment based on the "registration" event that is tracked on the website.
Send Your First SMS Campaign [LINK]
SMS Campaign Statistics [LINK]
