Giving your subscribers control over what they receive from you is a simple but powerful way to build trust and keep your email marketing effective. Every marketing email should include an unsubscribe option, but how you offer that option can make a big difference to both your audience and your results.
Instead of asking recipients to unsubscribe from all emails, an “Unsubscribe From Specific List” link lets them opt out of only the messages they’re no longer interested in, such as a particular newsletter or promotional campaign. This means subscribers can stay connected to the content that matters to them, while you keep a healthier, more engaged contact list. It also helps reduce spam complaints, improves deliverability, and supports compliance with email marketing regulations.
Fine more details on adding a general unsubscribe link in this article.
If you use contact lists to separate different types of communication, such as newsletters and important alerts, you may want recipients to unsubscribe from only one list instead of all emails.
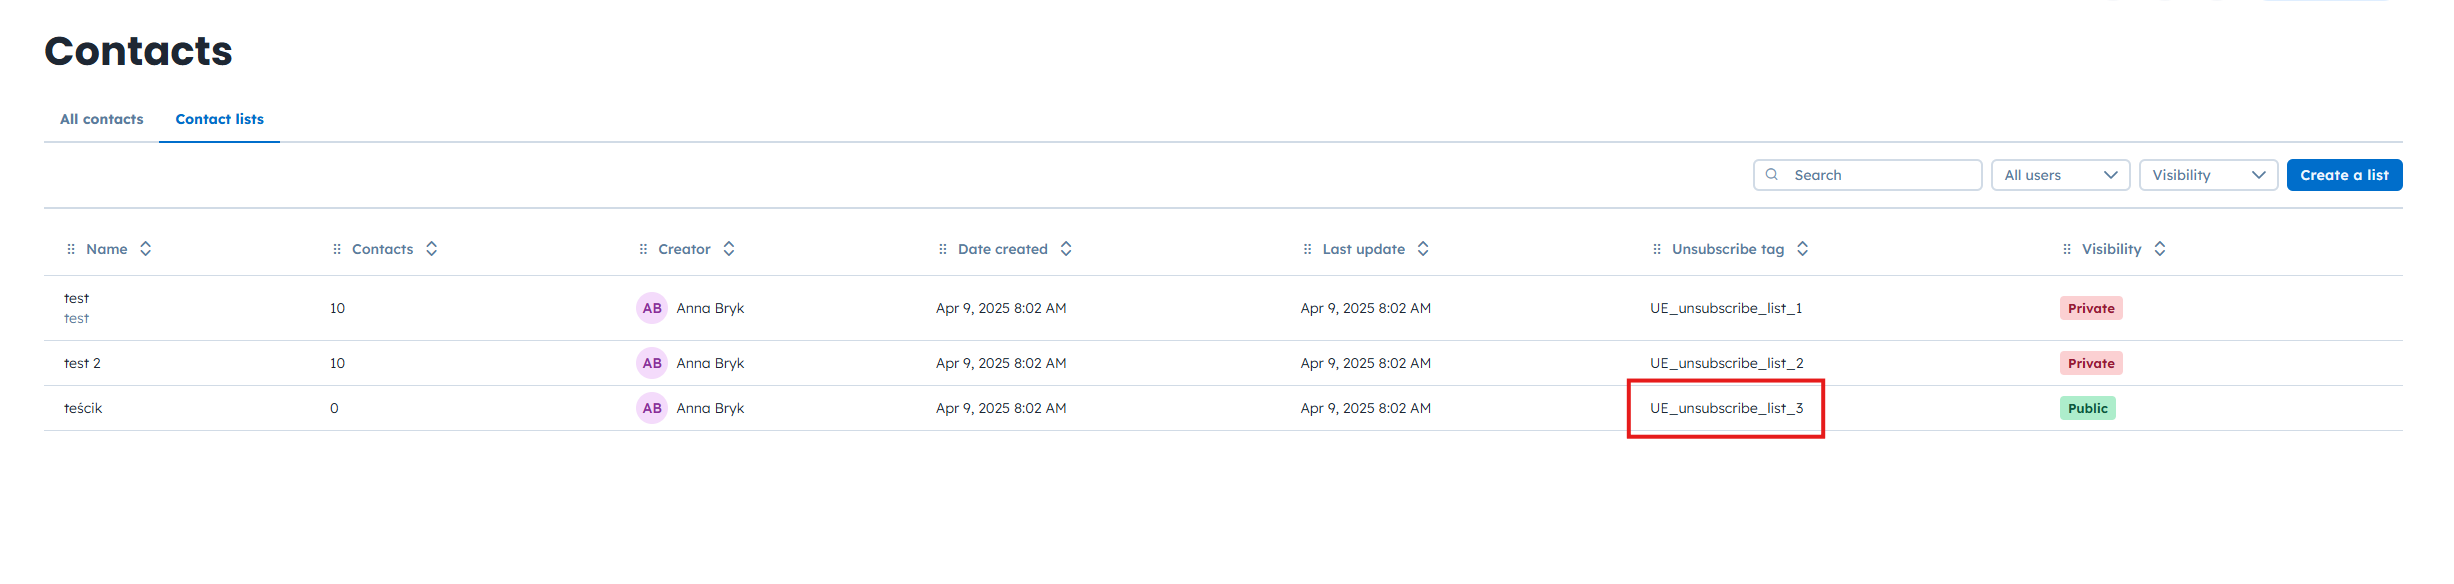
Go to “Data” → “Contacts” → “Contact Lists” section.
Here you can manage list visibility:
Public lists are visible to contacts on the manage subscription page.
Private lists are hidden from contacts.

Copy the value from the “Unsubscribe tag” column for the list you want to use. This tag is unique for every list. It includes a dedicated ID of the list.
Open the email template or the email message you want to add the unsubscribe link to.
Go to “Campaigns” → “Email” → Email campaign profile → Edit the message assigned to the campaign.
Or
“Studio” → “Templates” section and open the desired template in the editor.
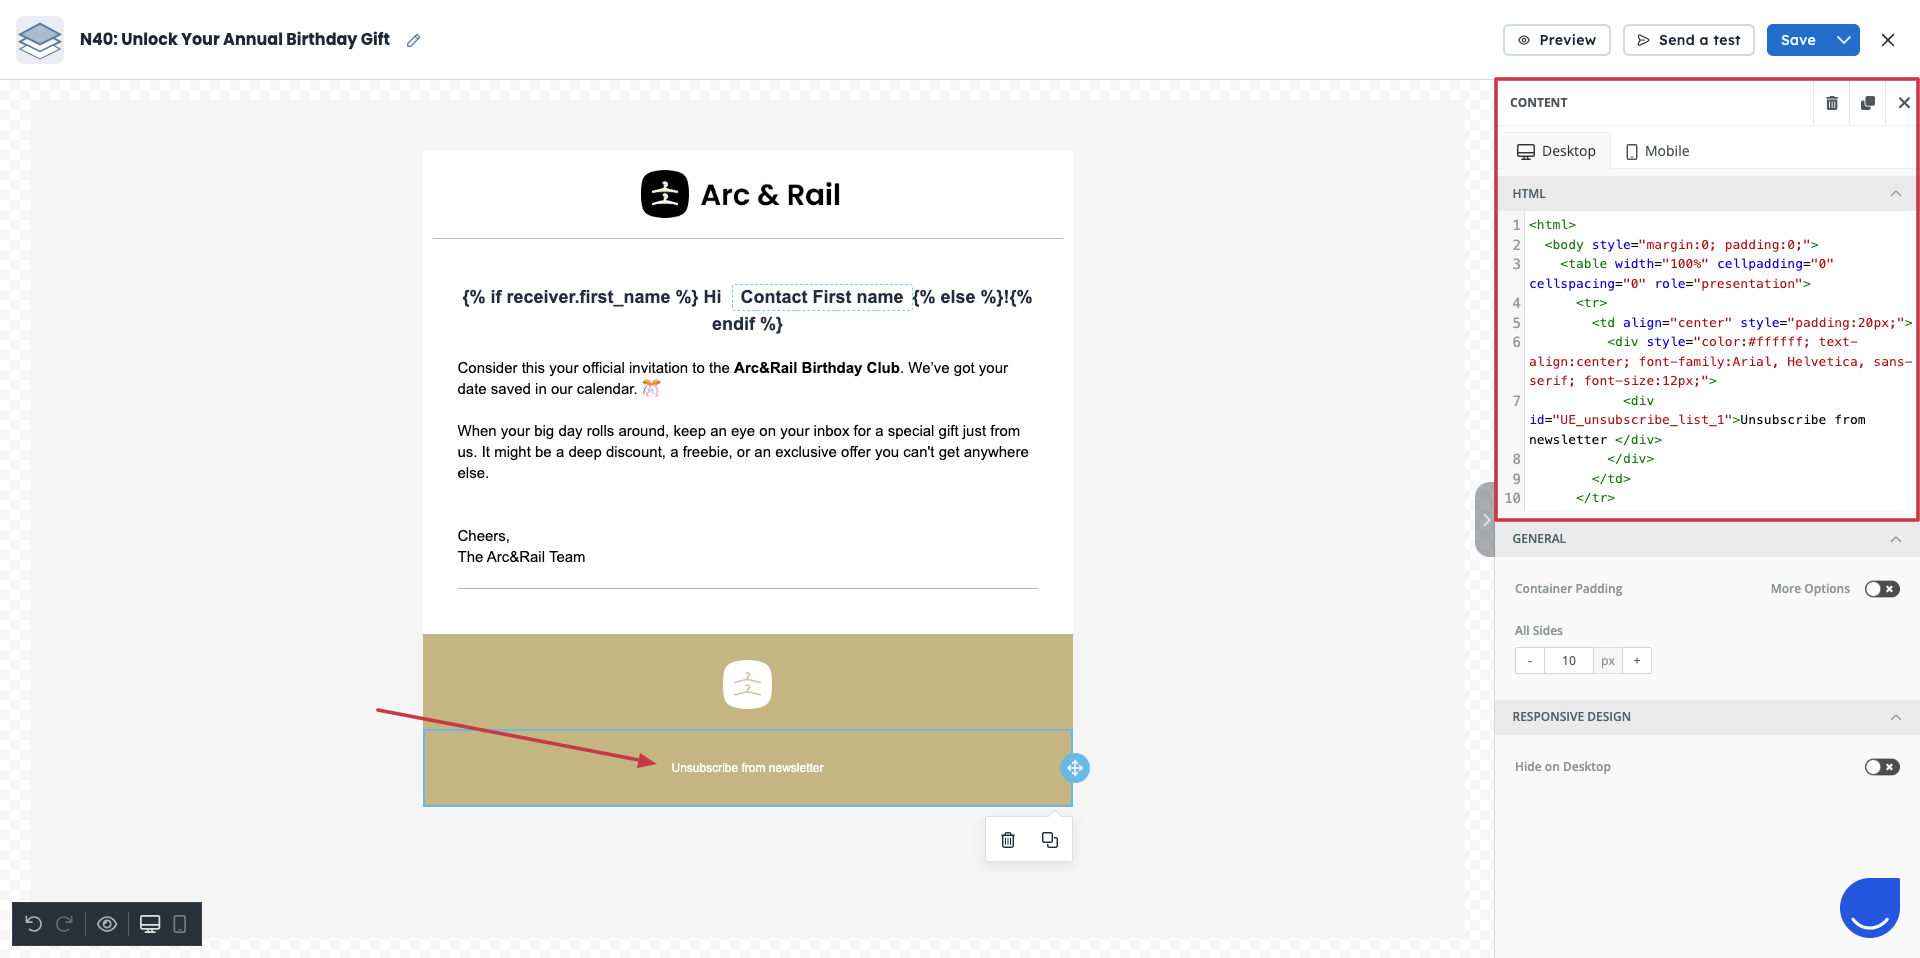
You can either edit the content in the code editor or directly in the drag&drop builder linking any piece of the text with the dedicated tag.
Code Editor
While working with the code editor just add the following element and change the “unsubscribe message” with the text you want to be linked:
<div id="UE_unsubscribe_list_ID">Unsubscribe message here</div>This ensures that clicking the link unsubscribes the contact only from the selected list.
Simple Builder (drag&drop)
In the Simple Builder, general unsubscribe option is automatically included in every email template to ensure compliance with email regulations.
By default, this link is placed in the footer of the message/template.
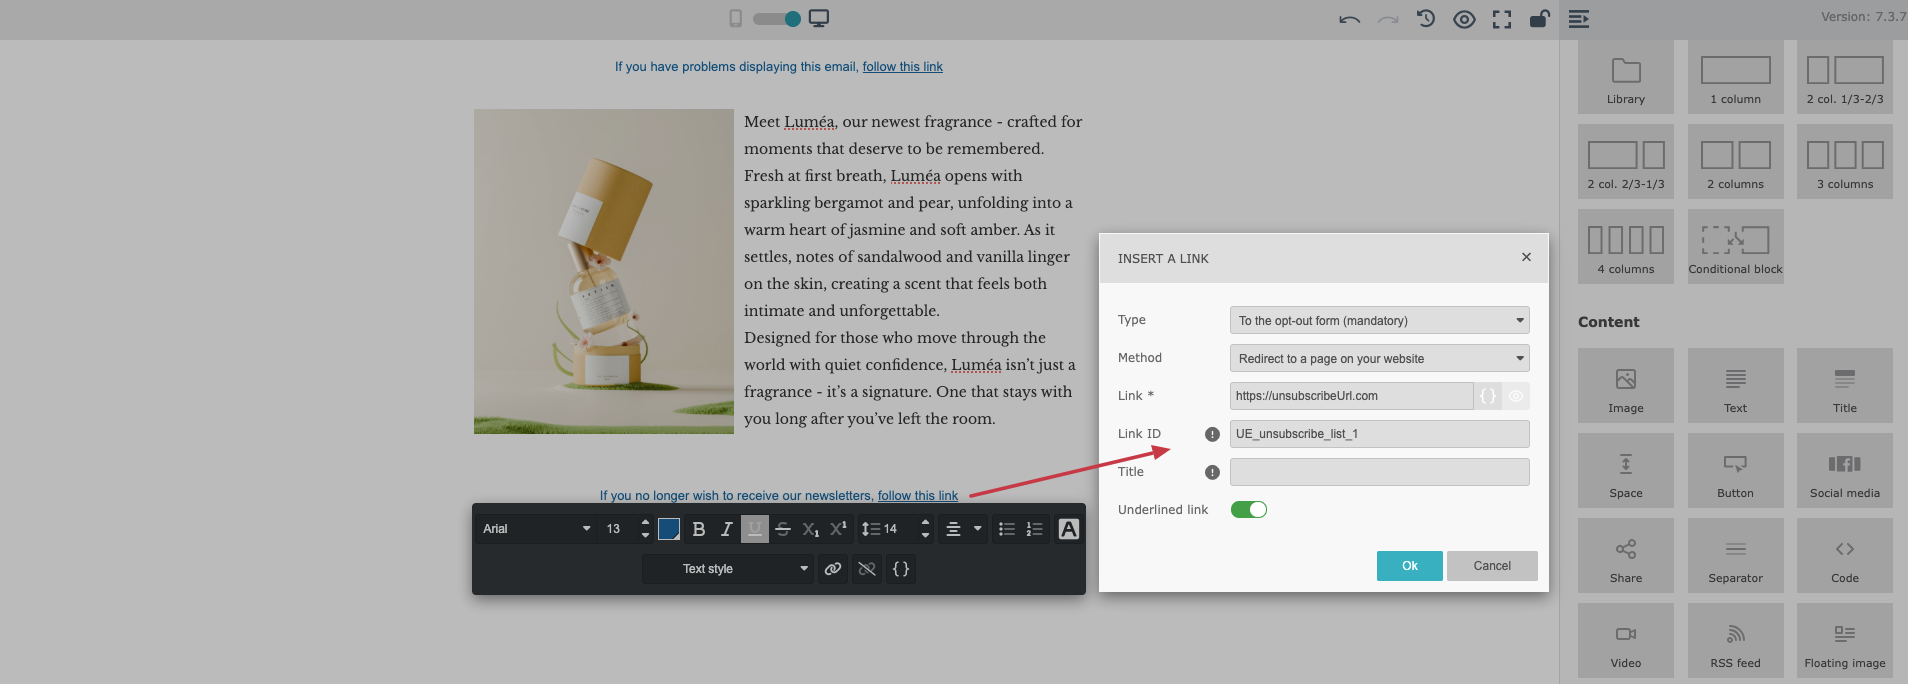
You can click the unsubscribe text in the footer and edit it using the standard text editor. This allows you to modify the type of the link from general to “unsubscribe from specific list”.
Click the “Link” icon and choose the “Opt-out form” link type.
Change the “Link ID” from global unsubscribe to an “unsubscribe from a specific list” one by pasting the unsubscribe tag you copied from the “Contact List” view.
Save the changes.
New link will remove the contact from the chosen list, but will not update main subscription attributes.
If you want to remove the unsubscribe link from the footer and place it somewhere else in your email:
Go to the “Style” section on the right panel.
Find the “Display footer” toggle.
Turn it off to remove the unsubscribe link from the footer.
After disabling the footer, you can manually place the unsubscribe link in another part of your email layout by adding a classical link with “Opt-out form” link type and suitable the “Link ID”.
The “unsubscribe from specific list” link only removes the contact from the list. It doesn’t update the “unsubscribed from emails” attribute or fire any event on the contact’s timeline.
To keep track of the contacts who unsubscribe from a specific list we highly recommend to trigger a dedicated event, that includes the name of the list. In this case you will have a precise timestamp of the moment, when the contact leaves the list.
You can apply this rule using the automations:

