Configuring your chat widget helps your team manage live conversations, capture leads, and share helpful resources from one central workspace. By tailoring the design and visibility rules, you ensure that your anonymous visitors and contacts receive support exactly when and where they need it.
Make sure you have the tracking script placed on your website. This script installs the widget.
Go to "Workspace settings" → "Conversations" → "Chat widget" to reach the settings view.

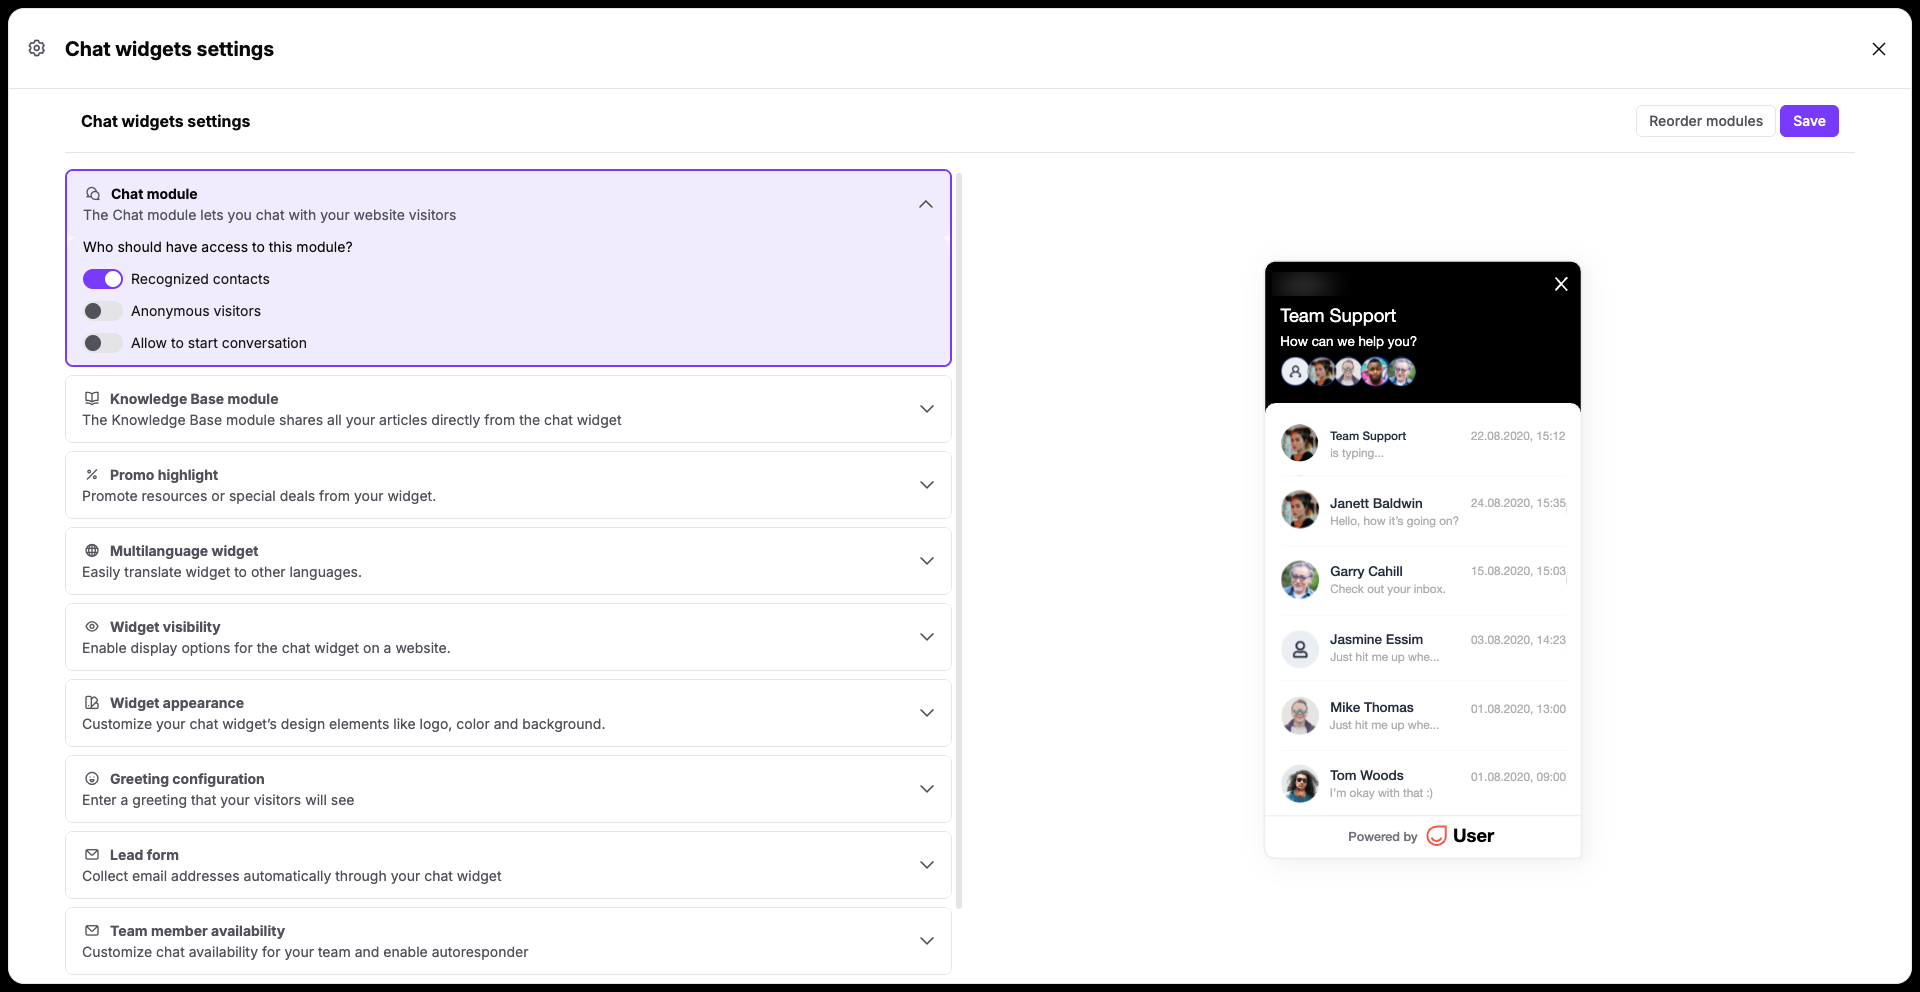
Expand the "Chat module" section to specify who can have the access to the chat widget on your website. You can show the widget to
Recognized contacts
Anonymous visitors
Everyone (turn on both toggles)
"Allow to start conversation" gives or removes a possibility of opening a new thread in the chat widget on the side of the visitor or contact.
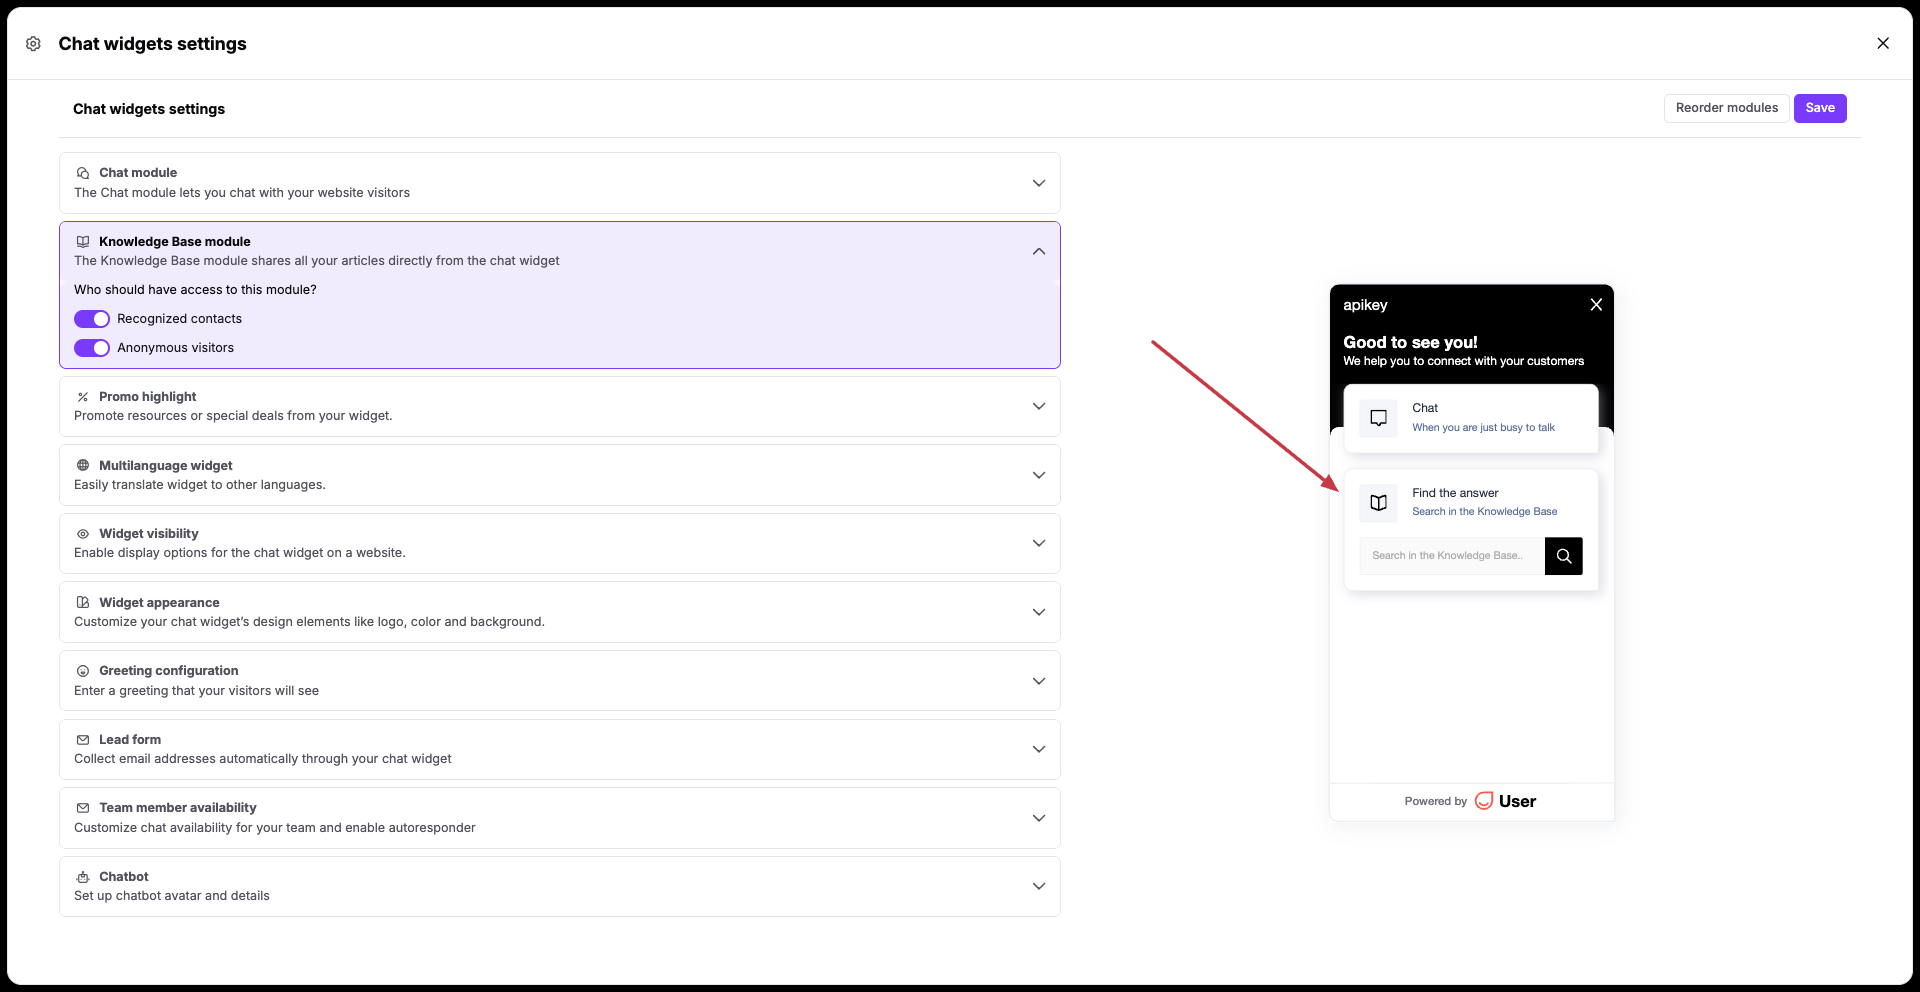
Open the "Knowledge Base module" section to let contacts search for help articles directly inside your live chat window.
This module is connected only to your Positive User knowledge base. [LINK]
Adjust the toggles to dictate whether "recognized contacts" or "anonymous visitors" (or both groups) are allowed to see your published documentation.
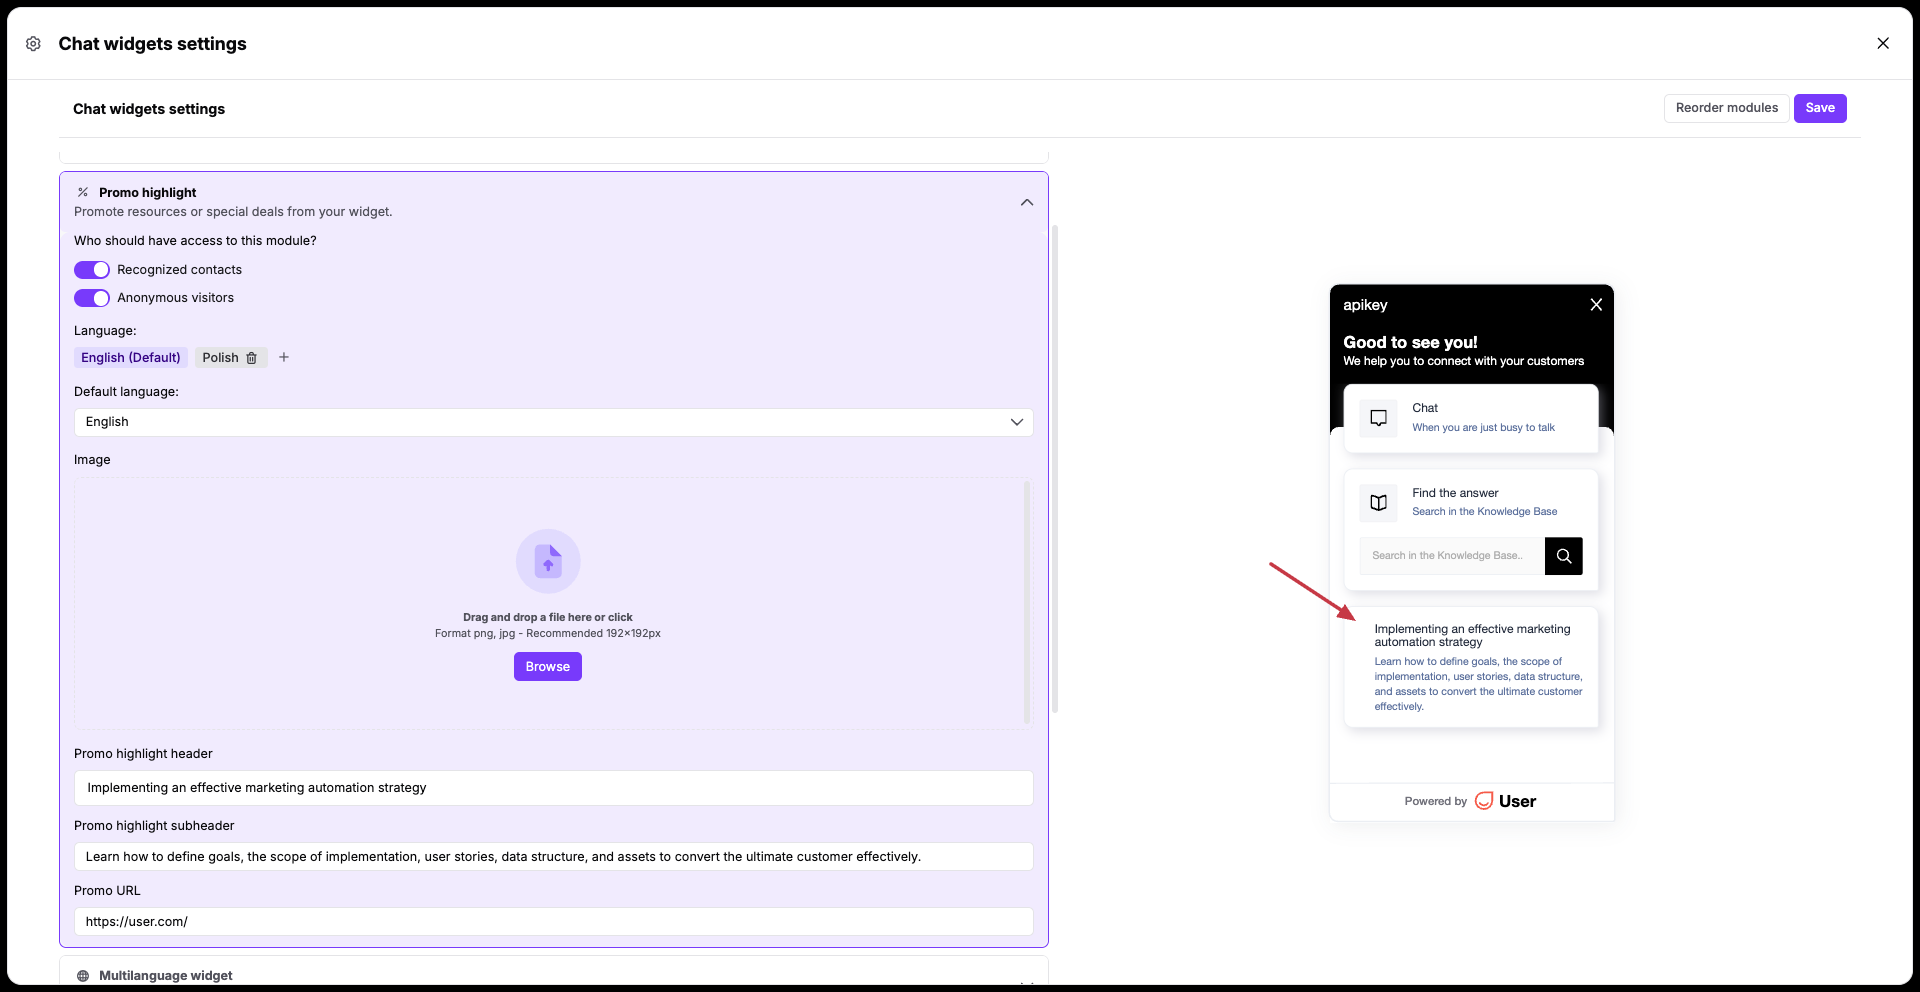
Expand the "Promo highlight" section to broadcast special announcements or content assets. Choose your target audience toggles, select a language, upload an image, and enter text for the "Promo highlight header", "Promo highlight subheader", and "Promo URL".
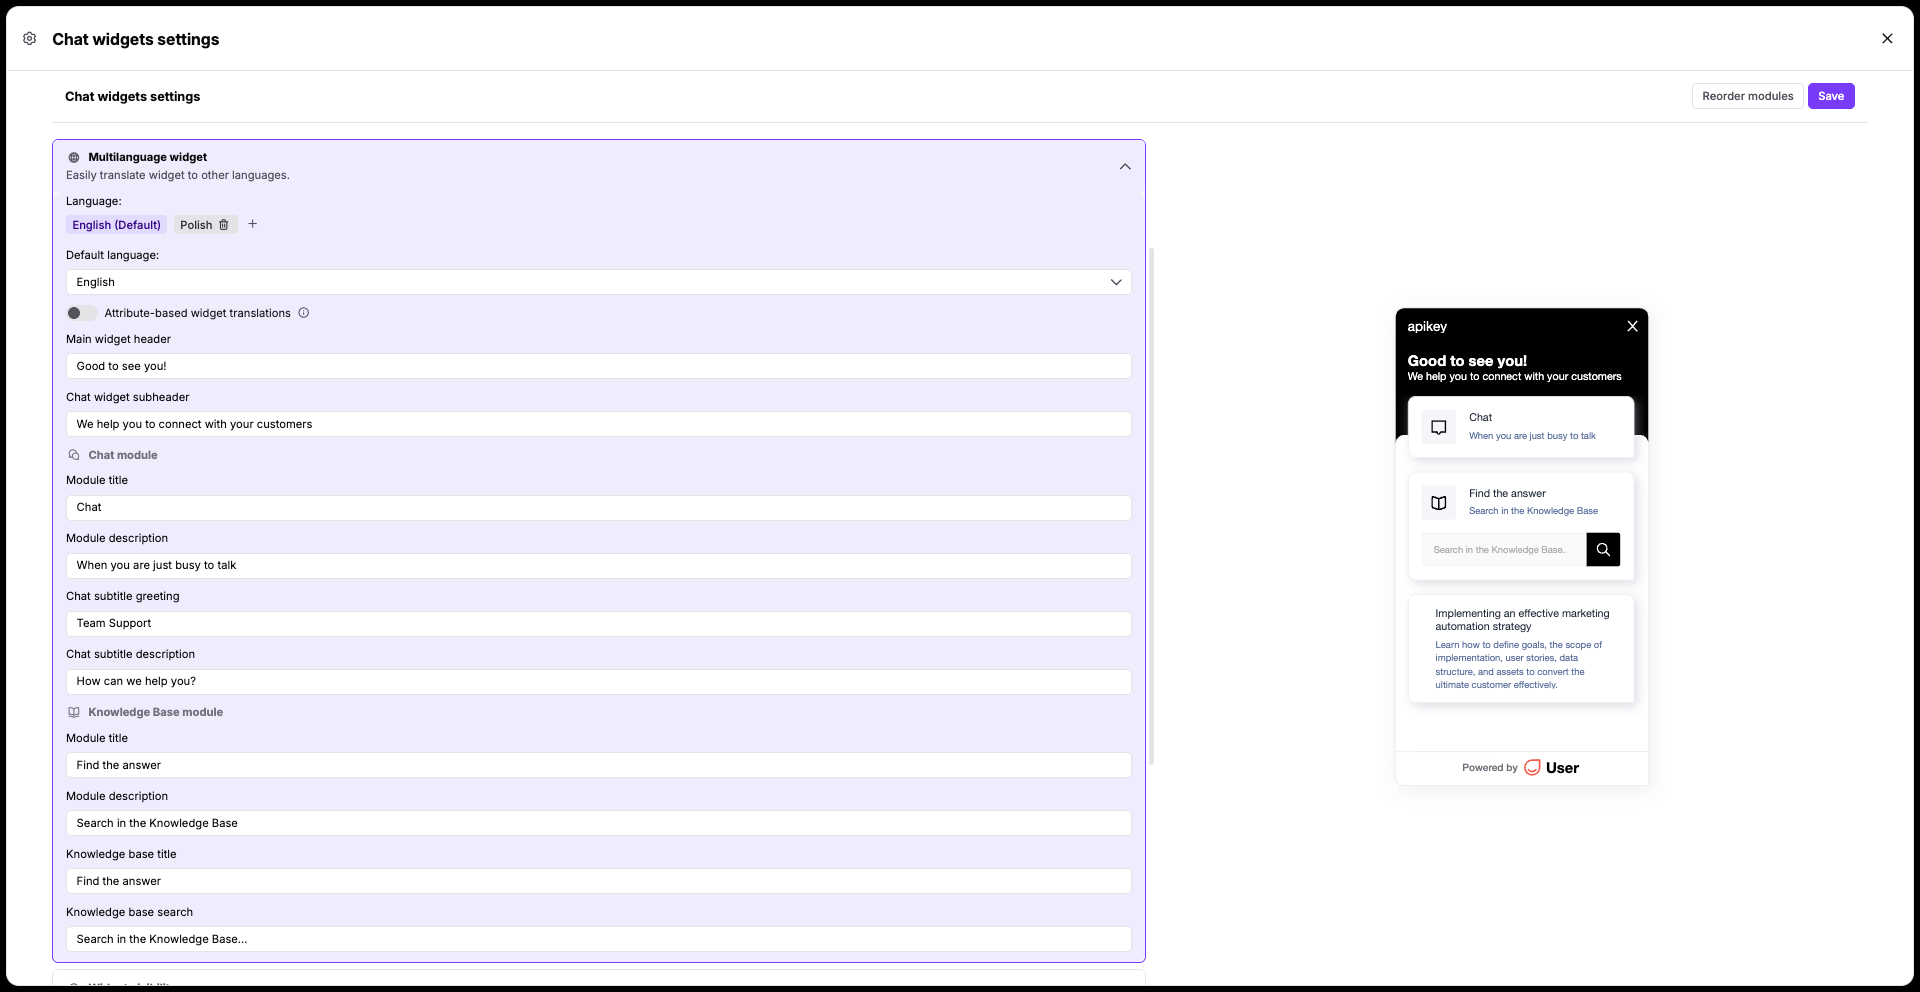
Open the "Multilanguage widget" section to configure default language and set translations for different regions.
Configure texts for chat and knowledge base modules.
By default the language versions are shown on the basis of the browser language of the visitor. However, you can choose an "attribute-based widget translations" version. In this case the widget is shown according to the values from the “widget_language” attribute.
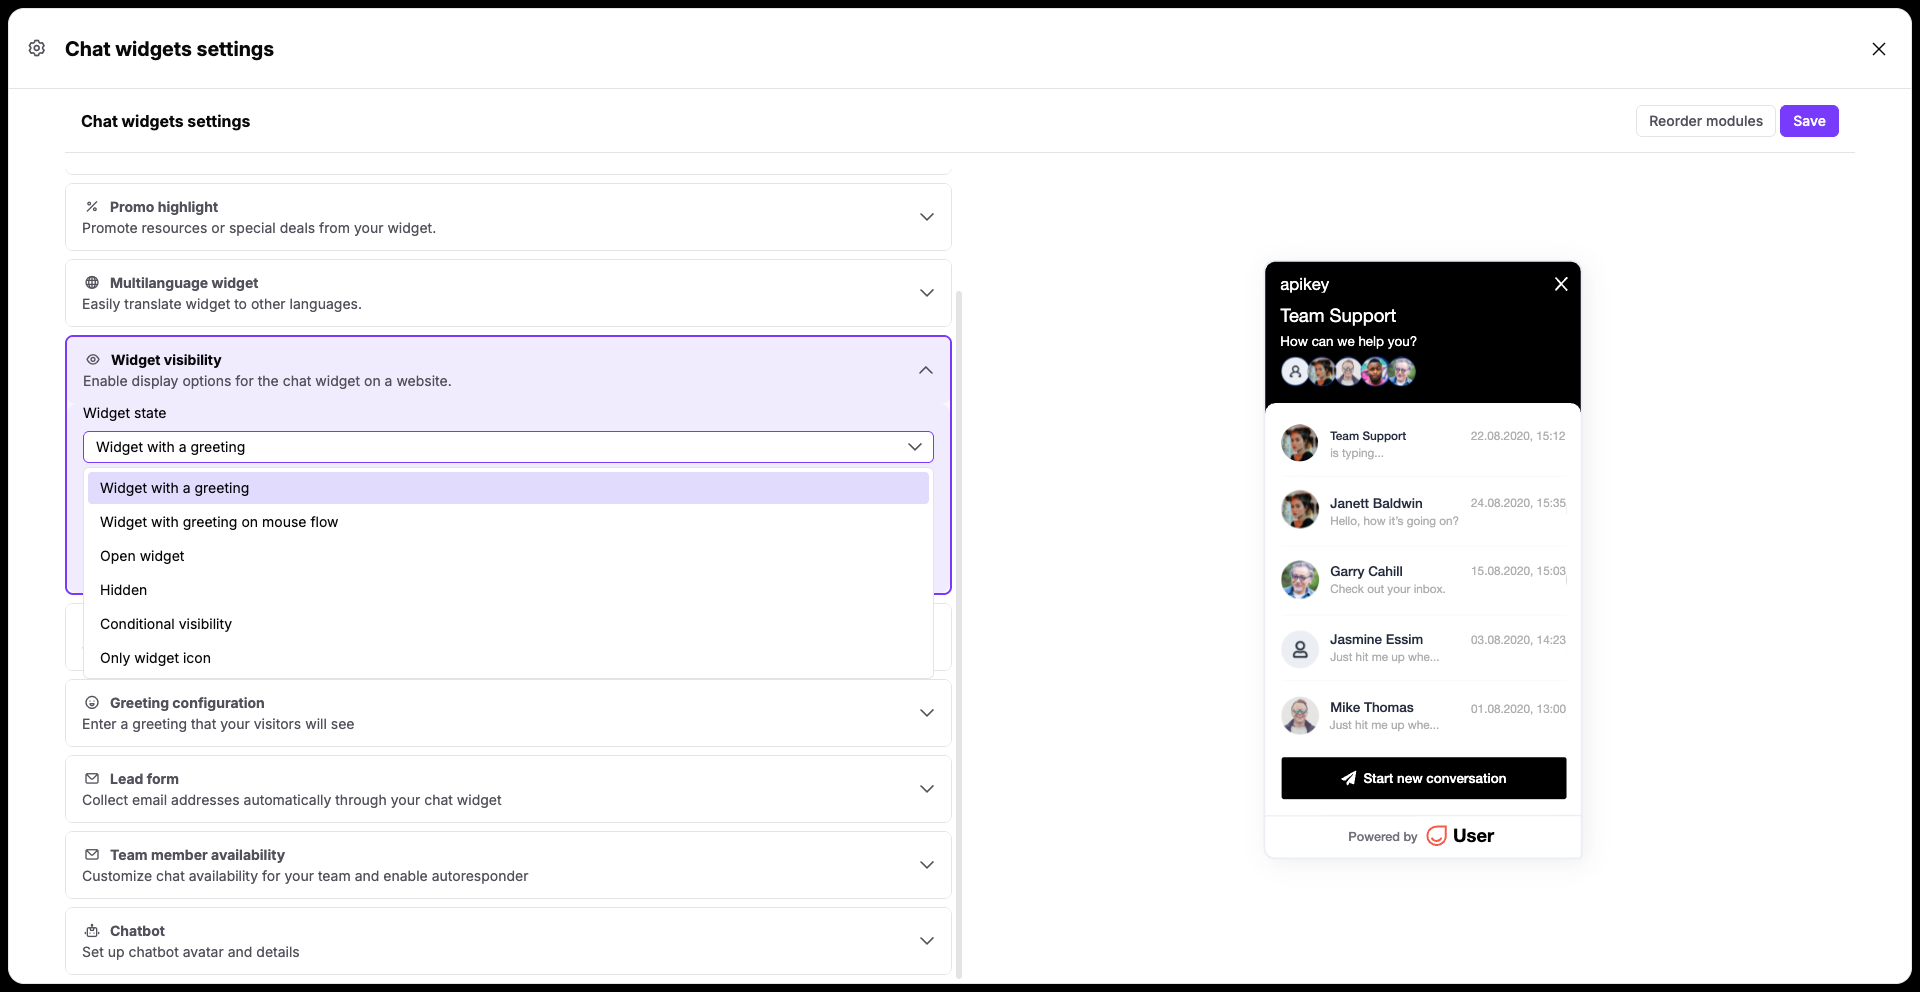
"Widget visibility" section controls where and how exactly the widget shows up on your site.
Define how the widget behaves on your pages. Click the "Widget state" dropdown and select one of the available display options:
"Widget with a greeting"
"Widget with greeting on mouse flow"
"Open widget"
"Hidden" (default state when widget is not shown)
"Conditional visibility" (based on the values from the “widget_visibility” attribute)
"Only widget icon"
By default, an asterisk (*) is placed in the website address field, meaning the widget will show on every page where your script is installed. To limit where it appears, replace the asterisk with specific subdomains or page URLs.
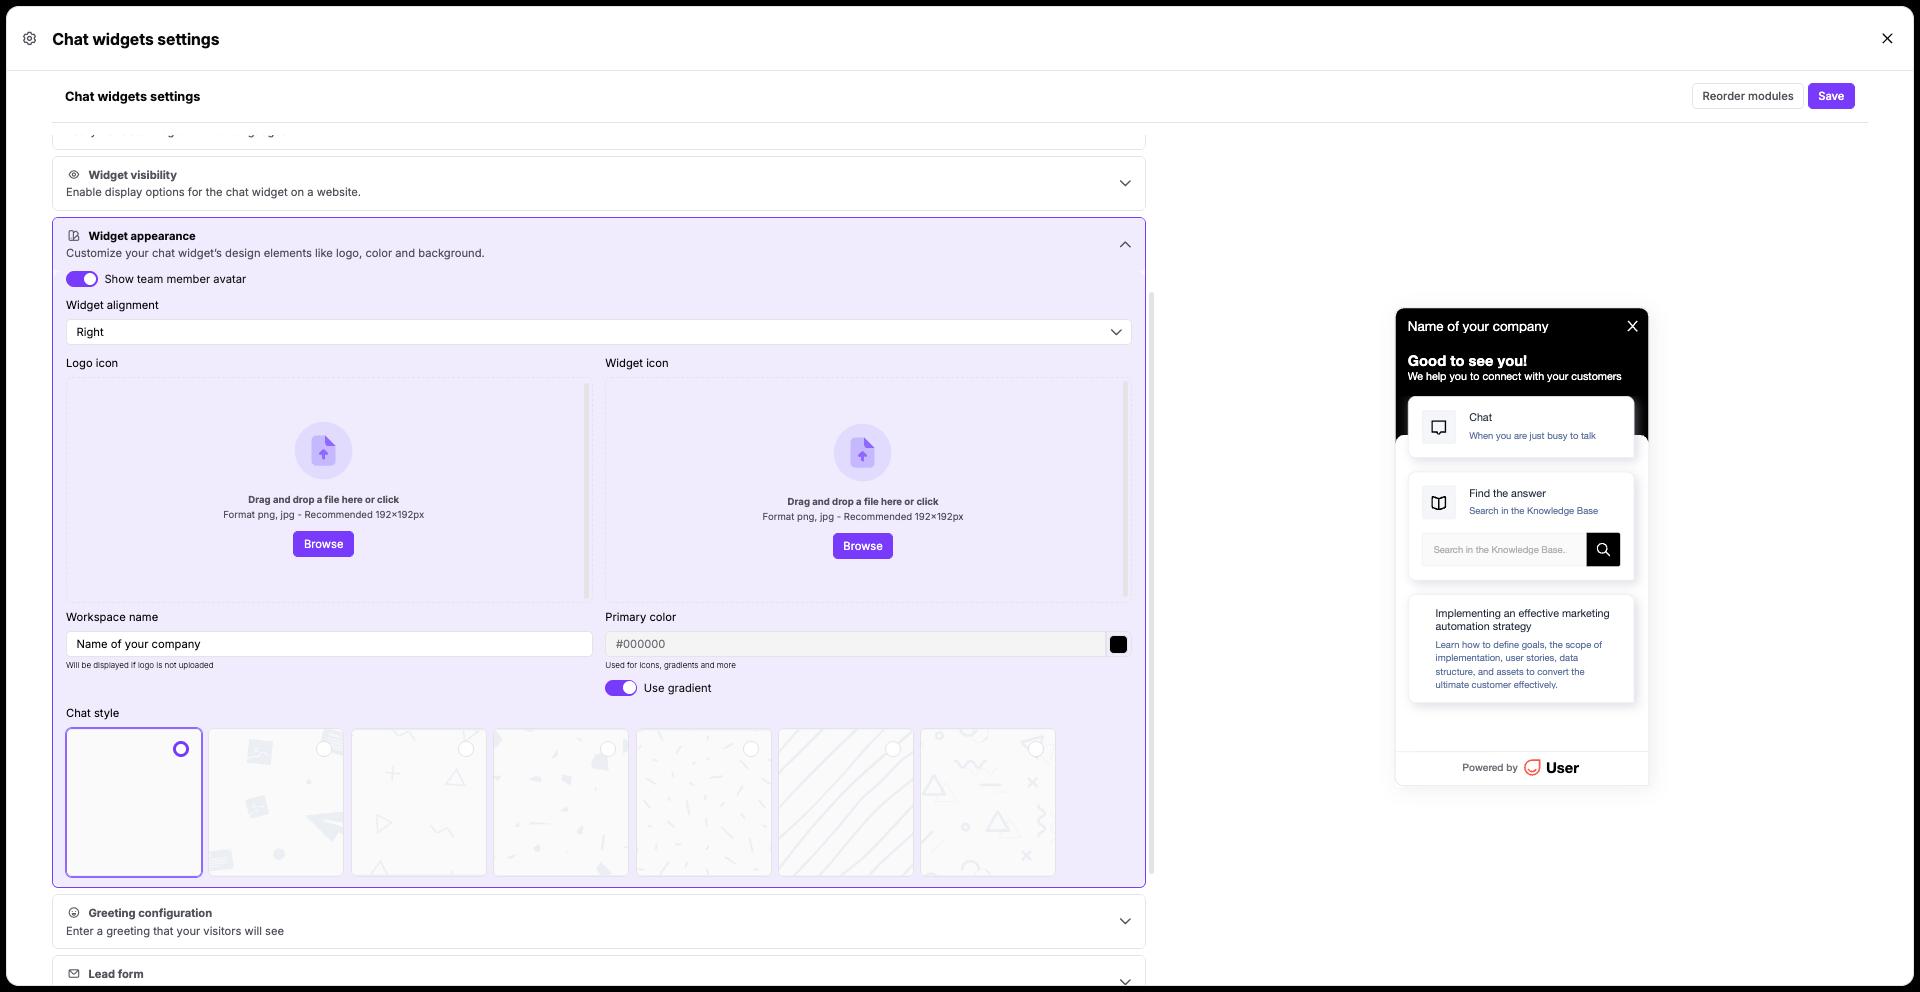
Open the "Widget appearance" section to customize the interface to match your corporate branding.
Use the "Show team member avatar" toggle, if you want to show the list of available customer support specialists within the widget.
Set your "Widget alignment" dropdown (e.g., "right") to decide which side of the website the widget should appear in.
Upload your company logo or widget icons to integrate the widget to the style of your website.
Fill out the "Workspace name" - it will be shown in top part of the opened widget.
Select a hex code for your "Primary color" and toggle "Use gradient", if you want.
Decide on a "Chat style" card layout template.
Greeting Configuration Callout
Expand the "Greeting configuration" section to set up the chat bubble preview that catches a contact's attention (it’s related to the “Widget with a greeting" and "Widget with greeting on mouse flow” widget states).
Fill out your text for the "Greeting title", "Widget greeting", and "Message typing prompt" for every language version of your choice.

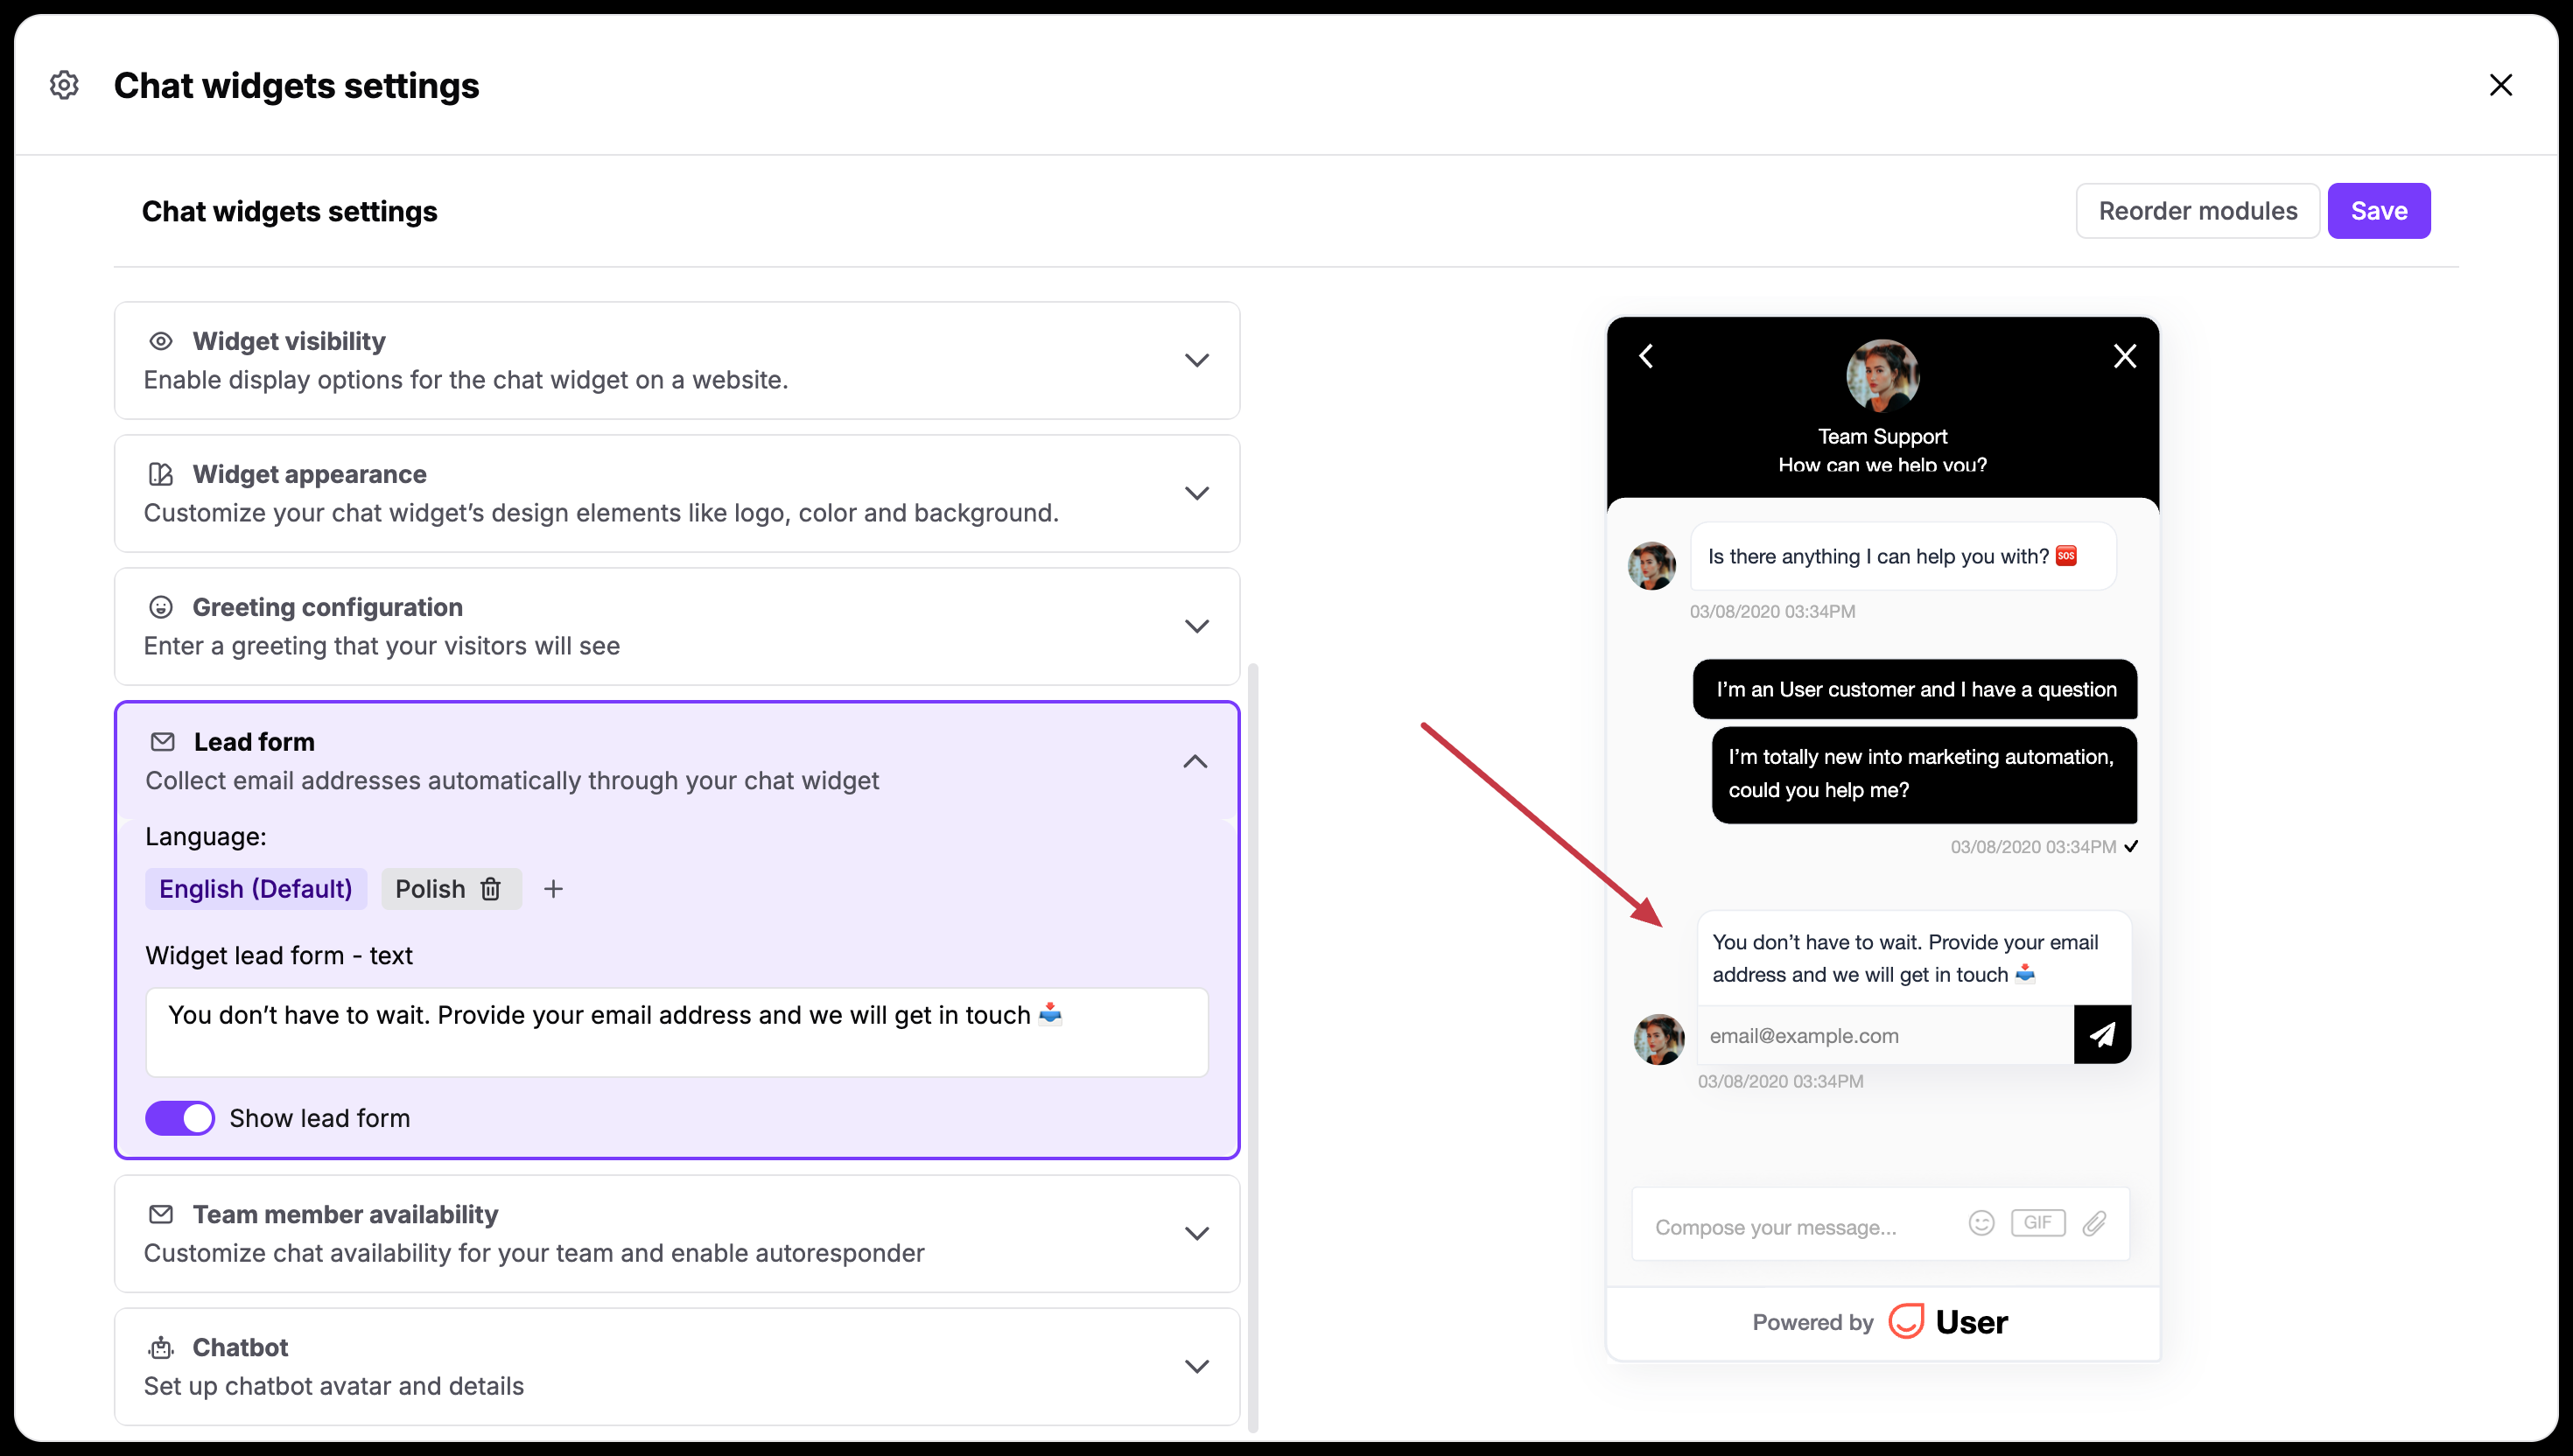
Move to the "Lead form" section to turn on automatic contact detail collection. Switch on the "Show lead form" toggle if you want to show a small data collection message in the widget after the anonymous visitor sends you the first message.
Create text versions for every language version.
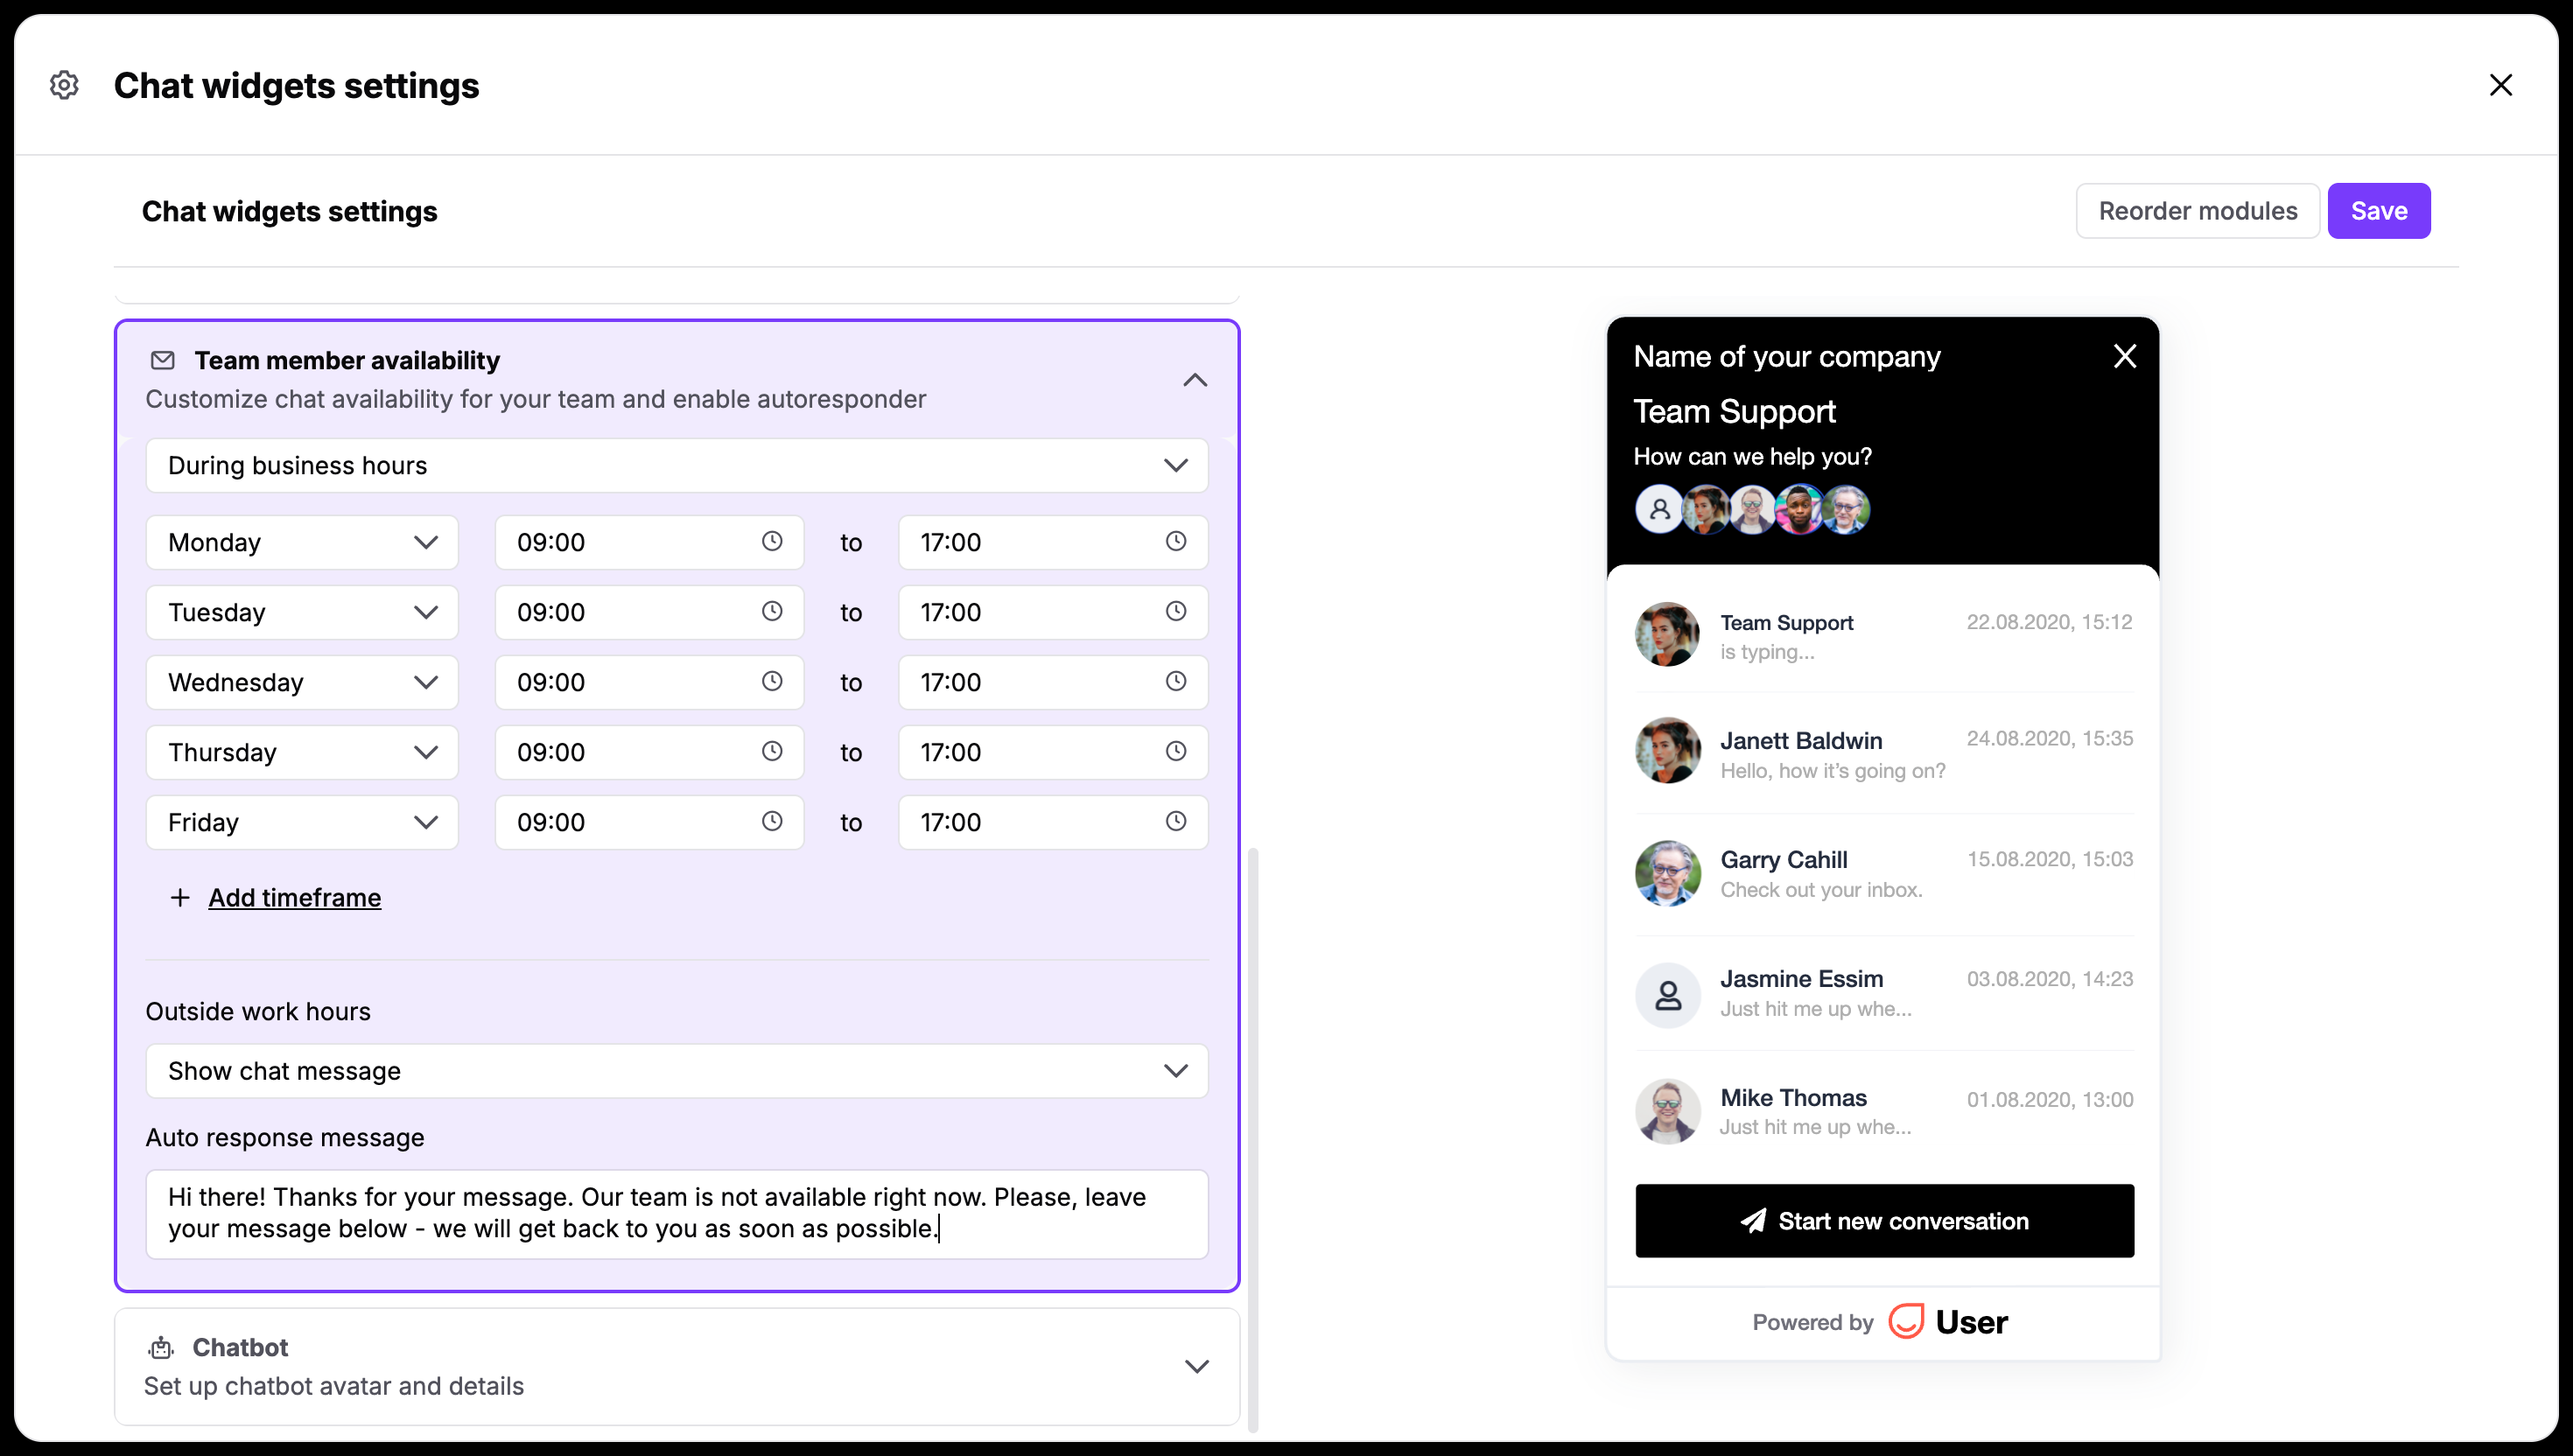
Open the "Team member availability" section to manage your active live support hours.
You can choose between “Always“ and "During business hours" from the dropdown menu. If you go with the second option, then you need to fill in your daily schedule inputs (e.g., from "09:00" to "17:00"), and use the lower dropdown to decide if the widget stays "Hidden" or shows an offline message when your team is away.
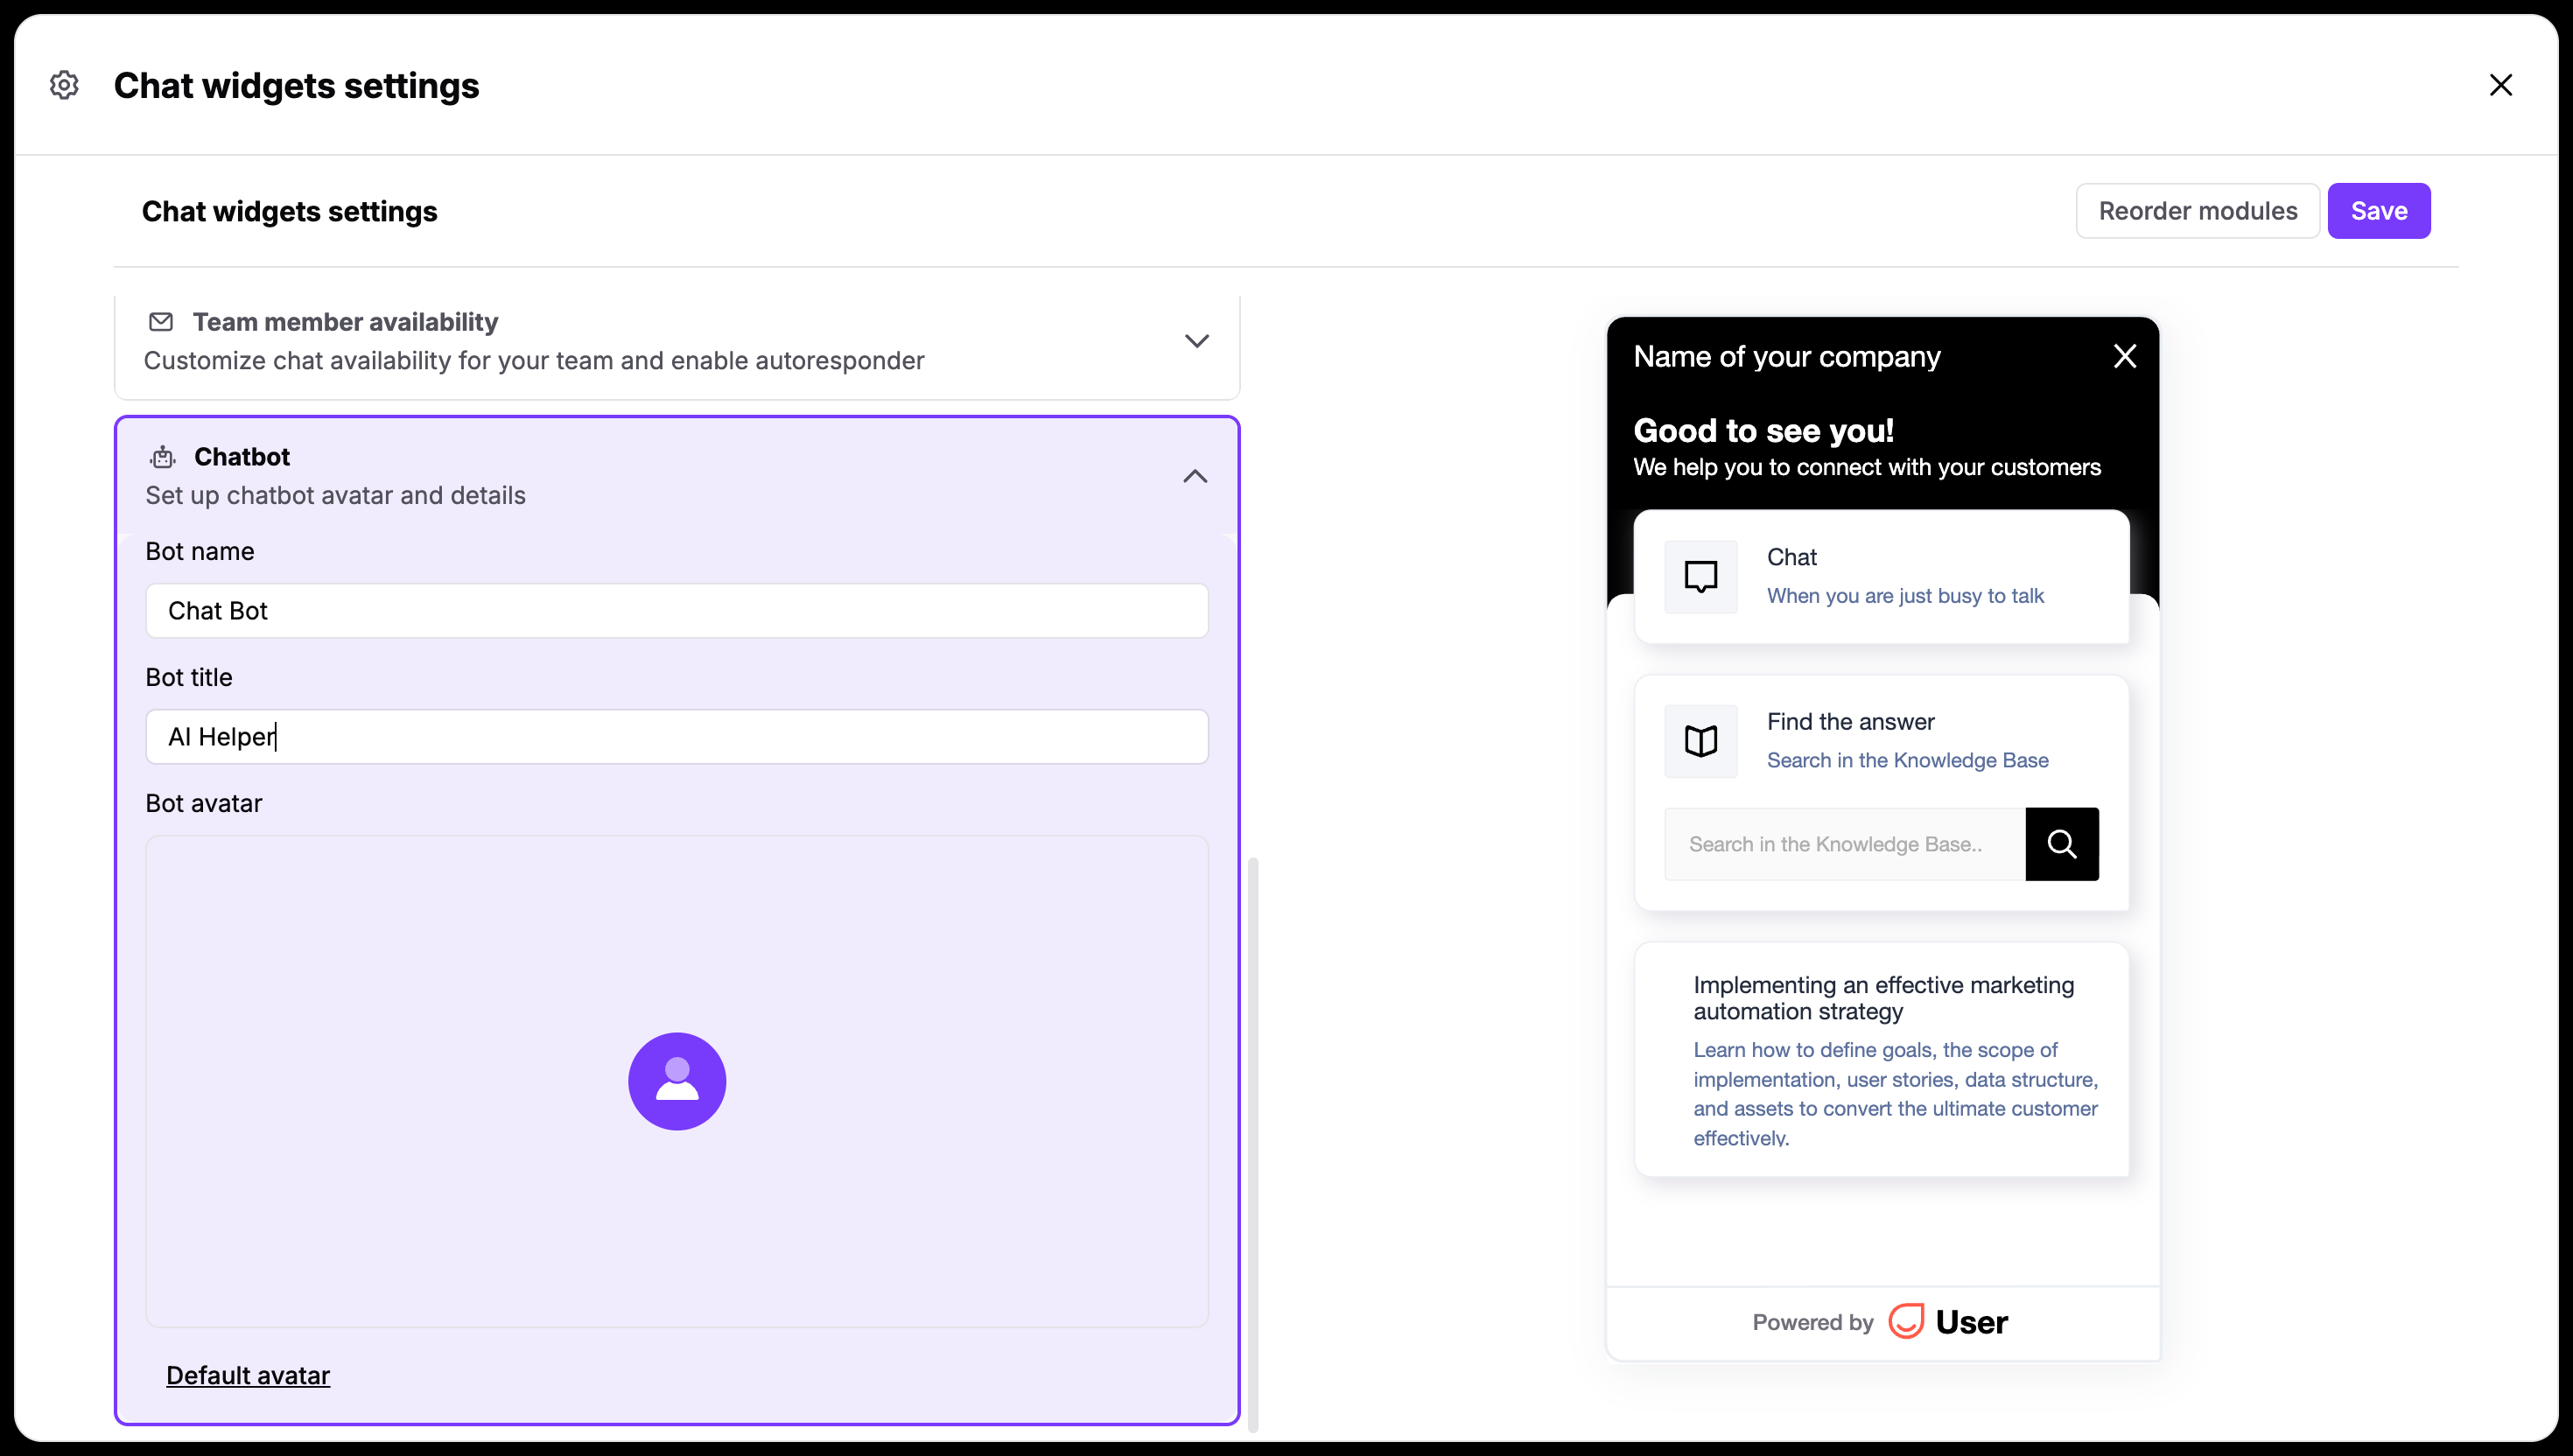
Expand the "Chatbot" section to configure the profile details for your automated assistant. Enter your text for "Bot name", "Bot title", and upload an image under "Bot avatar".
These details will be used for the automations, where you use the “Bot” modules. [LINK]