Configuring DNS records is a critical step in connecting your domain with User.com so you can reliably send emails from your own address. While the process is generally straightforward, some hosting providers like Cloudflare and Home.pl rules differ from standard setups.
In this guide, we’ll walk you through the exact steps required to add and verify the necessary DNS entries with these providers.

SPF Record
SPF lets mail servers verify that User.com is allowed to send emails from your domain.
Record type: TXT
Name: Usually your domain name (e.g., example.com). It may differ depending on your hosting provider docs.
Value: v=spf1 mx a include:_spf.mail03-userengage.com ~all
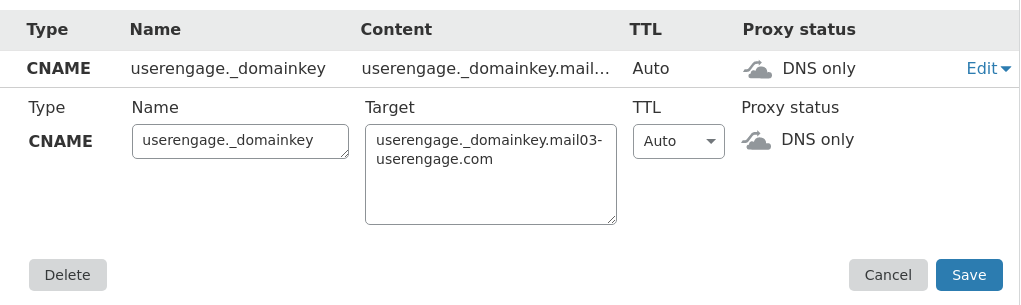
DKIM Record
DKIM adds a digital signature to your messages to confirm that they are legitimate and unchanged.
Cloudflare automatically removes the domain name at the end of DNS records. As a result, your DKIM and DMARC fields will look the following way.
Record type: CNAME
Name: userengage._domainkey
Value: userengage._domainkey.mail03-userengage.com
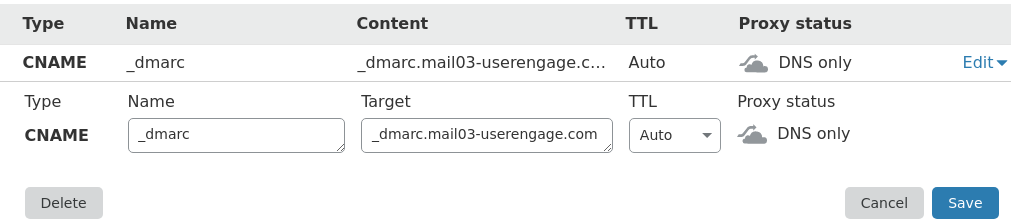
DMARC Record
DMARC helps receiving mail servers determine how to handle messages that fail SPF or DKIM.
Record type: CNAME
Name: _dmarc
Value: _dmarc.mail03-userengage.com
SPF Record
SPF lets mail servers verify that User.com is allowed to send emails from your domain.
Record type: TXT
Name: your domain name. (period at the end should be added automatically)
Value: v=spf1 mx a include:_spf.mail03-userengage.com ~all
DKIM Record
DKIM adds a digital signature to your messages to confirm that they are legitimate and unchanged.
Record type: CNAME
Name: userengage._domainkey.mail03-userengage.com.
Host: userengage._domainkey
DMARC Record
DMARC helps receiving mail servers determine how to handle messages that fail SPF or DKIM.
Record type: TXT
Value: _dmarc.mail03-userengage.com
Host: _dmarc
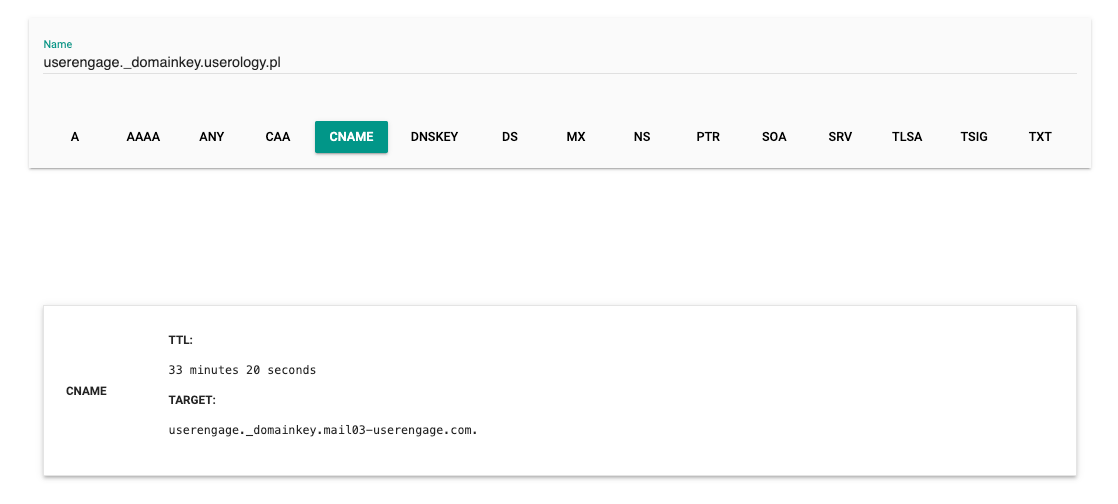
DNS propagation may take time. You can check your records with Google Dig or any DNS lookup tool.
In the provided example on a screenshot below, we can see that the DKIM record returns the correct value.
If your value check returns something like this:

It's a sign that you need to add a period at the end of the value, as mentioned before, because the value (target) contains your domain name which was added by your hosting panel automatically. The correct final value should contain only "userengage._domainkey.mail03-userengage.com".
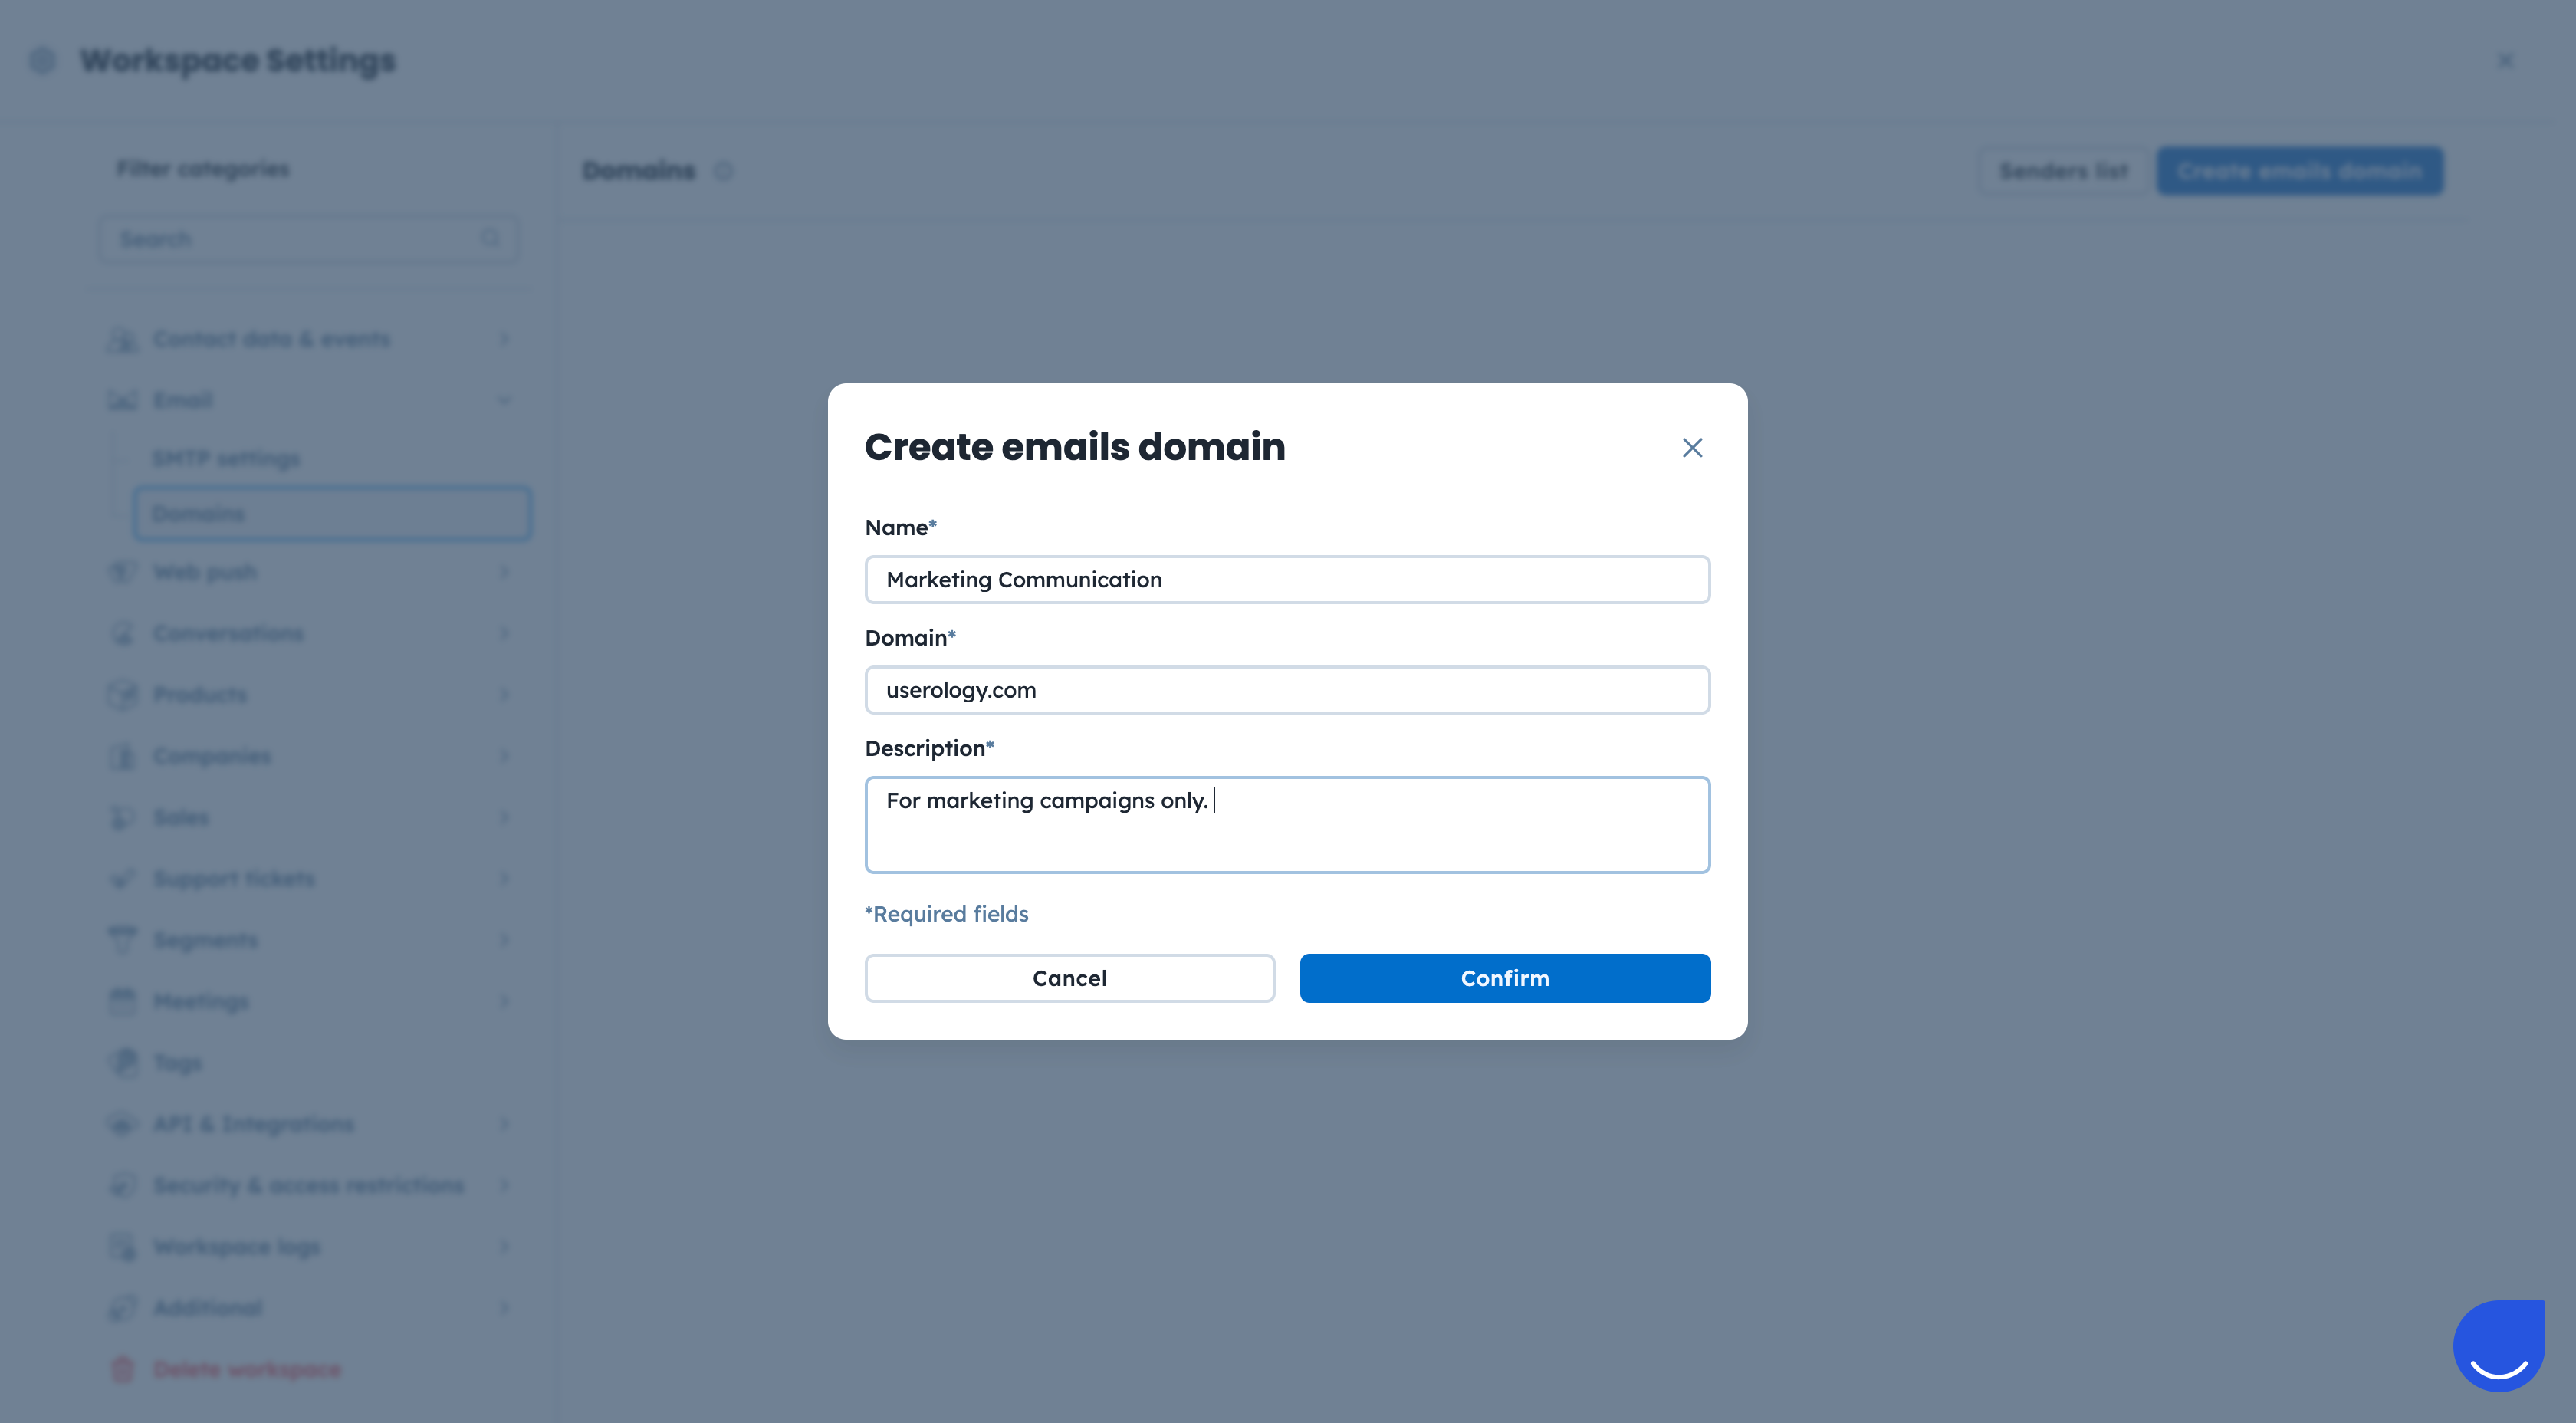
Once DNS is ready, add and verify your domain inside User.com.
Go to Settings → Workspace Settings → Email → Domains.
Click the “Create emails domain” button.
Fill the form with the required details:
Name: The label displayed on your domain list inside User.com app. Example: Marketing Communication.
Domain: The domain you want to send the emails from. Example: userology.com
Description: Useful details for your team.
Validate DNS Records

Once the DNS records are validated the domain can be used for the email campaign delivery.
Deliverability Optimization
Sending from your own domain improves credibility with mailbox providers, reduces spam filtering, and increases open and click rates.
Brand Trust
A recognizable sender domain increases trust and supports consistent communication.