Setting frequency limits (capping) on your automations ensures your contacts are not overwhelmed by automated messages across your communication channels. Managing send limits helps maintain high deliverability rates, improves open and click-through rates, and prevents contact fatigue.
Adjust the timing settings within an individual workflow to manage basic execution limits per contact.
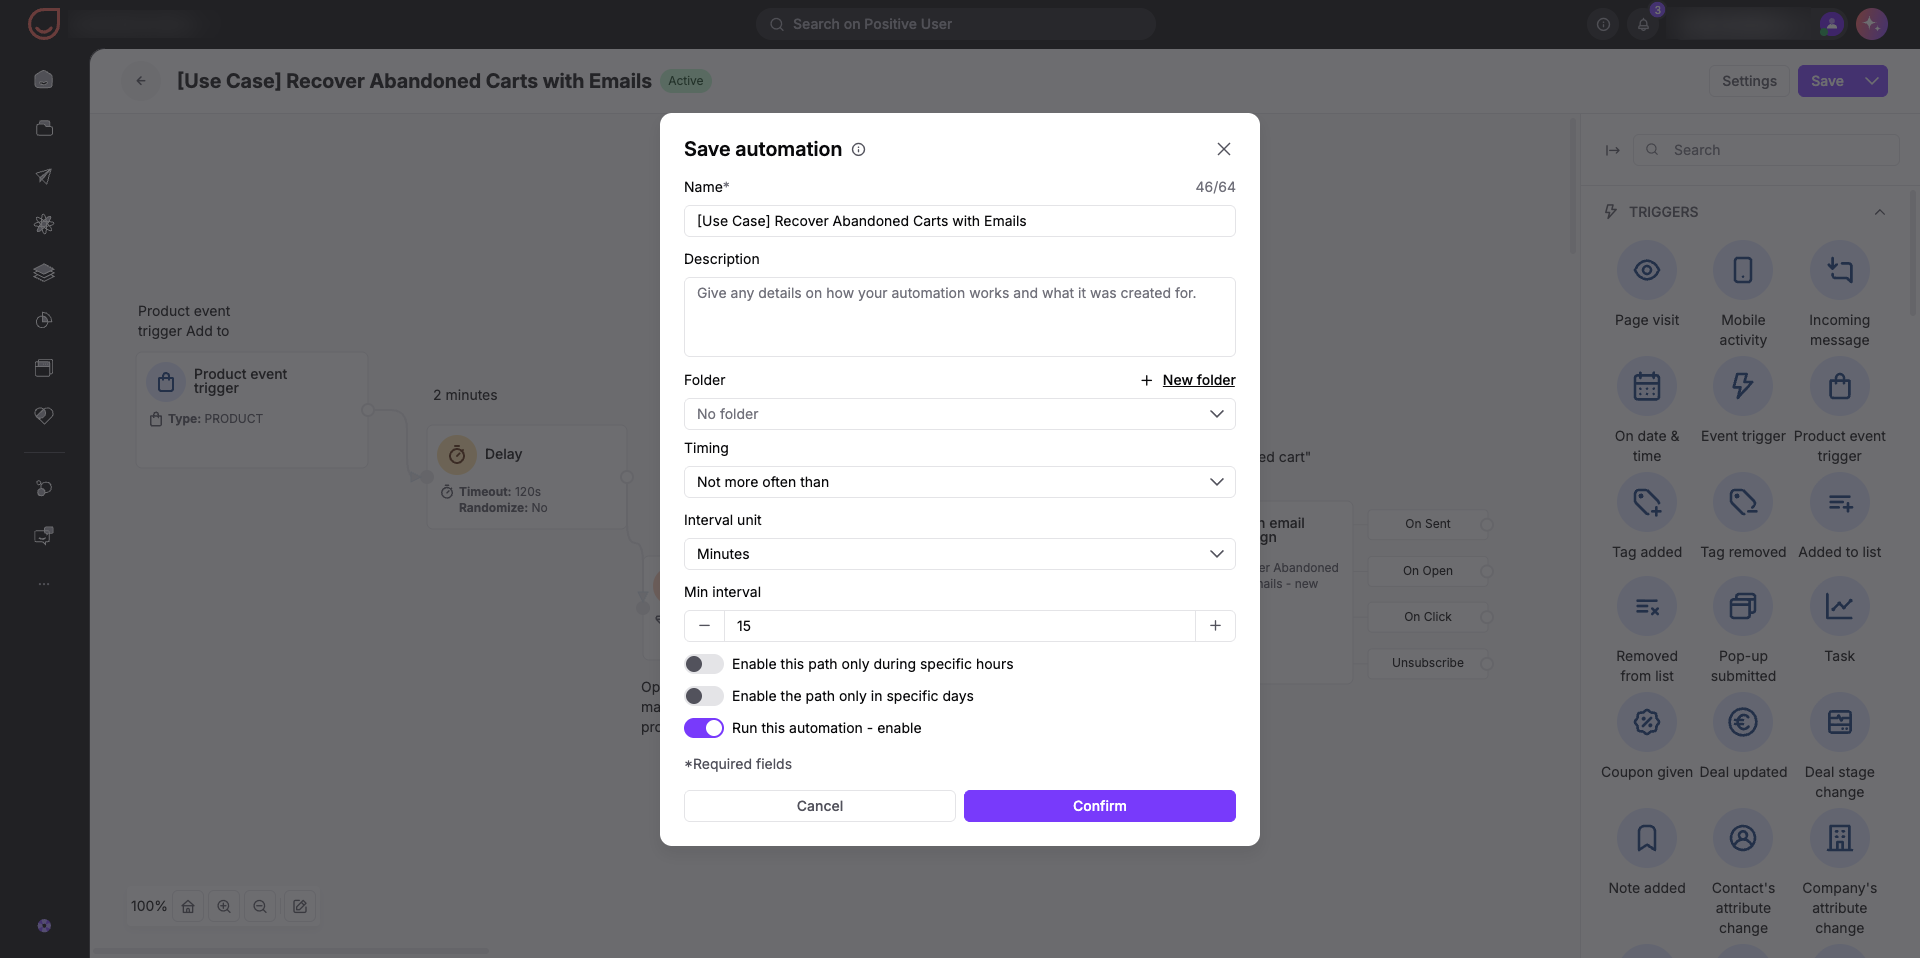
While saving an automation workflow you go through the “Settings” step. There you can find the “timing” parameter. It defines how often the automation flow is triggered per contact.
You can choose from the following options":
Once: The contact enters the flow one time only across their lifetime.
Maximum once per 24 hours (for each triggered module): Limits workflow entry to a single time every 24 hours per trigger module.
Each time condition is met: Allows contacts to enter every single time they meet the trigger criteria.
For next X days: Restricts re-entry to a specific number of days after the first trigger.
Only on given weekday: Ensures the workflow runs only on designated days, such as Mondays or Wednesdays.
No more often than: Defines custom spacing between entries (for example, no more often than once every 3 days).
Toggle specific execution windows under timing settings to define active hours or days. This ensures contacts only receive automated messages during business hours or active timeframes.

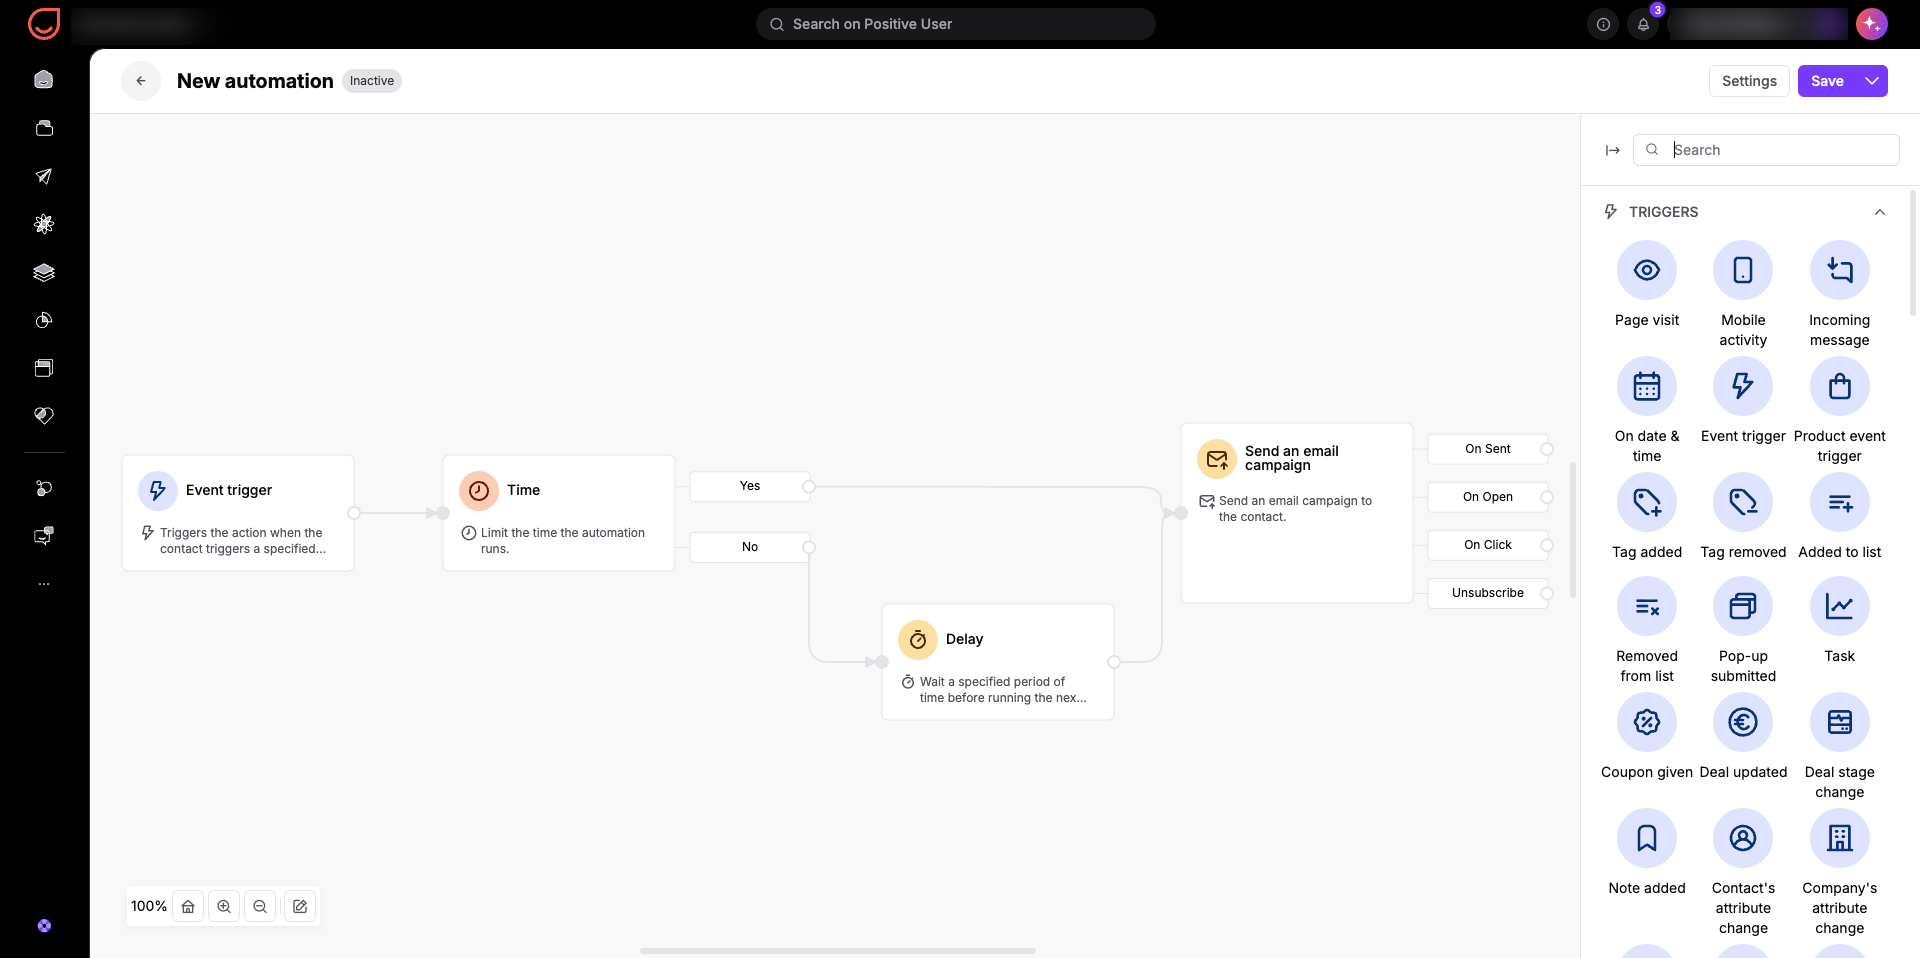
Control contact movement through your flow based on calendar dates, days of the week, or specific times of day.
The "Time” [LINK] condition module acts as a real-time traffic gate on your canvas. Instead of blocking contacts from entering a workflow entirely, it checks the exact time, day of the week, or calendar date when a contact reaches that step.
If a contact reaches the module within allowed hours or days, they move down the primary path. If they arrive outside those windows, you can hold them in a delay or route them down a secondary path to receive a different message. This helps your team pause weekend marketing sends and hold messages until Monday morning when open rates are higher.
When a contact reaches the module, Positive User checks your configured time windows:
Yes: If the contact arrives during an allowed window (for example, Tuesday at 2:00 PM), they move immediately down the primary path to receive the message.
No: If the contact arrives outside allowed hours (for example, Sunday at 3:00 AM), they route down an alternative path. You can send them into a delay module to wait until Monday morning, route them to a secondary communication channel, or end the flow.
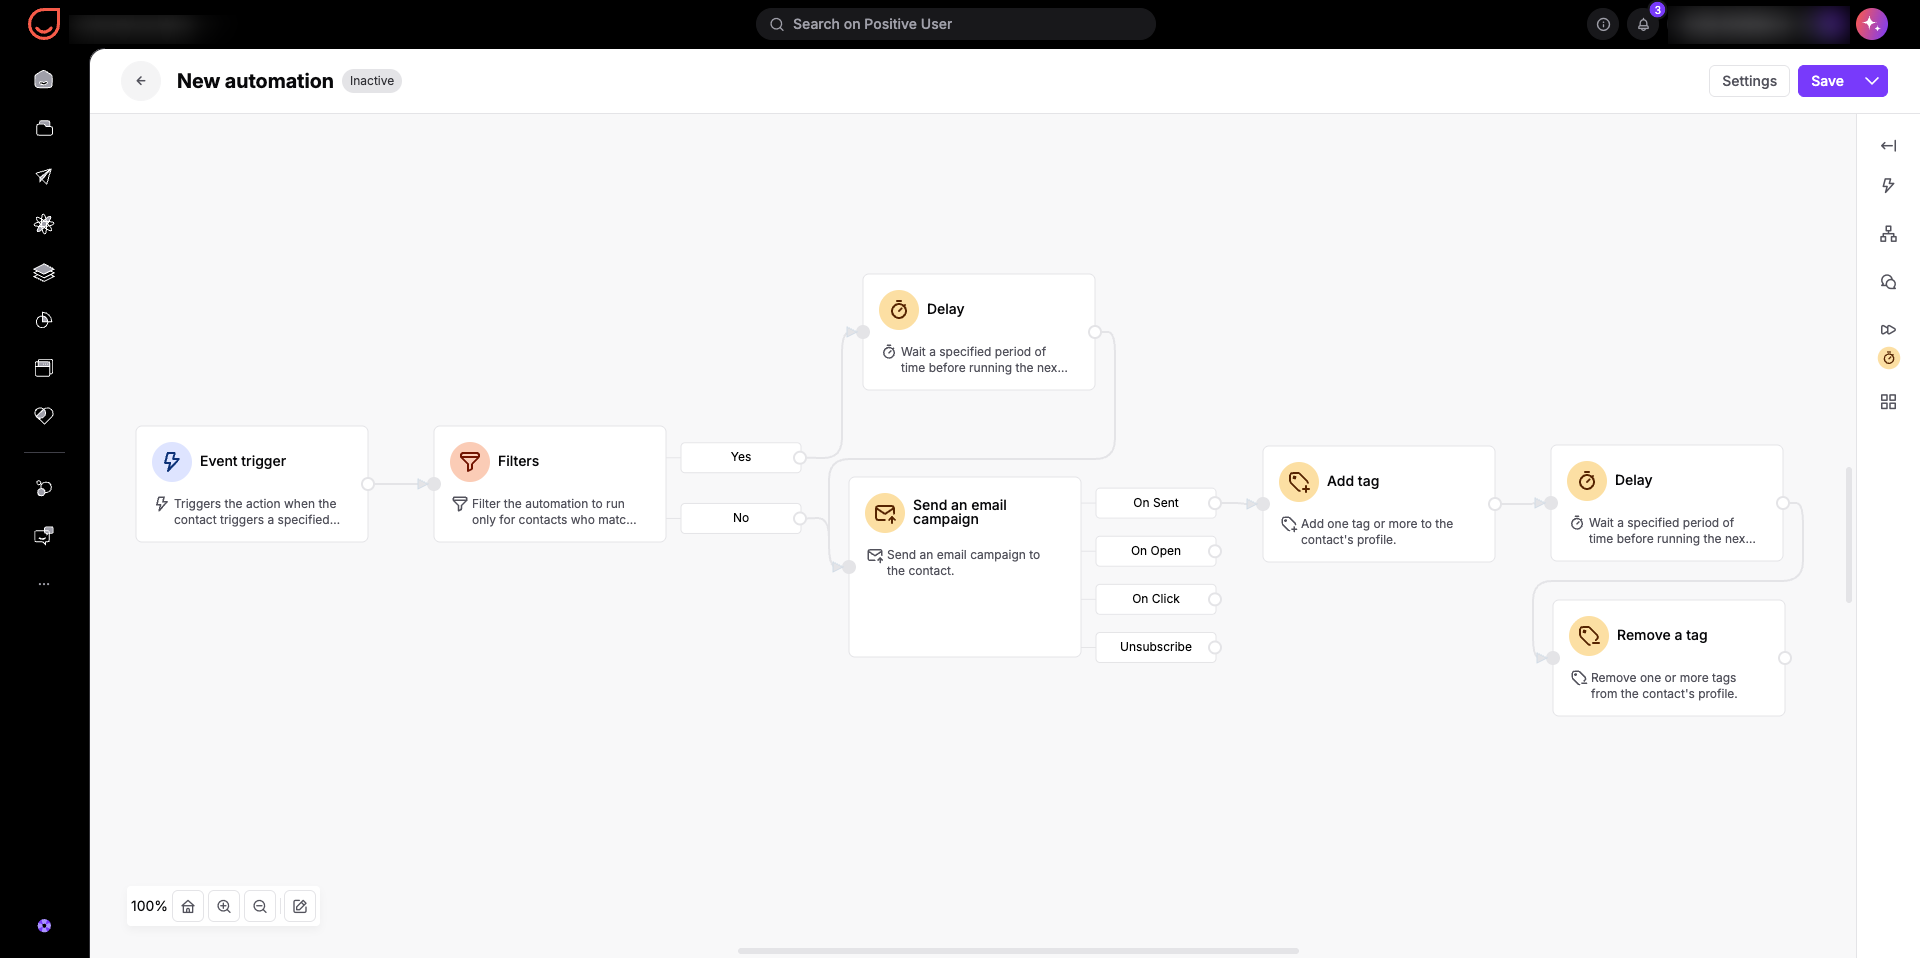
Tag-based capping uses temporary tags as "do not disturb" flags on contact profiles. This strategy allows your team to control total communication volume across several independent workflows and messaging channels.
By checking for a universal capping tag before sending any message, you prevent different automated workflows from firing messages at the same contact simultaneously.
Insert a filter module before your message step to verify whether the contact profile already carries your designated capping tag (for example, “message_cooldown”). If the tag is present, route the contact away from the message step. Place an "Add Tag" action module immediately following your message step. As soon as a message is sent, Positive User applies the “message_cooldown” tag to the contact profile. Add a delay module set to your desired resting window (such as X days), followed by a "Remove Tag" action module. Once the delay expires, Positive User removes the tag, making the contact eligible to receive automated communications again.
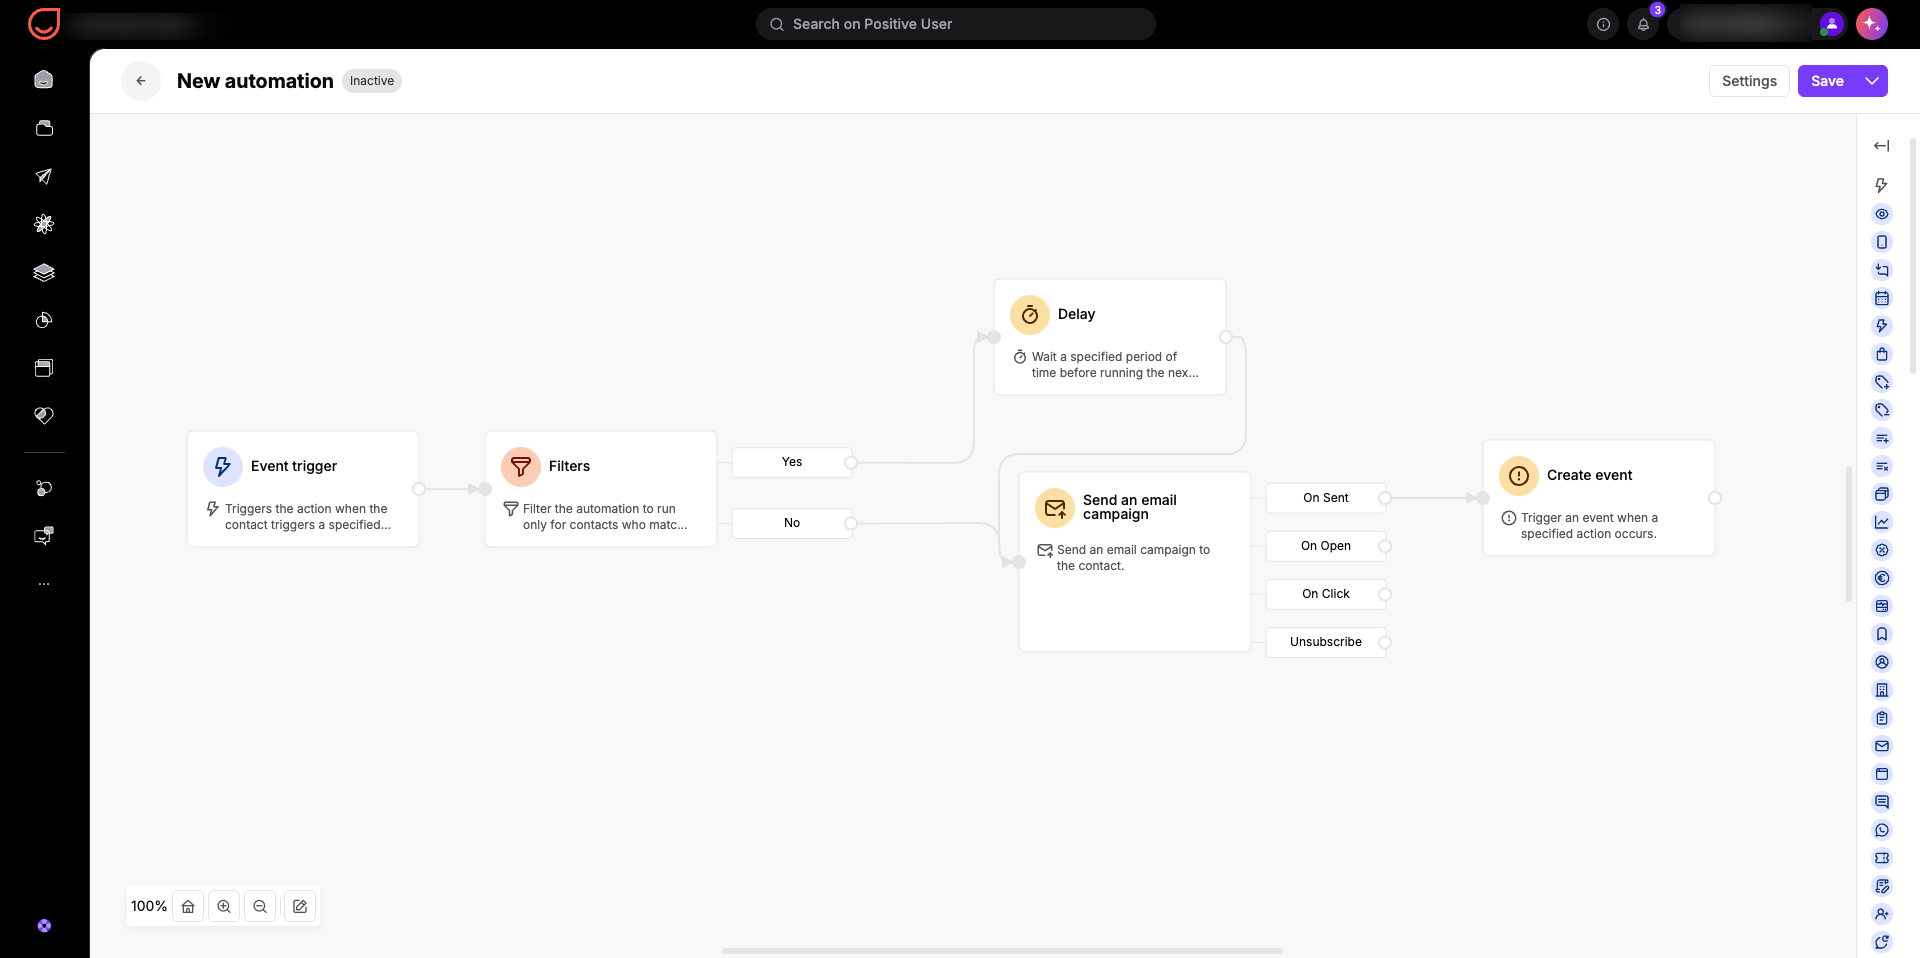
Event recency checking provides a more precise capping method than contact tags because events store exact timestamps. This allows your team to filter contacts not only by whether an event occurred, but by exactly when it happened.
When contacts perform actions that trigger automations (such as abandoning a shopping cart), Positive User logs a custom event (for example, “cart_reminder_sent”). Before delivering another message, your flow evaluates the timestamp to check how recently that custom event occurred in the “Filter” module.
Insert a "Create Event" action module immediately following your message step to record the interaction event and timestamp on the contact profile. Before your message step, add an event condition check to verify whether that custom event occurred within your chosen timeframe (such as the past 24 hours). If the event occurred recently, delay or skip the message.
You do not need to remove any tag like in a previous method, but set clear rules how much time should pass after the event to allow the automation flow to send the next message to the contact.
Calculated attributes aggregate contact interaction data over rolling timeframes. For capping automations, calculated attributes specifically analyze email campaigns by summarizing and counting sent, opened, clicked, and unsubscribed emails per contact.
By checking a calculated attribute in the “Filter” before delivering an email, your team can enforce account-wide message limits to prevent contacts from receiving too many emails at once, even across separate workflows.
Configure your “calculated attribute” module based on the type of email activity of your choice and save the value on a dedicated custom attribute. In your workflow, insert a “Filter” module before your email step to verify whether the contact's calculated attribute value is below your maximum limit (for example, less than 3 emails in 7 days). If the count exceeds your threshold, route the contact to a delay step or exit the flow.
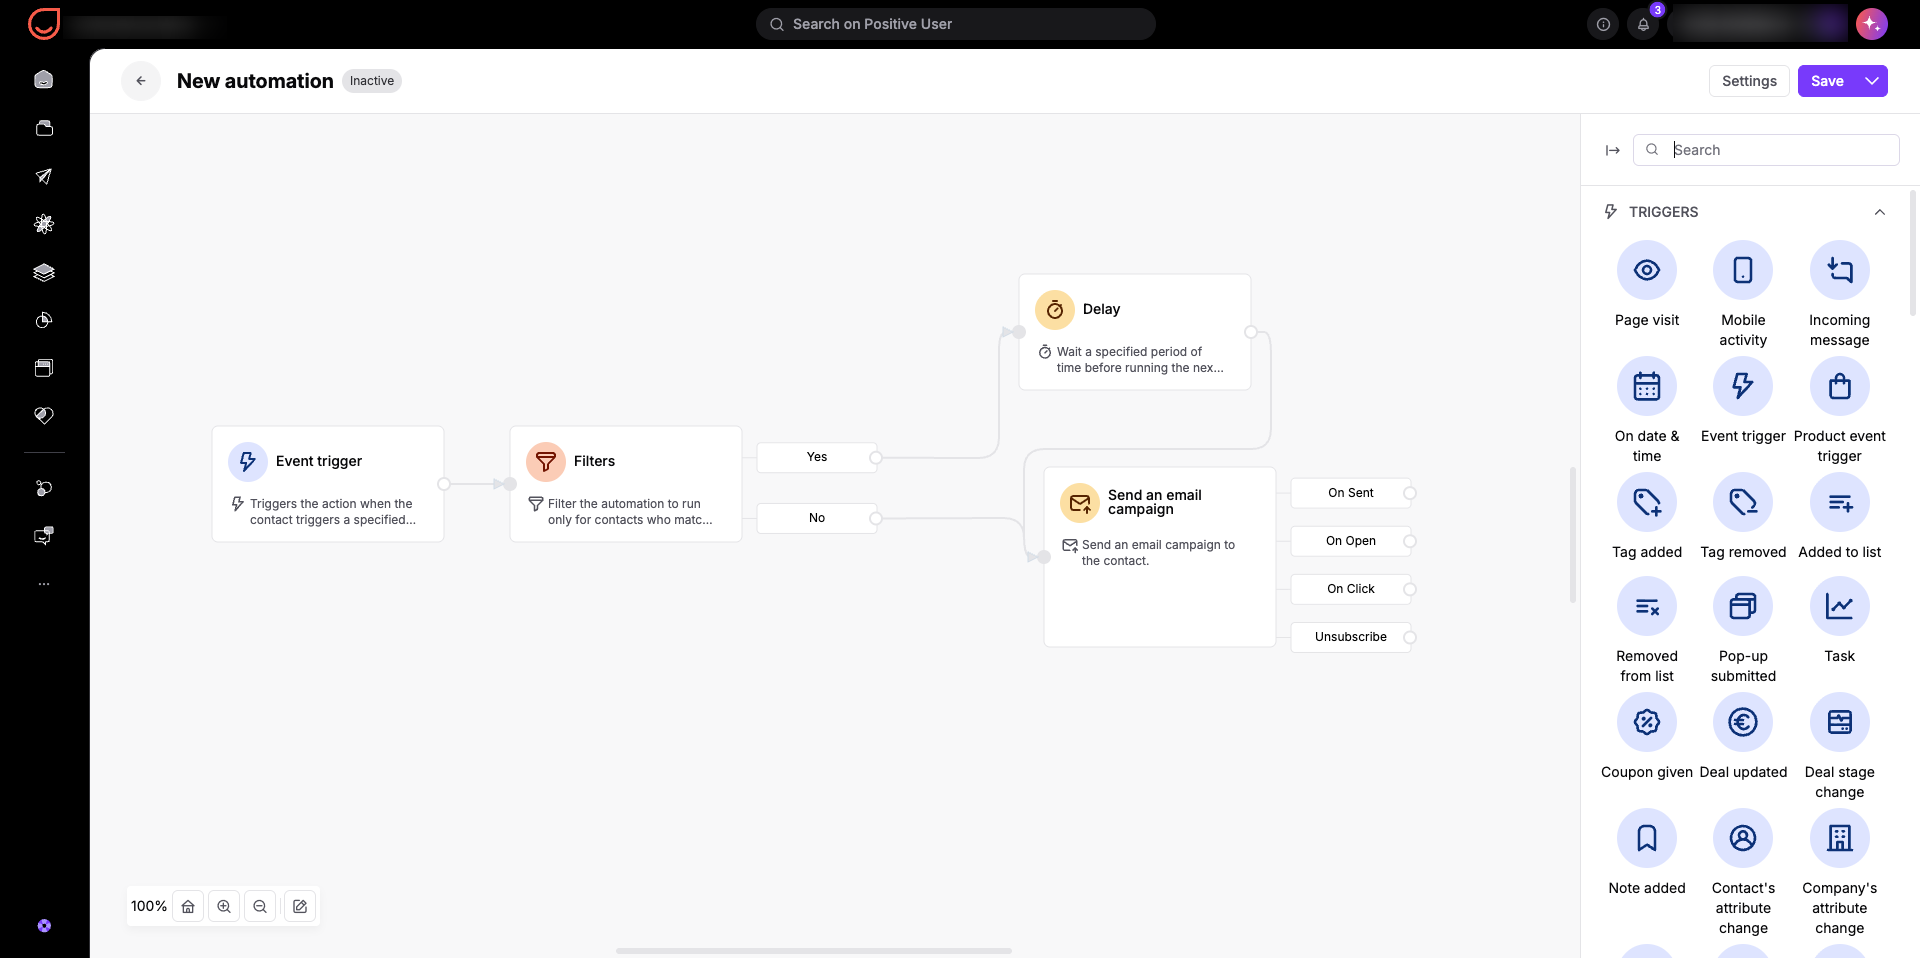
E-commerce Abandoned Cart Capping: A contact leaves items in their shopping cart multiple times in a single afternoon, which risks sending repetitive reminder emails. Using event recency checks or setting workflow timing to "maximum once per 24 hours for each triggered module" ensures the contact receives only one cart reminder per day, giving them time to complete their purchase without receiving repetitive emails.
Weekend Communication Redirection: Automated marketing messages sent on weekends often see lower open rates and higher unsubscribes because contacts are away from their inboxes. Adding a "Time” condition module before your message step pauses weekend deliveries and holds contacts until Monday morning when open rates are higher.
Multi-Channel Email Throttling: A contact triggers an onboarding flow, a promotional campaign, and a loyalty update on the same day, receiving multiple emails within hours. Creating a calculated attribute that tracks total email campaign sends per contact lets you filter workflow steps so messages send only if the contact has received fewer than 3 emails in the past 7 days.
Balancing scheduled promotional campaigns with automatic behavioral triggers (such as cart reminders or loyalty updates) is essential for keeping subscribers engaged. Delivering uncontrolled or overlapping automated messages leads to contact fatigue, lower open and click rates, and higher spam complaints. Setting clear capping rules across all channels keeps your communication structured, protects deliverability, and helps your emails land in the inbox, not spam.
Module Guide: Timing Condition [LINK]