Setting up a double opt-in process ensures that new contacts confirm their email address before joining your mailing list. This helps your team build a high-quality list, boost email deliverability, and stay compliant with global data protection regulations.
A double opt-in process is a two-step email verification method where new contacts must confirm their email address before being added to your contact list. First, a contact submits their email through a sign-up form, pop-up, or landing page. Next, they receive an automated confirmation email with a link they must click to verify their subscription. This extra step ensures that contacts genuinely want to receive your updates and helps prevent invalid addresses from entering your workspace.
Find more details about single and double opt-in approaches in the “Understanding Single and Double Opt-In” article.
Before setting up your double opt-in workflow, make sure your team completes the following setup steps:
Manage Single Opt-in: Set up at least one subscription channel on your website, such as pop-ups, embedded forms, landing pages, or registration forms, to capture subscriber intent.
Connect Your Email Domain: Ensure your email domain is connected to Positive User before creating and sending email campaigns. Learn how in our guide on “How to Connect an Email Domain”.
Create a Public Contact List: Go to "Website Experience" → "Lists" and click "Create List". Mark in as public meaning available for the recipients to manage in the subscription management center. For example, create a public list named "Newsletter" and add a detailed description to keep your workspace organized.
Follow these steps to build and launch your double opt-in email campaigns and automation.
A well-crafted double opt-in email should be clear, concise, and engaging, designed to confirm the recipient's intent to subscribe. Here’s what it should include:
Subject Line: The subject should be direct and reassuring, such as "Just one more step to join us!" or "Confirm your subscription."
Salutation: Use a friendly, personal tone. If possible, address the recipient by name to add a personal touch.
Introduction: Briefly remind the recipient that they are receiving this email because they expressed interest in subscribing. This can be a simple sentence like, "Thanks for signing up to receive our newsletter!"
Call to Action (CTA): This is the most critical part. Clearly state what the recipient needs to do next - click on the confirmation link provided. The CTA should be prominent and straightforward, such as "Please confirm your subscription by clicking here."
Benefits: Quickly highlight what they will gain by subscribing, such as exclusive content, discounts, or early access to new products.
The link in the most important element of this email. You can generate ready-to-use links for subscribing or unsubscribing using {% email_consent %} tag:
Standard Subscribe Link: Add {% email_consent opt_in='true' %} or simply {% email_consent %} to verify the contact's email address and record their consent automatically.
Subscribe Link with Custom Redirect (preferable option): Add {% email_consent opt_in='true' redirect='https://example.com/thank-you' %} to send contacts directly to a custom "Thank You" landing page on your site after clicking.
More details about the process can be found in the “Opt-in and Opt-out Process in Positive User” article.
This snippet will automatically update the standard contact attribute called “email_opt_in“ and trigger an “email_consent” event on the contact’s timeline with the opt-in details.
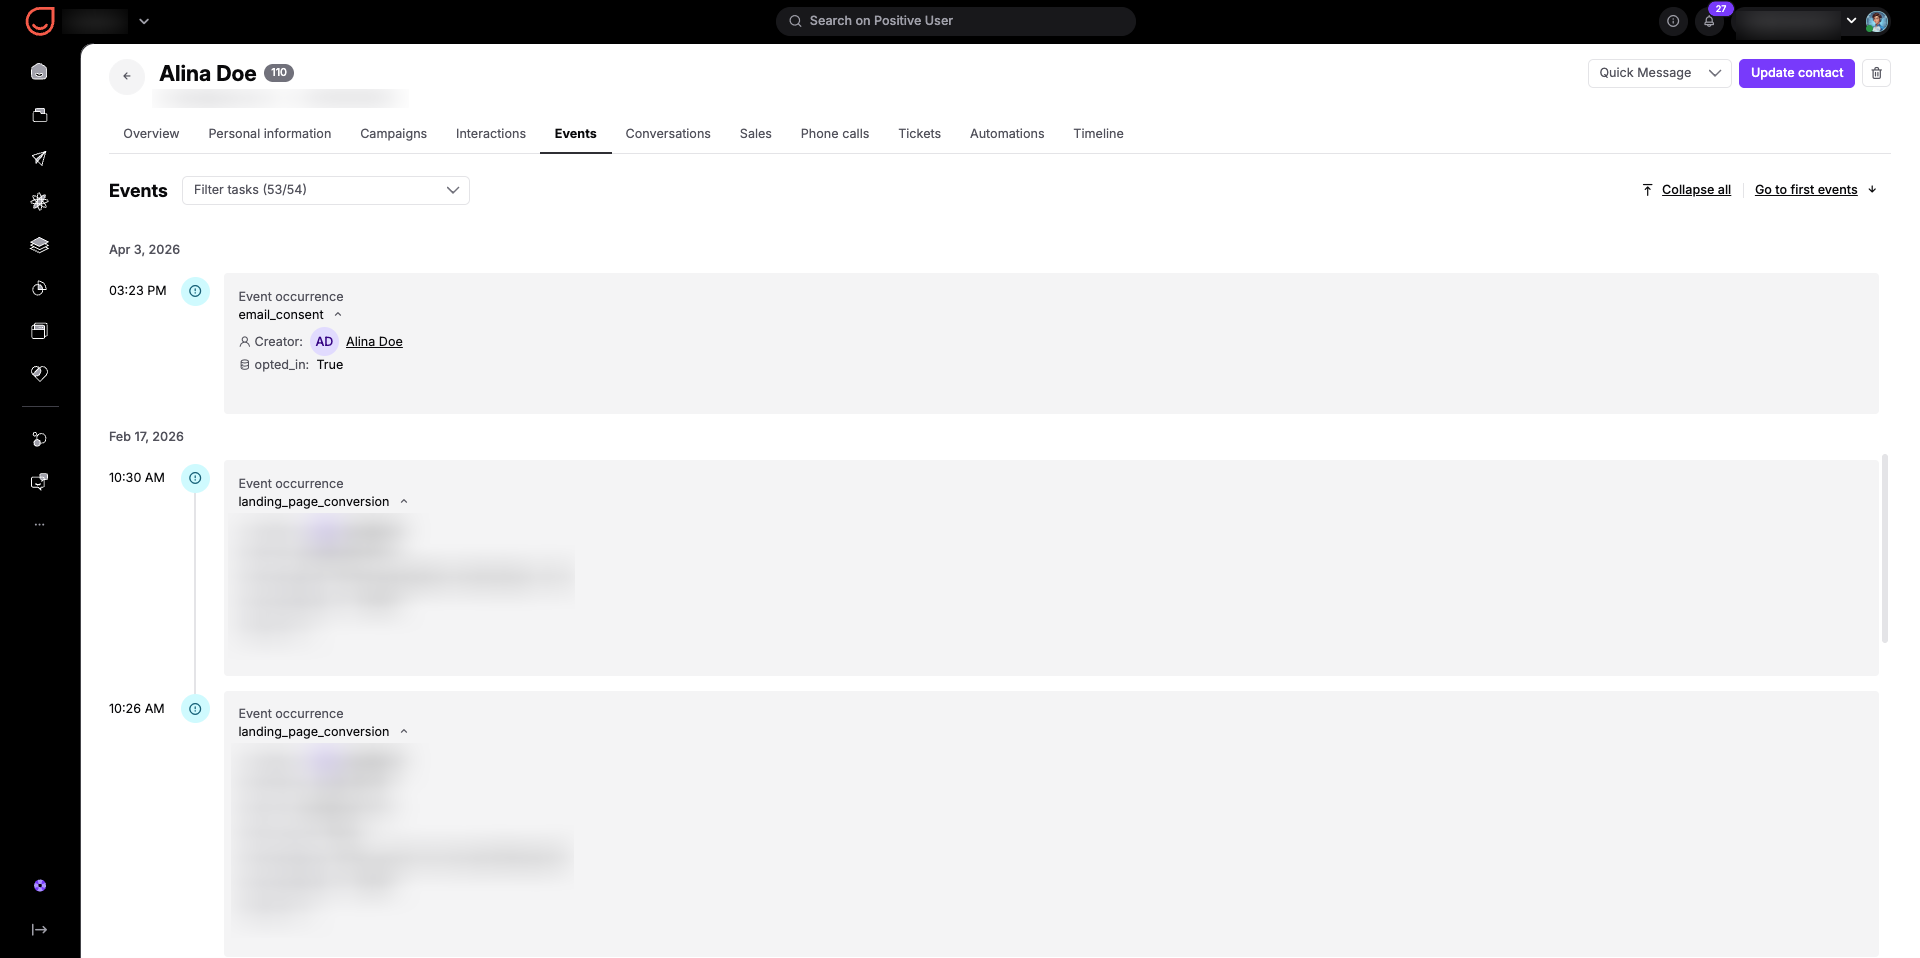
The email confirming a newsletter subscription, sent after a contact has completed the double opt-in process, plays a crucial role in welcoming and engaging new subscribers. Here’s how it should be structured:
Subject Line: This should be welcoming and affirmative, such as "Welcome aboard!" or "You're all set!"
Salutation: Personalize the greeting by using the subscriber's name if possible, e.g., "Hello {{ receiver.last_name|capfirst }},"
Introduction: Express gratitude and confirm the successful subscription. Something like, "Thank you for confirming your subscription to [Newsletter Name]!"
What to Expect: Briefly outline what the subscriber should expect in terms of content frequency (daily, weekly, monthly) and types of content (news updates, tips, special offers).
Exclusive Offer or Benefit (optional): To start the relationship on a high note, consider providing a welcome discount, a free download, or exclusive content as a thank you for subscribing.
Engagement Invitation: Encourage interaction by inviting them to follow your social media channels or check out specific sections of your website.
Unsubscribe Option: Include an easy way to unsubscribe, ensuring compliance with email marketing regulations and reinforcing your respect for the subscriber’s preferences.
Connect your sign-up forms, email campaigns, and contact lists into a single automated flow.
Go to "Automations" → "New Automation" and create a two-path automation based on the following scenario.
Path 1: Requesting Subscription Confirmation
Add an "Event” trigger based on a form submit event or a general “send opt-in” event that is fired by any subscription pop-up, form or landing pages of yours. Then connect a “Filters” module to check if the contact already has an email marketing consent (attribute “email_opt_in”). If “yes” (the contact is already subscribed), connect a "Send an Email Campaign" module selecting your "You are already subscribed" campaign. If “no”, connect an "Update an Attribute" module setting “unsubscribed from emails” to “false”. Then connect a "Send an Email Campaign" module selecting your double opt-in confirmation email.
Path 2: Confirming Consent & Welcoming Contacts
Add an "Event” trigger set to “email_consent” event. Connect the trigger to a "Filters" module checking if “email_opt_in” is “true”. On the “yes” path, connect an "Add to List" module selecting "Newsletter", a "Create Event" module firing “newsletter subscription” event (it’s an optional step) and a "Send an Email Campaign" module selecting your welcome email. End the flow with a "Finish Path" module to complete the automation.
Timing: each time condition is met.
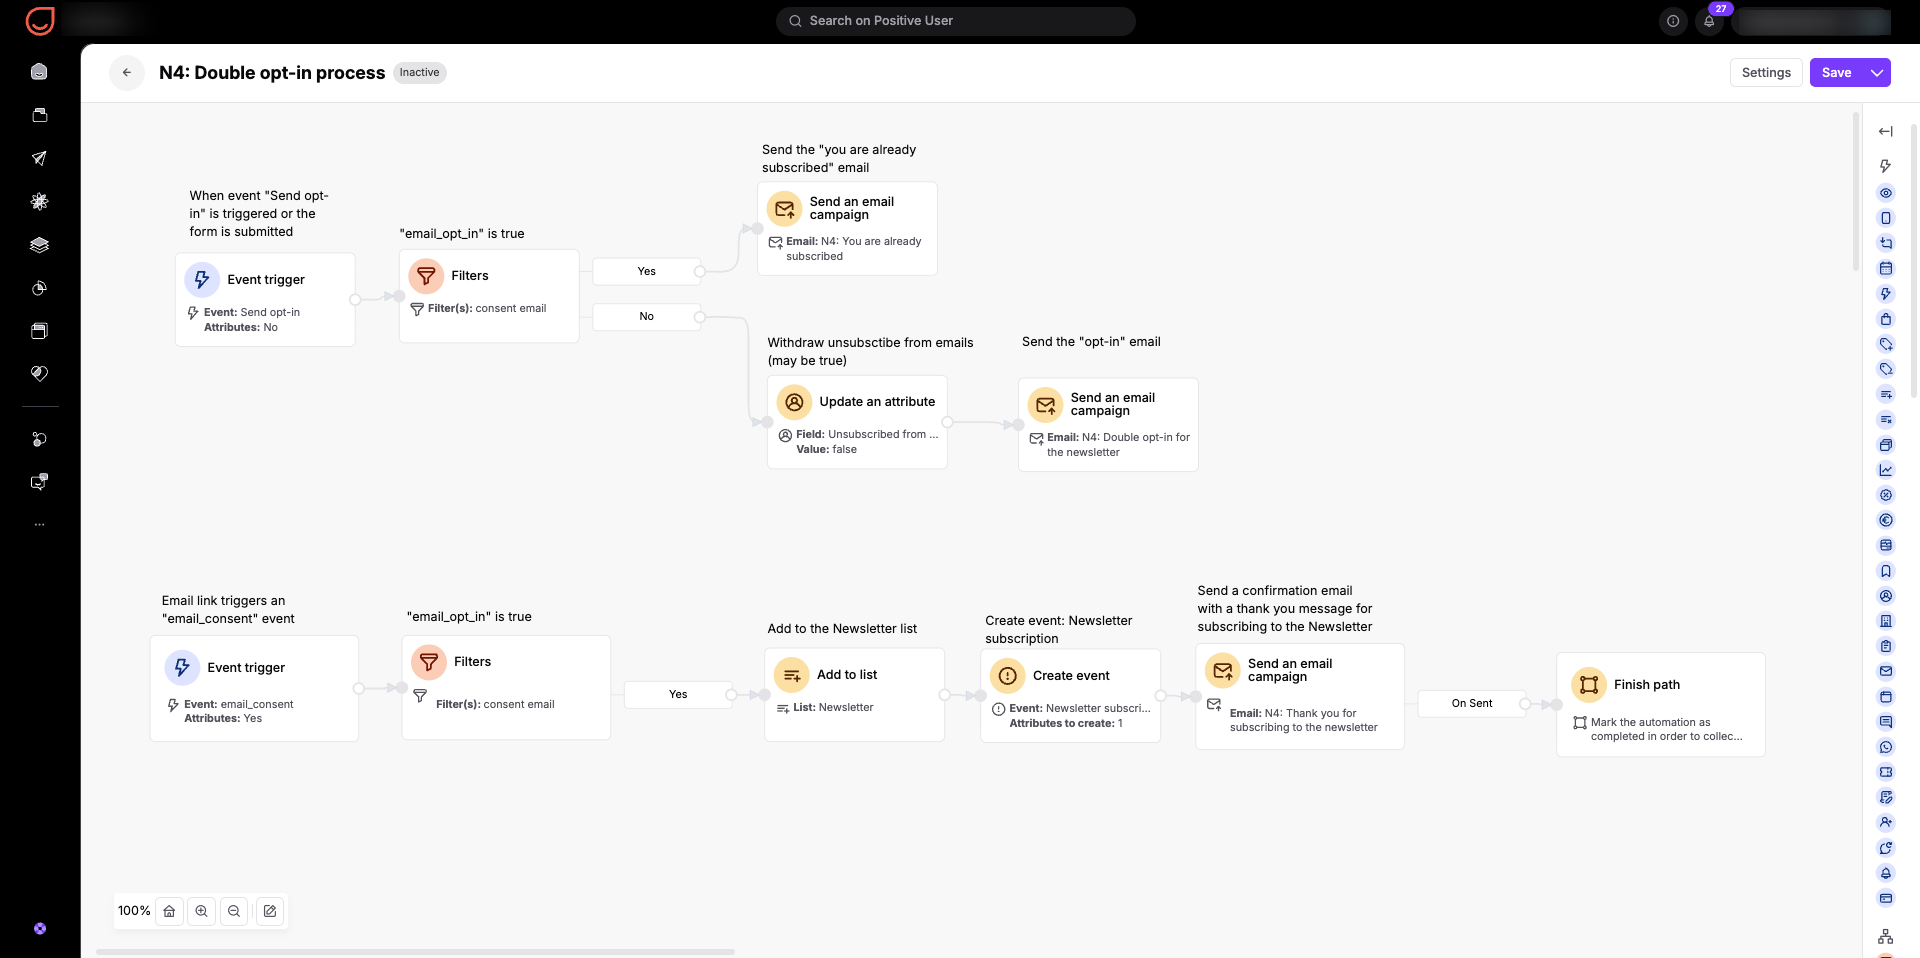
Implementing a double opt-in workflow helps your team protect domain health and handle re-subscriptions automatically.
Protecting Email Deliverability: Requiring new contacts to verify their email address ensures everyone on your list actively wants your updates. This step eliminates invalid or mistyped email addresses, keeping bounce rates low so your campaigns consistently land in the inbox instead of spam.
Re-Engaging Unsubscribed Contacts: When a contact who previously unsubscribed fills out a new subscription form, the automation sets their “unsubscribed from emails” attribute back to “false”. This allows Positive User to send the confirmation email smoothly without manual intervention from your team.
Boosting Campaign Engagement Statistics: Double opt-in noticeably improves your overall campaign reporting metrics. Because contacts explicitly verify their desire to receive your content, your list is filled with engaged recipients, resulting in higher open rates, better click-through rates, and more effective marketing campaigns.